Containers Technology
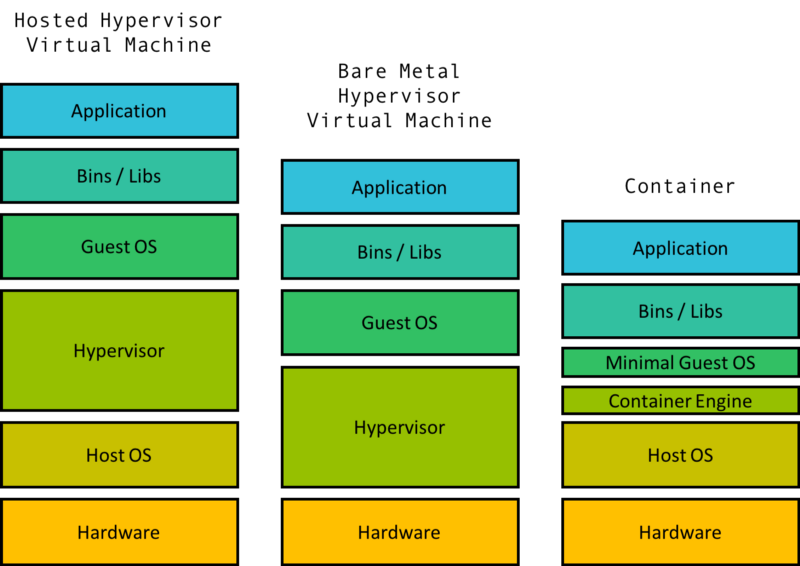
A container is a lightweight, standalone, executable package of software that includes everything needed to run a piece of software: code, runtime, system tools, system libraries, and settings. This technology is part of a broader trend known as containerization, a method of packaging software so it can be run with its dependencies isolated from other processes.

Containers allow developers to package and run applications in isolated environments, a process known as containerization. This technology provides a consistent and efficient means of deploying software across different environments, from a developer’s local workstation to production servers, without worrying about differences in OS configurations and underlying infrastructure.
Unlike traditional deployment methods, containers encapsulate an application and its dependencies in a container image. This image includes everything the application needs to run: code, runtime, libraries, and system tools. Because containers share the host system’s kernel (but maintain their own filesystem, CPU, memory, and process space), they are much lighter and more resource-efficient than virtual machines.
Key components of a container
Several key components make up a container:
1 Container engine: This is the core software that provides a runtime environment for containers. Examples include Docker and rkt. The engine creates, runs, and manages the lifecycle of containers.
2 Container image: This is a static file that includes all the components needed to run an application — code, runtime, system tools, libraries, and settings.
3 Registry: This is a storage and content delivery system, holding container images. Users can pull images from a registry to deploy containers.
4 Orchestration tools: These are tools for managing multiple containers. They help automate the deployment, scaling, and operations of containerized applications. Kubernetes is a prime example of an orchestration tool.
5 Namespaces and cgroups: These Linux features are used to isolate containers. Namespaces ensure that each container has its own isolated workspace (including file system, network stack, etc.), and cgroups manage resource allocation (CPU, memory, disk I/O, etc.) to each container.
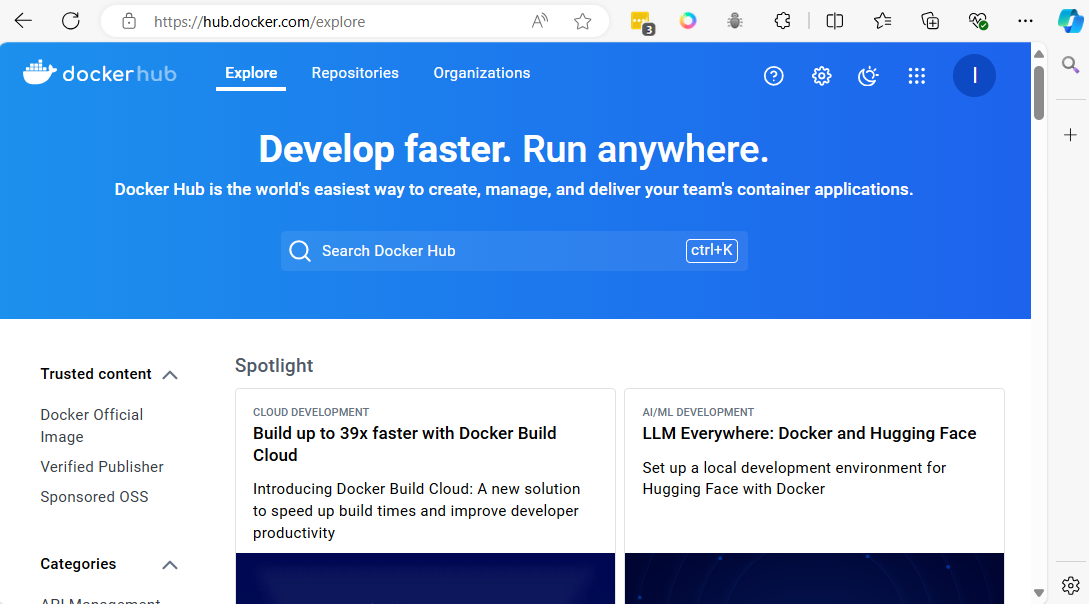
6 Docker Hub: A cloud-based registry service for sharing and managing container images. https://hub.docker.com/
7 Docker Compose: A tool for defining and running multi-container Docker applications.
Vagrant Template
Vagrantfile for Vagrant https://developer.hashicorp.com/vagrant/docs/vagrantfile
- Centos 9 Stream
generic/centos9s
# -*- mode: ruby -*-
# vi: set ft=ruby :

Vagrant.configure("2") do |config|

  config.vm.box = "generic/centos9s"
  config.vm.network "forwarded_port", guest: 80, host: 8080
  config.vm.network "private_network", ip: "192.168.33.10"

  # config.vm.network "public_network"

  # config.vm.synced_folder "../data", "/vagrant_data"

  #config.vm.synced_folder ".", "/vagrant"


  config.vm.provider "virtualbox" do |vb|
      vb.memory = "2048"
      vb.cpus = 2
  end

  config.vm.provision "shell", inline: <<-SHELL

  SHELL
end
- We can change template to use box
generic/ubuntu2310, below:
# -*- mode: ruby -*-
# vi: set ft=ruby :

Vagrant.configure("2") do |config|

  config.vm.box = "generic/ubuntu2310"
  config.vm.network "forwarded_port", guest: 80, host: 8080
  config.vm.network "private_network", ip: "192.168.33.10"

  # config.vm.network "public_network"

  # config.vm.synced_folder "../data", "/vagrant_data"

  #config.vm.synced_folder ".", "/vagrant"


  config.vm.provider "virtualbox" do |vb|
      vb.memory = "2048"
      vb.cpus = 2
  end

  config.vm.provision "shell", inline: <<-SHELL

  SHELL
end
Install Docker on CentOs 9 Stream
Docker simplifies the process of managing application processes in containers, which are isolated from each other and the host system. This isolation improves the security and efficiency of deploying applications.
Step1 Add Docker Repository
- install docker latest version from docker inc
$ sudo dnf install -y yum-utils device-mapper-persistent-data lvm2
$ sudo dnf config-manager --add-repo=https://download.docker.com/linux/centos/docker-ce.repo
$ sudo dnf repolist -v
Step2 Install
- Install Docker CE
$ sudo dnf install docker-ce

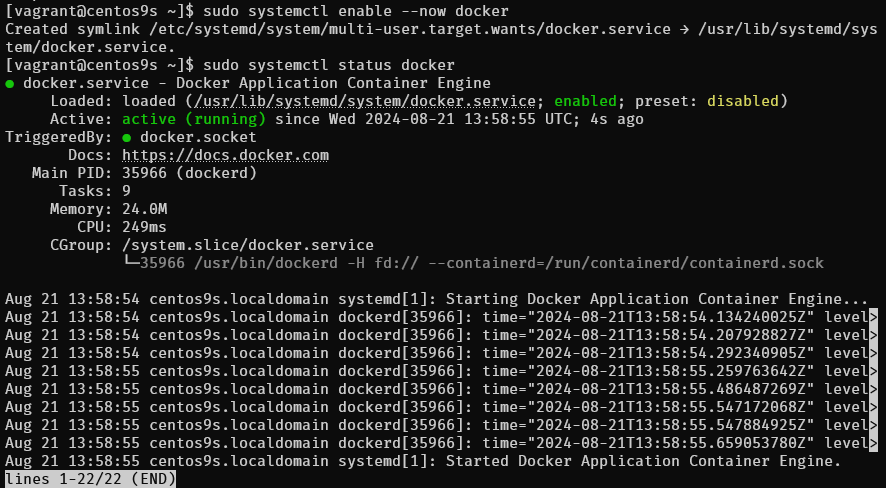
Step3 Enable and Start Docker Service
$ sudo systemctl enable --now docker
$ sudo systemctl status docker
Step3 Check info
- Check info
sudo docker info
$ sudo docker version
$ sudo docker info
Client: Docker Engine - Community
 Version:    27.1.2
 Context:    default
 Debug Mode: false
 Plugins:
  buildx: Docker Buildx (Docker Inc.)
    Version:  v0.16.2
    Path:     /usr/libexec/docker/cli-plugins/docker-buildx
  compose: Docker Compose (Docker Inc.)
    Version:  v2.29.1
    Path:     /usr/libexec/docker/cli-plugins/docker-compose

Server:
 Containers: 0
  Running: 0
  Paused: 0
  Stopped: 0
 Images: 0
 Server Version: 27.1.2
 Storage Driver: overlay2
  Backing Filesystem: xfs
  Supports d_type: true
  Using metacopy: false
  Native Overlay Diff: true
  userxattr: false
 Logging Driver: json-file
 Cgroup Driver: systemd
 Cgroup Version: 2
 Plugins:
  Volume: local
  Network: bridge host ipvlan macvlan null overlay
  Log: awslogs fluentd gcplogs gelf journald json-file local splunk syslog
 Swarm: inactive
 Runtimes: io.containerd.runc.v2 runc
 Default Runtime: runc
 Init Binary: docker-init
 containerd version: 8fc6bcff51318944179630522a095cc9dbf9f353
 runc version: v1.1.13-0-g58aa920
 init version: de40ad0
 Security Options:
  seccomp
   Profile: builtin
  cgroupns
 Kernel Version: 5.14.0-391.el9.x86_64
 Operating System: CentOS Stream 9
 OSType: linux
 Architecture: x86_64
 CPUs: 2
 Total Memory: 1.734GiB
 Name: centos9s.localdomain
 ID: 25e199fb-abb2-4ef6-9ceb-f843d3c50b8c
 Docker Root Dir: /var/lib/docker
 Debug Mode: false
 Experimental: false
 Insecure Registries:
  127.0.0.0/8
 Live Restore Enabled: false
Step4 Manage Docker as Non-root user
- By default, running Docker requires root privileges. However, you can add your user to the Docker group to manage Docker as a non-root user.
$ sudo usermod -aG docker $(whoami)
$ newgrp docker
$ docker ps
CONTAINER ID   IMAGE     COMMAND   CREATED   STATUS    PORTS     NAMES
user
newgrp dockeror logout and re login again
- Check file system of docker and containerd
[vagrant@centos9s ~]$ sudo ls -l  /var/lib/docker/
total 12
drwx--x--x.  4 root root  138 Aug 21 13:58 buildkit
drwx--x---.  5 root root 4096 Aug 21 14:15 containers
-rw-------.  1 root root   36 Aug 21 13:58 engine-id
drwx------.  3 root root   22 Aug 21 13:58 image
drwxr-x---.  3 root root   19 Aug 21 13:58 network
drwx--x---. 11 root root 4096 Aug 21 14:15 overlay2
drwx------.  4 root root   32 Aug 21 13:58 plugins
drwx------.  2 root root    6 Aug 21 13:58 runtimes
drwx------.  2 root root    6 Aug 21 13:58 swarm
drwx------.  2 root root    6 Aug 21 14:12 tmp
drwx-----x.  2 root root   50 Aug 21 13:58 volumes
[vagrant@centos9s ~]$ sudo ls -l  /var/lib/containerd/
total 0
drwxr-xr-x. 4 root root 33 Aug 21 14:06 io.containerd.content.v1.content
drwx--x--x. 2 root root 21 Aug 21 13:58 io.containerd.metadata.v1.bolt
drwx--x--x. 2 root root  6 Aug 21 13:58 io.containerd.runtime.v1.linux
drwx--x--x. 3 root root 18 Aug 21 14:06 io.containerd.runtime.v2.task
drwx------. 2 root root  6 Aug 21 13:58 io.containerd.snapshotter.v1.blockfile
drwx------. 3 root root 23 Aug 21 13:58 io.containerd.snapshotter.v1.native
drwx------. 3 root root 23 Aug 21 13:58 io.containerd.snapshotter.v1.overlayfs
drwx------. 2 root root  6 Aug 21 13:58 tmpmounts
Step5 Run Test Docker Container
- Test with image
hello-world
$ docker run hello-world

Unable to find image 'hello-world:latest' locally
latest: Pulling from library/hello-world
c1ec31eb5944: Pull complete
Digest: sha256:53cc4d415d839c98be39331c948609b659ed725170ad2ca8eb36951288f81b75
Status: Downloaded newer image for hello-world:latest

Hello from Docker!
This message shows that your installation appears to be working correctly.

To generate this message, Docker took the following steps:
 1. The Docker client contacted the Docker daemon.
 2. The Docker daemon pulled the "hello-world" image from the Docker Hub.
    (amd64)
 3. The Docker daemon created a new container from that image which runs the
    executable that produces the output you are currently reading.
 4. The Docker daemon streamed that output to the Docker client, which sent it
    to your terminal.

To try something more ambitious, you can run an Ubuntu container with:
 $ docker run -it ubuntu bash

Share images, automate workflows, and more with a free Docker ID:
 https://hub.docker.com/

For more examples and ideas, visit:
 https://docs.docker.com/get-started/
Step6 Check image
- Check image
$ docker image ls
REPOSITORY    TAG       IMAGE ID       CREATED         SIZE
hello-world   latest    d2c94e258dcb   15 months ago   13.3kB
Step 7 Download image
- download image of centos 9 stream from quay.io repository
$ docker pull quay.io/centos/centos:stream9

stream9: Pulling from centos/centos
26ef76492da3: Pull complete
Digest: sha256:a0017fa930fbbbb706509aafdb287b16d9d3d1672f09712a04ea634fea68a85d
Status: Downloaded newer image for quay.io/centos/centos:stream9
quay.io/centos/centos:stream9
- Run echo command inside container, then container will stop
$ docker run quay.io/centos/centos:stream9 /bin/echo "Welcome to the Docker World!"
Welcome to the Docker World!
Step 8 Run container with -it option to connect to interactive session
$  docker run -it quay.io/centos/centos:stream9 /bin/bash
[root@503c0e47b2be /]# uname -a
[root@503c0e47b2be /]# exit
- after
exityou will return back to origin shell and container will stop - Check container
$ docker ps -a

Note: you can exit container without stop container by use
Ctrl+p, Ctrl+q
Step 8 Install docker compose
Docker Compose is a tool for defining and running multi-container applications. It is the key to unlocking a streamlined and efficient development and deployment experience.
Compose simplifies the control of your entire application stack, making it easy to manage services, networks, and volumes in a single, comprehensible YAML configuration file. Then, with a single command, you create and start all the services from your configuration file.
Compose works in all environments; production, staging, development, testing, as well as CI workflows. It also has commands for managing the whole lifecycle of your application:
$ sudo dnf install docker-compose-plugin
- Check version docker compose
$ docker compose version
Docker Compose version v2.29.1
Step 8 Configure an application that has web and DB services with Docker Compose
$ mkdir web_db
$ cd web_db
$ vim Dockerfile
- add content of docker file from below
FROM quay.io/centos/centos:stream9
MAINTAINER ServerWorld <admin@srv.world>

RUN dnf -y install nginx

EXPOSE 80
CMD ["/usr/sbin/nginx", "-g", "daemon off;"]
- define application configuration
$ vim docker-compose.yml
- add content of docker compose
services:
  db:
    image: mariadb
    volumes:
      - /var/lib/docker/disk01:/var/lib/mysql
    environment:
      MYSQL_ROOT_PASSWORD: password
      MYSQL_USER: cent
      MYSQL_PASSWORD: password
      MYSQL_DATABASE: cent_db
    ports:
      - "3306:3306"
  web:
    build: .
    ports:
      - "80:80"
    volumes:
      - /var/lib/docker/disk02:/usr/share/nginx/html
- Build and run docker compose
$ docker compose up -d
- Result of command
$ docker compose up -d
[+] Running 9/9
 ✔ db Pulled                                                                                   20.5s
   ✔ 31e907dcc94a Pull complete                                                                 4.8s
   ✔ 8687fa065e6d Pull complete                                                                 4.9s
   ✔ bc75b4546118 Pull complete                                                                 5.5s
   ✔ 90824338d93e Pull complete                                                                 5.5s
   ✔ c13aedba8d5d Pull complete                                                                 5.6s
   ✔ ad9066662cff Pull complete                                                                15.9s
   ✔ 537f82e52967 Pull complete                                                                16.0s
   ✔ a5e6bca88fae Pull complete                                                                16.0s
[+] Building 52.5s (7/7) FINISHED                                                     docker:default
 => [web internal] load build definition from Dockerfile                                        0.1s
 => => transferring dockerfile: 256B                                                            0.0s
 => WARN: MaintainerDeprecated: Maintainer instruction is deprecated in favor of using label (  0.1s
 => [web internal] load metadata for quay.io/centos/centos:stream9                              0.0s
 => [web internal] load .dockerignore                                                           0.0s
 => => transferring context: 2B                                                                 0.0s
 => [web 1/2] FROM quay.io/centos/centos:stream9                                                0.0s
 => [web 2/2] RUN dnf -y install nginx                                                         51.4s
 => [web] exporting to image                                                                    0.8s
 => => exporting layers                                                                         0.8s
 => => writing image sha256:2054d035639c4bc56c2dcb6a4c34351f8a6a18e08d53c759af55a977ad217341    0.0s
 => => naming to docker.io/library/web_db-web                                                   0.0s
 => [web] resolving provenance for metadata file                                                0.0s
[+] Running 3/3
 ✔ Network web_db_default  Created                                                              0.6s
 ✔ Container web_db-web-1  Started                                                              0.6s
 ✔ Container web_db-db-1   Started                                                              0.6s
- Confirm running container
$ docker ps
CONTAINER ID   IMAGE        COMMAND                  CREATED              STATUS              PORTS                    NAMES
1cc94e9479fd   mariadb      "docker-entrypoint.s…"   About a minute ago   Up About a minute   0.0.0.0:3306->3306/tcp   web_db-db-1
5d95646a1f62   web_db-web   "/usr/sbin/nginx -g …"   About a minute ago   Up About a minute   0.0.0.0:80->80/tcp       web_db-web-1
- Test Verify access to database
$ sudo dnf install mysql
$ mysql -h 127.0.0.1 -u root -p -e "show variables like 'hostname';"
Enter password:
+---------------+--------------+
| Variable_name | Value        |
+---------------+--------------+
| hostname      | 1cc94e9479fd |
+---------------+--------------+

$ mysql -h 127.0.0.1 -u cent -p -e "show databases;"
Enter password:
+--------------------+
| Database           |
+--------------------+
| cent_db            |
| information_schema |
+--------------------+
- Add index.html content
$ sudo su -
# echo "Hello Docker Compose World" > /var/lib/docker/disk02/index.html
# curl 127.0.0.1
Hello Docker Compose World

# exit
Docker compose command
- check container process
$ docker compose ps
NAME           IMAGE        COMMAND                  SERVICE   CREATED         STATUS         PORTS
web_db-db-1    mariadb      "docker-entrypoint.s…"   db        7 minutes ago   Up 7 minutes   0.0.0.0:3306->3306/tcp
web_db-web-1   web_db-web   "/usr/sbin/nginx -g …"   web       7 minutes ago   Up 7 minutes   0.0.0.0:80->80/tcp
- Access to services (container) Servers list db and web.
$ docker compose exec db /bin/bash
root@1cc94e9479fd:/# exit
$ docker compose exec web /bin/bash
[root@5d95646a1f62 /]# exit
- Stop container
$ docker compose stop
[+] Stopping 2/2
 ✔ Container web_db-db-1   Stopped                                                                                                                              0.4s
 ✔ Container web_db-web-1  Stopped
- Start up a service only web
$ docker compose up -d web
[+] Running 1/1
 ✔ Container web_db-web-1  Started
                                 0.3s
$ docker compose ps
NAME           IMAGE        COMMAND                  SERVICE   CREATED          STATUS         PORTS
web_db-web-1   web_db-web   "/usr/sbin/nginx -g …"   web       13 minutes ago   Up 6 seconds   0.0.0.0:80->80/tcp
- Delete container
$ docker compose down
[+] Running 3/3
 ✔ Container web_db-web-1  Removed                                                                                                                              0.0s
 ✔ Container web_db-db-1   Removed                                                                                                                              0.0s
 ✔ Network web_db_default  Removed                                                                                                                              0.2s
Install Docker on Ubuntu 2310
$ cat /etc/os-release

PRETTY_NAME="Ubuntu 23.10"
NAME="Ubuntu"
VERSION_ID="23.10"
VERSION="23.10 (Mantic Minotaur)"
VERSION_CODENAME=mantic
ID=ubuntu
ID_LIKE=debian
HOME_URL="https://www.ubuntu.com/"
SUPPORT_URL="https://help.ubuntu.com/"
BUG_REPORT_URL="https://bugs.launchpad.net/ubuntu/"
PRIVACY_POLICY_URL="https://www.ubuntu.com/legal/terms-and-policies/privacy-policy"
UBUNTU_CODENAME=mantic
LOGO=ubuntu-logo
- Step 1 : Update the package index:
$ sudo apt update -y
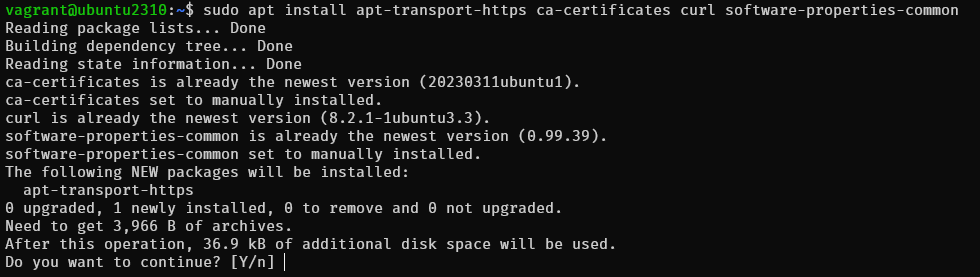
- Step 2 : Install prerequisites:
$ sudo apt install apt-transport-https ca-certificates curl software-properties-common
- Step 3 : Add the Docker GPG key:
curl -fsSL https://download.docker.com/linux/ubuntu/gpg | sudo gpg --dearmor -o /usr/share/keyrings/docker-archive-keyring.gpg
- Step 4 : Add the Docker APT repository
echo "deb [arch=$(dpkg --print-architecture) signed-by=/usr/share/keyrings/docker-archive-keyring.gpg] https://download.docker.com/linux/ubuntu $(lsb_release -cs) stable" | sudo tee /etc/apt/sources.list.d/docker.list > /dev/null
- Step 5 : Update the package index again:
sudo apt update
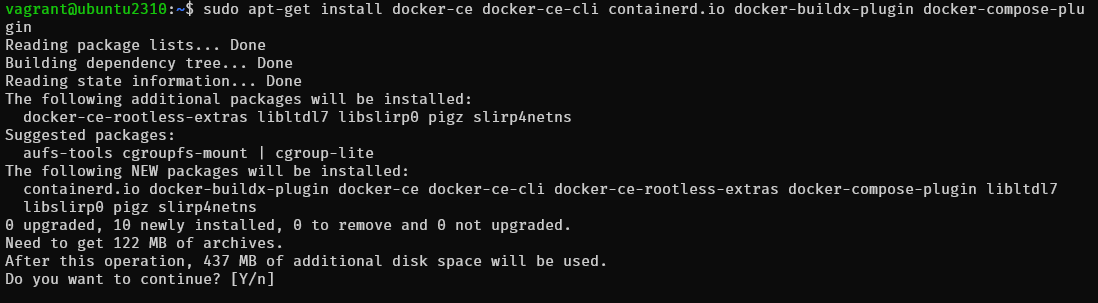
- Step 6 : Install latest version
$ sudo apt-get install docker-ce docker-ce-cli containerd.io docker-buildx-plugin docker-compose-plugin
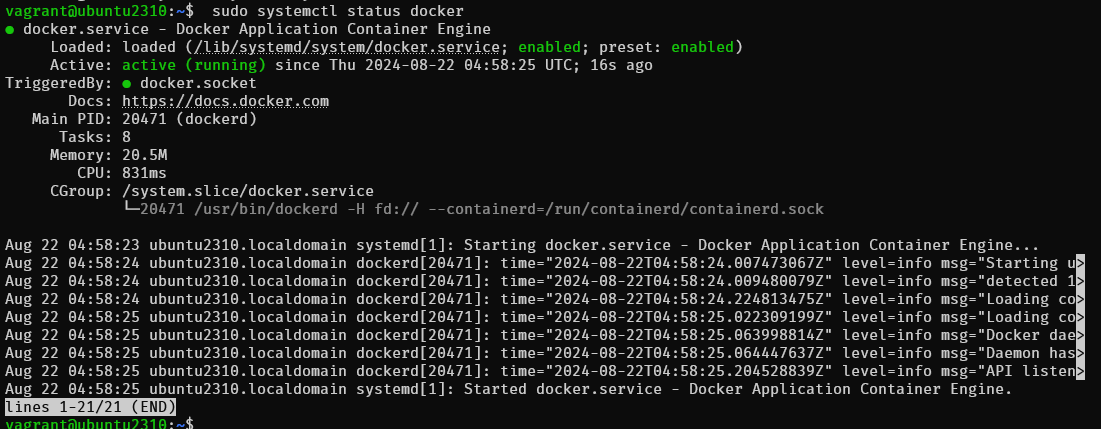
- Step 7 Start and Enable Docker Once the installation is complete, we can start and enable the Docker service. Run the following command:
$ sudo systemctl enable --now docker
$ sudo systemctl status docker
- Step 7 : Create Docker group To avoid having to use sudo each time we run Docker, it is recommended to add your user to the Docker group. To create the Docker group, run the following command:
$ sudo groupadd docker
groupadd: group 'docker' already exists
$ sudo usermod -aG docker $USER
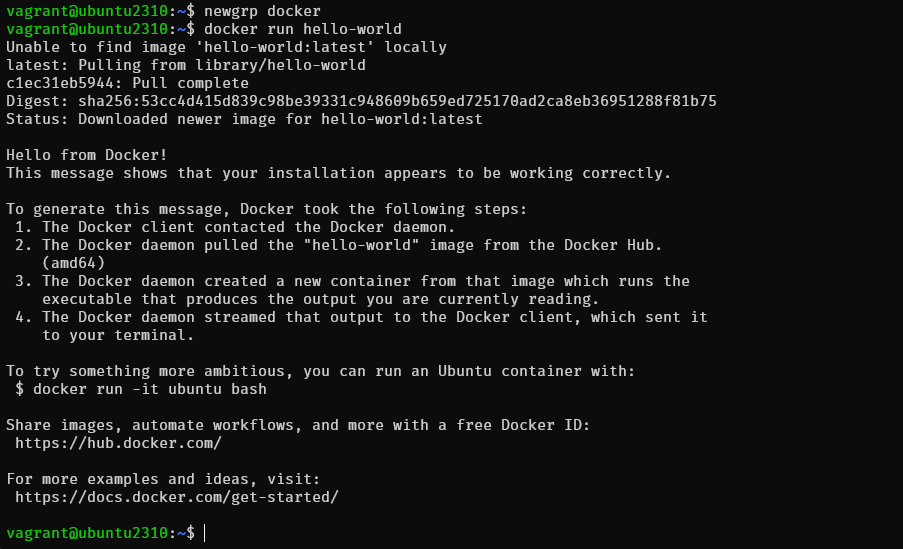
$ newgrp docker
- Step 8 : Test
$ docker run hello-world
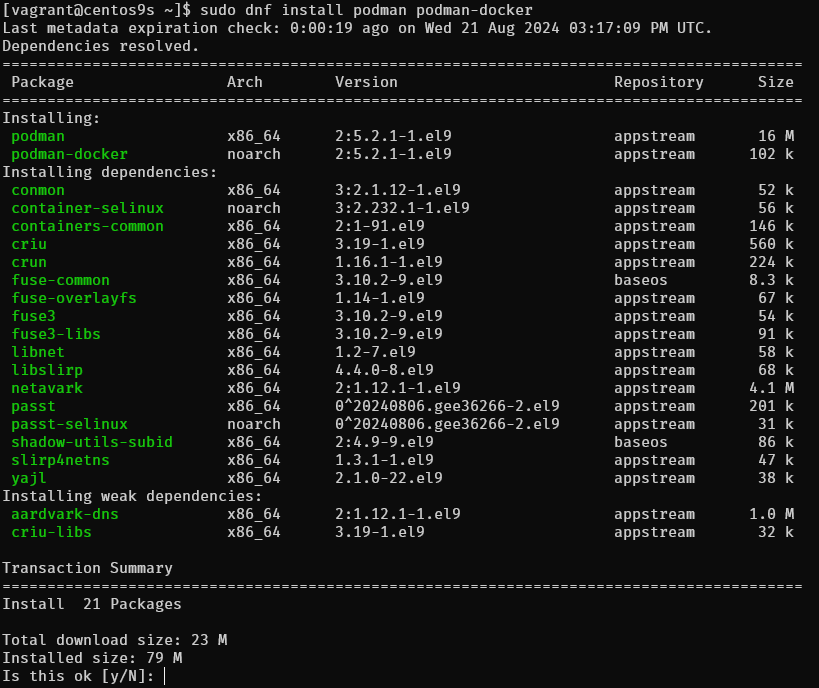
Install Docker on CentOs 9 Stream
$ sudo dnf install podman podman-docker
Install Docker on Ubuntu 2310
understand linux namespace
Objective:
This lab will introduce you to Linux namespaces, which are essential for containerization. We'll explore how namespaces isolate processes and their resources, making them ideal for running multiple containers on a single host. You'll learn how to create and manipulate namespaces using the unshare command and gain hands-on experience with Podman, a popular containerization tool.
Lab Steps:
- Understanding Namespaces
-
What are namespaces?
- Isolated environments for processes
- Provide resource isolation and security
- Types: PID, network, mount, IPC, UTS, user
-
How do they work? Each namespace has its own root filesystem, network stack, etc. Processes within a namespace cannot see or interact with resources outside of it.
-
types of namespaces:
- netns – network namespace
- ipcns – IPC namespace
- mntns – mount namespace
- utsns – UTS namespace
- userns – user namespace
- Creating Namespaces with unshare
- PID namespace:
- Isolate process IDs
- Create a child process with its own PID namespace:
[vagrant@centos9s ~]$ sudo unshare --fork --pid --mount-proc bash

[root@centos9s vagrant]# ps -o pid,pidns,netns,mntns,ipcns,utsns,userns,args -p 1
    PID      PIDNS      NETNS      MNTNS      IPCNS      UTSNS     USERNS COMMAND
      1 4026532299 4026531840 4026532298 4026531839 4026531838 4026531837 bash
# ps -o pid,pidns,netns,mntns,ipcns,utsns,userns,args -p 1
Apparently, PID 1 belongs to six different namespaces:
- PID
- network
- mount
- IPC
- UTS
- user
The /proc//ns Directory
[vagrant@centos9s ~]$ ps aux  | grep vagrant
root        3851  0.0  0.3  19404 11520 ?        Ss   13:20   0:00 sshd: vagrant [priv]
vagrant     3856  0.0  0.3  22644 13516 ?        Ss   13:20   0:00 /usr/lib/systemd/systemd --user
vagrant     3858  0.0  0.1 108256  7476 ?        S    13:20   0:00 (sd-pam)
vagrant     3865  0.0  0.1  19780  7460 ?        S    13:20   0:00 sshd: vagrant@pts/0
vagrant     3866  0.0  0.1   8408  4992 pts/0    Ss   13:20   0:00 -bash
vagrant     4042  0.0  0.0  10104  3328 pts/0    R+   13:38   0:00 ps aux
vagrant     4043  0.0  0.0   6428  2176 pts/0    R+   13:38   0:00 grep --color=auto vagrant
Generally, the /proc/
For instance, let’s use ls to check the namespaces of the process with PID 3856:
total 0
lrwxrwxrwx. 1 vagrant vagrant 0 Aug 20 13:20 cgroup -> 'cgroup:[4026531835]'
lrwxrwxrwx. 1 vagrant vagrant 0 Aug 20 13:31 ipc -> 'ipc:[4026531839]'
lrwxrwxrwx. 1 vagrant vagrant 0 Aug 20 13:31 mnt -> 'mnt:[4026531841]'
lrwxrwxrwx. 1 vagrant vagrant 0 Aug 20 13:31 net -> 'net:[4026531840]'
lrwxrwxrwx. 1 vagrant vagrant 0 Aug 20 13:31 pid -> 'pid:[4026531836]'
lrwxrwxrwx. 1 vagrant vagrant 0 Aug 20 13:38 pid_for_children -> 'pid:[4026531836]'
lrwxrwxrwx. 1 vagrant vagrant 0 Aug 20 13:38 time -> 'time:[4026531834]'
lrwxrwxrwx. 1 vagrant vagrant 0 Aug 20 13:38 time_for_children -> 'time:[4026531834]'
lrwxrwxrwx. 1 vagrant vagrant 0 Aug 20 13:31 user -> 'user:[4026531837]'
lrwxrwxrwx. 1 vagrant vagrant 0 Aug 20 13:31 uts -> 'uts:[4026531838]'
Lab: Exploring IP Netnamespaces with ip netns
Objective:
This lab will introduce you to IP network namespaces (netnamespaces) and how to manage them using the ip netns command. You'll learn how to create, list, delete, and interact with netnamespaces.
Lab Steps:
- Creating a Netnamespace
- Use the add command to create a new netnamespace:
[vagrant@centos9s ~]$ sudo ip netns add red
[vagrant@centos9s ~]$ sudo ip netns add blue
- Listing Netnamespaces
- Use the list command to view all existing netnamespaces:
[vagrant@centos9s ~]$ sudo ip netns list
- list network on host
[vagrant@centos9s ~]$ ip link
- view network namespace inside namespace
[vagrant@centos9s ~]$ sudo ip netns exec red ip link
[vagrant@centos9s ~]$ sudo ip netns exec blue ip link
- Entering a Netnamespace
- Use the exec command to enter a netnamespace and execute commands within it:
[vagrant@centos9s ~]$ ip netns exec red bash
[vagrant@centos9s ~]$ ps -o pid,pidns,args
or run in short command
ip -n red link
ip -n blue link
- Run arp command on host check Arp table
[vagrant@centos9s ~]$ arp
- Run route command check routing table
[vagrant@centos9s ~]$ route
- Configuring Network Interfaces
- Create a virtual network interface within the netnamespace:
[vagrant@centos9s ~]$ sudo ip link add veth-red type veth peer name veth-blue
[vagrant@centos9s ~]$ sudo ip link set veth-red netns red
[vagrant@centos9s ~]$ sudo ip link set veth-blue netns blue
- Add ip to veth-red and veth-blue
[vagrant@centos9s ~]$ sudo ip -n red addr add 192.168.15.1/24 dev veth-red
[vagrant@centos9s ~]$ sudo ip -n blue addr add 192.168.15.2/24 dev veth-blue

[vagrant@centos9s ~]$ sudo ip -n red link set veth-red up
[vagrant@centos9s ~]$ sudo ip -n blue link set veth-blue up
if Clear ip (Just in case some thing wrong)
# ip -n red  addr flush dev veth-red
# ip -n blue addr flush dev veth-blue
- Check
[vagrant@centos9s ~]$ sudo ip  netns exec red  ip a
[vagrant@centos9s ~]$ sudo ip  netns exec blue ip a
- ping ip address from red to blue, and blue to red
[vagrant@centos9s ~]$ sudo ip netns exec blue ping 192.168.15.1
[vagrant@centos9s ~]$ sudo ip netns exec red ping 192.168.15.2
- Check arp table on red and blue
[vagrant@centos9s ~]$ sudo ip netns exec red arp
[vagrant@centos9s ~]$ sudo ip netns exec blue arp
- But arp table on host will see this
[vagrant@centos9s ~]$ arp
- Final script 1
ip netns add red
ip netns add blue
#show namespace
ip netns show
ip link add veth-red type veth peer name veth-blue
ip link set veth-red netns red
ip link set veth-blue netns blue
ip -n red addr add 192.168.15.1/24 dev veth-red
ip -n blue addr add 192.168.15.2/24 dev veth-blue
ip -n red link set veth-red up
ip -n blue link set veth-blue up

ip netns exec red ping 192.168.15.2
ip netns exec red ping 192.168.15.1
#Cleanup
ip netns delete red
ip netns delete blue
Connect more than 2 namespace
- Create virtual switch with linux bridge (or OpenVswitch) and connect namespace together via bridge
[vagrant@centos9s ~]$ sudo ip link add v-net-0 type bridge
[vagrant@centos9s ~]$ ip a
[vagrant@centos9s ~]$ sudo ip link set dev v-net-0 up
- install package
bridge-utils
[vagrant@centos9s ~]$ sudo dnf install brige-utils
[vagrant@centos9s ~]$ brctl show
- Delete old veth-red, veth-blue link because we not use anymore
[vagrant@centos9s ~]$ sudo ip -n red link del veth-red
delete veth-red and veth-blue will automatically remove
- Create new cable connect namespace to bride
[vagrant@centos9s ~]$ sudo ip link add veth-red type veth peer name veth-red-br
[vagrant@centos9s ~]$ sudo ip link add veth-blue type veth peer name veth-blue-br
- Add cable to bride
[vagrant@centos9s ~]$ sudo ip link set veth-red netns red
[vagrant@centos9s ~]$ sudo ip link set veth-red-br master v-net-0

[vagrant@centos9s ~]$ sudo ip link set veth-blue netns blue
[vagrant@centos9s ~]$ sudo ip link set veth-blue-br master v-net-0
- Set ip address and turn it up
[vagrant@centos9s ~]$ sudo ip -n red addr add 192.168.15.1/24 dev veth-red
[vagrant@centos9s ~]$ sudo ip -n blue addr add 192.168.15.2/24 dev veth-blue

[vagrant@centos9s ~]$ sudo ip -n red link set veth-red up
[vagrant@centos9s ~]$ sudo ip -n blue link set veth-blue up

[vagrant@centos9s ~]$ sudo ip link set veth-red-br up
[vagrant@centos9s ~]$ sudo ip link set veth-blue-br up
- Test ping
[vagrant@centos9s ~]$ sudo ip netns exec red ping 192.168.15.2
[vagrant@centos9s ~]$ sudo ip netns exec blue ping 192.168.15.1
- Run brctl show again
[vagrant@centos9s ~]$ brctl show
- Final summary script connect namespace with linux bridge
ip netns add red
ip netns add blue

#show namespace
ip netns show
ip link add v-net-0 type bridge
ip link set dev v-net-0 up

ip link add veth-red type veth peer name veth-red-br
ip link add veth-blue type veth peer name veth-blue-br

ip link set veth-red netns red
ip link set veth-red-br master v-net-0

ip link set veth-blue netns blue
ip link set veth-blue-br master v-net-0
ip -n red addr add 192.168.15.1/24 dev veth-red
ip -n blue addr add 192.168.15.2/24 dev veth-blie

ip -n red link set veth-red up
ip -n blue link set veth-blue up
ip link set veth-red-br up
ip link set veth-blue-br up
ip netns vs. unshare: A Comparison
Both ip netns and unshare are tools used to create and manage isolated environments (namespaces) on Linux systems, but they serve different purposes and have distinct functionalities.
ip netns
- Purpose: Primarily designed for network namespace management.
- Functionality:
- Creates, lists, deletes, and manipulates network namespaces.
- Configures network interfaces, routes, and other network-related settings within namespaces.
- Provides a high-level interface for network namespace management.
unshare
- Purpose: A more general-purpose tool for creating various types of namespaces, including PID, network, mount, IPC, UTS, and user namespaces.
- Functionality:
- Creates child processes with specific namespaces.
- Allows for granular control over namespace creation and configuration.
- Can be used to isolate processes in a variety of ways beyond just networking.
Key Differences
- Scope: ip netns is specifically focused on network namespaces, while unshare can create and manage multiple types of namespaces.
- Level of Control: unshare provides more granular control over namespace creation and configuration, allowing you to specify which namespaces to isolate and how.
- Interface: ip netns offers a more user-friendly interface for managing network namespaces, while unshare is more flexible but requires a deeper understanding of namespace concepts.
When to Use Which
- Network Namespace Management: Use ip netns when you primarily need to create, manage, and configure network namespaces.
- General Namespace Creation: Use unshare when you need to isolate processes in a variety of ways, including PID, mount, IPC, UTS, or user namespaces.
In summary, ip netns is a specialized tool for network namespace management, while unshare is a more general-purpose tool for creating various types of namespaces. The best choice depends on your specific needs and the level of control you require.
Docker Docker Compose
Docker
Docker is a powerful Opensource platform that simplifies the process of developing, packaging, and deploying applications by using containers. It provides an isolated environment, known as a container, where applications can run consistently across different platforms. Containers are isolated from one another and bundle their own software, libraries, and configuration files
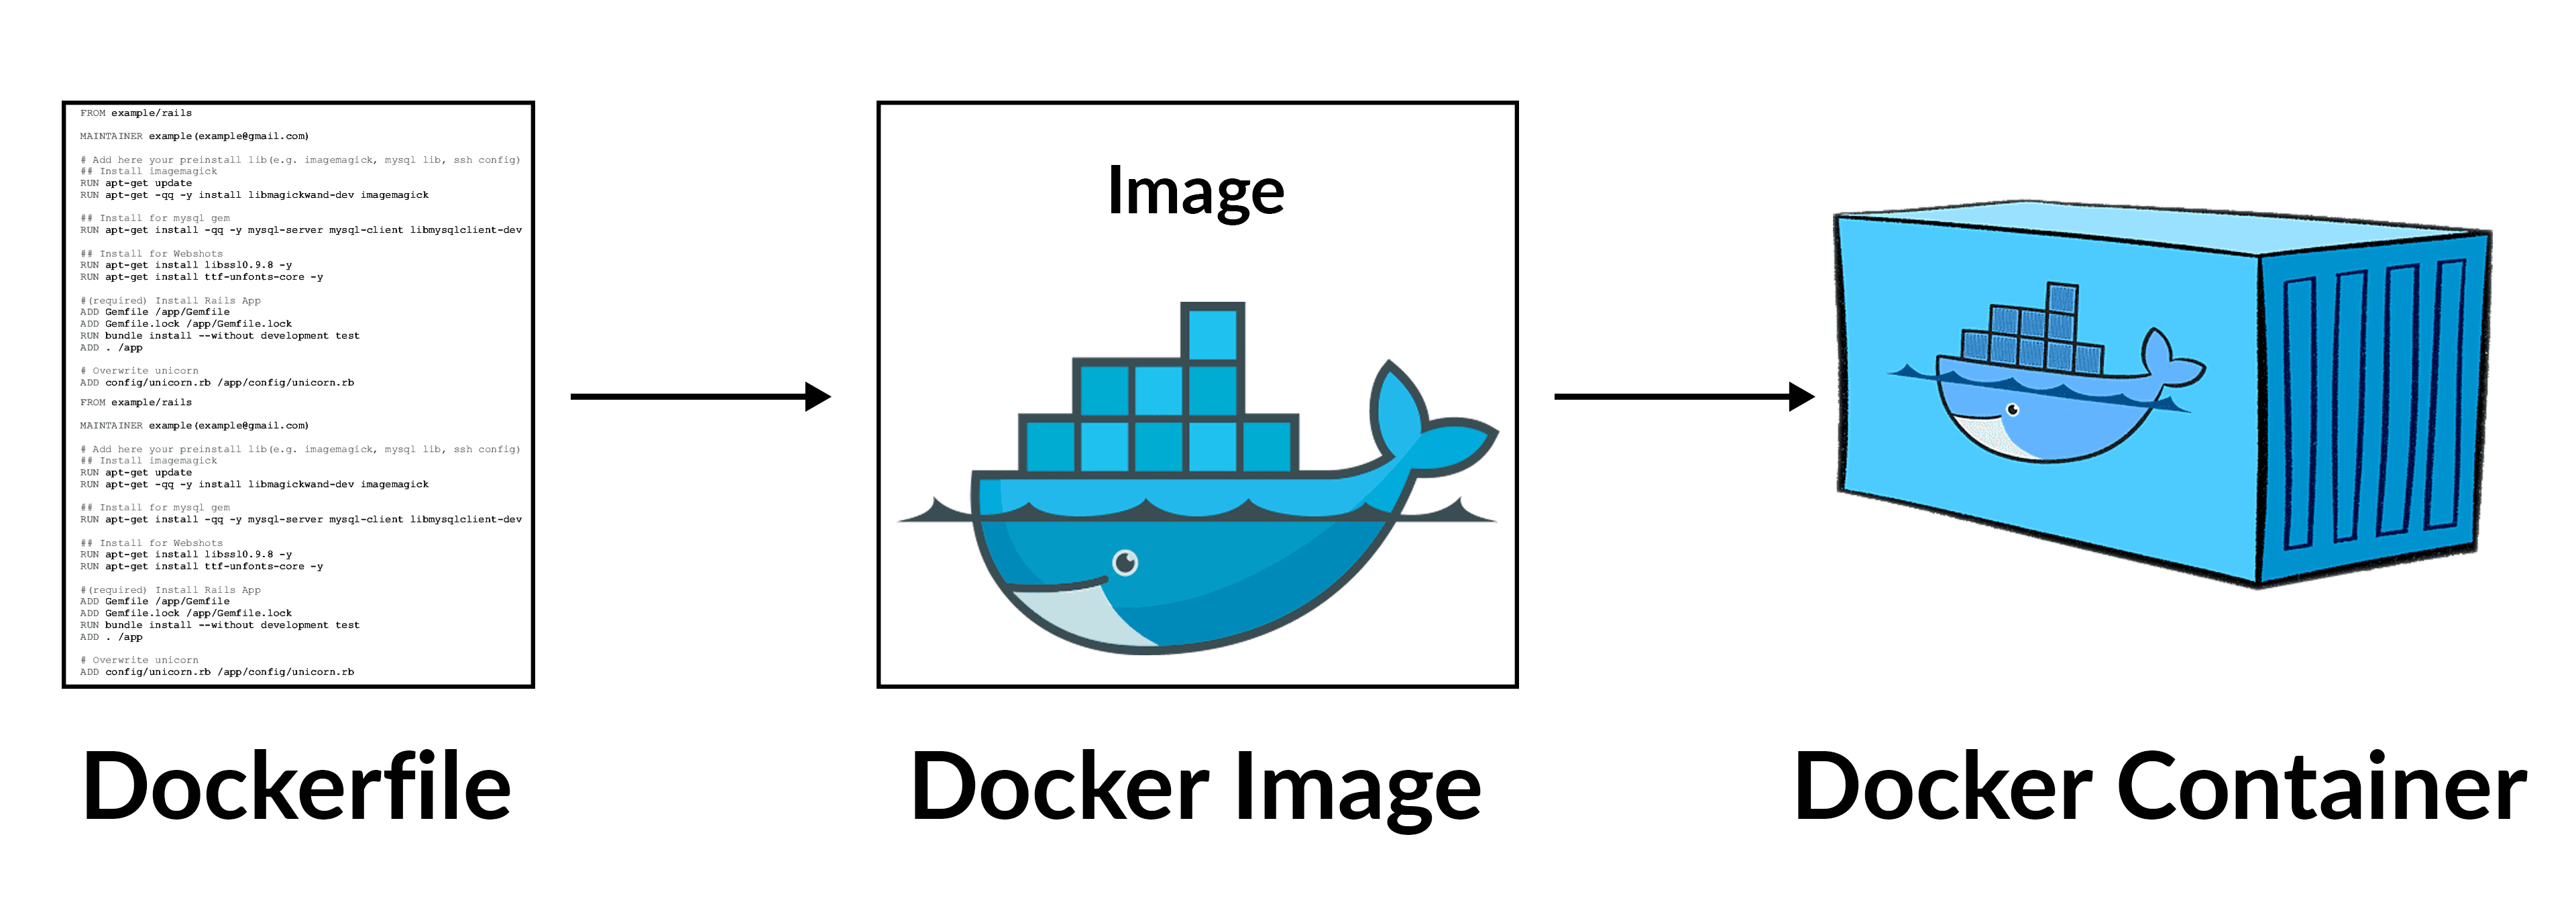
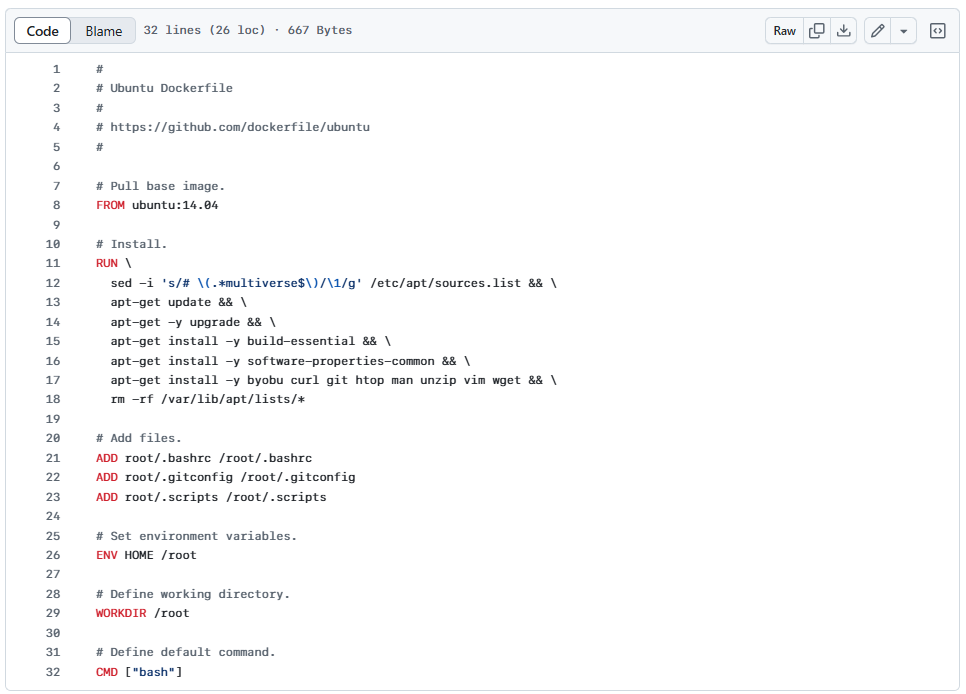
Dockerfile
A Dockerfile is a plain text file that contains instructions for building Docker images. There’s a Dockerfile standard they follow, and the Docker daemon is ultimately responsible for executing the Dockerfile and generating the image.
A typical Dockerfile usually starts by including another image. For example, it might build on a specific operating system or Java distribution.
From there, a Dockerfile can perform various operations to build an image
Format
https://docs.docker.com/reference/dockerfile/ https://docs.docker.com/build/building/best-practices/ Here is the format of the Dockerfile:
# Comment
INSTRUCTION arguments
Example
FROM busybox
ENV FOO=/bar
ARG  CODE_VERSION=latest
WORKDIR ${FOO}   # WORKDIR /bar
ADD . $FOO       # ADD . /bar
COPY \$FOO /quux # COPY $FOO /quux
ENTRYPOINT ["/bin/ping"]
CMD ["localhost"]
The ENTRYPOINT specifies a command that will always be executed when the container starts. The CMD specifies arguments that will be fed to the ENTRYPOINT. CMD will be overridden when running the container with alternative arguments.
Docker Compose
Docker Compose is a tool for defining and running multi-container Docker applications. Using a YAML configuration file, Docker Compose allows us to configure multiple containers in one place. We can then start and stop all of those containers at once using a single command.
Additionally, Docker Compose allows us to define common objects shared by containers. For example, we can define a volume once and mount it inside every container, so that they share a common file system. Or, we can define the network used by one or more containers to communicate.
Docker command
Here are some common Docker commands you might use:
-
docker build: Builds a Docker image from a Dockerfile.
-
docker run: Runs a command in a new container.
-
docker ps: Lists running containers.
-
docker stop: Stops one or more running containers.
-
docker rm: Removes one or more containers.
-
docker images: Lists the Docker images available on your system.
-
docker pull: Pulls an image from a registry.
-
docker push: Pushes an image to a registry.
Prepare VM
mkdir Docker
cd Docker
code Vagrantfile
content:
# -*- mode: ruby -*-
# vi: set ft=ruby :

Vagrant.configure("2") do |config|

  config.vm.box = "generic/centos9s"
  config.vm.network "forwarded_port", guest: 80, host: 8080
  config.vm.network "private_network", ip: "192.168.33.10"

  # config.vm.network "public_network"

  # config.vm.synced_folder "../data", "/vagrant_data"

  #config.vm.synced_folder ".", "/vagrant"


  config.vm.provider "virtualbox" do |vb|
      vb.memory = "2048"
      vb.cpus = 2
  end

  config.vm.provision "shell", inline: <<-SHELL

  SHELL
end
- Run start vagrant
vagrant up
vagrant ssh
- After Finish class
vagrant halt
vagrant destroy
Key understanding
- Docker has a default entrypoint which is /bin/sh -c but does not have a default command.
$ docker run -i -t ubuntu bash

// result
root@267a4961b03c:/# exit
- Run image is ubuntu, command is bash
- Container will gets executed is /bin/sh -c bash
- Run with out bash
[vagrant@centos9s lab2]$ docker run -i -t ubuntu
root@6725f7472f23:/#
- Result will we the same result because in Dockerfile of ubuntu CMD is specified CMD ["bash"]
So Remeber. When using the CMD instruction, it is exactly as if you were executing
docker run -i -t ubuntu
<cmd>
The parameter of the entrypoint is <cmd>.
By default there's no ENTRYPOINT; whether a shell is used depends on the used form of the CMD Later on, people asked to be able to customize this, so ENTRYPOINT and --entrypoint were introduced. so The ENTRYPOINT specifies a command that will always be executed when the container starts. The CMD specifies arguments that will be fed to the ENTRYPOINT.
Lab1
cd ~
mkdir lab1
cd lab1

cat <<EOF  | tee Dockerfile
FROM ubuntu
# Install ping
RUN apt-get update && apt-get install -y iputils-ping

ENTRYPOINT ["/bin/ping"]
CMD ["localhost"]
EOF

cat Dockerfile
- Create image from dockerfile
docker build -t lab1 .
- list image
$ docker images

REPOSITORY   TAG       IMAGE ID       CREATED       SIZE
lab1         latest    6734c52ab144   4 weeks ago   78.1MB
- Run
format command
docker run image-id
$ docker run lab1
PING localhost (::1) 56 data bytes
64 bytes from localhost (::1): icmp_seq=1 ttl=64 time=0.027 ms
64 bytes from localhost (::1): icmp_seq=2 ttl=64 time=0.086 ms
64 bytes from localhost (::1): icmp_seq=3 ttl=64 time=0.089 ms
64 bytes from localhost (::1): icmp_seq=4 ttl=64 time=0.096 ms


#ctrl-c to exit
Summary: ping localhost is default command when run container
$ docker run lab1 google.com

PING google.com (142.250.199.14) 56(84) bytes of data.
64 bytes from kul09s14-in-f14.1e100.net (142.250.199.14): icmp_seq=1 ttl=109 time=27.6 ms
64 bytes from kul09s14-in-f14.1e100.net (142.250.199.14): icmp_seq=2 ttl=109 time=27.1 ms
64 bytes from kul09s14-in-f14.1e100.net (142.250.199.14): icmp_seq=3 ttl=109 time=27.7 ms
64 bytes from kul09s14-in-f14.1e100.net (142.250.199.14): icmp_seq=4 ttl=109 time=28.0 ms

#ctrl-c
Summary: google.com will overide CMD arg in container
remove all Docker containers, you can use the following commands.
- Step1 Stop all running container
$ docker stop $(docker ps -q)
- Step2 Remove all containers: After stopping them, you can remove all containers with this command:
$ docker rm $(docker ps -a -q)
Explanation:
- docker ps -q: Lists the IDs of all running containers.
- docker ps -a -q: Lists the IDs of all containers, including stopped ones.
- docker stop $(docker ps -q): Stops all running containers by passing their IDs to the docker stop command.
- docker rm $(docker ps -a -q): Removes all containers by passing their IDs to the docker rm command.
Lab2
cd ~
mkdir lab2
cd lab2
cat <<EOF | tee Dockerfile
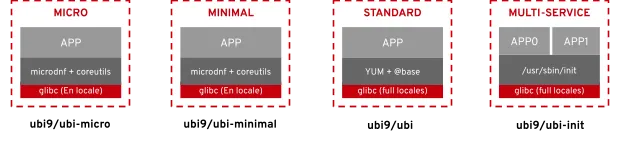
FROM registry.access.redhat.com/ubi9/ubi
RUN yum update -y && yum install iputils -y
WORKDIR /
CMD ["echo", "Hello Docker"]
EOF
cat Dockerfile
$ docker images

REPOSITORY   TAG       IMAGE ID       CREATED       SIZE
lab2         latest    8a6e9d1d5a47   8 days ago    213MB
- Run
$ docker run lab2
$ docker run lab2 ping google.com
Summary: ping google.com will overide cmd
Both CMD and ENTRYPOINT instructions define what command gets executed when running a container. There are few rules >that describe their co-operation.
1 Dockerfile should specify at least one of CMD or ENTRYPOINT commands.
2 ENTRYPOINT should be defined when using the container as an executable.
3 CMD should be used as a way of defining default arguments for an ENTRYPOINT command or for executing an ad-hoc >command in a container.
4 CMD will be overridden when running the container with alternative arguments.
Please remove all running
$ docker stop $(docker ps -q)
$ docker rm $(docker ps -a -q)
lab3
$ cd ~
$ mkdir redis-server
$ cd redis-server
$ cat <<EOF | tee Dockerfile
FROM ubuntu:24.04

RUN apt-get update && \
    apt-get install -y redis-server && \
    apt-get clean

EXPOSE 6379

CMD ["redis-server", "--protected-mode no"]
EOF

$ cat Dockerfile
- Build image
$ docker build -t redis-server .
- Run image
$ docker run -d -p 6379:6379 --name redis redis-server
$ docker container ls
Running Mysql container
- pull mysql image
$ docker pull mysql:latest
$ docker images
- Run mysql container
$ docker run --name test-mysql -e MYSQL_ROOT_PASSWORD=strong_password -d mysql
$ docker ps
-
run: creates a new container or starts an existing one
-
--name CONTAINER_NAME: gives the container a name. The name should be readable and short. In our case, the name is test-mysql.
-
-e ENV_VARIABLE=value: the -e tag creates an environment variable that will be accessible within the container. It is crucial to set MYSQL_ROOT_PASSWORD so that we can run SQL commands later from the container. Make sure to store your strong password somewhere safe (not your brain).
-
-d: short for detached, the -d tag makes the container run in the background. If you remove this tag, the command will keep printing logs until the container stops.
-
image_name: the final argument is the image name the container will be built from. In this case, our image is mysql.
-
Access to terminal inside container
docker exec -it container_name bash
$ docker exec -it test-mysql bash

// result
bash-5.1#  mysql -u root -p
Enter password: ...
mysql> show databases;
mysql> \q
Bye
bash-5.1# exit
exit
- Stop and delete container
$ docker stop test-mysql
$ docker rm test-mysql
- Start container again with port mapping
$ docker run -d --name test-mysql -e MYSQL_ROOT_PASSWORD=strong_password -p 3306:3306 mysql
Check port
$ docker port test-mysql
3306/tcp -> 0.0.0.0:3306
- install mysql client in vagrant
$ sudo dnf install mysql
- Start connect to mysql at port 3306
$ mysql --host=127.0.0.1 --port=3306 -u root -p
Enter password:
- Remove
$ docker stop test-mysql; docker rm test-mysql
- Configuration mysql container
cd ~
mkdir -p test-mysql/config
cd test-mysql
pwd

$ docker run \
   --name test-mysql \
   -v ./test-mysql/config:/etc/mysql/conf.d \
   -e MYSQL_ROOT_PASSWORD=strong_password \
   -d mysql
- Preserve Data after delete docker container
Persisting data stored in your MySQL containers is crucial for many reasons:
-
Data persistence: When you stop or remove a container, all data is lost, including your database. Decoupling the data from the container makes it always accessible.
-
Sharing data between containers: Detaching the data from the container allows multiple containers to have access to it. This way, you can avoid data duplication and simplify synchronization between projects that use the same data.
-
Portability and backup: persisted data can be easily backed up and shared independently, providing a reliable way to recover from data loss or accidental deletion.
-
Improved performance and scalability: By storing frequently accessed data to persistent storage like SSDs, you can improve the performance of your application compared to relying on the container’s writable layer, which is typically slower.
-
1 create volume
$ docker volume create test-mysql-data
$ docker volume ls

$ docker stop test-mysql; docker rm test-mysql

$ docker run \
   --name test-mysql \
   -v test-mysql-data:/var/lib/mysql \
   -e MYSQL_ROOT_PASSWORD=strong_password \
   -d mysql
- 2 inspect volume
$ docker inspect test-mysql-data
[
    {
        "CreatedAt": "2024-09-05T00:28:33Z",
        "Driver": "local",
        "Labels": null,
        "Mountpoint": "/var/lib/docker/volumes/test-mysql-data/_data",
        "Name": "test-mysql-data",
        "Options": null,
        "Scope": "local"
    }
]

$ ls /var/lib/docker/volumes/test-mysql-data/_data
- 3 Clean all
$ docker stop test-mysql; docker rm test-mysql
$ docker volume rm test-mysql-data
Postgresql Container
- Step1 pull image https://hub.docker.com/_/postgres/
$ docker pull postgres
- Step2 Run container
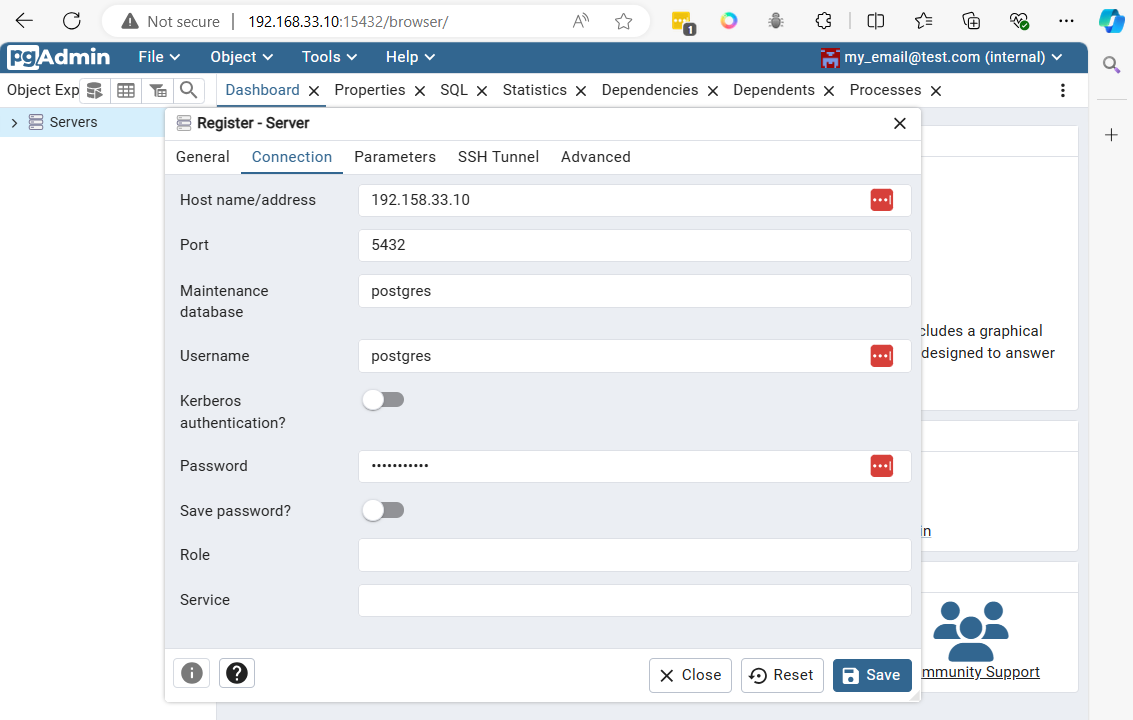
$ docker run --name my-postgres -e POSTGRES_PASSWORD=my_password -d -p 5432:5432 postgres
$ docker ps
-
Explaination
- my-postgres is the name of the container (you can choose a different name if you prefer).
- my_password is the password you want to set for the “postgres” user in PostgreSQL.
- The -d option runs the container in the background.
- The -p 5432:5432 option maps port 5432 from the container to port 5432 on the host, allowing you to connect to PostgreSQL from the host.
-
Step3 check port
$ docker port my-postgres
5432/tcp -> 0.0.0.0:5432
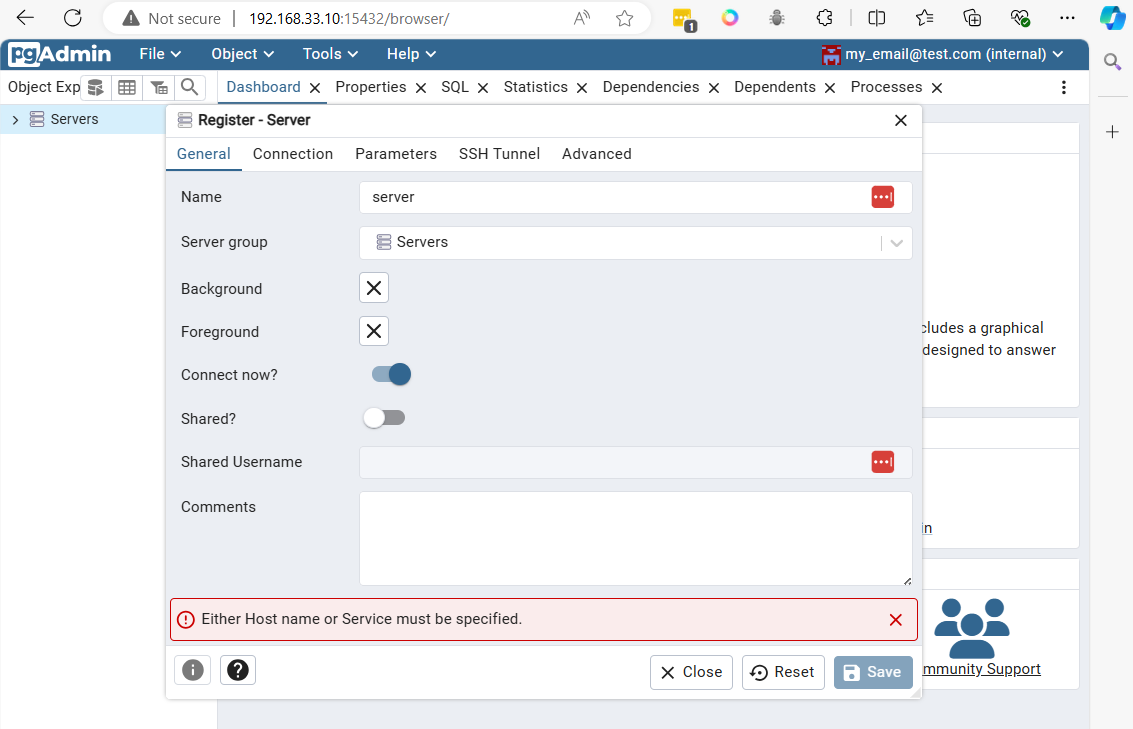
- Step4 Access point
pull image postgres addmin
- Step 5 Run
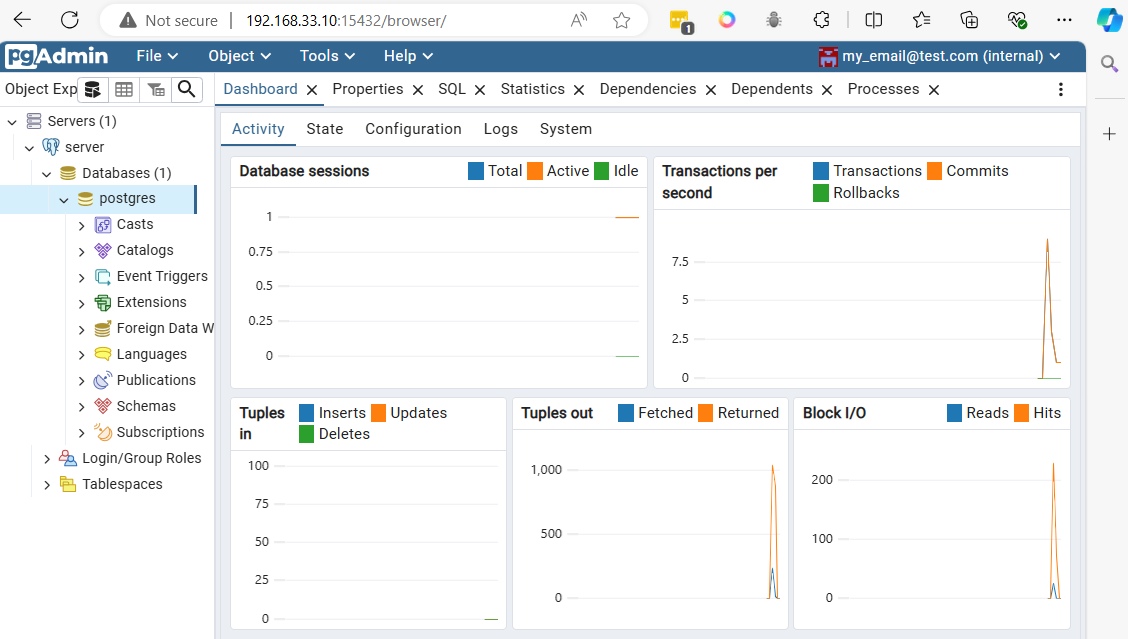
docker run --name test-pgadmin -p 15432:80 -e "PGADMIN_DEFAULT_EMAIL=my_email@test.com" -e "PGADMIN_DEFAULT_PASSWORD=my_password" -d dpage/pgadmin4
-
Explaination
- test-pgadmin is the name of the container being created.
- The -p 15432:80 option maps port 15432, which is used for communication with pgAdmin, to port 80.
- PGADMIN_DEFAULT_EMAIL will be the login you use to access pgAdmin.
- PGADMIN_DEFAULT_PASSWORD will be the password you use to access pgAdmin.
-
prepare firewall-cmd
sudo firewall-cmd --permanent --add-port=5432/tcp
sudo firewall-cmd --reload
access to dashboard
http://192.168.33.10:15432/
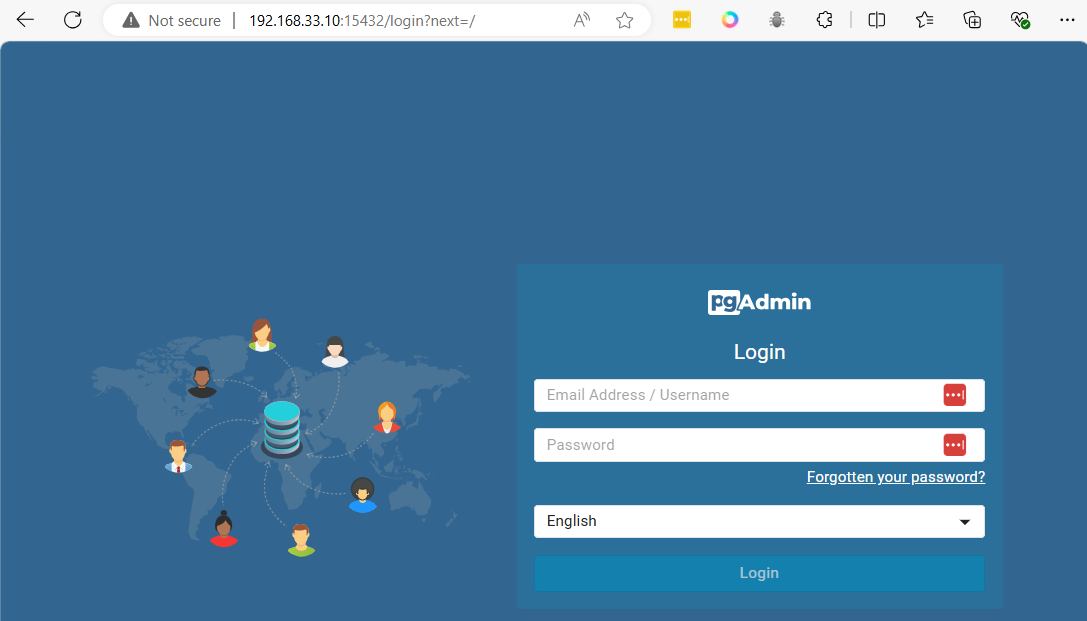
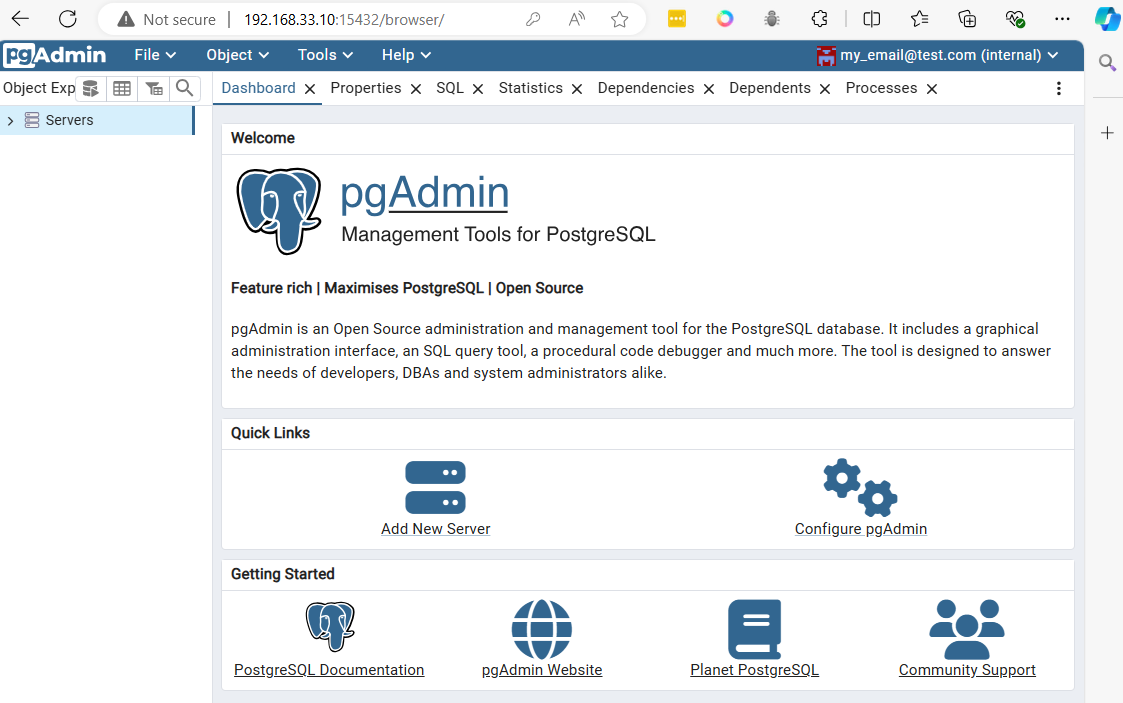
After logging in with the defined email (my_email@test.com) and password (my_password), the main panel will appear
Connect to postgresql from vagrant command line
sudo ss -tulpn | grep 5432
sudo dnf install postgresql
connnect with command line
PGPASSWORD=my_password psql -h localhost -p 5432 -U postgres
// result
psql (13.16, server 16.4 (Debian 16.4-1.pgdg120+1))
WARNING: psql major version 13, server major version 16.
         Some psql features might not work.
Type "help" for help.

postgres=# \q
$ PGPASSWORD=my_password psql -h localhost -p 5432 -U postgres -c '\l'
                                 List of databases
   Name    |  Owner   | Encoding |  Collate   |   Ctype    |   Access privileges
-----------+----------+----------+------------+------------+-----------------------
 postgres  | postgres | UTF8     | en_US.utf8 | en_US.utf8 |
 template0 | postgres | UTF8     | en_US.utf8 | en_US.utf8 | =c/postgres          +
           |          |          |            |            | postgres=CTc/postgres
 template1 | postgres | UTF8     | en_US.utf8 | en_US.utf8 | =c/postgres          +
           |          |          |            |            | postgres=CTc/postgres
(3 rows)
- Clean all
$ docker stop $(docker ps -q)
$ docker rm $(docker ps -a -q)
Create Dockerfile
$ mkdir postgresq
$ cd postgres

$ cat <<EOF | tee docker-compose.yml
services:
  postgres:
    image: postgres
    environment:
      POSTGRES_PASSWORD: my_password
    ports:
      - "5432:5432"
    volumes:
      - pgdata:/var/lib/postgresql/data
    networks:
      - pg_network

  pgadmin:
    image: dpage/pgadmin4
    environment:
      PGADMIN_DEFAULT_EMAIL: my_email@test.com
      PGADMIN_DEFAULT_PASSWORD: my_password
    ports:
      - "15432:80"
    networks:
      - pg_network

networks:
  pg_network:

volumes:
  pgdata:
EOF
$ cat docker-compose.yml
- Docker compose
$ docker compose up -d
[+] Running 4/4
 ✔ Network postgres_default       Created                                                    0.5s
 ✔ Volume "postgres_pgdata"       Created                                                    0.0s
 ✔ Container postgres-postgres-1  Started                                                    0.5s
 ✔ Container postgres-pgadmin-1   Started                                                    0.5s
- Clean
$ docker stop $(docker ps -q)
$ docker rm $(docker ps -a -q)
Containerize Application
Application structure
.
├── docker-compose.yml
├── node-app
│   ├── Dockerfile
│   ├── app.js
│   ├── package.json
└── python-app
    ├── Dockerfile
    └── app.py
create application
cd ~
mkdir lab-python-app
cd lab-python-app
mkdir {node-app,python-app}
-copy paste code below to terminal: create file: docker-compose.yml
cat <<EOF | tee docker-compose.yml
services:
  postgres:
    image: postgres
    environment:
      POSTGRES_USER: my_user
      POSTGRES_PASSWORD: my_password
      POSTGRES_DB: my_database
    ports:
      - "5432:5432"
    volumes:
      - pgdata:/var/lib/postgresql/data
    networks:
      - app_network

  node-app:
    build: ./node-app
    environment:
      DB_HOST: postgres
      DB_USER: my_user
      DB_PASSWORD: my_password
      DB_NAME: my_database
    depends_on:
      - postgres
    ports:
      - "3000:3000"
    networks:
      - app_network

  python-app:
    build: ./python-app
    environment:
      DB_HOST: postgres
      DB_USER: my_user
      DB_PASSWORD: my_password
      DB_NAME: my_database
    depends_on:
      - postgres
    ports:
      - "5000:5000"
    networks:
      - app_network

networks:
  app_network:

volumes:
  pgdata:
EOF
-copy paste code below to terminal: create file: node-app/Dockerfile
cat <<EOF  | tee node-app/Dockerfile
FROM node:22

WORKDIR /usr/src/app

COPY package*.json ./
RUN npm install

COPY . .

EXPOSE 3000

CMD ["node", "app.js"]
EOF
-copy paste code below to terminal: create file: node-app/app.js
cat <<EOF | tee node-app/app.js
const { Client } = require('pg');
const client = new Client({
host: process.env.DB_HOST,
user: process.env.DB_USER,
password: process.env.DB_PASSWORD,
database: process.env.DB_NAME,
});
client.connect()
.then(() => console.log('Connected to PostgreSQL from Node.js!'))
.catch(err => console.error('Connection error', err.stack));
const express = require('express');
const app = express();
const port = 3000;
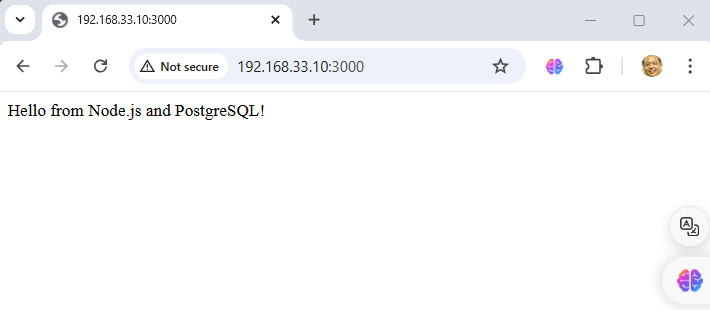
app.get('/', (req, res) => {
res.send('Hello from Node.js and PostgreSQL!');
});
app.listen(port, () => {
console.log(`Node.js app listening at http://localhost:${port}`);
});
EOF
-copy paste code below to terminal: create file: node-app/package.json
cat <<EOF | tee node-app/package.json
{
  "name": "node-app",
  "version": "1.0.0",
  "description": "A simple Node.js app with PostgreSQL",
  "main": "app.js",
  "scripts": {
    "start": "node app.js"
  },
  "dependencies": {
    "express": "^4.17.1",
    "pg": "^8.7.1"
  }
}
EOF
-copy paste code below to terminal: create file: python-app/Dockerfile
cat <<EOF | tee python-app/Dockerfile

FROM python:3.12

WORKDIR /usr/src/app

COPY requirements.txt ./
RUN pip install --no-cache-dir -r requirements.txt

COPY . .

EXPOSE 5000

CMD ["python", "./app.py"]

EOF
-copy paste code below to terminal: create file: python-app/requirements.txt
cat <<EOF | tee python-app/requirements.txt
flask
psycopg2
EOF
-copy paste code below to terminal: create file: python-app/app.py
cat <<EOF | tee python-app/app.py
from flask import Flask
import psycopg2
import os
app = Flask(__name__)
def connect_db():
conn = psycopg2.connect(
host=os.getenv("DB_HOST"),
database=os.getenv("DB_NAME"),
user=os.getenv("DB_USER"),
password=os.getenv("DB_PASSWORD")
)
return conn
@app.route('/')
def hello():
try:
conn = connect_db()
cursor = conn.cursor()
cursor.execute('SELECT version()')
db_version = cursor.fetchone()
cursor.close()
conn.close()
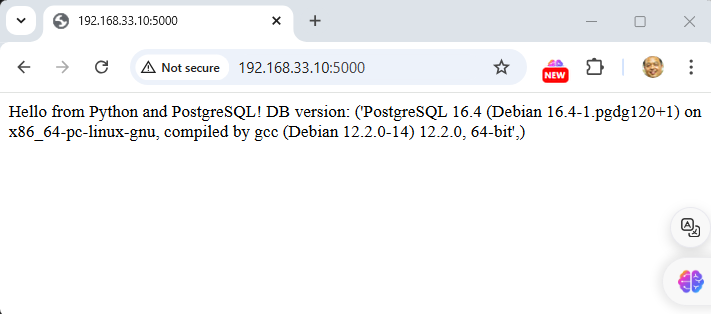
return f"Hello from Python and PostgreSQL! DB version: {db_version}"
except Exception as e:
return str(e)
if __name__ == '__main__':
app.run(host='0.0.0.0', port=5000)
EOF
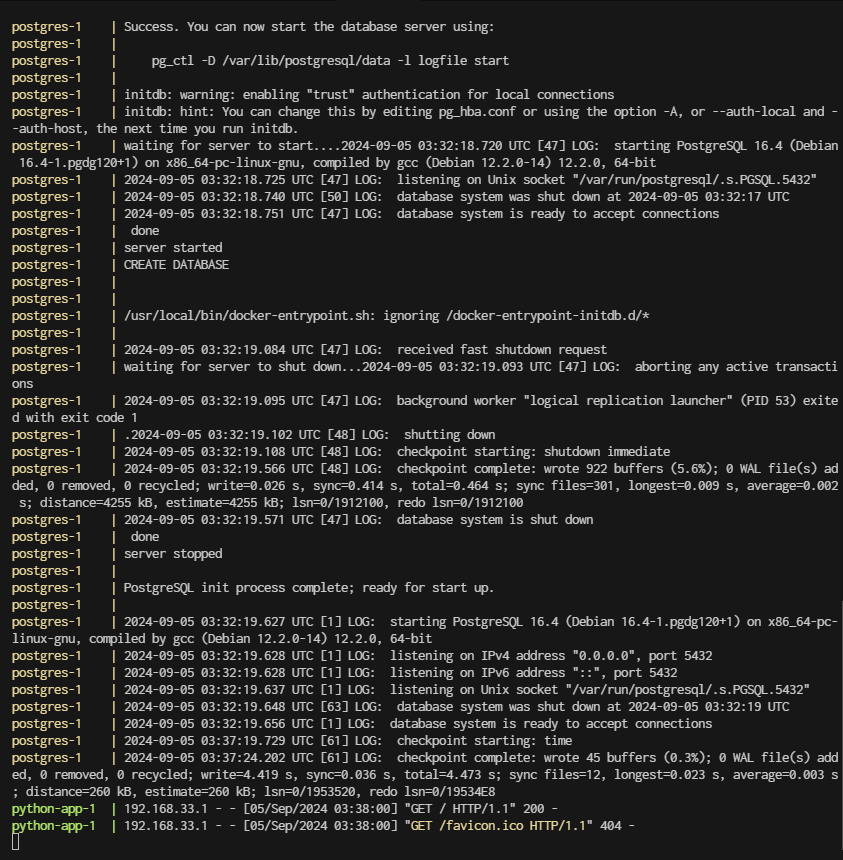
Steps to Run: Build and run the services:
docker compose up --build
Command Usage:
-
docker-compose up --build: This command builds the images and starts the containers. It’s useful when you’ve made changes to your Dockerfiles or the application code, and you need to rebuild the images.
-
docker-compose up -d: This command starts the containers in detached mode (background) using the existing images. If you have made changes and want to ensure the latest images are used, you should run docker-compose up --build first. After the initial build, subsequent runs with docker-compose up -d will use the existing images unless the Dockerfile or docker-compose.yml file changes.
Access the applications:
Node.js app will be running at http://localhost:3000
 Python app will be running at http://localhost:5000
Both applications will connect to the PostgreSQL database using the same credentials.
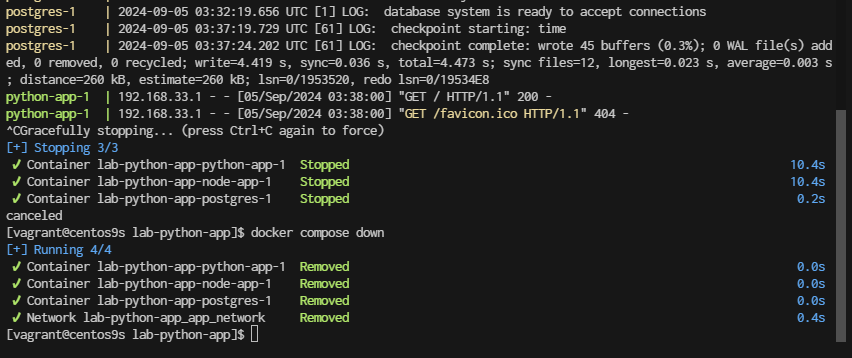
- Stop application go back to console
- control + c to stop
- run
docker compose down
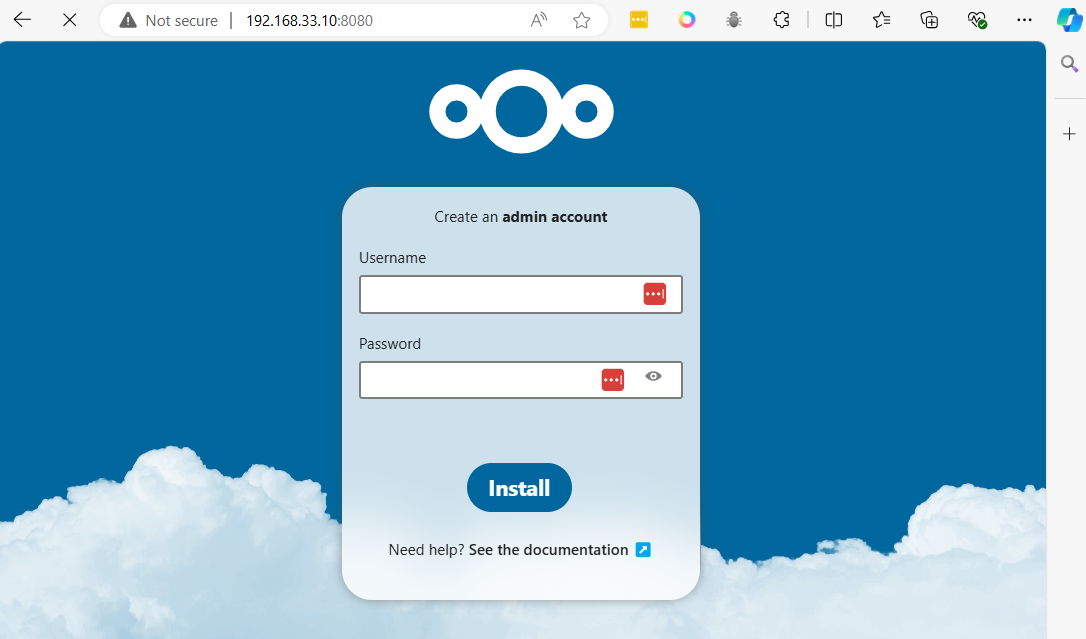
NextCloud Container

cd ~
mkdir nextcloud
cd nextcloud
cat <<EOF | tee docker-compose.yml
services:
  nextcloud_db:
    # This could be a specific version like mariadb:10.6
    image: mariadb
    restart: always
    command: --transaction-isolation=READ-COMMITTED --binlog-format=ROW
    networks:
      - cloudnet
    volumes:
      - db:/var/lib/mysql
    environment:
      - MYSQL_RANDOM_ROOT_PASSWORD=true
      - MYSQL_PASSWORD=PASSWORD
      - MYSQL_DATABASE=nextcloud
      - MYSQL_USER=nextcloud

  nextcloud:
    # This could be just 'nextcloud' to get the latest version
    image: nextcloud:28-apache
    restart: always
    networks:
      - cloudnet
    ports:
      - 8080:80
    volumes:
      - nextcloud:/var/www/html
    environment:
      - NEXTCLOUD_DATA_DIR=/var/www/html/data
      - MYSQL_PASSWORD=PASSWORD-as-above
      - MYSQL_DATABASE=nextcloud
      - MYSQL_USER=nextcloud
      - MYSQL_HOST=nextcloud_db

volumes:
   nextcloud:
   db:


networks:
  cloudnet:
    name: cloudnet
    driver: bridge
EOF
cat docker-compose.yml
docker compose up -d
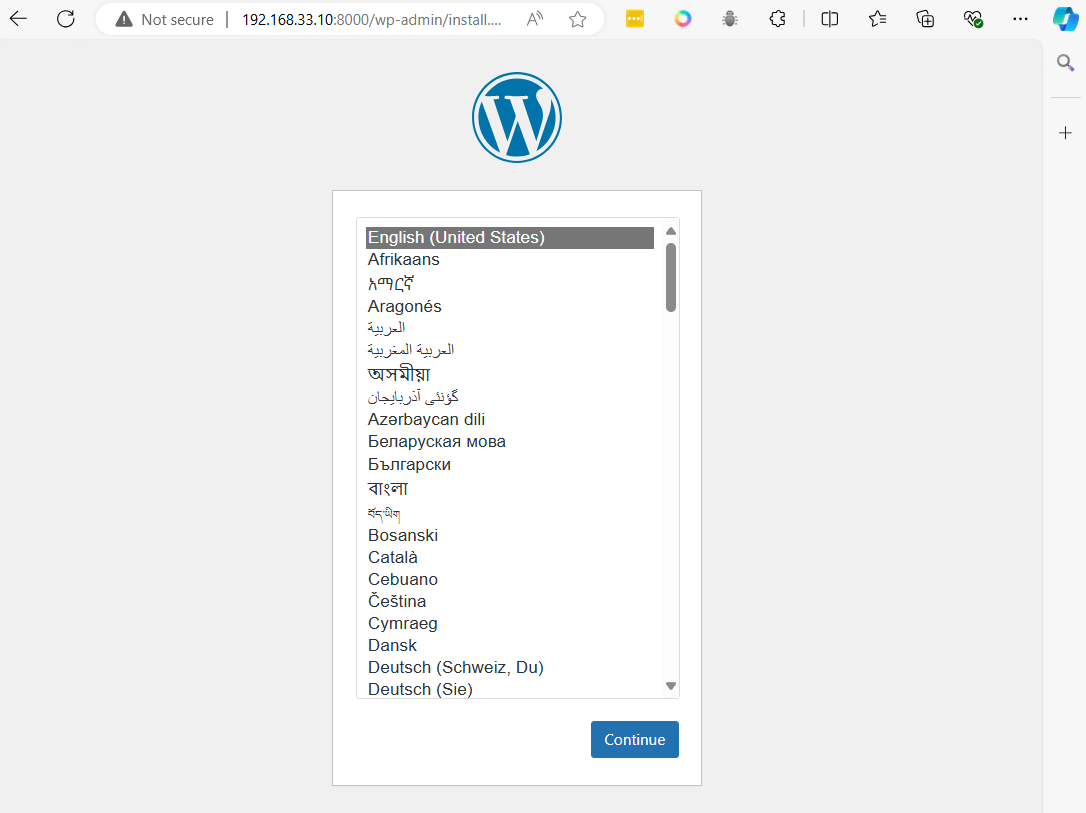
Wordpress Container
cd ~
mkdir wordpress
cd wordpress
Copy to terminial create docker-compose.yml
cat <<EOF | tee docker-compose.yml
services:
  db:
    image: mysql
    volumes:
      - db_data:/var/lib/mysql
    restart: always
    environment:
      MYSQL_ROOT_PASSWORD: rootpassword
      MYSQL_DATABASE: wordpress
      MYSQL_USER: wordpress
      MYSQL_PASSWORD: wordpress

  wordpress:
    depends_on:
      - db
    image: wordpress:latest
    ports:
      - "8000:80"
    restart: always
    environment:
      WORDPRESS_DB_HOST: db:3306
      WORDPRESS_DB_USER: wordpress
      WORDPRESS_DB_PASSWORD: wordpress
      WORDPRESS_DB_NAME: wordpress
volumes:
  db_data:
EOF
cat docker-compose.yml
docker compose up -d
docker compose stop
docker compose down
python project
Common instructions Some of the most common instructions in a Dockerfile include:
FROM <image>- this specifies the base image that the build will extend.WORKDIR <path>- this instruction specifies the "working directory" or the path in the image where files will be copied and commands will be executed.COPY <host-path> <image-path>- this instruction tells the builder to copy files from the host and put them into the container image.RUN <command>- this instruction tells the builder to run the specified command.ENV <name> <value>- this instruction sets an environment variable that a running container will use.EXPOSE <port-number>- this instruction sets configuration on the image that indicates a port the image would like to expose.USER <user-or-uid>- this instruction sets the default user for all subsequent instructions.CMD ["<command>", "<arg1>"]- this instruction sets the default command a container using this image will run.
vagrant ssh to vim
vagrant ssh
check install python, pip
python --version
sudo dnf install python-pip
sudo dnf install tree
Create project
$ cd
$ mkdir week3_python
$ cd week3_python
$ mkdir src


$ python -m venv myenv

$ source  myenv/bin/activate
(myenv) $ pip install  flask

(myenv) $ pip freeze >> requirements.txt
(myenv) $ cat requirements.txt
- Create main.py
cat <<EOF | tee src/main.py
from flask import Flask
server = Flask(__name__)

@server.route("/")
def index():
     return "Hello World!"

if __name__ == "__main__":
    server.run(host='0.0.0.0')
EOF
- Test Application
(myenv) $ python src/main.py
Result:
 * Serving Flask app 'main'
 * Debug mode: off
WARNING: This is a development server. Do not use it in a production deployment. Use a production WSGI server instead.
 * Running on all addresses (0.0.0.0)
 * Running on http://127.0.0.1:5000
 * Running on http://10.0.2.15:5000
Press CTRL+C to quit
Exit project by CTRL+C
- Exit from python development
(myenv) $ deactivate
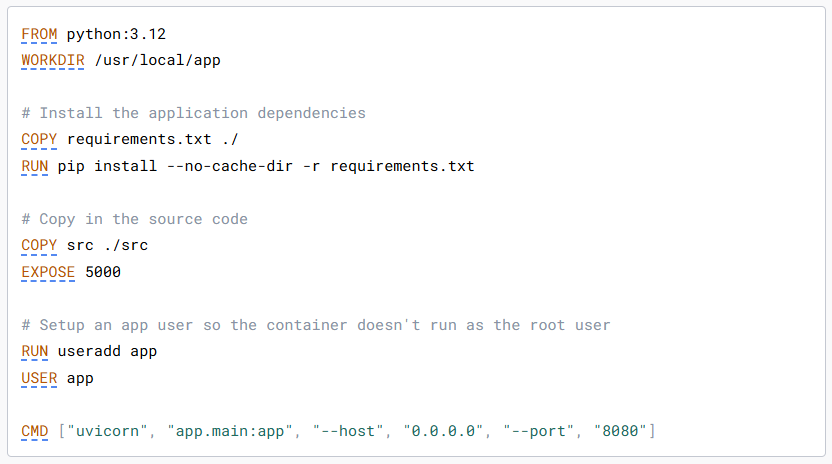
- Create Dockerfile with python image https://hub.docker.com/_/python
cat <<EOF  | tee Dockerfile
FROM python
WORKDIR /code
COPY requirements.txt .
RUN pip install --no-cache-dir -r requirements.txt

# Copy in the source code
COPY src/ .
EXPOSE 5000

# Setup an app user so the container doesn't run as the root user
RUN useradd -m app
USER app

CMD ["python", "main.py"]
EOF
- Project Structure
$ tree -L 2 .
.
├── Dockerfile
├── myenv
│   ├── bin
│   ├── include
│   ├── lib
│   ├── lib64 -> lib
│   └── pyvenv.cfg
├── requirements.txt
└── src
    └── main.py
- Create Image
docker build -t week3-python-app .
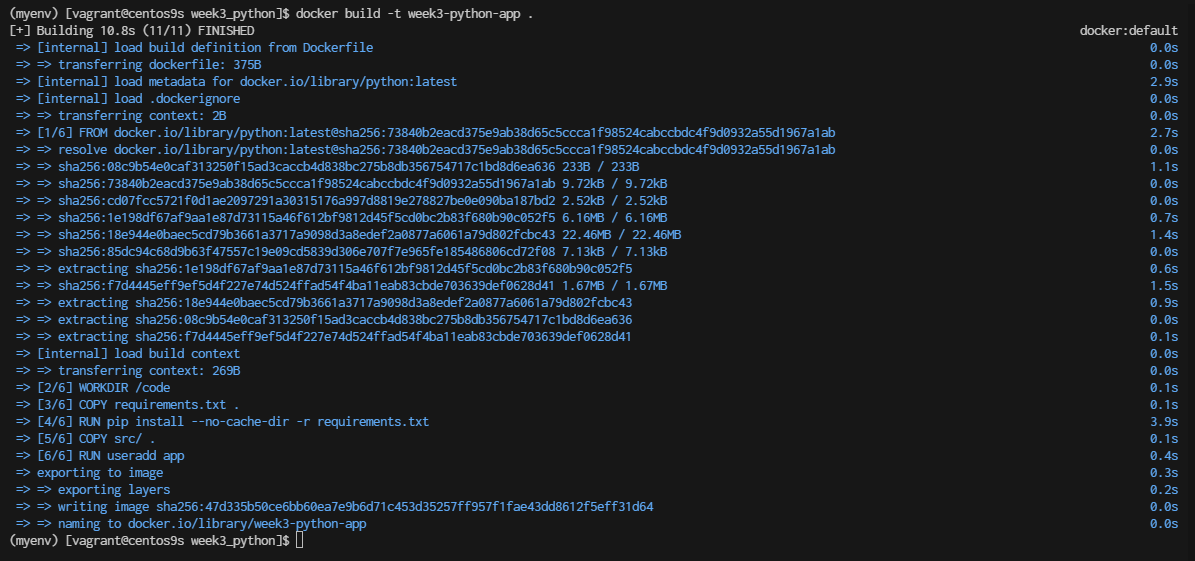
- Check image
$ docker images
$ docker run -it week3-python-app bash
app@12ec39dcd0fc:/code$ ls
main.py  requirements.txt
- Run docker container
$ docker run -d -p 5000:5000 --name week3-app week3-python-app
f9bb95ba424167586ad36d54a8b7a9bfc643e6515efb8328d915c84584914c74


$ ss -tulpn | grep 5000
tcp   LISTEN 0      4096         0.0.0.0:5000      0.0.0.0:*
- monitor log
$ docker logs week3-app
Result:
 * Serving Flask app 'main'
 * Debug mode: off
WARNING: This is a development server. Do not use it in a production deployment. Use a production WSGI server instead.
 * Running on all addresses (0.0.0.0)
 * Running on http://127.0.0.1:5000
 * Running on http://172.17.0.2:5000
Press CTRL+C to quit
- stop container
$ docker container stop wee3-app
$ docker rm week3-app
- Create Docker compose
cat <<EOF | tee docker-compose.yml
services:
  week3-app:
    container_name: week3-app-compose
    image: myreponame/week3-python-app:latest
    ports:
      - "5000:5000"
    build:
      context: .
      dockerfile: Dockerfile
EOF
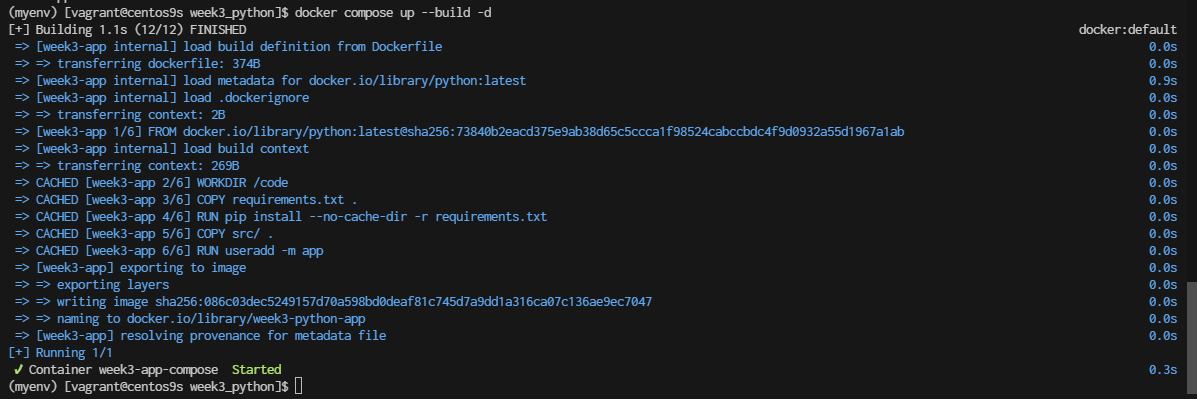
- Verify Build and Run:
Make sure the Dockerfile builds successfully by running:
docker compose up --build -d
- Check Logs: with service name. if container stops
$ docker compose logs week3-app

- list docker compose
$ docker compose ps

- Delete images
$ docker rmi week3-python-app:latest
Compare Run and Exec
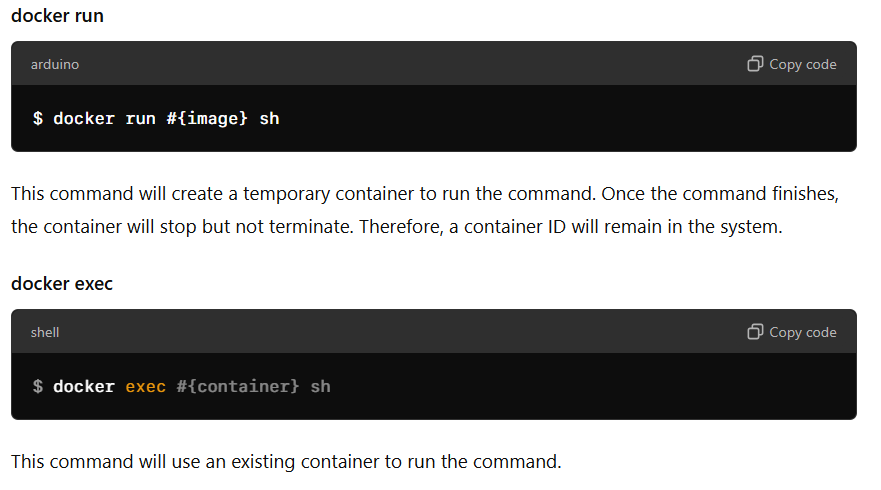
- Stop Docker compose before process
$ docker compose down
Run another python App
cat <<EOF | tee src/main2.py
from flask import Flask, request, jsonify

app = Flask(__name__)

@app.route("/greet", methods=["GET"])
def greet():
    return "Hello! Welcome to the API."

@app.route("/echo", methods=["POST"])
def echo():
    data = request.get_json()
    return jsonify(data)

@app.route("/hello/<name>", methods=["GET"])
def hello(name):
    return f"Hello, {name}!"

if __name__ == "__main__":
    app.run(host='0.0.0.0', port=5000)
EOF
- enable firewall port 5000
sudo firewall-cmd --permanent --add-port=5000/tcp
sudo firewall-cmd --reload
$ python src/main2.py
1 Test
curl http://192.168.33.10:5000/greet
Hello! Welcome to the API.
2 Test
curl -X POST http://192.168.33.10:5000/echo -H "Content-Type: application/json" -d '{"key": "1234"}'
Express.js project
Prerequisites
- Create project folder
cd
mkdir express
cd express
- install node js package
sudo dnf install nodejs
- Step 1: Setting up the Node.js and Express.js Application
Create a simple Node.js and Express.js application. Create a file named app.js and add the following code:
cat <<EOF | tee app.js
const express = require("express");
const app = express();

app.get("/", function(req, res) {
    return res.send("Hello World");
});

app.listen(3000, function(){
    console.log('Listening on port 3000');
});
EOF
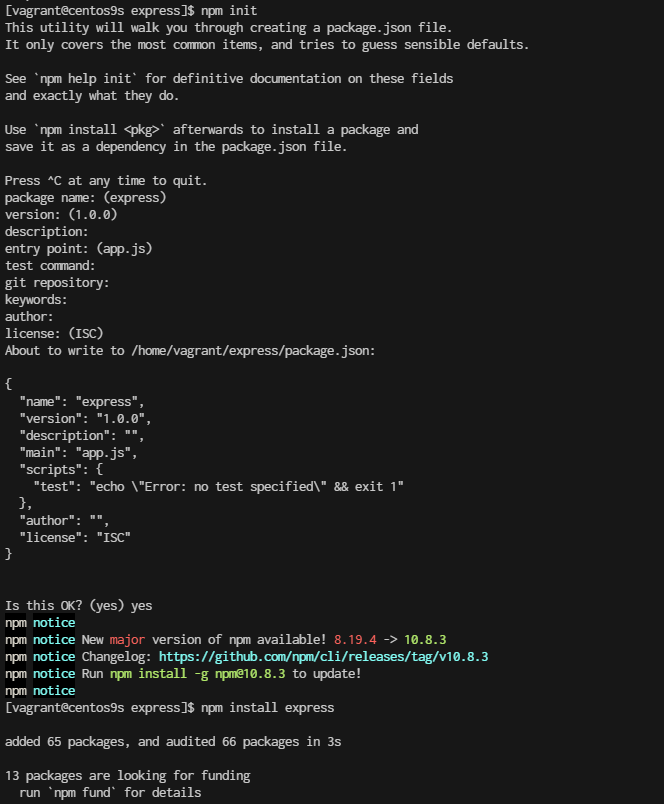
$ npm init
$ npm install express

$ node app.js
Listening on port 3000
Express server code looks good! Here's a brief rundown of what each part does:
-
Import Express: const express = require("express"); imports the Express library.
-
Create an Express App: const app = express(); creates an instance of an Express application.
-
Define a Route: app.get("/", function(req, res) { return res.send("Hello World"); }); sets up a route for the root URL (/). When someone accesses this URL, the server will respond with "Hello World".
-
Start the Server: app.listen(3000, function(){ console.log('Listening on port 3000'); }); tells the application to listen on port 3000 and logs a message to the console when the server is running.
- Step 2: Create a Dockerfile
[vagrant@centos9s express]$ ls -l
total 64
-rw-r--r--.  1 vagrant vagrant   211 Sep 12 01:12 app.js
-rw-r--r--.  1 vagrant vagrant   106 Sep 12 01:32 Dockerfile
drwxr-xr-x. 66 vagrant vagrant  4096 Sep 12 01:18 node_modules
-rw-r--r--.  1 vagrant vagrant   251 Sep 12 01:18 package.json
-rw-r--r--.  1 vagrant vagrant 46645 Sep 12 01:18 package-lock.json
Next, create a Dockerfile to specify how to build our Docker image. Create a file named Dockerfile in the same directory as your app.js file and add the following content:
- Create Dockerfile
cat <<EOF | tee Dockerfile
FROM node:22-alpine

# Set the working directory in the container
WORKDIR /app

# Copy package.json and package-lock.json if available
COPY package.json package-lock.json ./

# Install dependencies
RUN npm install

# Copy the rest of the application code
COPY . .

# Expose the port that the app runs on
EXPOSE 3000

# Command to run the application
CMD ["node", "app.js"]

EOF
- create ```.dockerignore`` Consider adding a .dockerignore file to avoid including unnecessary files in the Docker image:
cat <<EOF | tee .dockerignore
node_modules
npm-debug.log
Dockerfile
.dockerignore
.git
EOF
- Step 3: Building the Docker Image Now that we have our Dockerfile ready, let’s build the Docker image. Open a terminal, navigate to the directory containing your Dockerfile, and run the following command:
$ docker build -t week3_node-application .
- Step 4: Run Docker Container
$ docker run -p 3000:3000 week3_node-application
- Remove image
$ docker stop $(docker ps -a -q)
$ docker rm $(docker pa -a -q)
- Step5 Create Docker Compose
Docker Compose with your Node.js application, you’ll need to create a docker-compose.yml file. This file allows you to define and run multi-container Docker applications. Since your application is a single container application
cat <<EOF | tee docker-compose.yml
version: '3.8'

services:
  app:
    image: my-node-app
    build:
      context: .
      dockerfile: Dockerfile
    ports:
      - "3000:3000"
    volumes:
      - .:/app
    environment:
      NODE_ENV: development
EOF
-
services: This section defines the services (containers) for your application.
-
app: This is the name of the service. You can name this whatever you like.
-
image: my-node-app: This specifies the Docker image to use. You can either build it yourself or pull it from a repository. In this case, it assumes you will build it using Docker Compose.
-
build: This section is used to build the Docker image. context: . indicates the directory where the Dockerfile is located. dockerfile: Dockerfile specifies the name of the Dockerfile (it defaults to Dockerfile if not specified).
-
ports: This maps port 3000 on your host machine to port 3000 in the container, allowing you to access the application via http://localhost:3000.
-
volumes: This mounts your project directory (.) to /app in the container. This is useful for development as it allows you to see changes in real time without rebuilding the image. For production, you might want to omit this to use the image as-is.
-
environment: This sets environment variables for your container. Here, NODE_ENV is set to development.
-
Building and Running with Docker Compose
To build and start your application using Docker Compose:
- Build and Start Services:
docker-compose up --build
This command builds the Docker image (if not already built) and starts the container as specified in your docker-compose.yml.
- Stop Services:
docker-compose down
This command stops and removes the containers defined in your docker-compose.yml file.
Why Docker Compose
- Structure Folder
cd
mkdir whycompose
cd whycompose
mkdir api
cd api
npm init

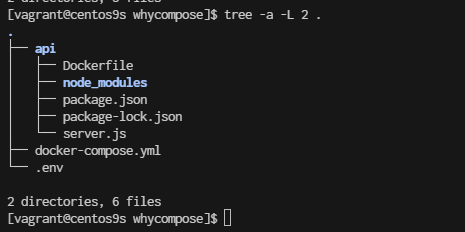
- Create project
- create file server.js
vim server.js
const express = require('express');
const cors = require('cors');
const { MongoClient } = require('mongodb');
const bodyParser = require('body-parser');
const app = express();

const mongoClientOptions = { useNewUrlParser: true, useUnifiedTopology: true };
const databaseName = 'my-db';
const port = 3000;

app.use(cors());
app.use(bodyParser.urlencoded({ extended: true }));
app.use(bodyParser.json());

app.post('/add-user', async (req, res) => {
  const userObj = req.body;
  const dbUrl = process.env.DB_URL;

  try {
    const client = await MongoClient.connect(dbUrl, mongoClientOptions);
    const db = client.db(databaseName);

    // Define the newvalues object with $set operator
    const newvalues = { $set: userObj };

    // Update or insert the document
    const result = await db.collection('users').updateOne(
      { userName: userObj.userName }, // Query to find the document
      newvalues, // Update the document
      { upsert: true } // Create the document if it does not exist
    );

    client.close();

    // Send success response
    res.status(200).json({ message: 'User updated or added successfully', result });
  } catch (err) {
    console.error('Error updating user:', err);
    res.status(500).send('Internal Server Error');
  }
});

app.get('/get-user', async (req, res) => {
  const query = req.query;
  const dbUrl = process.env.DB_URL;

  try {
    const client = await MongoClient.connect(dbUrl, mongoClientOptions);
    const db = client.db(databaseName);

    const result = await db.collection('users').findOne(query);
    client.close();

    // Send user data or empty object
    res.status(200).json(result || {});
  } catch (err) {
    console.error('Error fetching user:', err);
    res.status(500).send('Internal Server Error');
  }
});

app.listen(port, () => {
  console.log(`App listening on port ${port}!`);
});
Install the Required Packages
Next, you'll need to install the required npm packages. Based on your server.js file, you need the following packages:
- express: A web framework for Node.js.
- cors: A package for enabling Cross-Origin Resource Sharing (CORS).
- mongodb: The MongoDB driver for Node.js.
- body-parser: Middleware for parsing request bodies.
$ npm install express cors mongodb body-parser
- Create Dockerfile
cat <<EOF | tee Dockerfile
FROM node:22-alpine
# Import a Nodejs image that runs on top of an Alpine image.

RUN mkdir -p /home/app
# This command will create a subdirectory called /app in the /home directory of the Alpine image

WORKDIR /home/app
# This command will set the default directory as /home/app.
# Hence, the next commands will start executing from the /home/app directory of the Alpine image.

COPY package*.json ./
# To copy both package.json and package-lock.json to the working directory (/home/app) of the Alpine image.
# Prior to copying the entire current working directory, we copy the package.json file to the working directory (/home/app) of the Alpine image. This allows to take advantage of any cached layers.

RUN npm install
# This will create a node_modules folder in /home/app and
# install all the dependencies specified in the package.json file.

COPY . .
# Here “.” represents the current working directory.
# This command will copy all the files in the current directory to the working directory (/home/app) of the Alpine image.

EXPOSE 3000
# Make the application available on port 3000. By doing this, you can access the Nodejs application via port 3000.

CMD ["npm", "start"]
# One important thing to notice here is that “RUN” executes while the image creation process is running
# and “CMD” executes only after the image creation process is finished.
# One Dockerfile may consist of more than one "RUN" command, but it can only consist of one "CMD" command.
EOF
- create .cokerignore
cat <<EOF | tee .dockerignore
node_modules
EOF
Go back to whycompose
cd whycompose
- create docker-compose.yml
cat <<EOF | tee docker-compose.yml
services:
  api:
    build:
      context: ./api
      dockerfile: Dockerfile
    ports:
      - "3000:3000"
    environment:
      DB_URL: ${DB_URL}
    networks:
      - my-network
    depends_on:
      - mongodb
    healthcheck:
      test: ["CMD-SHELL", "curl -f http://localhost:3000/health || exit 1"]
      interval: 30s
      retries: 3
      start_period: 30s
      timeout: 10s
    restart: unless-stopped

  mongodb:
    image: mongo:latest
    ports:
      - "27017:27017"
    environment:
      MONGO_INITDB_ROOT_USERNAME: ${MONGO_INITDB_ROOT_USERNAME}
      MONGO_INITDB_ROOT_PASSWORD: ${MONGO_INITDB_ROOT_PASSWORD}
    volumes:
      - mongo-data:/data/db
    networks:
      - my-network
    healthcheck:
      test: ["CMD-SHELL", "mongo --eval 'db.runCommand({ connectionStatus: 1 })' || exit 1"]
      interval: 30s
      retries: 3
      start_period: 30s
      timeout: 10s
    restart: unless-stopped

volumes:
  mongo-data:
    driver: local

networks:
  my-network:
    driver: bridge

EOF
Understand: docker compose
- build Configuration:
- Explicitly define context and dockerfile in the build section for clarity.
- Environment Variables:
- Use the : syntax for environment variables which is more readable and aligns with docker-compose conventions.
- Health Checks:
- Updated the health checks to ensure both services are properly monitored. The api service now checks a /health endpoint to verify it's up and running, while the mongodb service checks the connection status.
- Dependencies:
- Added depends_on to the api service to ensure MongoDB starts before the API service. Note: depends_on does not wait for MongoDB to be "ready" but ensures it starts before the API.
- Restart Policy:
- Added restart: unless-stopped to ensure services are automatically restarted unless explicitly stopped. This is useful for resilience.
- Networking:
- Defined a custom network my-network with the bridge driver for better isolation and management of network traffic.
Additional Considerations:
- .env File: Ensure your .env file is in place with appropriate variables:
cat <<EOF | tee .env
DB_URL=mongodb://mongodb:27017/mydatabase
MONGO_INITDB_ROOT_USERNAME=yourusername
MONGO_INITDB_ROOT_PASSWORD=yourpassword
EOF
-
Dockerfile for API: Make sure your Dockerfile in the ./api directory is properly set up for building your application.
-
Security: Be cautious with sensitive information and consider using secrets management tools for production environments.
-
Volume Management: Regularly monitor and manage your volumes to avoid excessive disk usage.
-
Build the Docker image
whycompose]$ docker compose build --no-cache
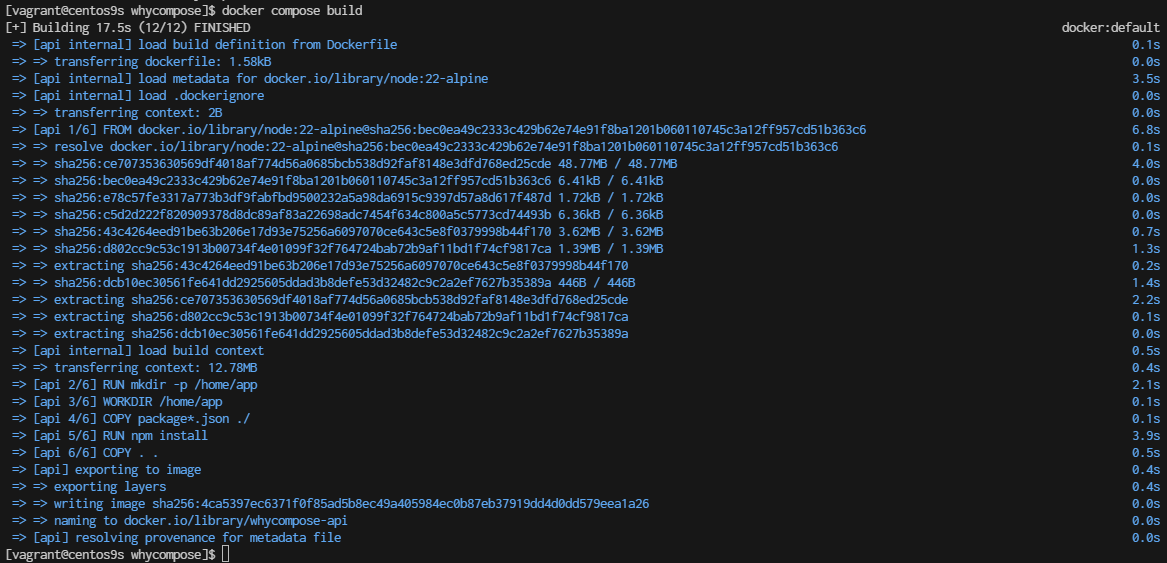
- Check docker image
whycompose]$ docker images
REPOSITORY                  TAG         IMAGE ID       CREATED         SIZE
whycompose-api              latest      4ca5397ec637   2 minutes ago   181MB
- Docker compose up
whycompose]$ docker compose up
Summary docker command
When using Docker Compose and you want to force a rebuild of your services, even if Docker thinks the current images are up-to-date, you can use several options. These methods ensure that Docker Compose does not use cached layers and rebuilds everything from scratch.
1. Use the --no-cache Option
The --no-cache flag can be used with docker-compose build to force Docker to rebuild the images without using cache:
docker-compose build --no-cache
- --no-cache: Ignores the cache and builds each step of the Dockerfile from scratch.
2. Use the --build Flag with docker-compose up
You can also force a rebuild by using the --build flag when running docker-compose up. This will rebuild the images before starting the containers:
docker-compose up --build
- --build: Forces the build of images before starting the containers.
3. Remove Existing Images If you want to ensure that old images are not used, you can manually remove them before rebuilding. You can list and remove the images using the following commands:
# List images
docker images
# Remove an image
docker rmi <image_id>
Alternatively, you can use Docker Compose to remove images related to your project:
docker-compose down --rmi all
- --rmi all: Removes all images used by the services defined in the docker-compose.yml file.
- Clean Up Build Cache To clean up build cache that might interfere with forcing a rebuild, you can use the following command:
docker builder prune
- docker builder prune: Cleans up the build cache. You can add -a to remove all unused build cache, not just dangling cache.
- Rebuild with docker-compose and --pull If you also want to make sure you pull the latest versions of the base images, you can use --pull:
docker-compose build --pull --no-cache
- --pull: Always attempt to pull a newer version of the base image.
- --no-cache: Ignores the cache and builds from scratch.
Summary
To force a rebuild of your Docker Compose services:
- Ignore Cache: Use docker-compose build --no-cache.
- Rebuild and Start: Use docker-compose up --build.
- Remove Images: Use docker-compose down --rmi all or manually remove images.
- Clean Build Cache: Use docker builder prune.
- Pull Latest Images: Use docker-compose build --pull --no-cache.
These options give you flexibility depending on whether you want to rebuild from scratch, update base images, or clean up old images and cache.
Docker push/pull
Docker Lab push pull
Install Docker: Make sure Docker is installed on your machine. You can follow the official installation guide for your operating system.
Create a Simple Dockerfile: Create a directory for your Docker project and add a Dockerfile. This file will define the image you want to build.
mkdir my-docker-lab
cd my-docker-lab
Create a file named Dockerfile in this directory with the following content:
Dockerfile
cat <<EOF | tee Dockerfile
# Use an official Python runtime as a parent image
FROM python

# Set the working directory in the container
WORKDIR /usr/src/app

# Copy the current directory contents into the container at /usr/src/app
COPY . .

# Install any needed packages specified in requirements.txt
RUN pip install --no-cache-dir -r requirements.txt

# Make port 80 available to the world outside this container
EXPOSE 80

# Define environment variable
ENV NAME World

# Run app.py when the container launches
CMD ["python", "app.py"]
EOF
Create a Requirements File: Create a requirements.txt file to specify Python dependencies:
cat <<EOF | tee requirements.txt
Flask
EOF
Create a Simple Python Application: Create a file named app.py:
cat <<EOF | tee app.py
from flask import Flask
app = Flask(__name__)

@app.route('/')
def hello_world():
    return 'Hello, World!'

if __name__ == '__main__':
    app.run(host='0.0.0.0', port=80)
EOF
Build Your Docker Image: From the directory containing your Dockerfile, build the Docker image:
$ docker build -t my-flask-app .
Run Your Docker Container: After building the image, run a container based on this image:
$ docker run -p 4000:80 my-flask-app
Your Flask app should now be accessible at http://localhost:4000.
ss -tulpn | grep 4000
curl http://localhost:4000
Docker Push and Pull Commands To push and pull Docker images to and from a Docker registry (e.g., Docker Hub), follow these steps:
Tag Your Image: Before pushing an image to Docker Hub, you need to tag it with your repository name. If your Docker Hub username is yourusername and your image name is my-flask-app, tag it like this:
docker tag my-flask-app yourrreponame/my-flask-app:latest
Login to Docker Hub: Log in to Docker Hub using your credentials:
$ docker login
Push the Image to Docker Hub: Push the tagged image to Docker Hub:
$ docker push yourrreponame/my-flask-app:latest
Pull the Image from Docker Hub: To pull the image from Docker Hub to another machine, use:
$ docker pull yourusername/my-flask-app:latest
Run the Pulled Image: After pulling the image, you can run it just like any other Docker image:
$ docker run -p 4000:80 yourusername/my-flask-app:latest
This will pull the image from Docker Hub and run it locally, making your Flask app accessible at http://localhost:4000.
install minikube
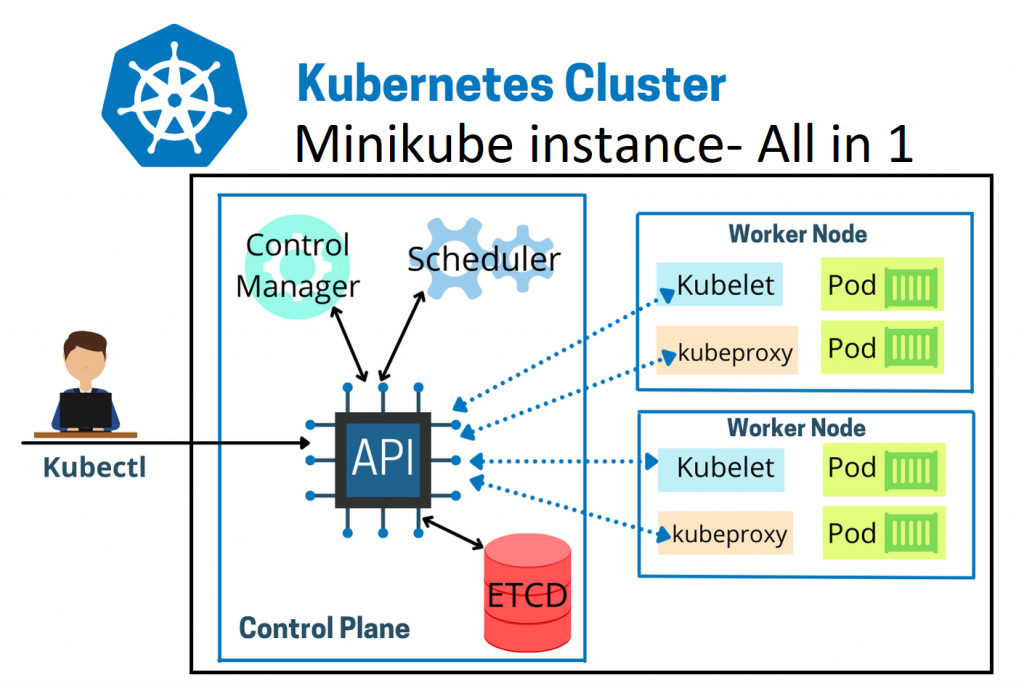
What is Minikube? Minikube is a tool that enables developers to run a single-node Kubernetes cluster locally on their machine. It simplifies Kubernetes development and testing by providing an easy-to-use environment that closely mimics a production Kubernetes cluster. With Minikube, developers can quickly prototype, deploy, and debug applications, making it an essential tool for building and testing Kubernetes-based solutions. Its benefits include fast setup, isolation, reproducibility, and the ability to develop and test Kubernetes applications without the need for a full-scale cluster.
Most users of this driver should consider the newer Docker driver, as it is significantly easier to configure and does not require root access. The ’none’ driver is recommended for advanced users only.
on window create folder for project vm
mkdir minikube
cd minikube
code Vagrantfile
# -*- mode: ruby -*-
# vi: set ft=ruby :

Vagrant.configure("2") do |config|

  config.vm.box = "generic/centos9s"
  config.vm.network "private_network", ip: "192.168.40.10"

  # config.vm.network "public_network"

  # config.vm.synced_folder "../data", "/vagrant_data"

  #config.vm.synced_folder ".", "/vagrant"


  config.vm.provider "virtualbox" do |vb|
      vb.memory = "4096"
      vb.cpus = 4
  end

  config.vm.provision "shell", inline: <<-SHELL
    echo "\nStep-1 Enable ssh password authentication"
    echo $(whoami)
    sed -i 's/PasswordAuthentication no/PasswordAuthentication yes/g' /etc/ssh/sshd_config
    systemctl restart sshd.service

    #add docker repository
    sudo dnf install -y yum-utils device-mapper-persistent-data lvm2
    sudo dnf config-manager --add-repo=https://download.docker.com/linux/centos/docker-ce.repo
    sudo dnf repolist -v
    #install docker
    sudo dnf install docker-ce -y
    sudo systemctl enable --now docker
    sudo systemctl status docker
    # add vagrant user to docker group
    sudo groupadd docker
    sudo usermod -aG docker vagrant
    sudo -i -u vagrant newgrp docker

    echo "\>> Status docker "
    sudo systemctl status docker
    # Run docker ps
    echo "Run Test docker command"
    docker ps
cat <<EOF | sudo tee /etc/yum.repos.d/kubernetes.repo
[kubernetes]
name=Kubernetes
baseurl=https://pkgs.k8s.io/core:/stable:/v1.28/rpm/
enabled=1
gpgcheck=1
gpgkey=https://pkgs.k8s.io/core:/stable:/v1.28/rpm/repodata/repomd.xml.key
exclude=kubelet kubeadm kubectl cri-tools kubernetes-cni
EOF

    sudo dnf install -y kubelet kubeadm kubectl --disableexcludes=kubernetes
    sudo systemctl enable --now kubelet
    sudo systemctl status kubelet

  echo "kubectl version --output=yaml"
  sudo kubectl version --output=yaml

  #Download minikube
  curl -LO https://storage.googleapis.com/minikube/releases/latest/minikube-linux-amd64
  sudo chmod +x minikube-linux-amd64

  sudo mv minikube-linux-amd64 /usr/local/bin/minikube

  SHELL
end
- Create VM with provision
vagrant up --provision
vagrant ssh
- Start Minikube
$ minikube start
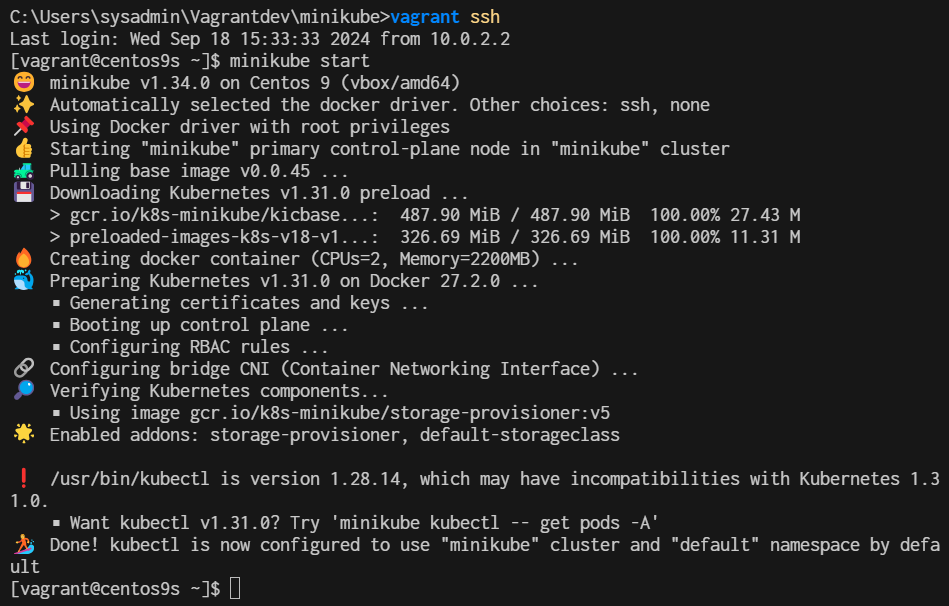
- Verify Installation
$ minikube status
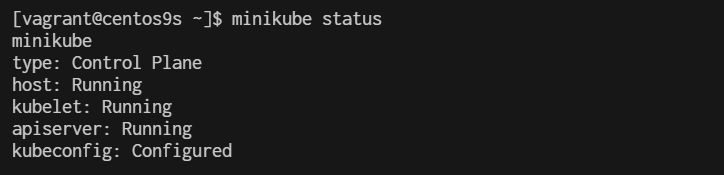
$ kubectl cluster-info
Kubernetes control plane is running at https://192.168.49.2:8443
CoreDNS is running at https://192.168.49.2:8443/api/v1/namespaces/kube-system/services/kube-dns:dns/proxy

[vagrant@centos9s ~]$ minikube ip
192.168.49.2
[vagrant@centos9s ~]$ kubectl get nodes
NAME       STATUS   ROLES           AGE   VERSION
minikube   Ready    control-plane   24m   v1.31.0
[vagrant@centos9s ~]$ kubectl get pods -A
NAMESPACE              NAME                                        READY   STATUS    RESTARTS        AGE
kube-system            coredns-6f6b679f8f-fqg9g                    1/1     Running   1 (5m51s ago)   24m
kube-system            etcd-minikube                               1/1     Running   1 (5m55s ago)   24m
kube-system            kube-apiserver-minikube                     1/1     Running   1 (3m20s ago)   24m
kube-system            kube-controller-manager-minikube            1/1     Running   1 (5m55s ago)   24m
kube-system            kube-proxy-66dtw                            1/1     Running   1 (5m56s ago)   24m
kube-system            kube-scheduler-minikube                     1/1     Running   1 (5m55s ago)   24m
kube-system            storage-provisioner                         1/1     Running   3 (2m25s ago)   24m
kubernetes-dashboard   dashboard-metrics-scraper-c5db448b4-rdbmf   1/1     Running   1 (5m56s ago)   19m
kubernetes-dashboard   kubernetes-dashboard-695b96c756-nw2tv       1/1     Running   1 (5m56s ago)   19m
[vagrant@centos9s ~]$
- run kubectl get pods
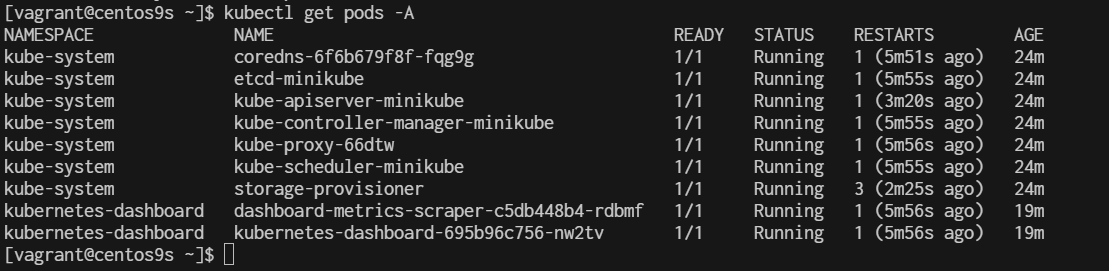
Managing Addons on Minikube
By default, several addons have been enable during the Minikube instalallation. To see the addons of Minikube, run the following command:
$ minikube addons list
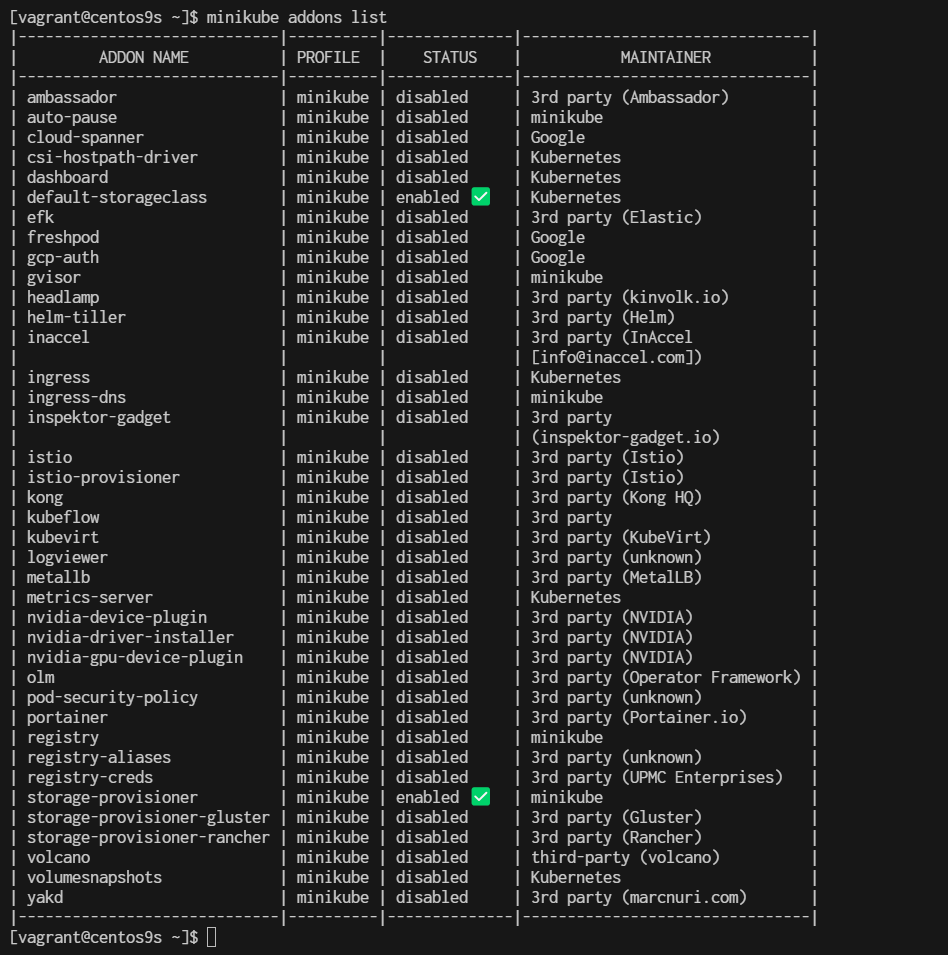
To enable an addon use command minikube addons enable <addon-name>
$ minikube addons enable ingress

$ minikube addons enable matrics-server
Install minikube on CentOs9 Stream: Accessing the Kubernetes Dashboard
Enabling and Accessing Minikube Dashboard Minikube dashboard is the Kubernetes dashboard. Using Kubernetes dashboard we can manage all resources within Kubernetes using web-based GUI instead of CLI. To enable Minikube dashboard, execute the following command:
$ minikube dashboard

🔌  Enabling dashboard ...
    ▪ Using image docker.io/kubernetesui/dashboard:v2.7.0
    ▪ Using image docker.io/kubernetesui/metrics-scraper:v1.0.8
💡  Some dashboard features require the metrics-server addon. To enable all features please run:

        minikube addons enable metrics-server

🤔  Verifying dashboard health ...
🚀  Launching proxy ...
🤔  Verifying proxy health ...

🎉  Opening http://127.0.0.1:34571/api/v1/namespaces/kubernetes-dashboard/services/http:kubernetes-dashboard:/proxy/ in your default browser...
👉  http://127.0.0.1:34571/api/v1/namespaces/kubernetes-dashboard/services/http:kubernetes-dashboard:/proxy/
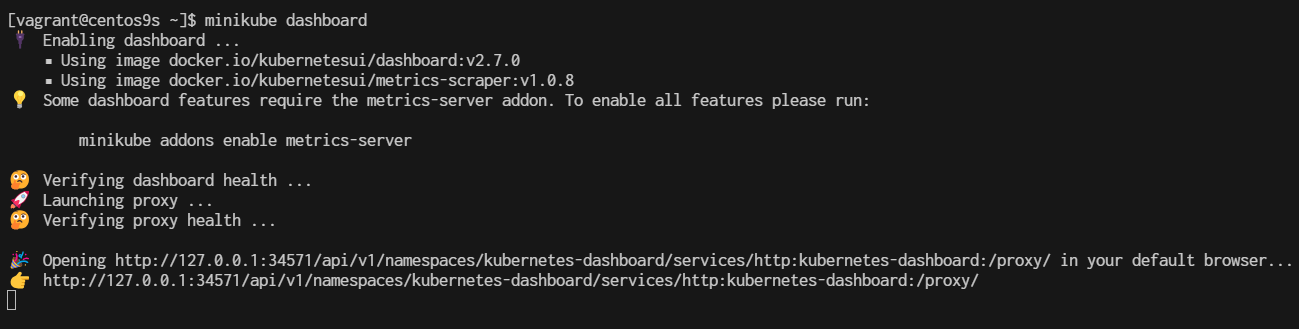
open second terminal and test from terminal
The above command is enabling dashboard addon and directly set access to it. We can see from the command response, the dashboard is accessible through URL http://127.0.0.1:34571/api/v1/namespaces/kubernetes-dashboard/services/http:kubernetes-dashboard:/proxy/, but to access this link you have to remote your server desktop and open the link using web browser. But it is going to be a problem if your server is only installed with the command line interface (without desktop). By the way, to confirm that the dashboard is really running, you can use curl from second terminal.
http://127.0.0.1:34571/api/v1/namespaces/kubernetes-dashboard/services/http:kubernetes-dashboard:/proxy/
press CTRL+C to exit
if we run minikube dashboard again minikube will start with random port
$ minikube dashboard
🤔  Verifying dashboard health ...
🚀  Launching proxy ...
🤔  Verifying proxy health ...
🎉  Opening http://127.0.0.1:42819/api/v1/namespaces/kubernetes-dashboard/services/http:kubernetes-dashboard:/proxy/ in your default browser...
👉  http://127.0.0.1:42819/api/v1/namespaces/kubernetes-dashboard/services/http:kubernetes-dashboard:/proxy/

- this time port will change to 42819 (may difference from yours)
Check add on again
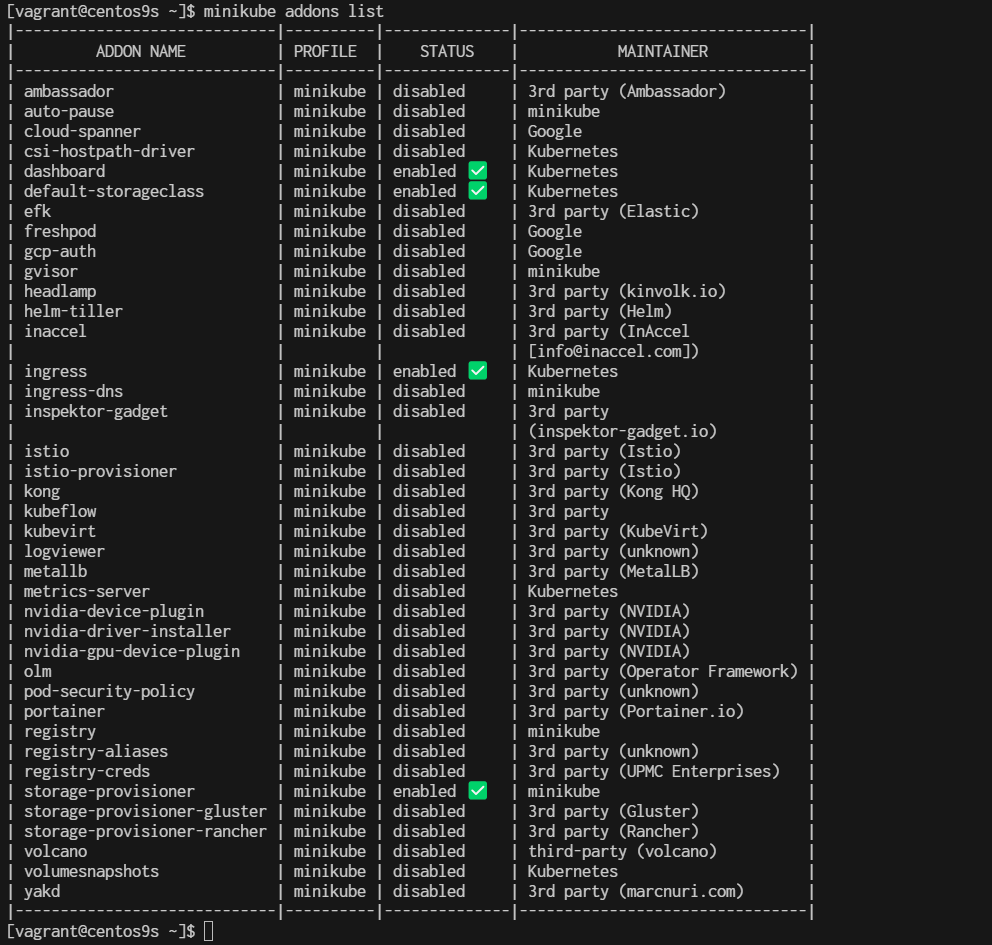
Uses proxy to connect to dashboard
running command minikube dashboard will automatically run proxy to access the dashboard but with random port at the localhost (in the above example we get port number 42819). We know that the dashboard addon has been enabled and we just need a proxy to access it from a static port. Stop the dashboard proxy by pressing button CTRL + C / Command + C for Mac, after that type command kubectl proxy and press enter
$ kubectl proxy
Starting to serve on 127.0.0.1:8001

The Kubernetes APIs are now served through port 8001 (default port for Kubernetes API). Now your dashboard is accessible through port 8001 together with all Kubernetes APIs. The URL for the dashboard is now http://127.0.0.1:8001/api/v1/namespaces/kubernetes-dashboard/services/http:kubernetes-dashboard:/proxy/, but again this URL is only accessible by local access.
To access it remotely, you can utilize the SSH to your server, using -L option. Open terminal/command prompt on your local PC/laptop and type the following command:
ssh -L 12345:localhost:8001 root@<ip-of-your-server>
ssh -L 12345:localhost:8001 vagrant@192.168.40.10
Replace http://localhost:12345/api/v1/namespaces/kubernetes-dashboard/services/http:kubernetes-dashboard:/proxy/. Your local port 12345 will be tied up with the server at port 8001 as long as the SSH connection is connected. Following is the Kubernetes dashboard, accessed remotely from local machine.
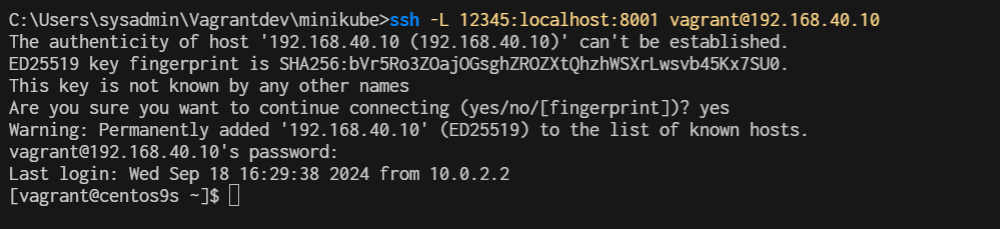
open browser from windows http://localhost:12345/api/v1/namespaces/kubernetes-dashboard/services/http:kubernetes-dashboard:/proxy/#/pod?namespace=_all
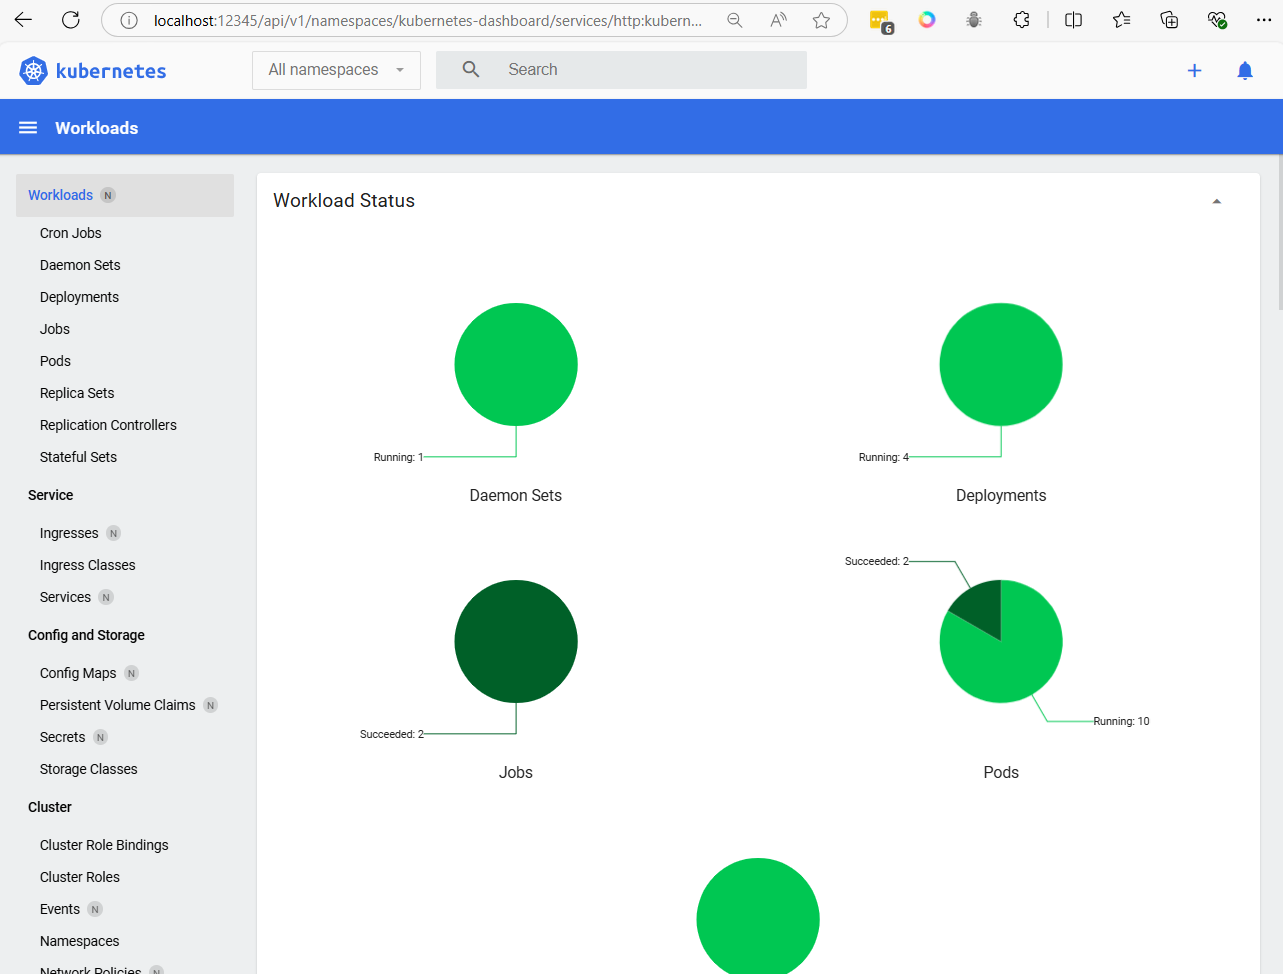
Summary addon command
$ minikube addons list    // This will list available addons
$ minikube addons enable dashboard   // It will enable k8s dashboard
$ minikube addons enable ingress     // It will enable ingress controller
$ minikube addons list | grep -i -E "dashboard|ingress"
if you want to reset minikube.
$ minikube delete
$ rm -rf ~/.minikube
$ rm -rf ~/.kube

$ minikube start
Workshop1 kubernetes
Step1 Start minikube start
$ minikube version
$ minikube start
Step2 Cluster pods see all the pods running in the minikube cluster using the command
$ kubectl get pods -A
Step3 Cluster Version
$ kubectl version --client -o json
Step4 list manage
$ minikube image ls --format table
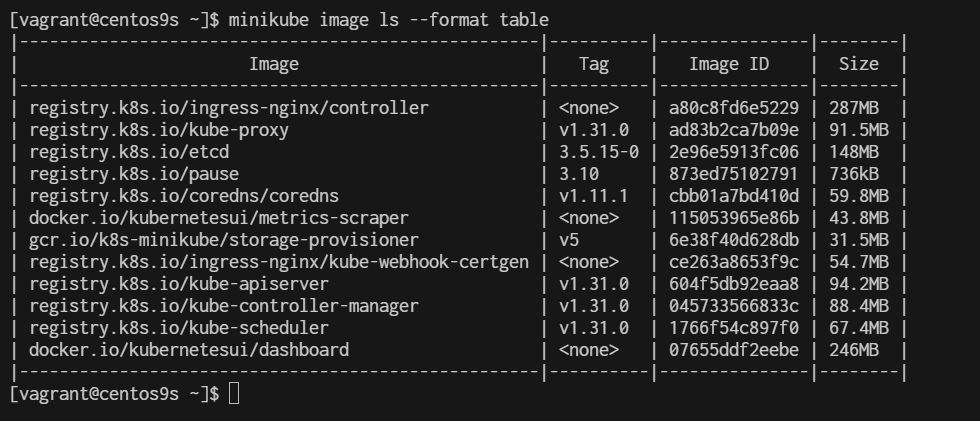
Step5 Build Docker image
$ sudo dnf install git -y
$ git clone https://github.com/OctopusSamples/octopus-underwater-app.git
$ cd octopus-underwater-app
$ docker build . -t underwater
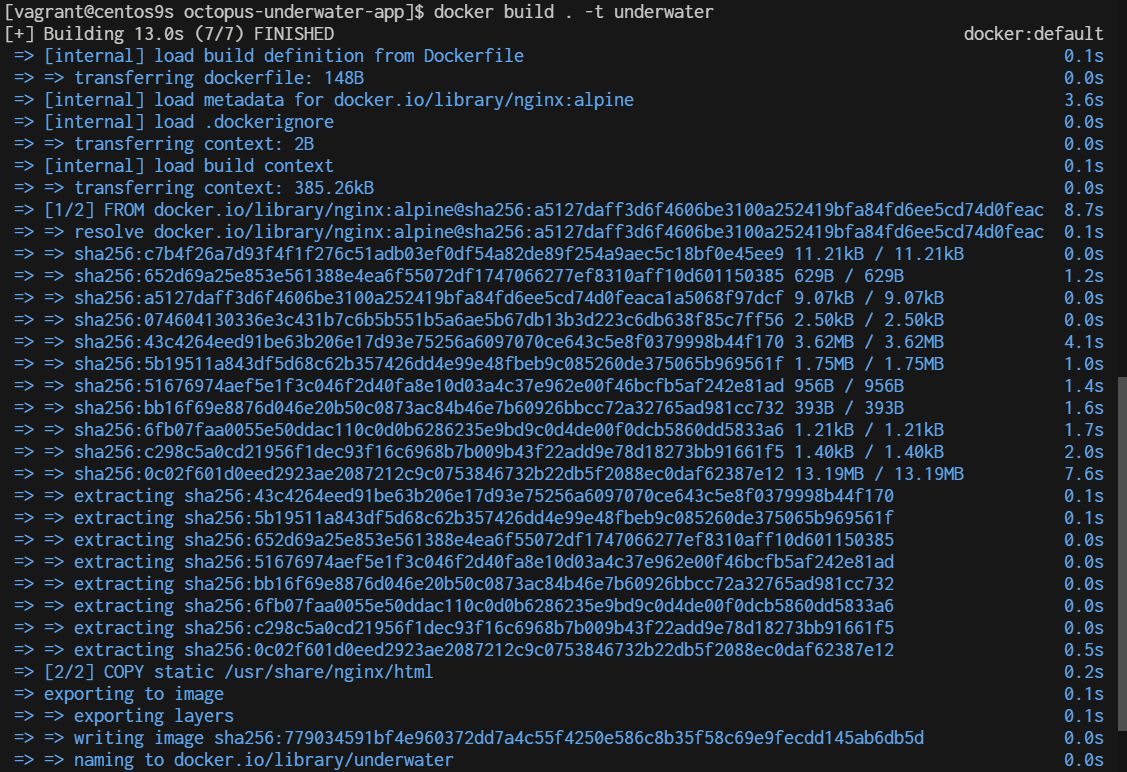
$ docker images
REPOSITORY                    TAG       IMAGE ID       CREATED          SIZE
underwater                    latest    779034591bf4   39 seconds ago   43.6MB
gcr.io/k8s-minikube/kicbase   v0.0.45   aeed0e1d4642   2 weeks ago      1.28GB

Step6 Finally, run the Docker image with the command:
$ docker run -rm -p 5000:80 underwater
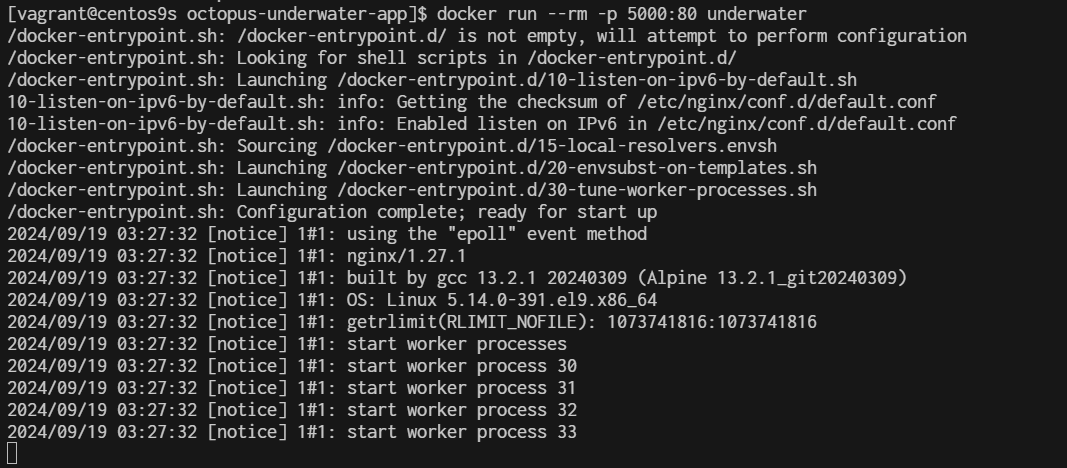
Step7 Test by open other windows terminal create ssh forwardport
C:\Users\sysadmin\Vagrantdev\minikube>ssh -L 5000:localhost:5000 vagrant@192.168.40.10
vagrant@192.168.40.10's password:
Last login: Thu Sep 19 03:31:32 2024 from 192.168.40.10

The command you've provided is used to set up SSH port forwarding. Here’s what it does:
- ssh: This is the SSH command to log in to a remote machine.
- -L 5000:localhost:5000: This sets up local port forwarding. It forwards port 5000 on your local machine to port 5000 on the remote machine (in this case, localhost refers to the remote machine).
- vagrant@192.168.40.10: This specifies the user (vagrant) and the remote host's IP address (192.168.40.10) that you're connecting to. Once this command is executed, you can access services running on port 5000 of the remote machine through port 5000 of your local machine. For example, if the remote machine is running a web application on port 5000, you can access it locally by opening http://localhost:5000 in your browser.
Step8 Test from browser after ssh reverse
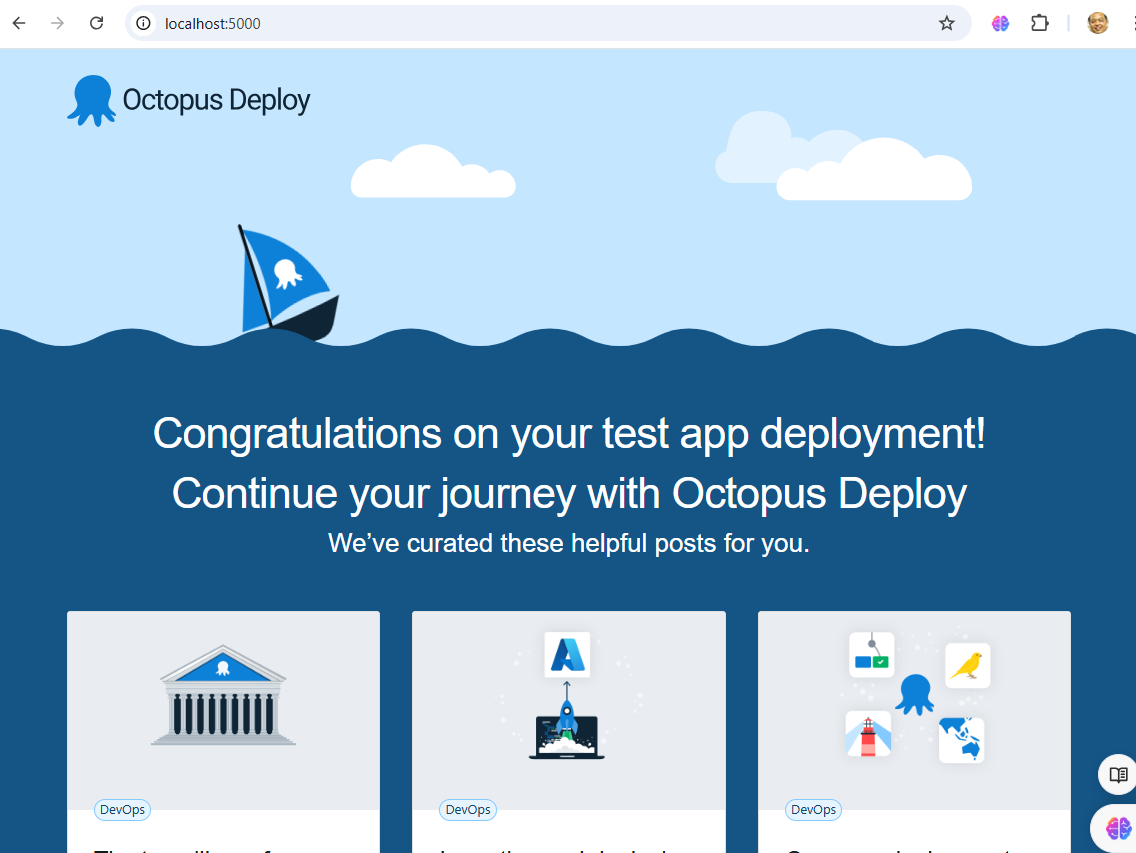
Ctrl+C to stop running container. then container will be remove with option --rm

Step9 Push image to minikube Pushing local images to minikube is a straightforward process with the command:
$ minikube image load underwater
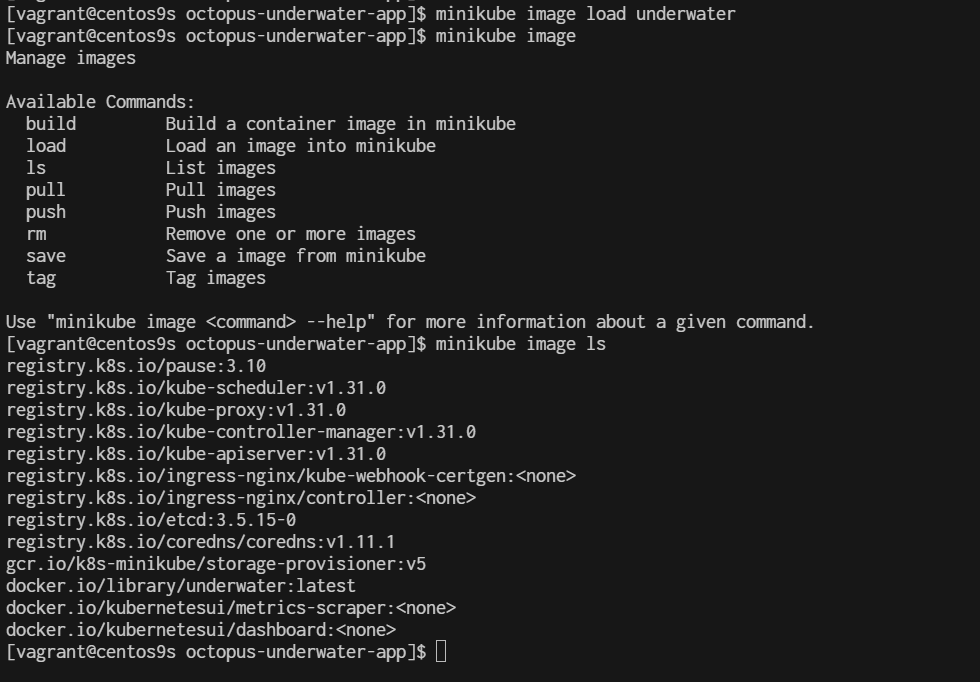
Step19 create deployment yaml
cd ~
mkdir deployment
cd deployment
cat <<EOF | tee underwater.yaml
apiVersion: apps/v1
kind: Deployment
metadata:
  name: underwater
  labels:
    app: web
spec:
  selector:
    matchLabels:
      app: web
  replicas: 1
  strategy:
    type: RollingUpdate
  template:
    metadata:
      labels:
        app: web
    spec:
      containers:
        - name: underwater
          image: underwater
          imagePullPolicy: Never
          ports:
            - containerPort: 80
EOF
Then deploy the app with the command:
$ kubectl apply -f underwater.yaml

check pod
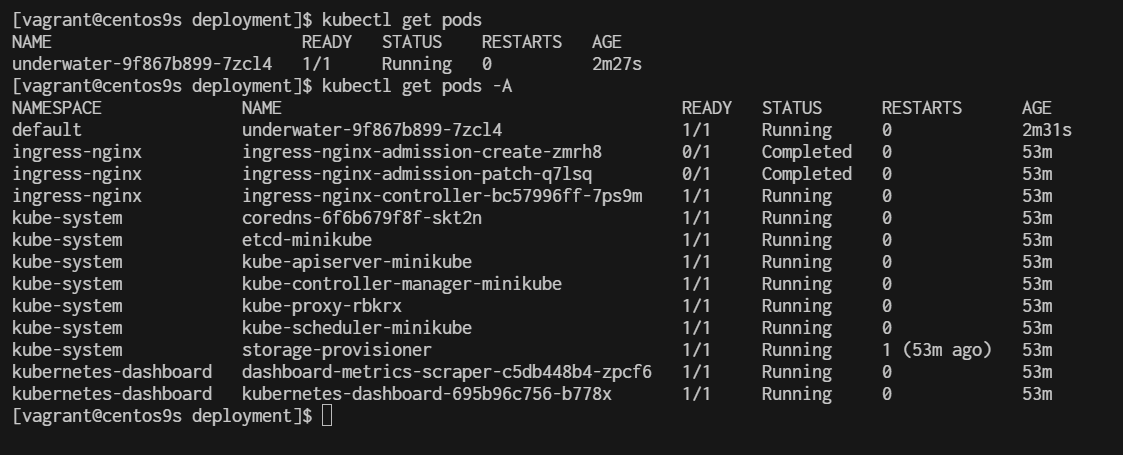
workshop2 deploy nginx
install nginx-pod
Using kubectl run:
$ kubectl run nginx-pod --image=nginx --restart=Never --port=80 -n default
pod/nginx-pod created
This command creates a pod named nginx-pod in default namespace using the Nginx Docker image. The --restart=Never flag indicates that it's a one-time job and won't be restarted automatically if it fails or stops.
$ kubectl get pods
NAME                         READY   STATUS              RESTARTS        AGE
nginx-pod                    0/1     ContainerCreating   0               33s
Create nginx-service
Now pod is up and running let’s create a service to access application externally
Using kubectl run:
$ kubectl expose pod nginx-pod --type=NodePort --port=80 --name=nginx-service
service/nginx-service exposed
This command exposes the Nginx pod using a NodePort service, making it accessible externally on a specific port.
Verify the service is created using below command:
$ kubectl get svc
NAME            TYPE        CLUSTER-IP       EXTERNAL-IP   PORT(S)        AGE
kubernetes      ClusterIP   10.96.0.1        <none>        443/TCP        5h39m
nginx-service   NodePort    10.105.183.188   <none>        80:30933/TCP   60s
$ minikube ip
192.168.49.2

$ minikube service nginx-service --url
http://192.168.49.2:30933
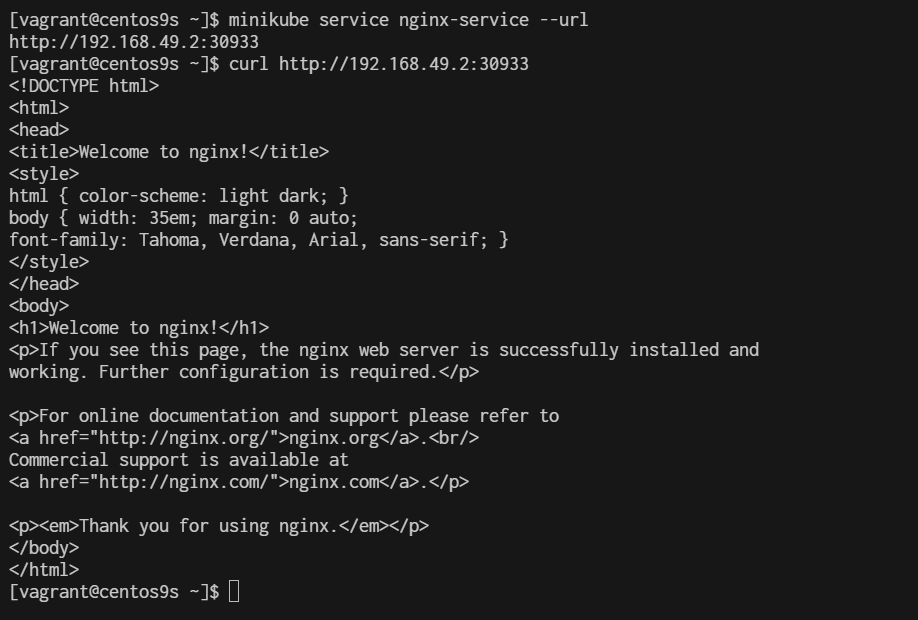
install kubernetest
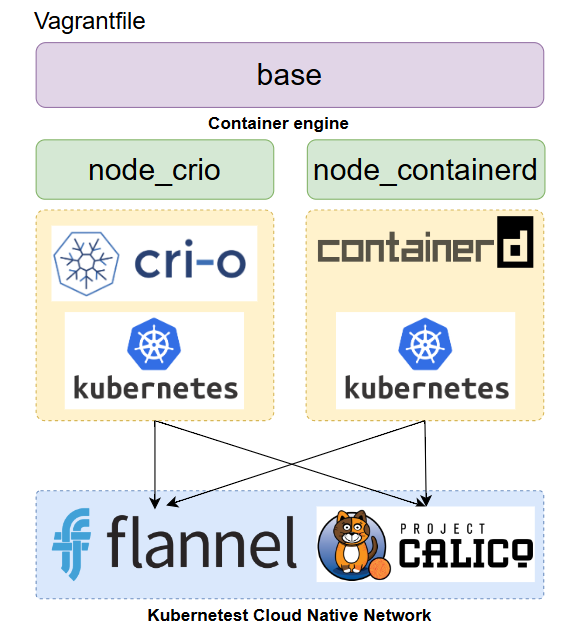
Vagrantfile
# -*- mode: ruby -*-
# vi: set ft=ruby :

# All Vagrant configuration is done below. The "2" in Vagrant.configure
# configures the configuration version (we support older styles for
# backwards compatibility). Please don't change it unless you know what
# you're doing.

$base=<<-SCRIPT
    echo ">>> Run Kubernetes Base script"
    echo "-----------------------------------------------"
    echo "\nStep-1 Enable ssh password authentication"
    echo $(whoami)
    sed -i 's/PasswordAuthentication no/PasswordAuthentication yes/g' /etc/ssh/sshd_config
    systemctl restart sshd.service
    echo "\nStep-2 Enable firewall"
    sudo dnf update -y
    sudo dnf install -y firewalld socat
    sudo systemctl enable --now firewalld

    # Step-3 Disable SELinux
    echo "\nStep-3 Disable SELinux"
    sudo setenforce 0
    sudo sed -i 's/^SELINUX=enforcing$/SELINUX=permissive/' /etc/selinux/config


    # Step-4 manage kernel module
    echo "\nStep-4 manage kernel module"
cat <<EOF | sudo tee /etc/sysctl.d/k8s.conf
net.ipv4.ip_forward = 1
net.bridge.bridge-nf-call-ip6tables = 1
net.bridge.bridge-nf-call-iptables = 1
EOF

    sudo "show sysctl -p"
    sudo sysctl -p
    sudo sysctl --system

    # Load kernel module
cat <<EOF | sudo tee /etc/modules-load.d/k8s.conf
overlay
br_netfilter
ip_vs
ip_vs_rr
ip_vs_wrr
ip_vs_sh
EOF
    sudo modprobe br_netfilter
    sudo modprobe ip_vs
    sudo modprobe ip_vs_rr
    sudo modprobe ip_vs_wrr
    sudo modprobe ip_vs_sh
    sudo modprobe overlay

    # Step-5: Disable swap permanently
    echo "\nStep-5: Disable swap permanently"
    sudo swapoff -a
    sudo sed -e '/swap/s/^/#/g' -i /etc/fstab

    # Step-6: Enable Enable firewall port
    echo "\nStep-6: Enable Enable firewall port"
    sudo firewall-cmd --zone=public --permanent --add-port=443/tcp
    sudo firewall-cmd --zone=public --permanent --add-port=6443/tcp
    sudo firewall-cmd --zone=public --permanent --add-port=2379-2380/tcp
    sudo firewall-cmd --zone=public --permanent --add-port=10250/tcp
    sudo firewall-cmd --zone=public --permanent --add-port=10251/tcp
    sudo firewall-cmd --zone=public --permanent --add-port=10252/tcp
    sudo firewall-cmd --zone=public --permanent --add-port=10255/tcp
    sudo firewall-cmd --zone=public --permanent --add-port=5473/tcp
    sudo firewall-cmd --permanent --add-port 10250/tcp --add-port 30000-32767/tcp

    # Flannel port
    sudo firewall-cmd --permanent --add-port=8472/udp
    # Etcd port
    sudo firewall-cmd --permanent --add-port=2379-2380/tcp
    sudo firewall-cmd --reload


    # Step-7: Enable Hostname

    echo "Step7 Enable Hostname"
cat <<EOF | sudo tee /etc/hosts
127.0.0.1   localhost localhost.localdomain localhost4 localhost4.localdomain4
::1         localhost localhost.localdomain localhost6 localhost6.localdomain6

127.0.0.1 centos9s.localdomain

192.168.35.10  k8s-master-01 k8s-master-01
192.168.35.21  k8s-node-01  k8s-node-01
192.168.35.22  k8s-node-02  k8s-node-02
192.168.35.23  k8s-node-03  k8s-node-03
EOF

SCRIPT


$node_crio=<<-SCRIPT
    echo ">>> Run Kubernetes node script"
    echo "-----------------------------------------------"
    echo "\nStep1 Install crio engine"
    # Install crio engine
cat <<EOF | sudo tee /etc/yum.repos.d/crio.repo
[cri-o]
name=CRI-O
baseurl=https://pkgs.k8s.io/addons:/cri-o:/prerelease:/main/rpm/
enabled=1
gpgcheck=1
gpgkey=https://pkgs.k8s.io/addons:/cri-o:/prerelease:/main/rpm/repodata/repomd.xml.key
EOF
    sudo dnf install -y cri-o
    sudo systemctl enable crio --now
    sudo systemctl status crio
    sudo journalctl -u crio

    # Install kubenetest
    echo "\nStep2 Install kubenetest"
cat <<EOF | sudo tee /etc/yum.repos.d/kubernetes.repo
[kubernetes]
name=Kubernetes
baseurl=https://pkgs.k8s.io/core:/stable:/v1.28/rpm/
enabled=1
gpgcheck=1
gpgkey=https://pkgs.k8s.io/core:/stable:/v1.28/rpm/repodata/repomd.xml.key
exclude=kubelet kubeadm kubectl cri-tools kubernetes-cni
EOF


    sudo dnf install -y kubelet kubeadm kubectl --disableexcludes=kubernetes
    sudo systemctl enable --now kubelet

    echo "\nRun command: sudo systemctl status kubelet"
    sudo systemctl status kubelet

    # Enable Bash completion for kubernetes command
    source <(kubectl completion bash)
    sudo kubectl completion bash | sudo tee  /etc/bash_completion.d/kubectl
SCRIPT

$node_containerd=<<-SCRIPT
    echo ">>> Run Kubernetes node script"
    echo "-----------------------------------------------"
    echo "\nStep1 Install containerd engine"
    # Install docker engine
    sudo dnf config-manager --add-repo=https://download.docker.com/linux/centos/docker-ce.repo
    sudo dnf install -y docker-ce docker-ce-cli containerd.io
    sudo systemctl enable --now docker
    sudo usermod -aG docker vagrant

    # install containerd daemon
    sudo dnf install -y containerd.io
    sudo systemctl enable --now containerd

    # Install kubenetest
    echo "\nStep2 Install kubenetest"
cat <<EOF | sudo tee /etc/yum.repos.d/kubernetes.repo
[kubernetes]
name=Kubernetes
baseurl=https://pkgs.k8s.io/core:/stable:/v1.28/rpm/
enabled=1
gpgcheck=1
gpgkey=https://pkgs.k8s.io/core:/stable:/v1.28/rpm/repodata/repomd.xml.key
exclude=kubelet kubeadm kubectl cri-tools kubernetes-cni
EOF


    sudo dnf install -y kubelet kubeadm kubectl --disableexcludes=kubernetes
    sudo systemctl enable --now kubelet

    echo "\nRun command: sudo systemctl status kubelet"
    sudo systemctl status kubelet

    source <(kubectl completion bash)
    sudo kubectl completion bash | sudo tee  /etc/bash_completion.d/kubectl

    echo "\nStep3 Config containerd with systemdCroup"
    sudo mv /etc/containerd/config.toml  /etc/containerd/config.toml.orgi
    sudo containerd config default | sudo tee /etc/containerd/config.toml
    sudo sed -i 's/SystemdCgroup = false/SystemdCgroup = true/g' /etc/containerd/config.toml

    sudo systemctl restart containerd
    sudo systemctl status containerd.service
    echo "\mStep4 Test pull and run image"
    sudo ctr image pull docker.io/library/hello-world:latest
    sudo ctr run --rm docker.io/library/hello-world:latest test
SCRIPT

Vagrant.configure("2") do |config|
  # The most common configuration options are documented and commented below.
  # For a complete reference, please see the online documentation at
  # https://docs.vagrantup.com.
  config.vm.box = "generic/centos9s"

  config.vm.define "k8s-master-01" do |control|
    control.vm.hostname = "k8s-master-01"
    control.vm.network "private_network", ip: "192.168.35.10"
    control.vm.provider "virtualbox" do |vb|
      vb.memory = "4096"
      vb.cpus = 4
    end

    control.vm.provision "shell", inline: $base
    control.vm.provision "shell", inline: $node_containerd
  end

  config.vm.define "k8s-node-01" do |node1|
    node1.vm.hostname = "k8s-node-01"
    node1.vm.network "private_network", ip: "192.168.35.21"
    node1.vm.provider "virtualbox" do |vb|
      vb.memory = "2048"
      vb.cpus = 2
    end

    node1.vm.provision "shell", inline: $base
    node1.vm.provision "shell", inline: $node_containerd
  end

  config.vm.define "k8s-node-02" do |node2|
    node2.vm.hostname = "k8s-node-02"
    node2.vm.network "private_network", ip: "192.168.35.22"
    node2.vm.provider "virtualbox" do |vb|
      vb.memory = "2048"
      vb.cpus = 2
    end
    node2.vm.provision "shell", inline: $base
    node2.vm.provision "shell", inline: $node_containerd
  end

  config.vm.define "k8s-node-03" do |node3|
    node3.vm.hostname = "k8s-node-03"
    node3.vm.network "private_network", ip: "192.168.35.23"
    node3.vm.provider "virtualbox" do |vb|
      vb.memory = "2048"
      vb.cpus = 2
    end
    node3.vm.provision "shell", inline: $base
    node3.vm.provision "shell", inline: $node_containerd
  end

  #config.vm.synced_folder ".", "/vagrant"


end
**Start vagrant **
vagrant up
vagrant status
vagrant halt
vagrant snapshot save origin_state1
vagrant snapshot list
- first snapshot is clean state before cluster
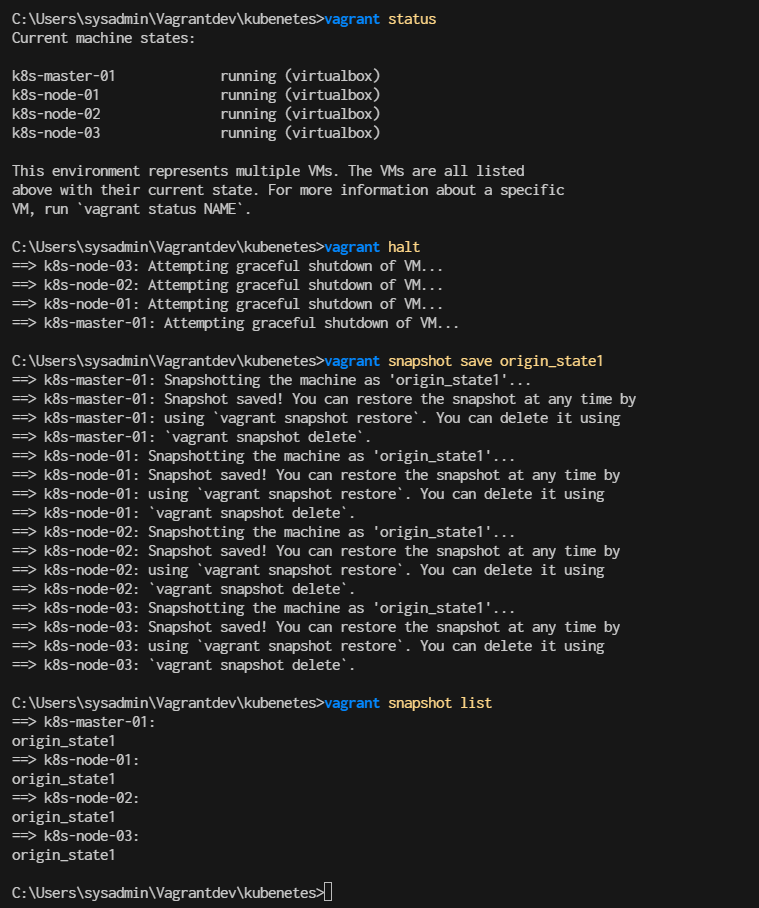
Restore origin_state and install k8s
- restore vagrant
- ssh to k8s-master-01(192.168.35.10)
vagrant snapshot restore origin_state1
vagrant ssh k8s-master-01
Download pull image and install k8s master with kubectl init
$ sudo kubeadm config images pull

$ sudo kubeadm init \
  --control-plane-endpoint=192.168.35.10 \
  --pod-network-cidr=10.244.0.0/16 \
  --apiserver-advertise-address=192.168.35.10
- For flannel to work correctly, you must pass --pod-network-cidr=10.244.0.0/16 to kubeadm init. Result Screen:
- Run as vagrant use or normal user. we need to copy file admin.conf to vagrant use,, by run command
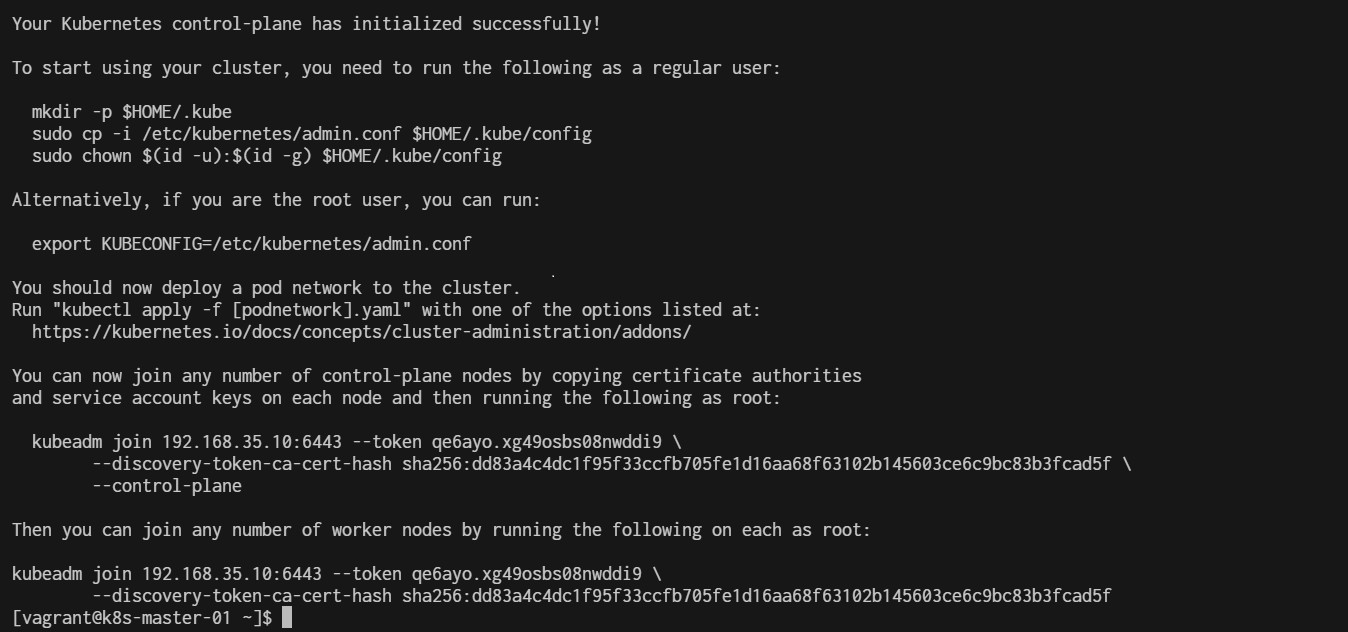
copy admin.conf to user vagrant
mkdir -p $HOME/.kube
sudo cp -i /etc/kubernetes/admin.conf /home/vagrant/.kube/config
sudo chown $(id -u vagrant):$(id -g vagrant) /home/vagrant/.kube/config
Run Command kubectl get nodes
kubectl  get nodes
NAME            STATUS     ROLES           AGE     VERSION
k8s-master-01   NotReady   control-plane   4m15s   v1.28.13
- Status must show NotReady
Install Flannel network to Fix Install Pod network flannel Install a Pod Network Addon: You need to deploy a network plugin that matches the --pod-network-cidr you specified. For Flannel, you can apply the Flannel YAML file:
$ kubectl apply -f https://raw.githubusercontent.com/flannel-io/flannel/master/Documentation/kube-flannel.yml

namespace/kube-flannel created
serviceaccount/flannel created
clusterrole.rbac.authorization.k8s.io/flannel created
clusterrolebinding.rbac.authorization.k8s.io/flannel created
configmap/kube-flannel-cfg created
daemonset.apps/kube-flannel-ds created
Check flannel is running correct
[vagrant@k8s-master-01 ~]$ kubectl get daemonset kube-flannel-ds -n kube-flannel
Recreate join string to worker node
sudo kubeadm token create --print-join-command
- we will copy output to workernode
Add Kubernetes node workload to master
now our master node is already runing
- Then you can join any number of worker nodes by running the following on each as root:
- Run command in k8s-node-01,k8s-node-02,k8s-node-03
Now Join Cluster with kubeadm join string
- Vagrant ssh to k8s-node-01 ( Repeat this stop in k8s-node-02, k8s-node-03)
- Open another 3 tabs in windows
- Tab 1 for k8s-node-01
- Tab 2 for k8s-node-02
- Tab 3 for k8s-node-03
Example for node1
$ vagrant ssh k8s-node-01
- Run join string
sudo kubeadm join 192.168.35.10:6443 --token <Token> --discovery-token-ca-cert-hash <Cert>
example:
sudo kubeadm join 192.168.35.10:6443 --token qe6ayo.xg49osbs08nwddi9 \
        --discovery-token-ca-cert-hash sha256:dd83a4c4dc1f95f33ccfb705fe1d16aa68f63102b145603ce6c9bc83b3fcad5f
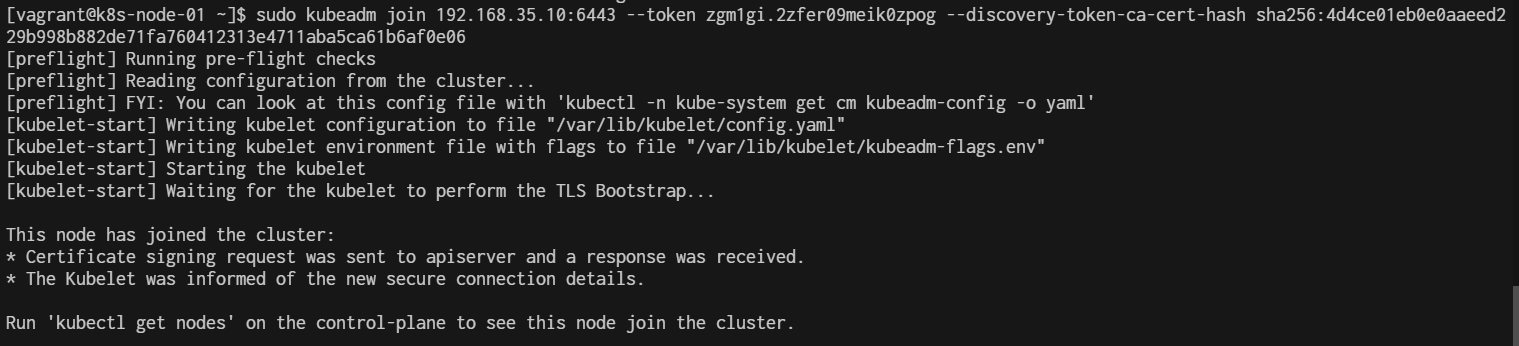
Remember Repeat in k8s-node-02, k8s-node-03
Verify pods After join Worker node

Vagrant halt and crate snapshopt
> vagrant halt
> vagrant snapshot save origin_k8s_fresh
> vagrant snapshot list
Workshop2 kubernetes
prepare on k8s-master-01
sudo dnf install docker-ce -y
Step1 Start minikube start
$ kubectl version
Client Version: v1.28.14
Kustomize Version: v5.0.4-0.20230601165947-6ce0bf390ce3
Server Version: v1.28.14
Step2 Cluster pods
see all the pods running in the minikube cluster using the command
$ kubectl get pods -A
Step3 Cluster Version
$ kubectl version --client -o json
{
  "clientVersion": {
    "major": "1",
    "minor": "28",
    "gitVersion": "v1.28.14",
    "gitCommit": "66f3325d5562da565def802b8bacf431b082991d",
    "gitTreeState": "clean",
    "buildDate": "2024-09-11T08:27:29Z",
    "goVersion": "go1.22.6",
    "compiler": "gc",
    "platform": "linux/amd64"
  },
  "kustomizeVersion": "v5.0.4-0.20230601165947-6ce0bf390ce3"
}
Step4 list manage
$ kubectl get pods --all-namespaces -o jsonpath="{.items[*].spec['initContainers', 'containers'][*].image}" |\
tr -s '[[:space:]]' '\n' |\
sort |\
uniq -c
      4 docker.io/flannel/flannel-cni-plugin:v1.5.1-flannel2
      8 docker.io/flannel/flannel:v0.25.6
      3 nginxdemos/nginx-hello:latest
      1 quay.io/metallb/controller:v0.14.8
      4 quay.io/metallb/speaker:v0.14.8
      2 registry.k8s.io/coredns/coredns:v1.10.1
      1 registry.k8s.io/etcd:3.5.15-0
      1 registry.k8s.io/kube-apiserver:v1.28.14
      1 registry.k8s.io/kube-controller-manager:v1.28.14
      4 registry.k8s.io/kube-proxy:v1.28.14
      1 registry.k8s.io/kube-scheduler:v1.28.14
Step5 Build Docker image
$ sudo dnf install git -y
$ git clone https://github.com/OctopusSamples/octopus-underwater-app.git
$ cd octopus-underwater-app
$ docker build . -t underwater

$ docker images
REPOSITORY                    TAG       IMAGE ID       CREATED          SIZE
REPOSITORY               TAG       IMAGE ID       CREATED              SIZE
underwater               latest    28537b35135f   About a minute ago   43.6MB
Step6 Finally, run the Docker image with the command:
$ docker run -rm -p 5000:80 underwater

Step7 Test by open other windows terminal create ssh forwardport
>ssh -L 5000:localhost:5000 vagrant@192.168.35.10
vagrant@192.168.40.10's password:
Last login: Thu Sep 19 03:31:32 2024 from 192.168.40.10
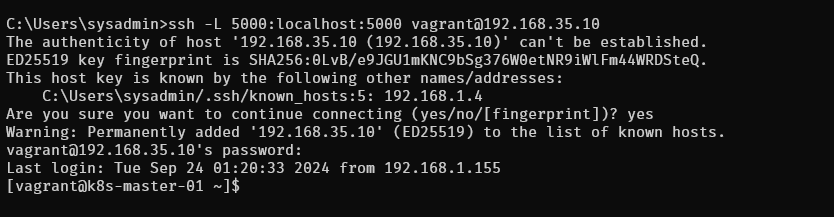
The command you've provided is used to set up SSH port forwarding. Here’s what it does:
- ssh: This is the SSH command to log in to a remote machine.
- -L 5000:localhost:5000: This sets up local port forwarding. It forwards port 5000 on your local machine to port 5000 on the remote machine (in this case, localhost refers to the remote machine).
- vagrant@192.168.40.10: This specifies the user (vagrant) and the remote host's IP address (192.168.40.10) that you're connecting to. Once this command is executed, you can access services running on port 5000 of the remote machine through port 5000 of your local machine. For example, if the remote machine is running a web application on port 5000, you can access it locally by opening http://localhost:5000 in your browser.
Step8 Test from browser after ssh reverse
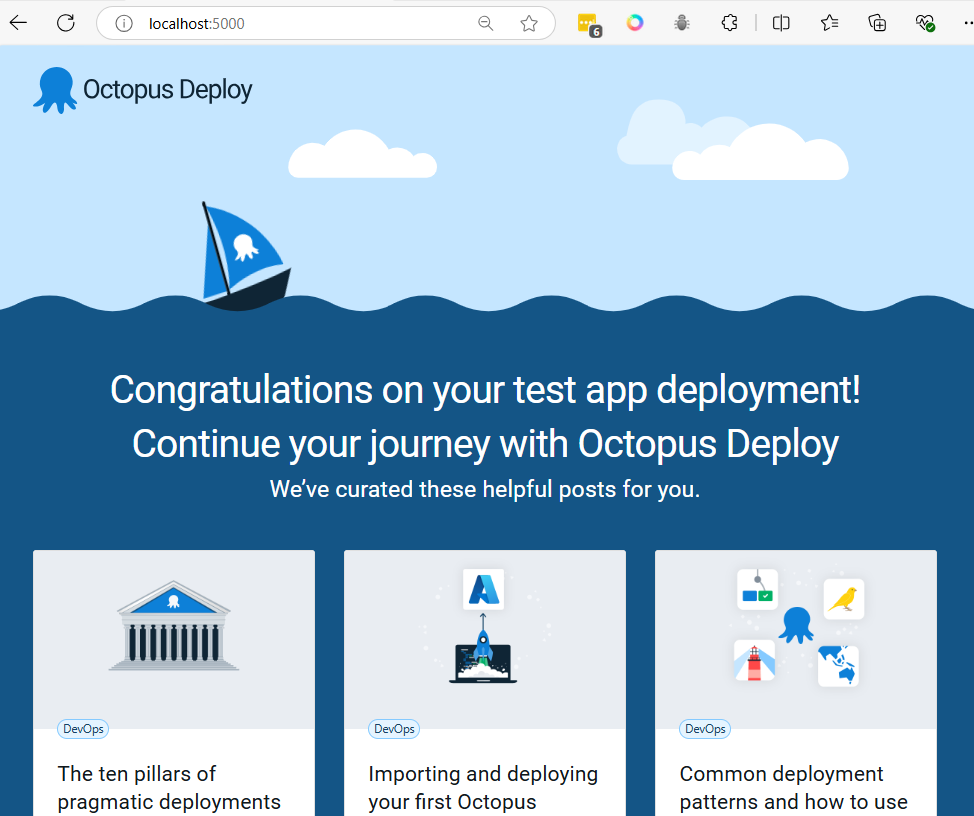
Ctrl+C to stop running container. then container will be remove with option --rm
Step9 Push image to registry
- crate account on docker.io
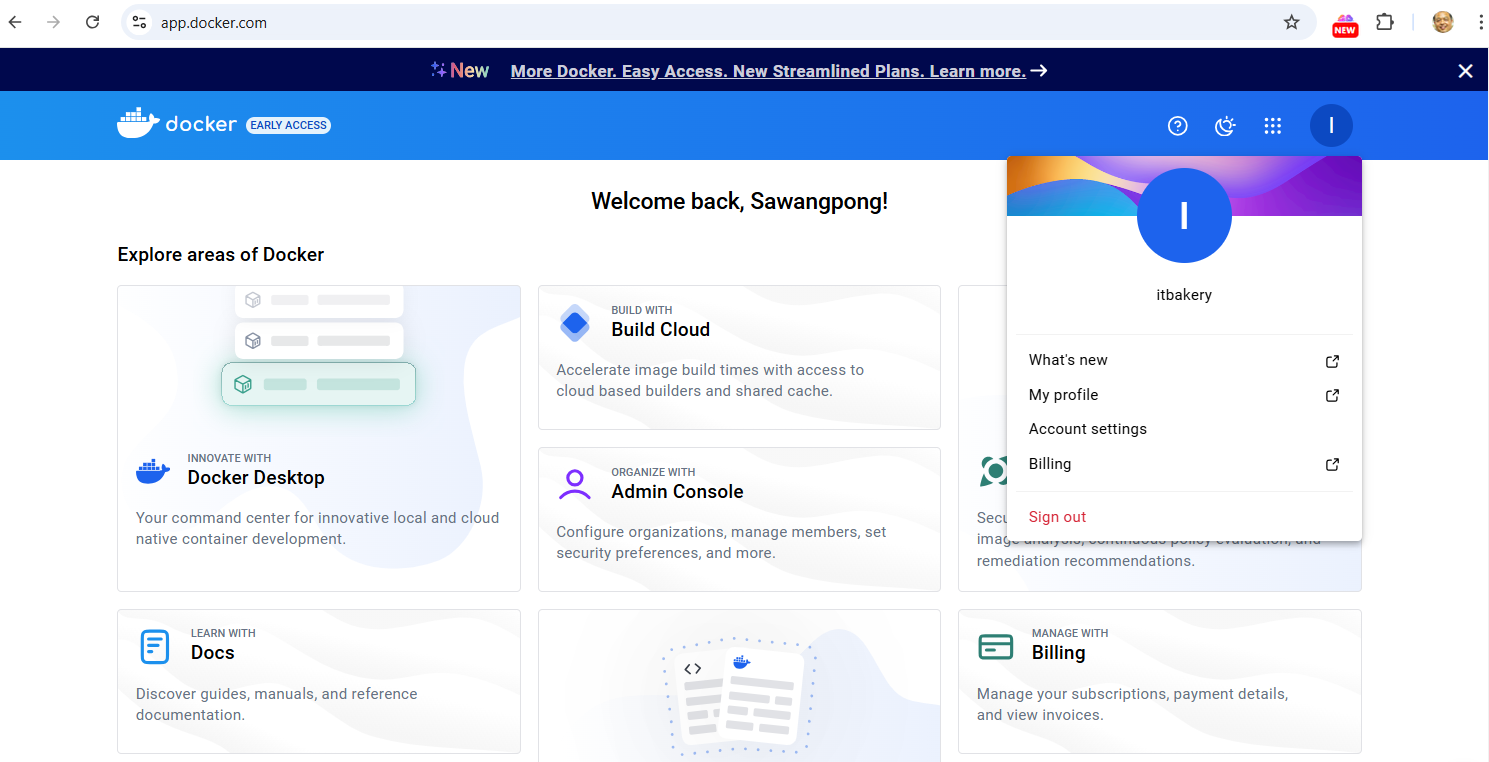
docker cli login:
$ docker login -u username
example:

- tag image
$ docker tag underwater <registry-address>/underwater:latest
$ docker images
example:
$ docker tag underwater itbakery/underwater:latest
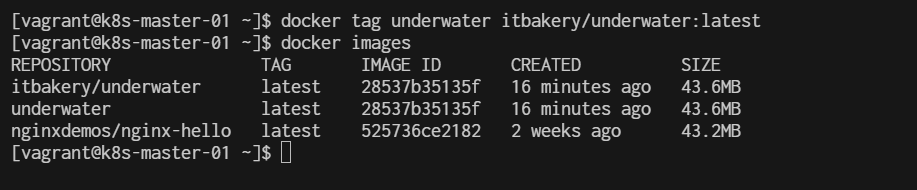
- Docker push to registry
$ docker push underwater <registry-address>/underwater:latest
example:
$ docker push itbakery/underwater:latest
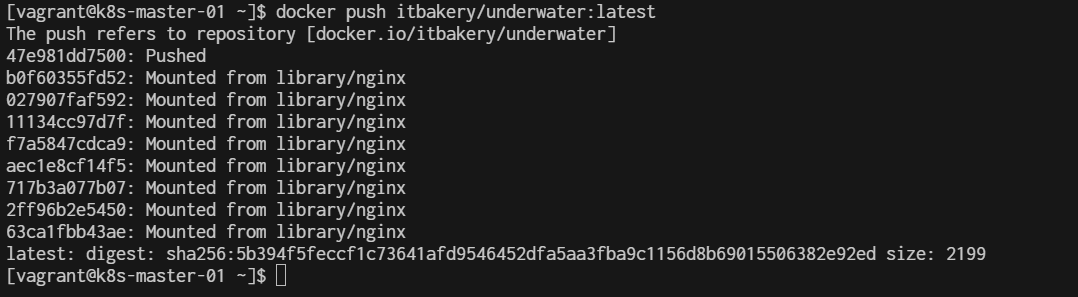
Step19 create deployment yaml
cd ~
mkdir deployment
cd deployment
cat <<EOF | tee underwater.yaml
apiVersion: apps/v1
kind: Deployment
metadata:
  name: underwater-deployment
spec:
  replicas: 1
  selector:
    matchLabels:
      app: underwater
  template:
    metadata:
      labels:
        app: underwater
    spec:
      containers:
      - name: underwater
        image: <registry-address>/underwater:latest
        ports:
        - containerPort: 80  # Adjust this port according to your application

---
apiVersion: v1
kind: Service
metadata:
  name: underwater-service
spec:
  selector:
    app: underwater
  ports:
    - protocol: TCP
      port: 80          # Port exposed by the service
      targetPort: 80    # Port on which the container is listening
  type: NodePort  # Change this to LoadBalancer or ClusterIP if needed

EOF
- change registry-address to yours
Then deploy the app with the command:
$ kubectl apply -f underwater.yaml
deployment.apps/underwater-deployment created
service/underwater-service created
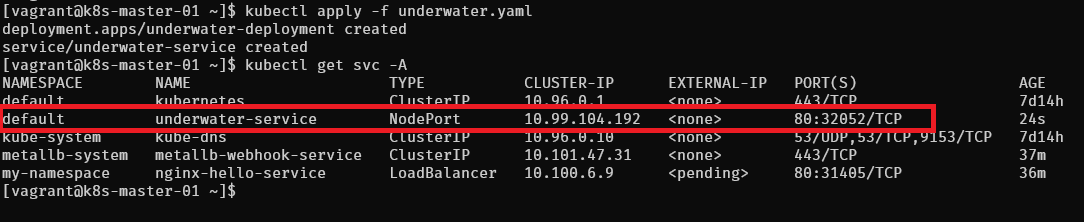
open browser http://192.168.35.21:32052/
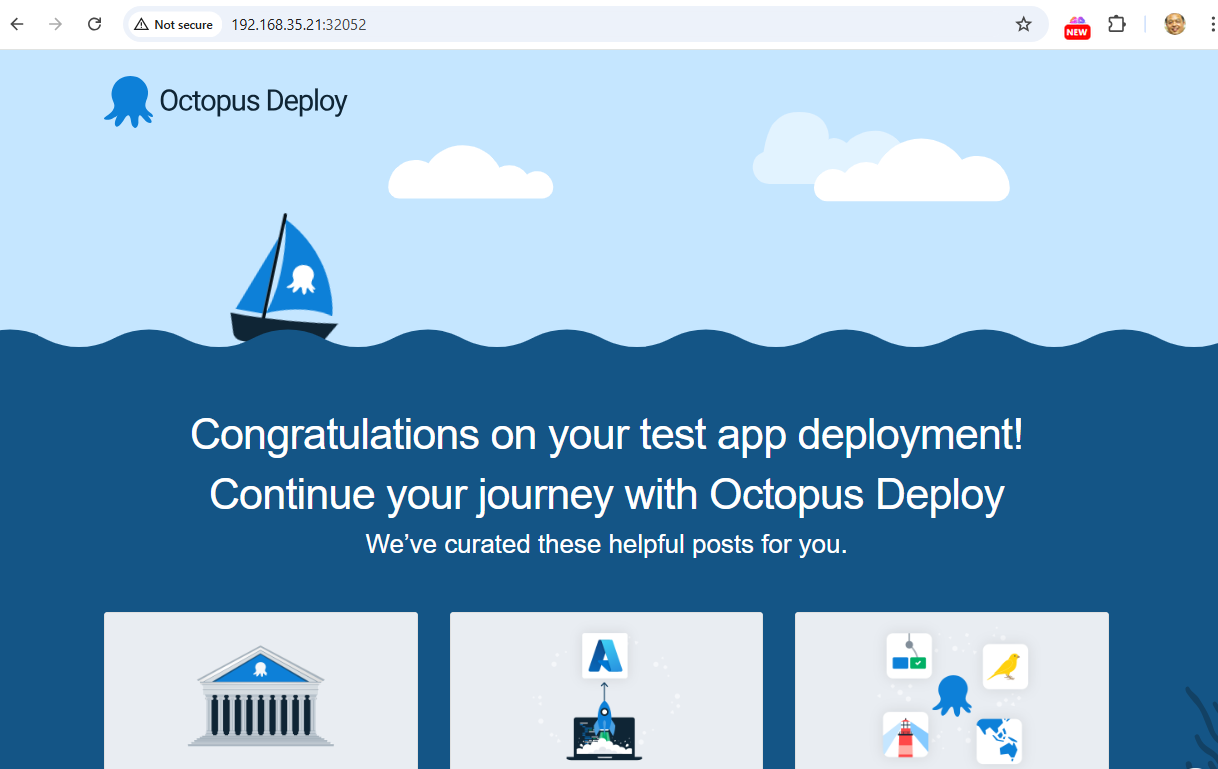
Workshop2 Nginx+NodePort
Deploying NGINX on Kubernetes Using Deployment YAML
Workshop Overview:
This workshop will walk participants through the steps to deploy an NGINX web server on Kubernetes using a YAML manifest file. By the end of the workshop, participants will have learned how to create and apply a Kubernetes Deployment, manage Pods, and expose the application via a Kubernetes Service.
Learn:
- Basic knowledge of Kubernetes concepts (Pods, Deployments, and Services). Access to a Kubernetes cluster
- kubectl installed and configured to communicate with the Kubernetes cluster.
Hands-on Section:
- create nginx-deployment.yml file
mkdir workshop2
cd workshop2
cat <<EOF | tee nginx-deployment.yml
apiVersion: apps/v1
kind: Deployment
metadata:
  name: nginx-deployment
spec:
  replicas: 3
  selector:
    matchLabels:
      app: nginx
  template:
    metadata:
      labels:
        app: nginx
    spec:
      containers:
      - name: nginx
        image: nginx:latest
        ports:
        - containerPort: 80

EOF
- Apply Deployment
$ kubectl apply -f nginx-deployment.yml
- Verify
$ kubectl get deployments -A
$ kubectl get pods -A
- Create service file
cat <<EOF | tee nginx-service.yml
apiVersion: v1
kind: Service
metadata:
  name: nginx-service
spec:
  type: NodePort
  selector:
    app: nginx
  ports:
    - protocol: TCP
      port: 80
      targetPort: 80
      nodePort: 30007
EOF
- Apply Service
$ kubectl apply -f nginx-service.yml
- Run
$ kubectl get svc -A
$ kubectl get pod -A -o wide
open browser [http://192.168.35.21:30007]
Podman & Pod Deployment
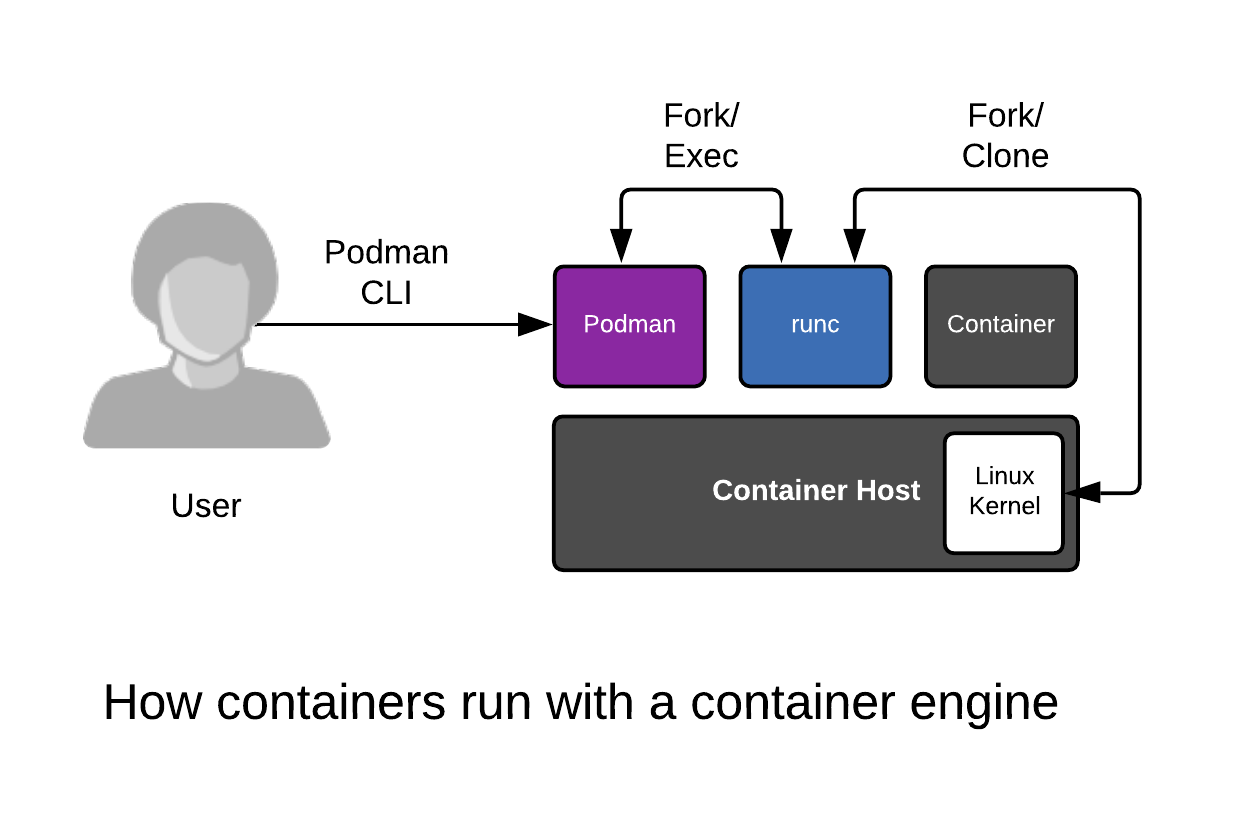
Create project folder
mkdir Podman
cd Podman
Create Vagrantfile
-
install podman
-
open port 80, 8080, 6379 in firewall
-
cpu 2 ram 4096
# -*- mode: ruby -*-
# vi: set ft=ruby :


$script=<<-SCRIPT
    sed -i 's/PasswordAuthentication no/PasswordAuthentication yes/g' /etc/ssh/sshd_config
    sudo systemctl restart sshd.service
    sudo firewall-cmd --state
    sudo systemctl --enable --now firewalld
    sudo firewall-cmd --permanent --add-port=80/tcp
    sudo firewall-cmd --permanent --add-port=8080/tcp
    sudo firewall-cmd --permanent --add-port=6379/tcp
    sudo firewall-cmd --reload
    sudo firewall-cmd --list-all
    sudo dnf update -y
    sudo dnf install podman -y
SCRIPT

Vagrant.configure("2") do |config|

  config.vm.box = "generic/centos9s"

  config.vm.network "private_network", ip: "192.168.30.10"
  config.vm.synced_folder ".", "/vagrant"

  config.vm.provider "virtualbox" do |vb|
     vb.memory = "4096"
     vb.cpus = 2
  end

  config.vm.provision "shell", inline: $script
end
Start vm
vagrant up
ssh to VM
vagrant ssh
1. Install Podman on CentOS Stream 9 (skip)
sudo dnf update -y
sudo dnf install -y podman
2. To confirm that Podman is installed correctly, check the version:
$ podman --version
podman version 5.2.2
Podman works similarly to Docker, but it doesn’t require a daemon to run containers and has better integration with rootless containers
- 2.1 Download an official image and create a Container and output the words
$ podman pull centos:stream9

Resolved "centos" as an alias (/etc/containers/registries.conf.d/000-shortnames.conf)
Trying to pull quay.io/centos/centos:stream9...
Getting image source signatures
Copying blob da0e926b3d56 done   |
Copying config 088a066b40 done   |
Writing manifest to image destination
088a066b40b472b1fb270e23481df7b4e60840519d395d20e1fbef1e89558f1e
Run one time
$ podman run centos:stream9 /bin/echo "Welcome to the Podman"

Welcome to the Podman

$ podman ps -a

CONTAINER ID  IMAGE                          COMMAND               CREATED         STATUS                     PORTS       NAMES
ee576a0e185c  quay.io/centos/centos:stream9  /bin/echo Welcome...  52 seconds ago  Exited (0) 51 seconds ago              agitated_hellman
- 2.2 Connect to the interactive session of a Container with
-it
$ podman run -it centos:stream9 /bin/bash

[root@d32cc72527ce /]# exit
-
type exit
-
2.3 run a Container as a Daemon add -d
$ podman run -itd centos:stream9 /bin/bash
162460cb5993b980ba4254cb0ad8b5931027ae754f2afb14650065038942523f
$ podman ps

CONTAINER ID  IMAGE                          COMMAND     CREATED         STATUS         PORTS       NAMES
162460cb5993  quay.io/centos/centos:stream9  /bin/bash   12 seconds ago  Up 13 seconds              upbeat_blackwell
3. Working with Pods
In Podman, a pod can run multiple containers, and they share the same network namespace, allowing them to communicate easily via localhost.
Step-by-Step Pod Deployment
- 3.1. Create a Pod
Pods in Podman are a group of one or more containers sharing networking and other resources.
$ podman pod create --name mypod -p 6379:6379 -p 8080:80

7eedb39acc12e17e10c61b6477059056a12f9245720b9cd9bfa80054c57c122f

$ podman pod ls

POD ID        NAME        STATUS      CREATED         INFRA ID      # OF CONTAINERS
7eedb39acc12  mypod       Created     25 seconds ago  9b292b11f55c  1
This creates a pod named mypod with a port forward from 8080 on the host to 80 in the pod.

In Podman (as well as Kubernetes), the first container in a pod is called the infra container (sometimes referred to as the "pause container"). This container plays a crucial role in maintaining the shared namespaces for the pod, even though it doesn't run any significant application workload itself.
Infra Container in Podman
In Podman, when you create a pod, an infra container is automatically created. You can see it when you inspect a pod. podman pod inspect <pod-name>
$ podman pod inspect mypod
- 3.2. Deploy a Container Inside the Pod Now let's deploy a container inside the pod. For example, we can deploy an Nginx container.
$ podman run -d --name mynginx --pod mypod docker.io/library/nginx:latest

Trying to pull docker.io/library/nginx:latest...
Getting image source signatures
Copying blob 97182578e5ec done   |
Copying blob 302e3ee49805 done   |
Copying blob 34a52cbc3961 done   |
Copying blob cd986b3703ae done   |
Copying blob d1875670ac8a done   |
Copying blob af17adb1bdcc done   |
Copying blob 67b9310357e1 done   |
Copying config 9527c0f683 done   |
Writing manifest to image destination
cc99c5baf935f9256e8bef6d903500c7002fe15c0fdbc70e5330f3d63b18e180
The --pod mypod flag specifies that the container should run inside the mypod pod.
$ podman pod ls
POD ID        NAME        STATUS      CREATED        INFRA ID      # OF CONTAINERS
7eedb39acc12  mypod       Running     2 minutes ago  9b292b11f55c  2
- 3.3. Add Another Container to the Same Pod
Now, add another container, such as a redis container.
$ podman run -d --name myredis --pod mypod docker.io/library/redis:latest

Trying to pull docker.io/library/redis:latest...
Getting image source signatures
Copying blob 302e3ee49805 skipped: already exists
Copying blob 96377887d476 done   |
Copying blob 4825c5e95815 done   |
Copying blob 5d0249d9189d done   |
Copying blob b0ce50685fa2 done   |
Copying blob 455886c7d31b done   |
Copying blob 4f4fb700ef54 done   |
Copying blob 5fac73c23c9b done   |
Copying config 7e49ed81b4 done   |
Writing manifest to image destination
33715d3e55b1d33df769818018de3579f7402d7a3dbc1c14cc86a5e3d7ebc8dc
$ podman pod ls
POD ID        NAME        STATUS      CREATED        INFRA ID      # OF CONTAINERS
7eedb39acc12  mypod       Running     3 minutes ago  9b292b11f55c  3
Now you have two containers (nginx and redis) running inside the same pod and sharing the same network namespace. You can access the Nginx service from localhost:8080 on your host.
3.4. Summary Check Pod and Container Status
You can inspect the running pod and its containers using the following commands:
$ podman pod ps     # List all running pods
$ podman ps         # List all running containers

To view detailed information about the pod:
podman pod inspect mypod
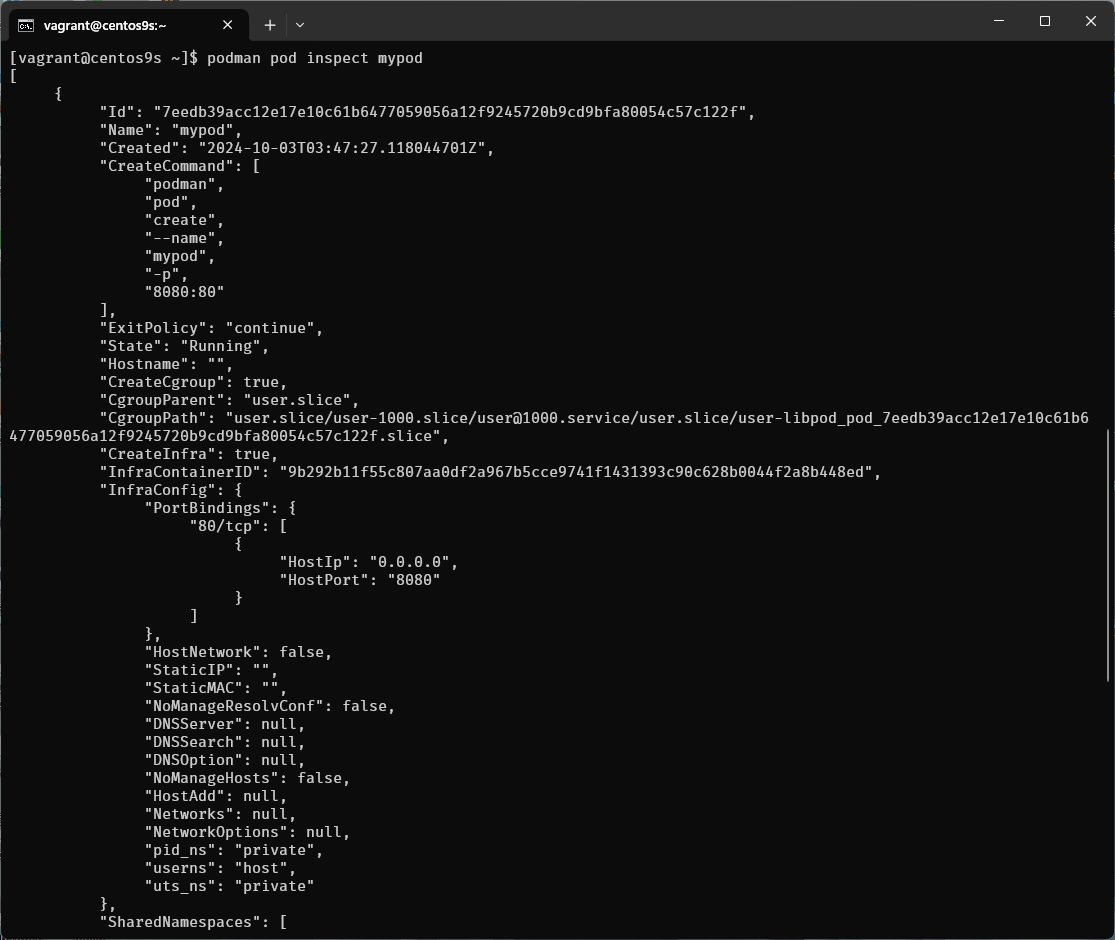
$ curl http://localhost:8080

open browser
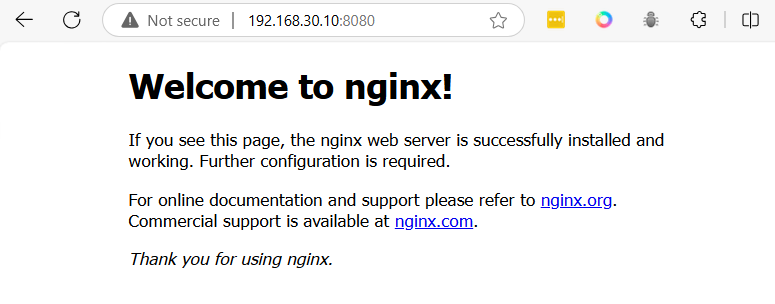
Test redis
$ sudo dnf install redis
$ redis-cli -h 127.0.0.1 -p 6379
127.0.0.1:6379> ping
PONG
127.0.0.1:6379>
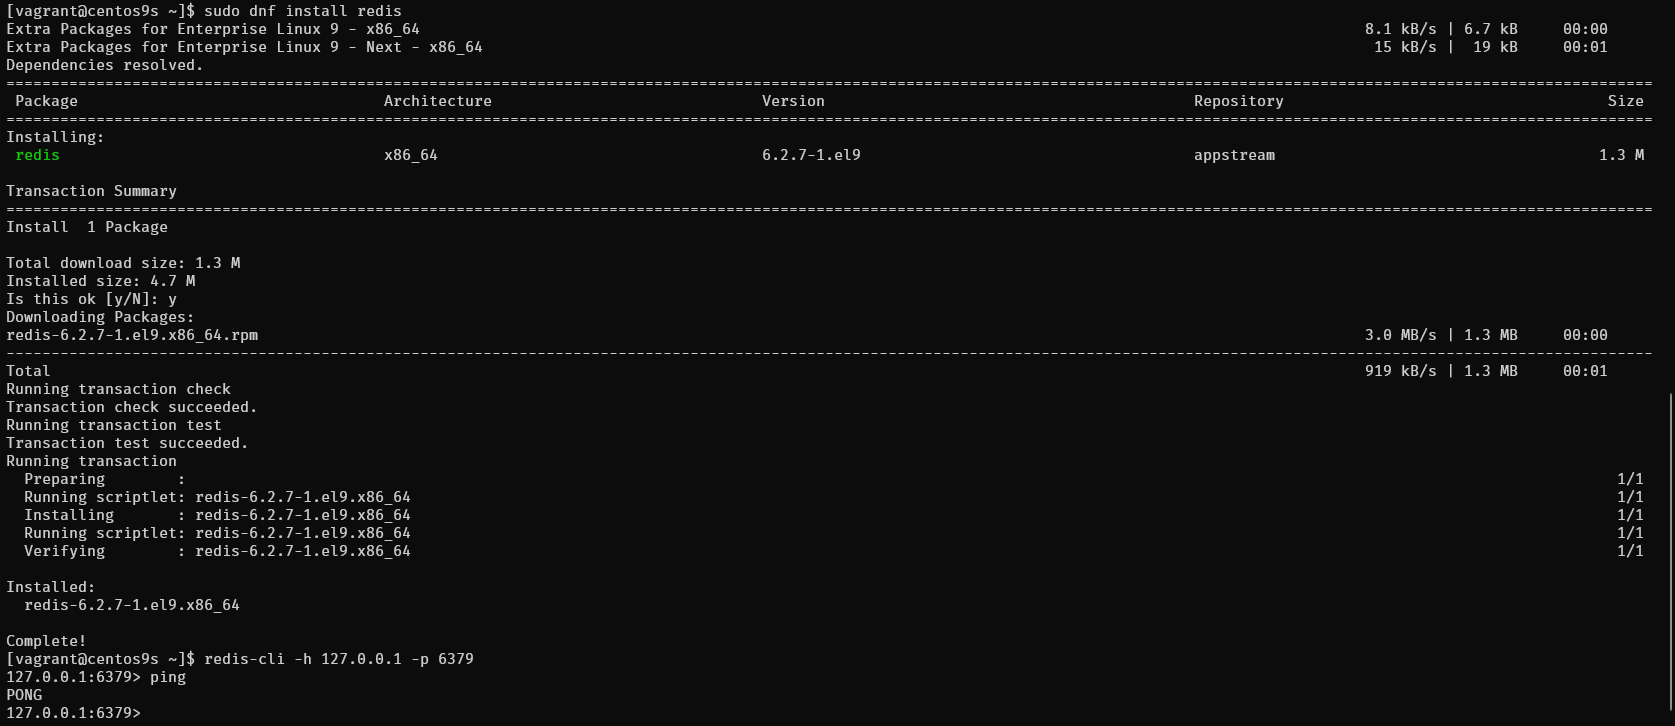
4. Managing Containers in a Pod
You can stop, start, or remove containers individually or manage the entire pod
4.1. Stopping a Pod
To stop the entire pod (and all containers within it):
podman pod stop mypod
4.2. Starting a Pod
To start the pod again:
podman pod start mypod
4.3 Removing a Pod
To remove the pod and its containers:
podman pod rm -f mypod
Postgresql & Pod deployment
Here’s a guide on how to create another Podman pod deployment with multiple containers, such as a simple PostgreSQL and Adminer setup. Adminer is a lightweight database management tool, and PostgreSQL will be used as the database.
1. Create the Pod
You need to create a pod that exposes ports for both PostgreSQL and Adminer. PostgreSQL typically runs on port 5432, and Adminer uses port 8080.
$ podman pod ls
POD ID      NAME        STATUS      CREATED     INFRA ID    # OF CONTAINERS

$ podman pod create --name dbpod -p 5432:5432 -p 8080:8080
- -p 5432:5432: Exposes PostgreSQL port 5432 from the container to the host.
- -p 8080:8080: Exposes Adminer’s port 8080 on the host
2. Deploy PostgreSQL in the Pod
podman run -d \
  --name postgres \
  --pod dbpod \
  -e POSTGRES_USER=myuser \
  -e POSTGRES_PASSWORD=mypassword \
  -e POSTGRES_DB=mydb \
  docker.io/library/postgres:latest
- -e POSTGRES_USER=myuser: Sets the PostgreSQL username.
- -e POSTGRES_PASSWORD=mypassword: Sets the PostgreSQL password.
- -e POSTGRES_DB=mydb: Creates a new database named mydb.
3. Deploy Adminer in the Pod
podman run -d \
  --name adminer \
  --pod dbpod \
  docker.io/library/adminer:latest
This will start Adminer inside the pod and make it accessible on port 8080 (mapped to localhost:8080)
4. Verify the Pod and Containers
Check the status of the pod and its containers:
$ podman pod ps
$ podman ps --pod
5 Test the Setup
sudo dnf install postgrsql
sudo psql -h 127.0.0.1 -U myuser -d mydb -p 5432
Test Adminer
http://192.168.30.10:8080
Wordpress & Pod deployment
1. Create a Pod
First, create a new Pod to house both the WordPress and MariaDB containers.
$ podman pod create --name wordpress-pod -p 8080:80
af245546816ea8d82dea5254f40db9455bd6841321f58a9377390d40a7a9e192
2. Deploy the MariaDB Container Inside the Pod
Run the MariaDB container inside the newly created Pod. This container will store WordPress data in the database.
podman run -d \
--pod wordpress-pod \
--name mariadb \
-e MYSQL_ROOT_PASSWORD=rootpassword \
-e MYSQL_DATABASE=wordpress \
-e MYSQL_USER=wpuser \
-e MYSQL_PASSWORD=wppassword \
-v mariadb_data:/var/lib/mysql \
mariadb:10.5
Here:
- The --pod wordpress-pod flag ensures that the MariaDB container is attached to the Pod.
- The container is running with environment variables to configure the database.
- A volume mariadb_data is used to persist MariaDB data.
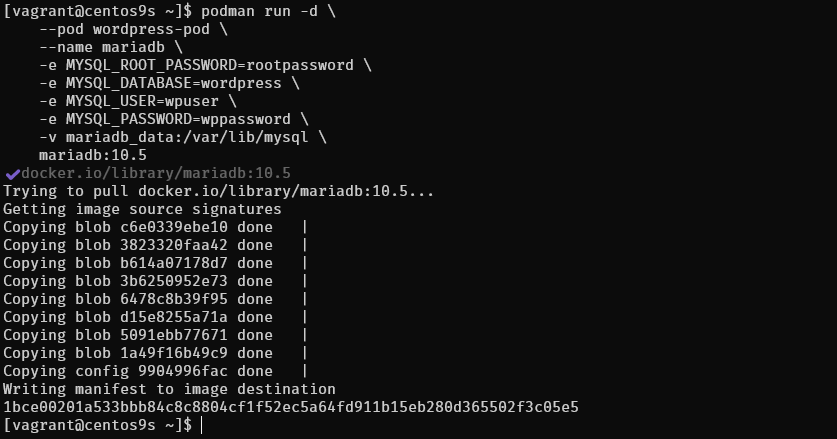
3. Deploy the WordPress Container Inside the Pod
podman run -d \
--pod wordpress-pod \
--name wordpress \
-e WORDPRESS_DB_HOST=127.0.0.1 \
-e WORDPRESS_DB_NAME=wordpress \
-e WORDPRESS_DB_USER=wpuser \
-e WORDPRESS_DB_PASSWORD=wppassword \
-v wordpress_data:/var/www/html \
wordpress:latest
Here:
- The --pod wordpress-pod flag attaches the WordPress container to the same Pod.
- The WORDPRESS_DB_HOST=127.0.0.1 variable points to the local MariaDB instance inside the Pod (as both containers share the same network namespace).
- The WordPress content is persisted with the volume wordpress_data.
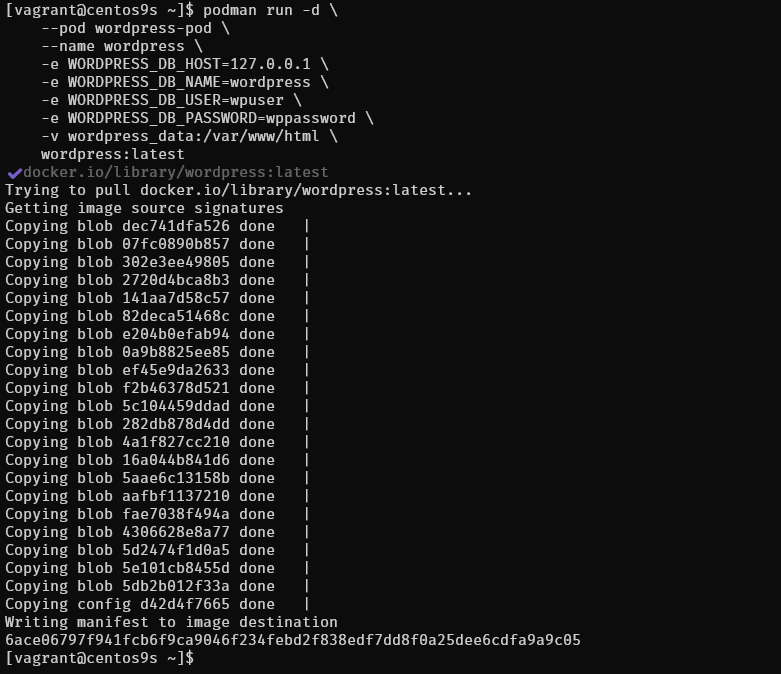
4. Verify the Pod and Containers
To check if both containers are running in the Pod, you can use the following command:
$ podman ps --pod
This should show the Pod wordpress-pod and both containers (mariadb and wordpress) running inside it.
5. Access WordPress http://<your_server_ip>:8080
Open your web browser and navigate to http://192.168.30.10:8080. You should see the WordPress installation page, where you can complete the setup.
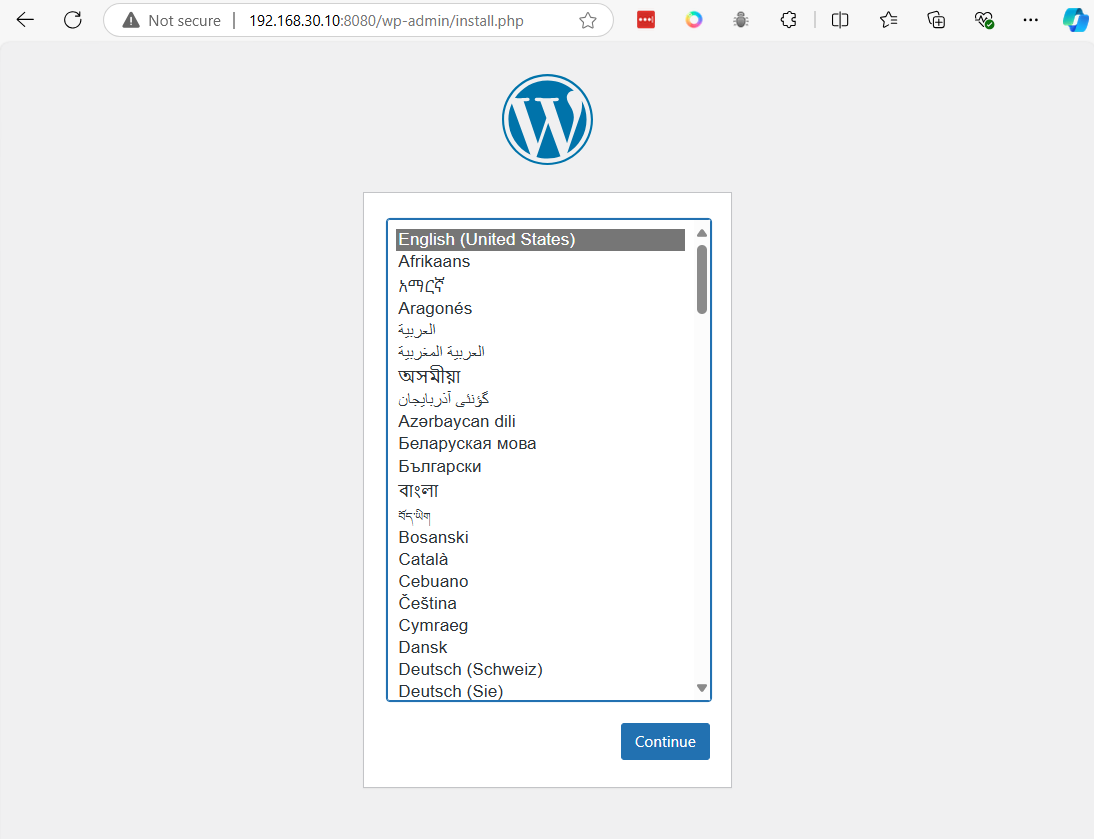
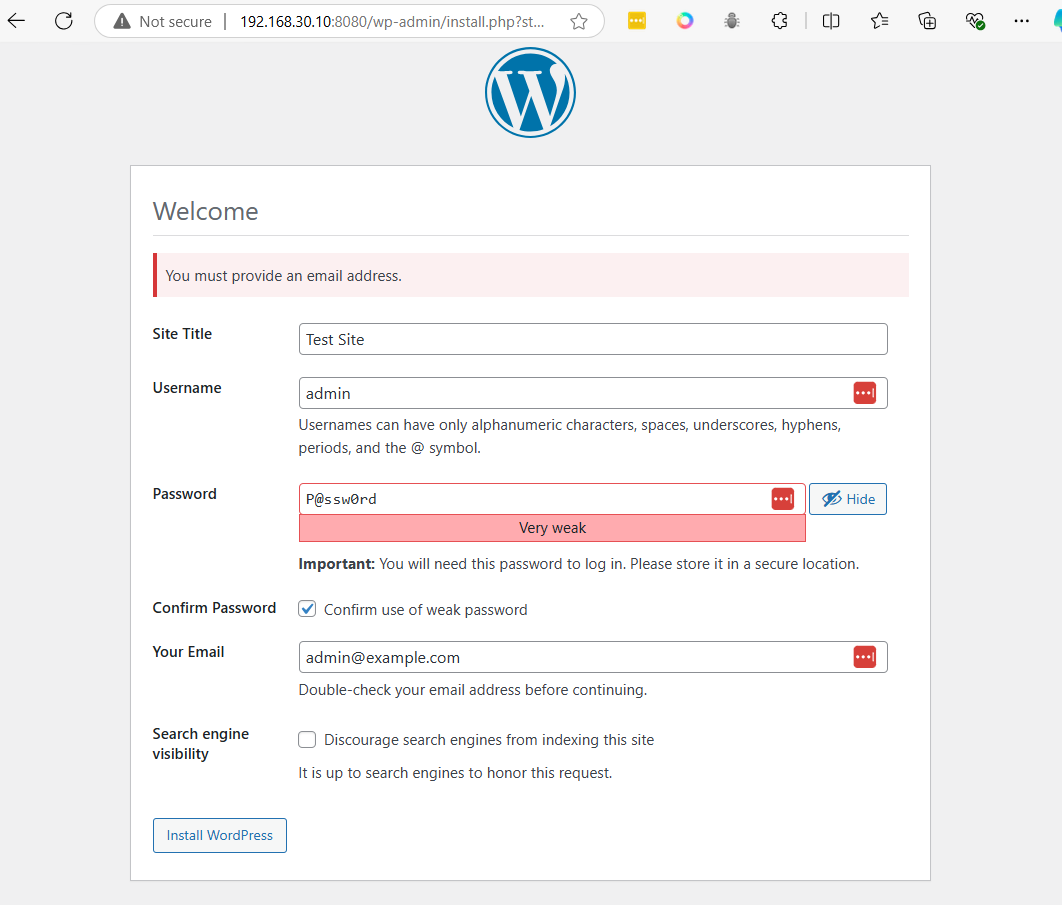
- Press install
 login
login
6. Use Ngrok to access
-
create Accout https://ngrok.com/
 Login
Login
-
Open Dashboard ngrok (https://dashboard.ngrok.com/)
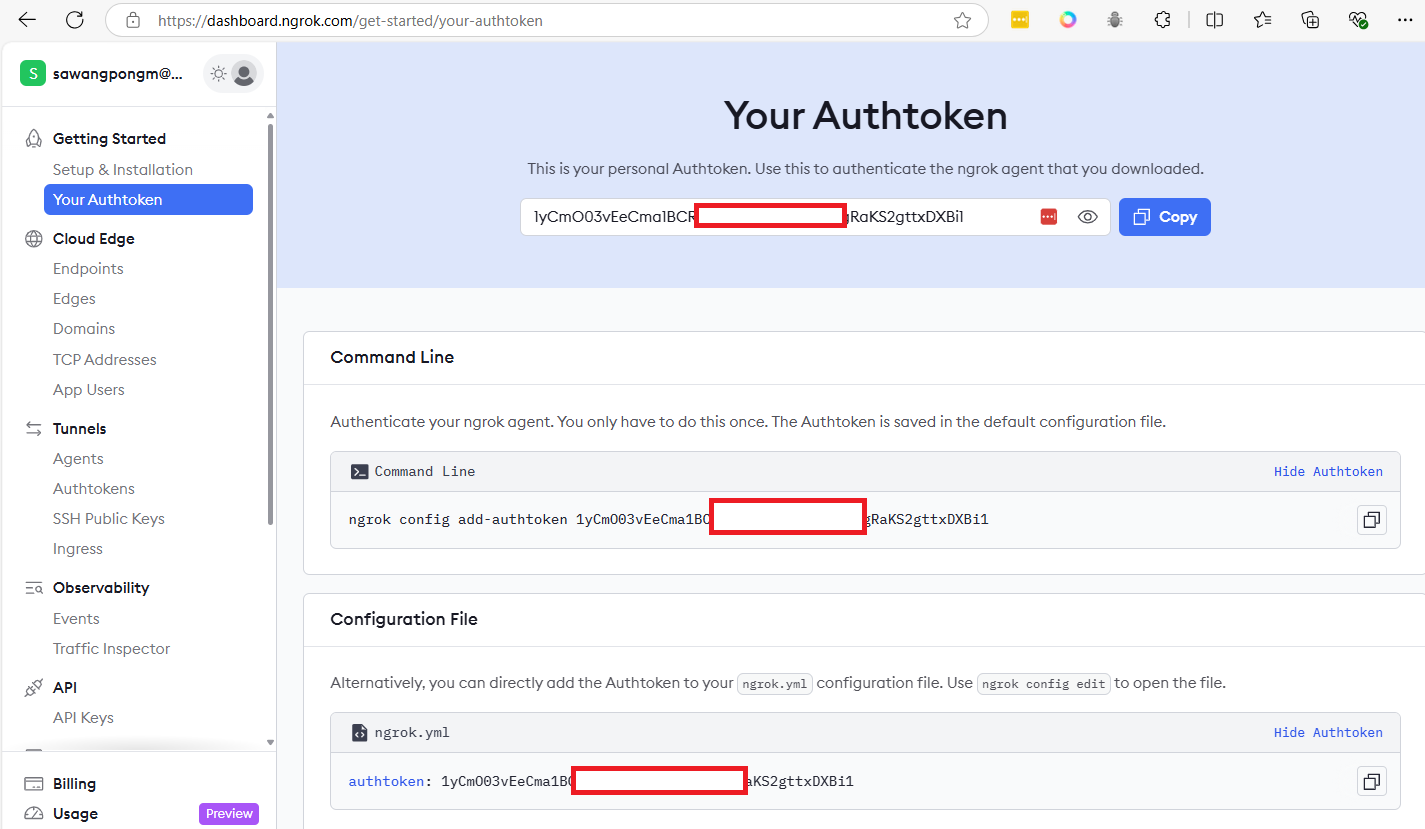
-
Get token, copy it
-
Download ngrok to vm
wget https://bin.equinox.io/c/bNyj1mQVY4c/ngrok-v3-stable-linux-amd64.tgz
sudo tar xvzf ./ngrok-v3-stable-linux-amd64.tgz -C /usr/local/bin
- ngrok authtoken NGROK_AUTHTOKEN
ngrok config add-authtoken 1yCmO03vEeCma1BCRaxxxxxxxxxxxxjs5NgRaKS2gttxDXBi1
- change to you token
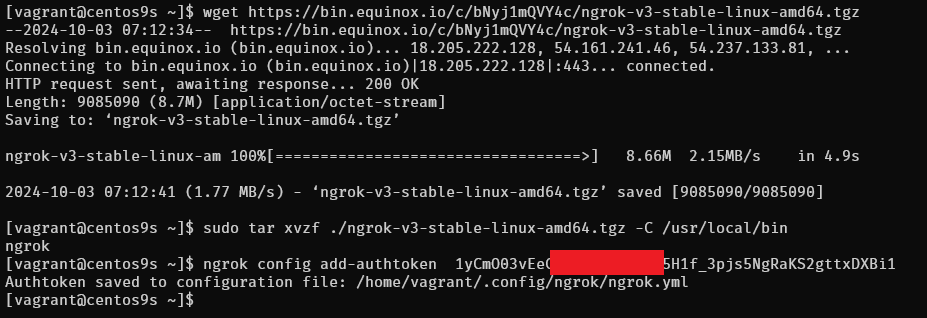
Create tunnel to app

Enter
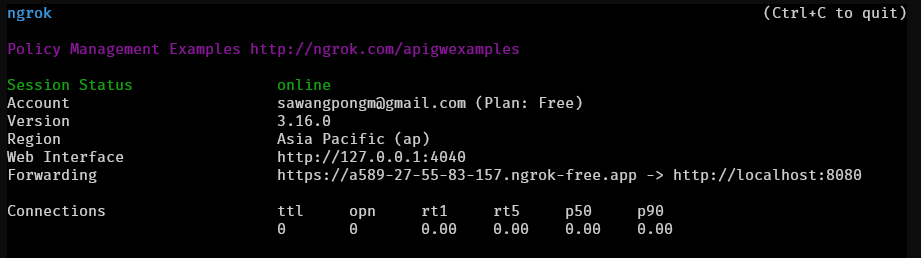
copy https://a589-27-55-83-157.ngrok-free.app
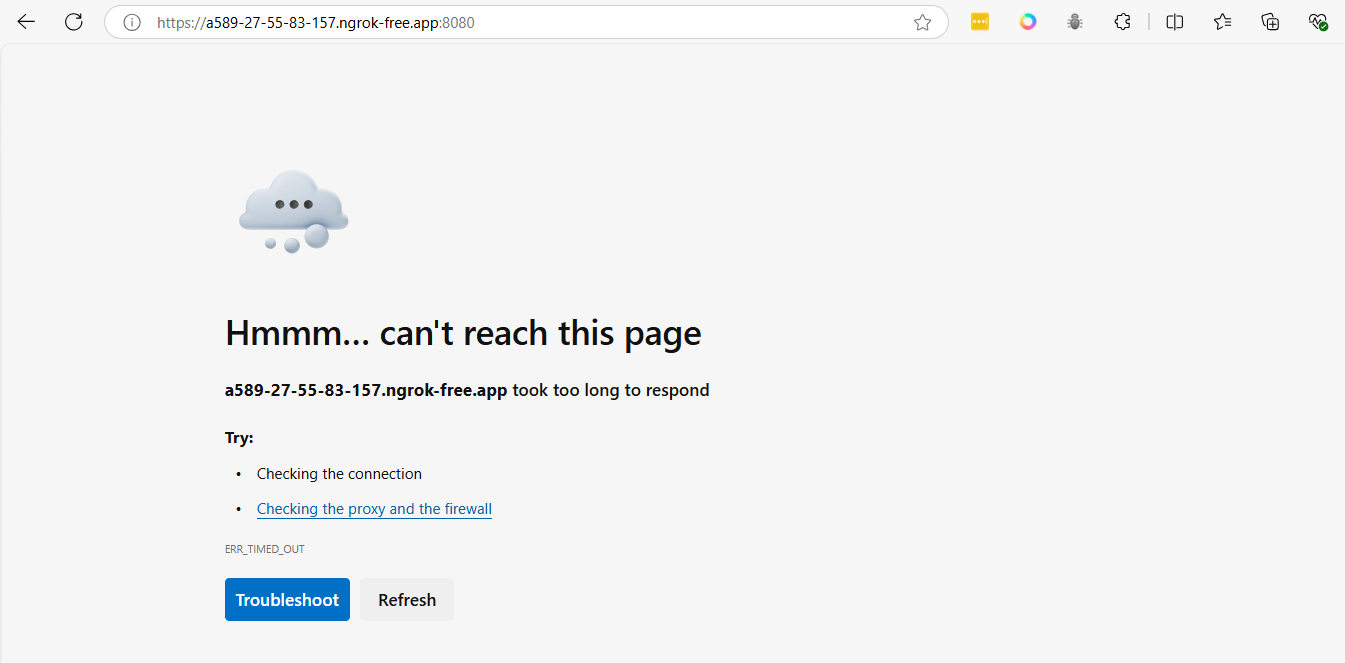
7. Managing the Pod
- Stop pod
podman pod stop wordpress-pod
- Start the Pod
podman pod start wordpress-pod
- Remove
podman pod rm -f wordpress-pod
workshop 1
Step1 Create github project
- Create project in Github name
kmutnb-gitaction-demo1

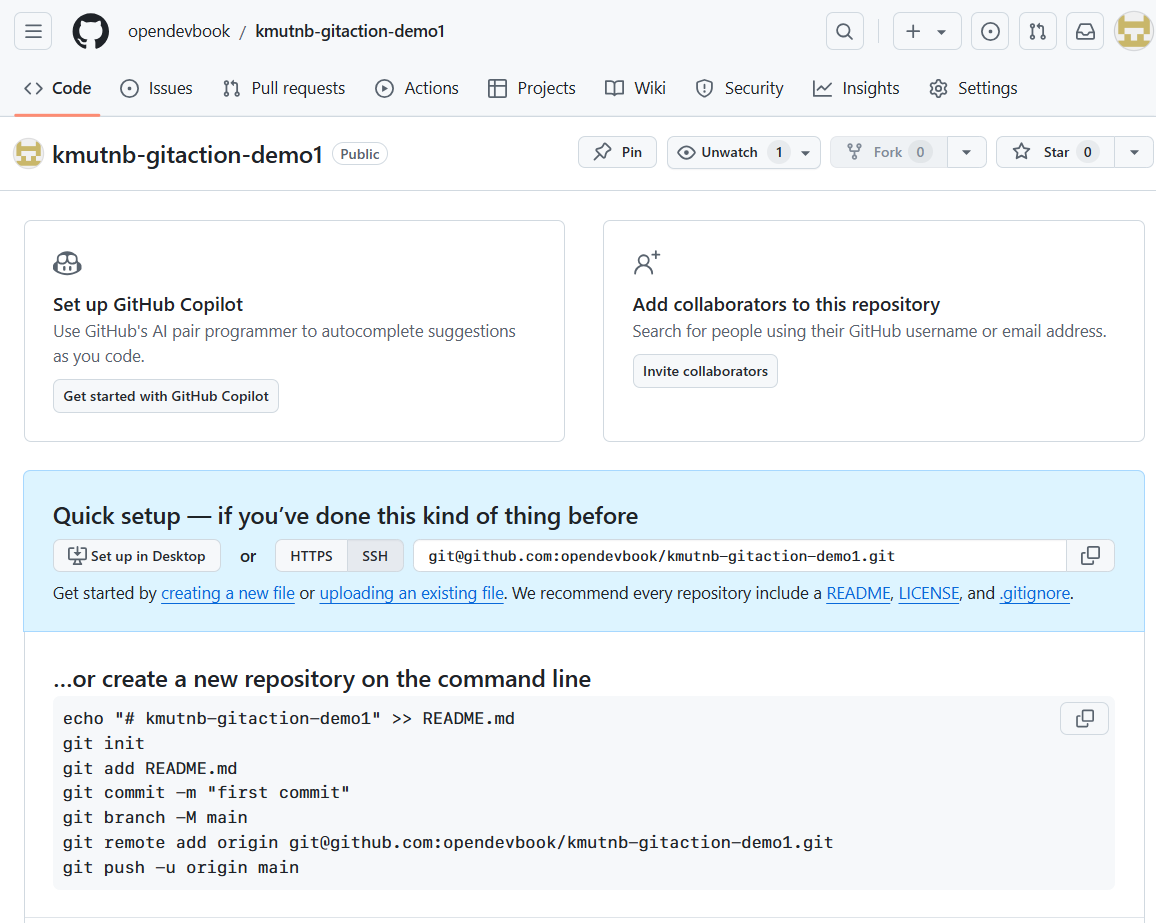
on local machine
mkdir kmutnb-gitaction-demo1
cd kmutnb-gitaction-demo1
echo "# kmutnb-gitaction-demo1" >> README.md
git init
git add README.md
git commit -m "first commit"
git branch -M main
git remote add origin git@github.com:<github-account>/kmutnb-gitaction-demo1.git
git push -u origin main
- change github-account to your's accout first
- After push code. Go to Github project and click "Actions" menu
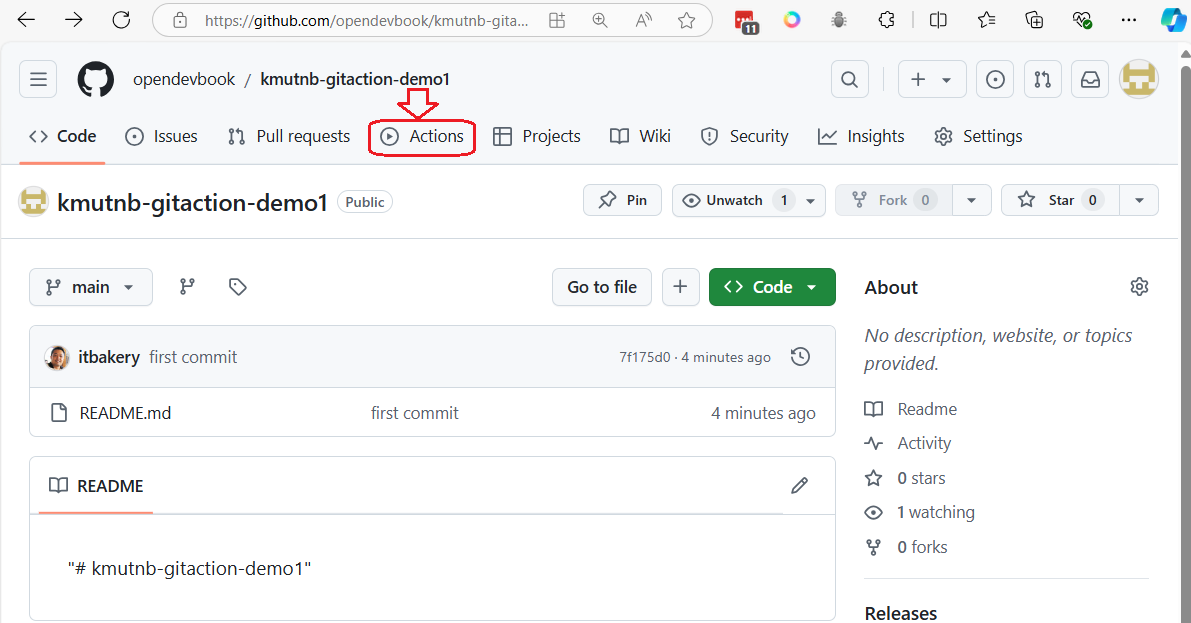
Search docker in Github Actions template's
- Click Configure
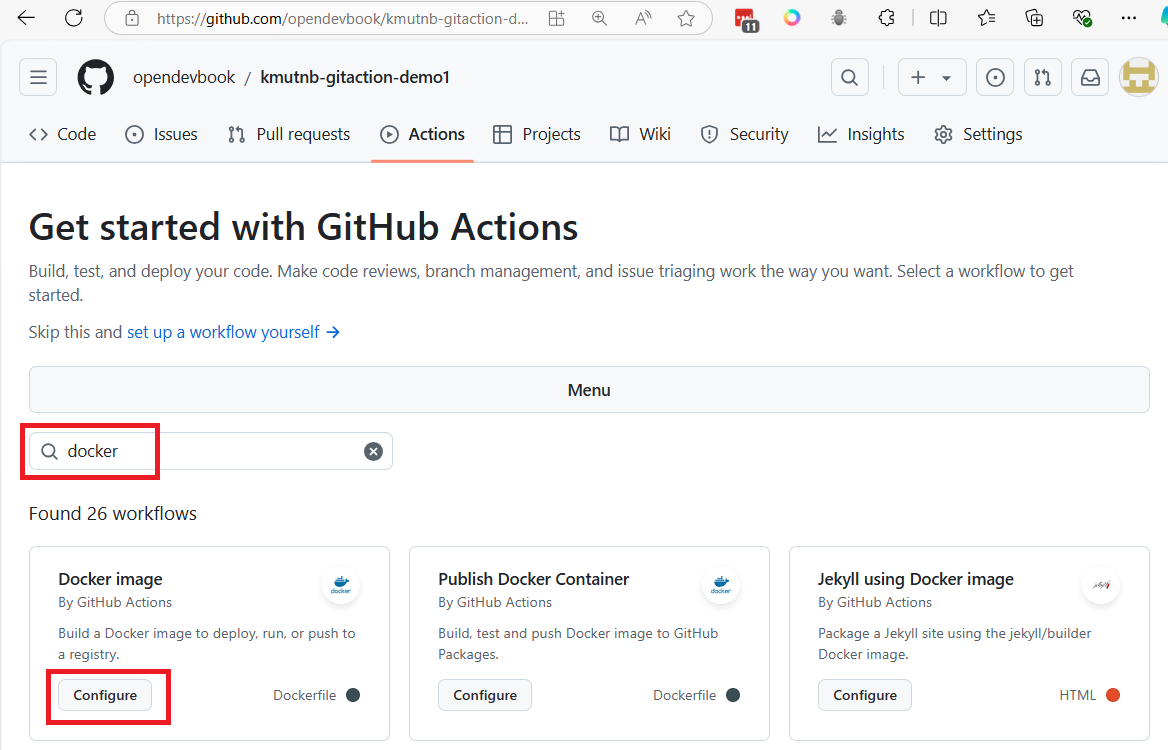
commit change to add workflows to projects
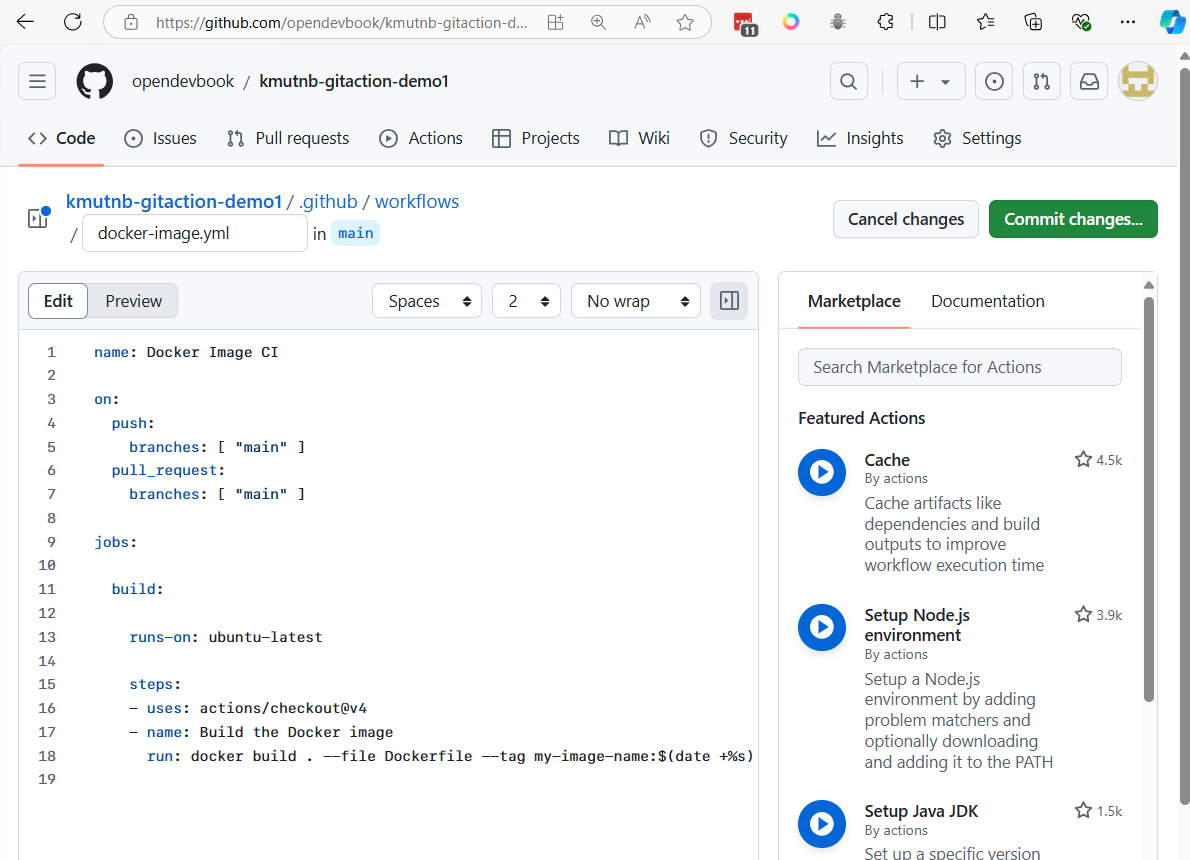
- github actions will add file
docker-image.ymlin folder.github/workflows
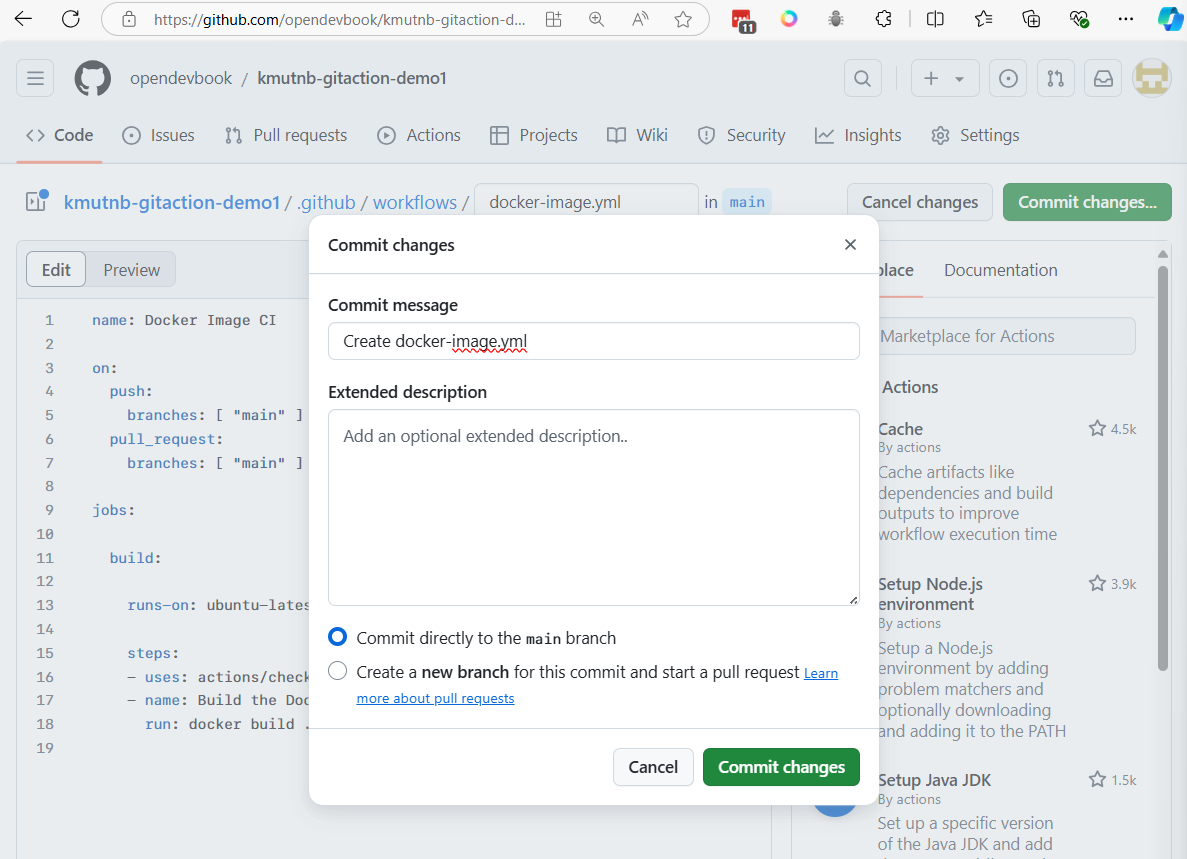
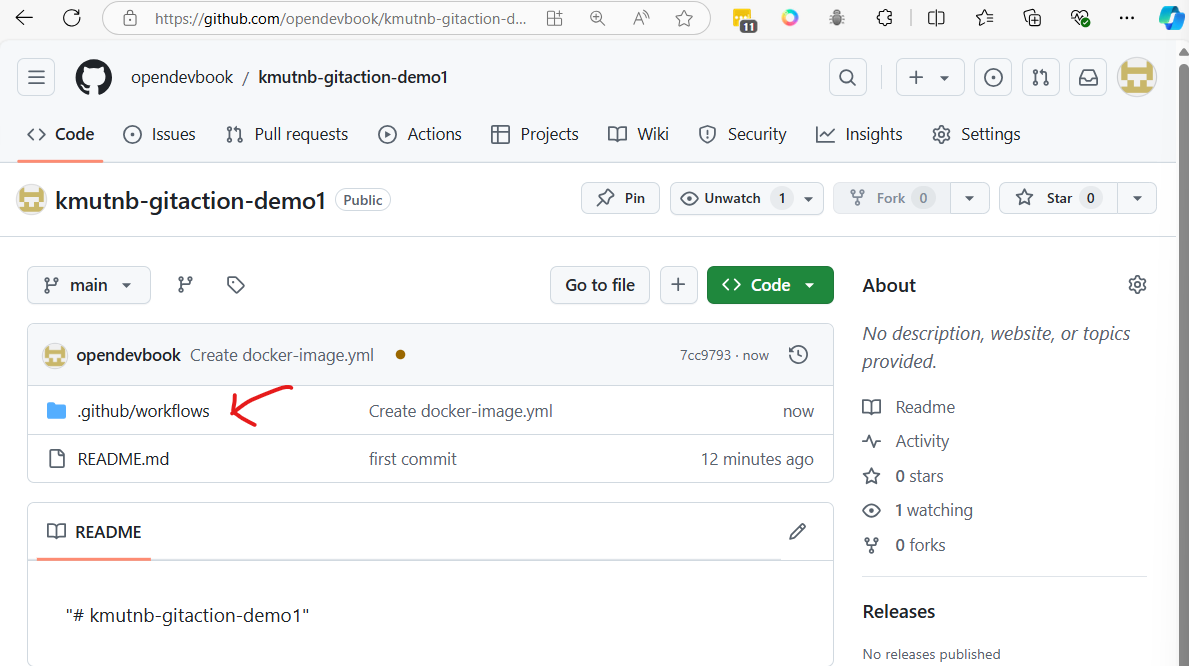
Git pull change to local repo
git pull
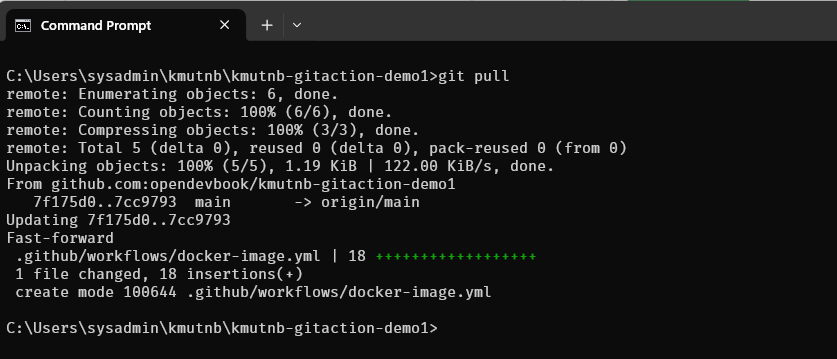
Step 2 Explain Git Actions Template to your application
name: Docker Image CI
on:
push:
branches: [ "main" ]
pull_request:
branches: [ "main" ]
jobs:
build:
runs-on: ubuntu-latest
steps:
- uses: actions/checkout@v4
- name: Build the Docker images
run: |
docker build ./api/ -t ${{ secrets.DOCKER_HUB_ACCOUNT }}/app1-api:latest
docker build ./front/ -t ${{ secrets.DOCKER_HUB_ACCOUNT }}/app1-frontend:latest
- name: Login to Docker Hub
run: |
echo "${{ secrets.DOCKER_HUB_PASSWORD }}" | docker login -u ${{ secrets.DOCKER_HUB_ACCOUNT }} --password-stdin
- name: Push images to Docker Hub
run: |
docker push ${{ secrets.DOCKER_HUB_ACCOUNT }}/app1-api:latest
docker push ${{ secrets.DOCKER_HUB_ACCOUNT }}/app1-frontend:latest
Ensure that both DOCKER_HUB_ACCOUNT and DOCKER_HUB_PASSWORD are set in your GitHub repository secrets for this workflow to work properly.
-
Setting > Secrets and variable > Action > Repository Secret
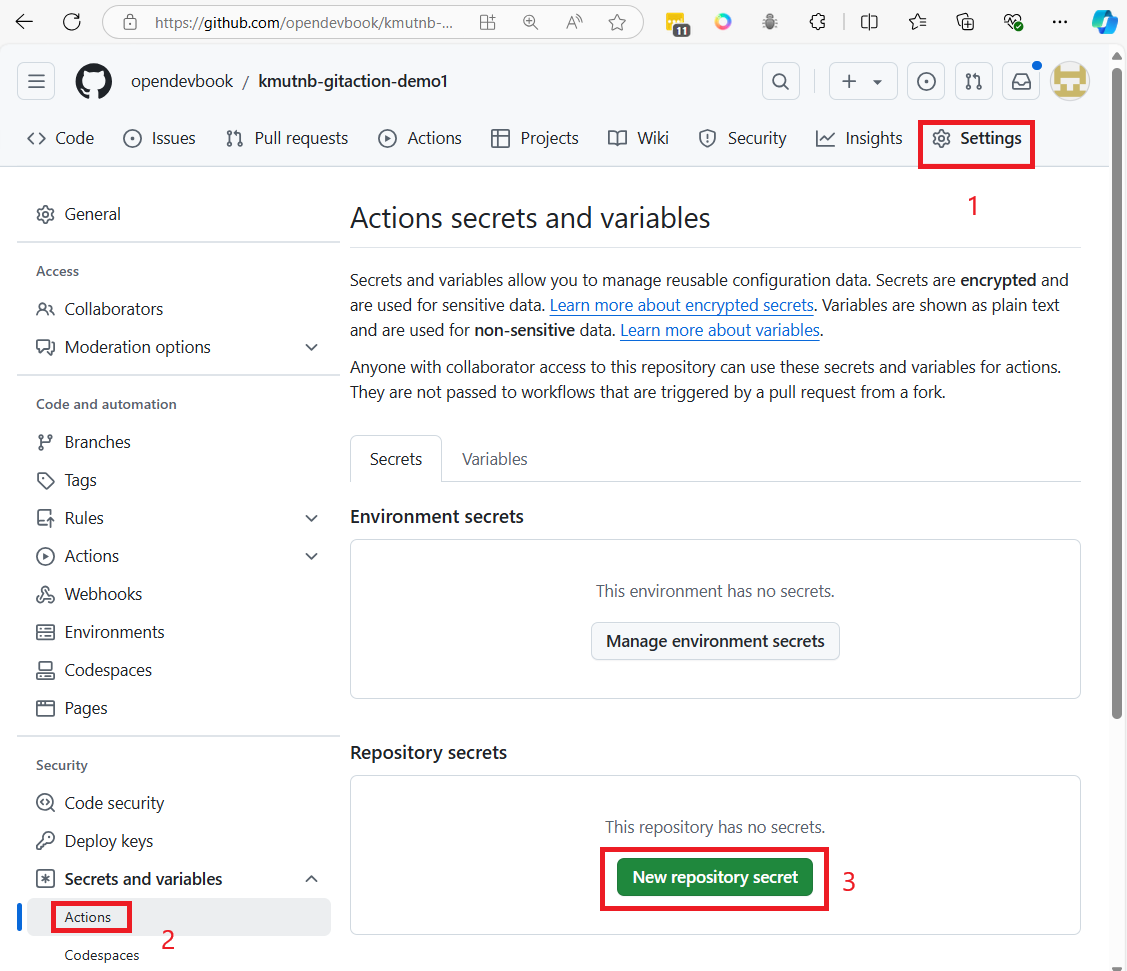
-
final result
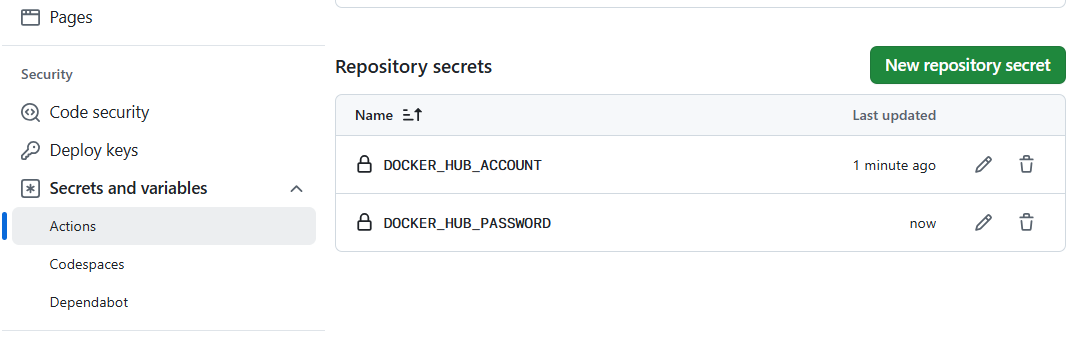
GitHub provides two types of secrets: Environment secrets and Repository secrets, and they are used to securely store sensitive information such as API keys, tokens, or passwords. Here's the difference between the two:
1. Repository Secrets:
-
Scope: Repository-level secrets are accessible to all workflows within the specific repository where they are defined.
-
Usage: If you define a secret at the repository level, it can be used across all workflows and jobs in that repository, regardless of which environment (production, staging, etc.) the job runs in.
-
Common Use: These secrets are often used when you have workflows that apply across the entire repository, such as Continuous Integration (CI), where you might push Docker images or deploy code. Example:
-
Docker Hub credentials (DOCKER_HUB_ACCOUNT, DOCKER_HUB_PASSWORD) used for pushing containers from any branch of the repository.
2. Environment Secrets:
-
Scope: Environment-level secrets are scoped to specific environments within a repository (e.g., "production," "staging," "development"). You can define different sets of secrets for each environment.
-
Usage: Environment secrets are tied to specific deployment or operational environments. A job that uses a specific environment will have access only to the secrets defined for that environment.
-
Common Use: These are useful when you have different secrets for different environments (like separate API keys for production and staging). Workflows can specify which environment they run in, and only the secrets for that environment will be accessible. Example:
-
Production API key for deployments running in the "production" environment, and a separate staging key for the "staging" environment. When to use each:
-
Repository Secrets are ideal for secrets that apply globally to all workflows and environments in the repository, such as shared access tokens or service credentials.
-
Environment Secrets are suitable when your workflows target different environments (e.g., production vs. staging), and you need to manage separate credentials for each environment.
Key Point: Environment secrets provide finer control and are more specific, making them useful in scenarios where environment-specific configuration is important.
Step3 Create Dockerfile in /api
- Create Dockerfile in /api
# Use the official Python image from the DockerHub
FROM python:3.11-slim
# Set the working directory in the container
WORKDIR /app
# Copy the requirements file into the container
COPY requirements.txt .
# Install the Python dependencies
RUN pip install --no-cache-dir -r requirements.txt
# Copy the entire FastAPI app into the working directory
COPY . .
# Expose port 8000 to the outside world (FastAPI runs on 8000 by default)
EXPOSE 8000
# Command to run the FastAPI application using Uvicorn
CMD ["uvicorn", "main:app", "--host", "0.0.0.0", "--port", "8000"]
create main.py
from fastapi import FastAPI
# Create the FastAPI app instance
app = FastAPI()
# Define a root endpoint that returns a simple message
@app.get("/")
def read_root():
return {"message": "Hello, World!"}
# Define a GET endpoint with a path parameter
# GET /items/5?q=test
@app.get("/items/{item_id}")
def read_item(item_id: int, q: str = None):
return {"item_id": item_id, "q": q}
# Define a POST endpoint that accepts data in JSON format
# POST /create-item
@app.post("/create-item")
def create_item(item: dict):
return {"message": "Item created", "item": item}
# Define a PUT endpoint for updating an item
@app.put("/update-item/{item_id}")
def update_item(item_id: int, item: dict):
return {"message": "Item updated", "item_id": item_id, "updated_data": item}
To run the Fast API. We need to use ASGI server like uvicorn
- change directory to api folder
- Create virtual environment
cd api
python -m venv venv
-
Activate virtual environment
- On windows
venv\Scripts\activate- On mac or linux
source venv/bin/activate -
install python package with pip command
pip install fastapi uvicorn

Run FastApi
uvicorn main:app --reload

Test Fast Api with postman
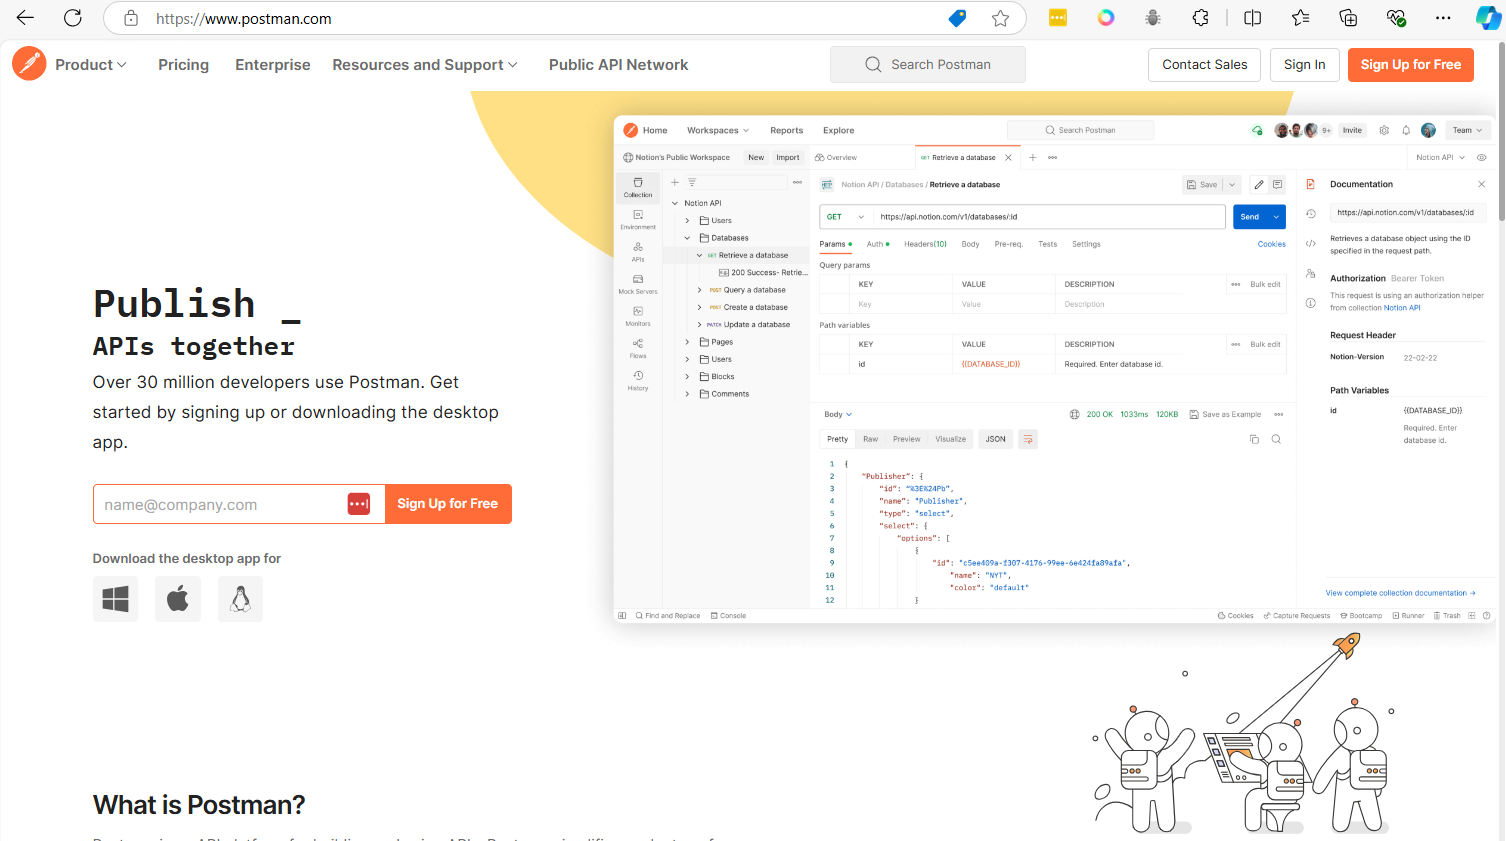
-
test1 GET /
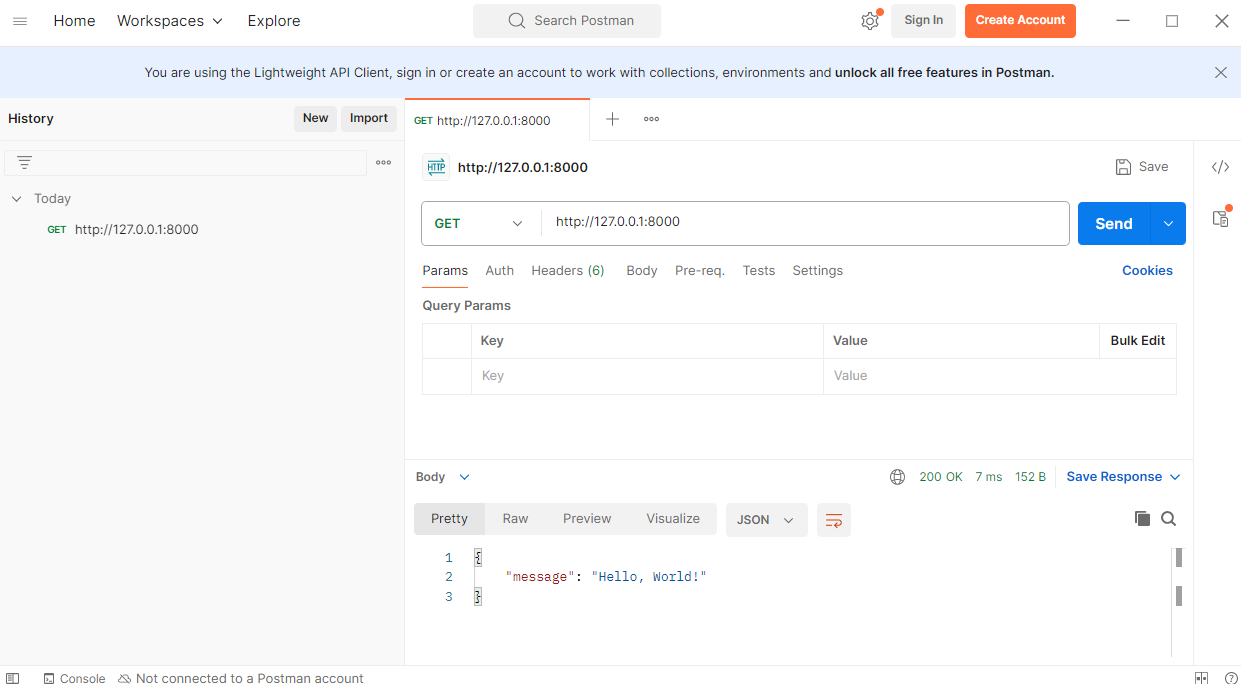
-
test2 GET /items/5?q=test
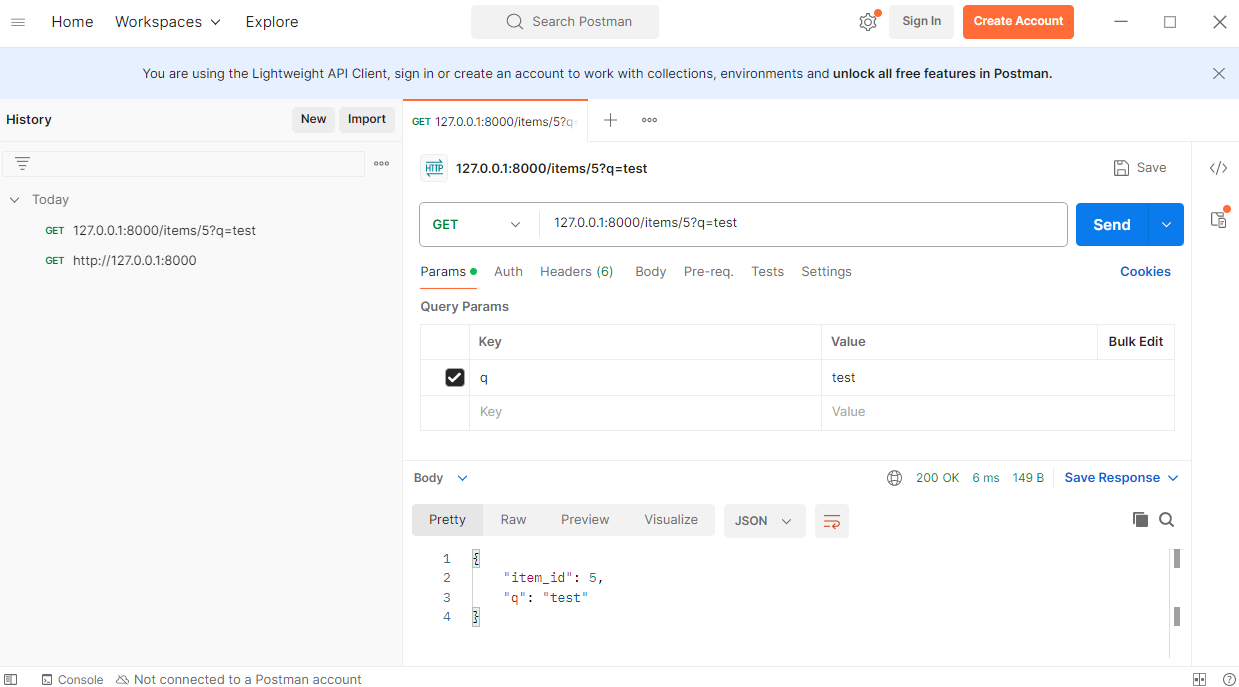
-
test3 POST Endpoint (POST /create-item):
- Request Body
{ "name": "Item A", "price": 25 }
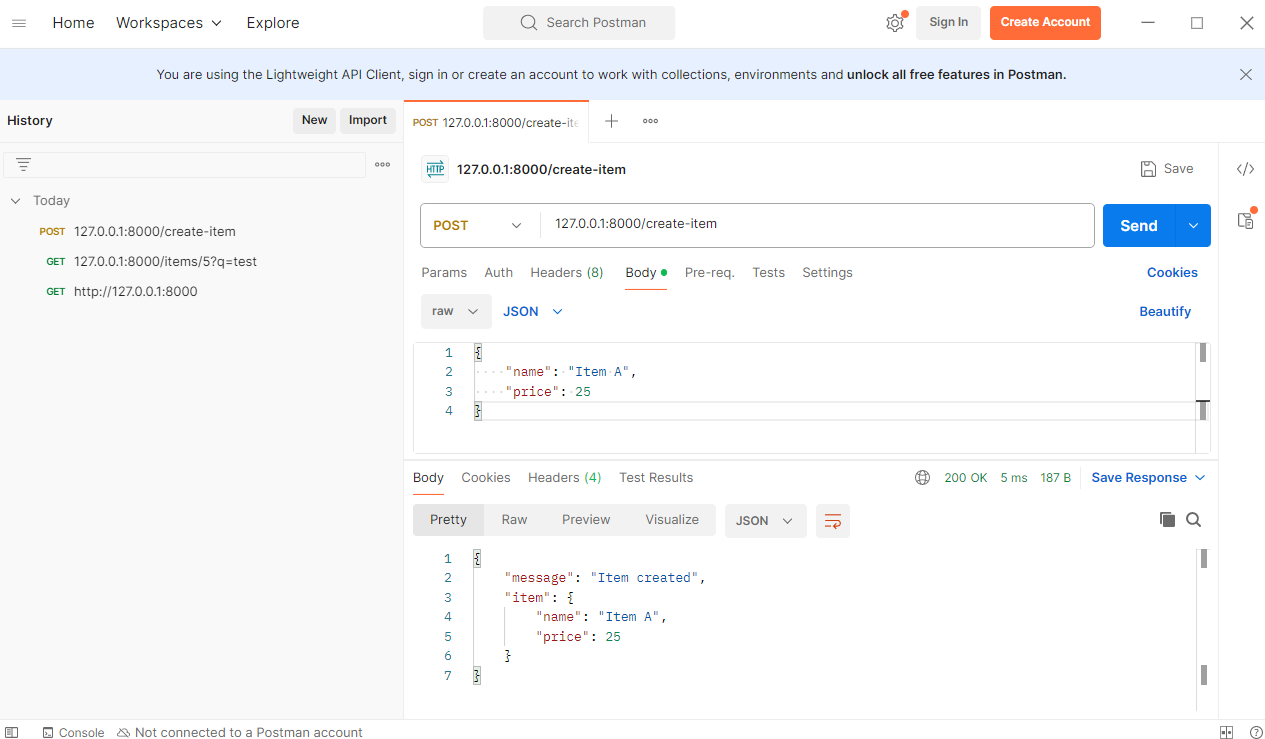
To Generate requirements.txt
This will capture the current environment's installed packages and their versions and save them to requirements.txt.
pip freeze > requirements.txt
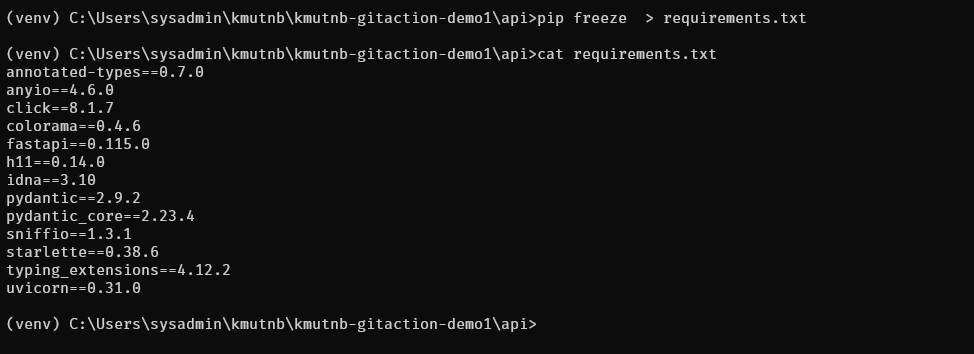
Note:
To restore package again pip install -r requirements.txt
To build and test your API image (which is developed using FastAPI), follow these steps:
Step 1: Build the API Docker Image
1.1 Navigate to your /api directory where the Dockerfile for the FastAPI application is located.
1.2. Run the following command to build the Docker image:
docker build -t fastapi-app .
- fastapi-app is the name of your Docker image.
- This command will build the FastAPI app using the Dockerfile located in the current directory.
Step 2: Run the Docker Container
2.1 Once the image is built, you need to run it:
docker run -p 8000:80 fastapi_app
- -d runs the container in detached mode.
- -p 8000:8000 exposes port 8000 of the container to port 8000 of your local machine, so you can access your FastAPI app through http://localhost:8000.
Step4 Create Dockerfile in /front (Reactjs)
Create React project
- Check environment node
node -v
npm -v
cd front
npx create-react-app .
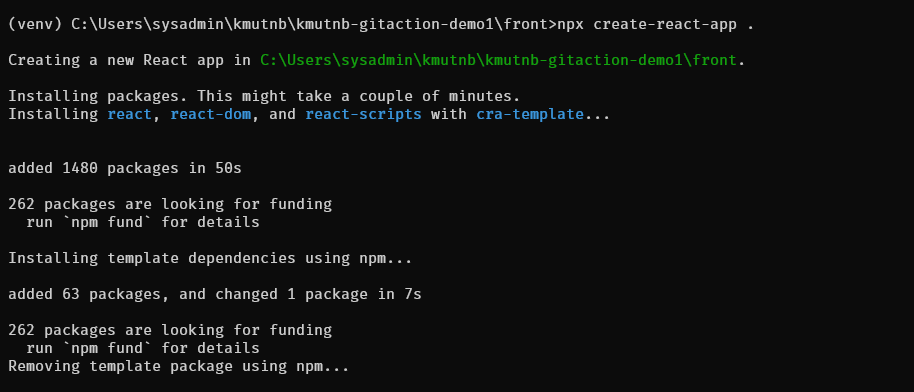
- Start Development Server
npm start
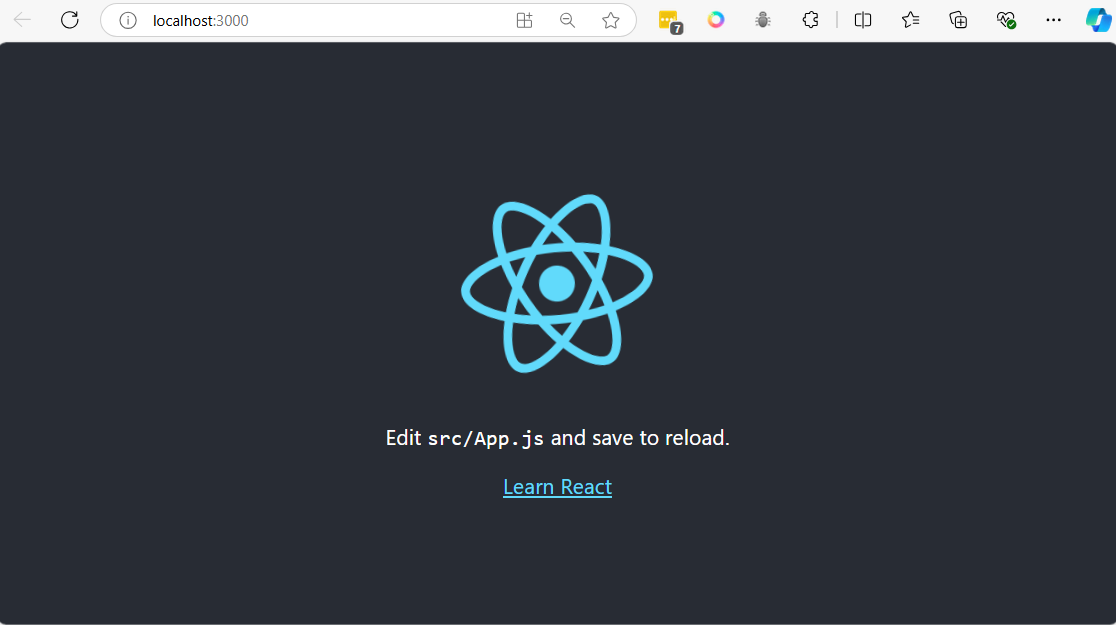
- Create Dockerfile for ReactJs in front/
# Stage 1: Build the React app
FROM node:18-alpine as build
# Set working directory
WORKDIR /app
# Copy the package.json and package-lock.json files
COPY package*.json ./
# Install dependencies
RUN npm install
# Copy the rest of the application source code
COPY . .
# Build the React app for production
RUN npm run build
# Stage 2: Serve the app using Nginx
FROM nginx:alpine
# Copy the build files from the first stage to Nginx's default public folder
COPY --from=build /app/build /usr/share/nginx/html
# Expose port 80
EXPOSE 80
# Start Nginx server
CMD ["nginx", "-g", "daemon off;"]
Explanation:
Stage 1 (Build):
- Base image: The Dockerfile uses
node:18-alpineas the base image, which is a lightweight Node.js image. - Working directory: Sets
/appas the working directory. - Install dependencies: Copies
package.jsonandpackage-lock.jsoninto the container and runsnpm installto install dependencies. - Copy application: The rest of the application files are copied into the container.
- Build the React app: Runs
npm run buildto create an optimized production build of the React app, which will be placed in thebuilddirectory.
Stage 2 (Serve with Nginx):
- Base image: Uses
nginx:alpine, a minimal Nginx image, to serve the static files. - Copy build files: The files generated from the build stage are copied to Nginx's default directory (
/usr/share/nginx/html). - Expose port 80: The container listens on port 80 for HTTP traffic.
- Start Nginx: Starts Nginx with the
daemon offdirective to keep it running in the foreground.
Multi-stage build:
This approach is a multi-stage build, which is more efficient because it keeps the final image small. The final image contains only the production-ready static files and Nginx, not the Node.js runtime or development dependencies.
To build and run the Docker container:
Build the image:
docker build -t test-react-app .
Run the container:
docker run -p 80:80 test-react-app
Step5 Git push to github
- Befor we push to git. we have to create file name
.gitignorein /api to ignore folder venv
touch api/.gitignore
- add name of python in file
venv
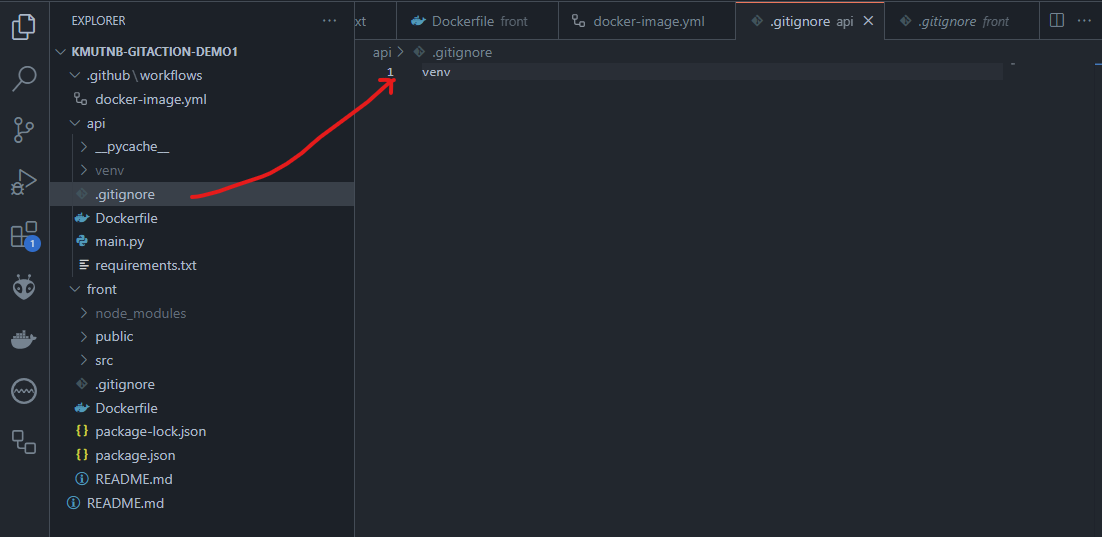
git add .
git commit -m "Initial project api, front"
git push origin main
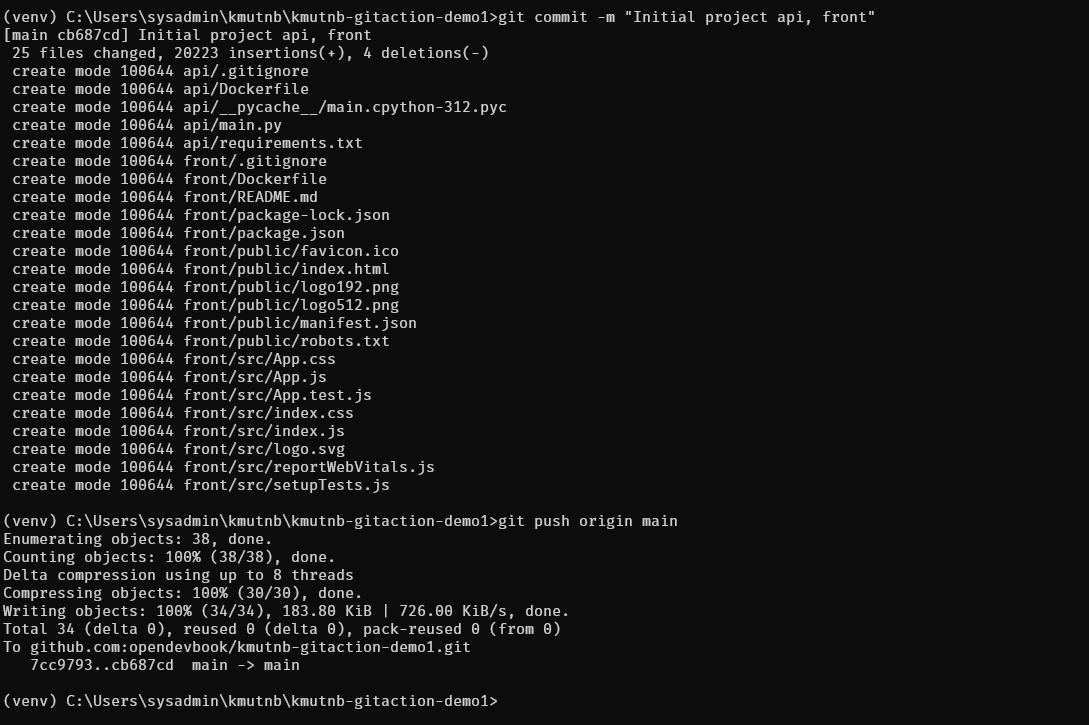
Go back to github
- Actions
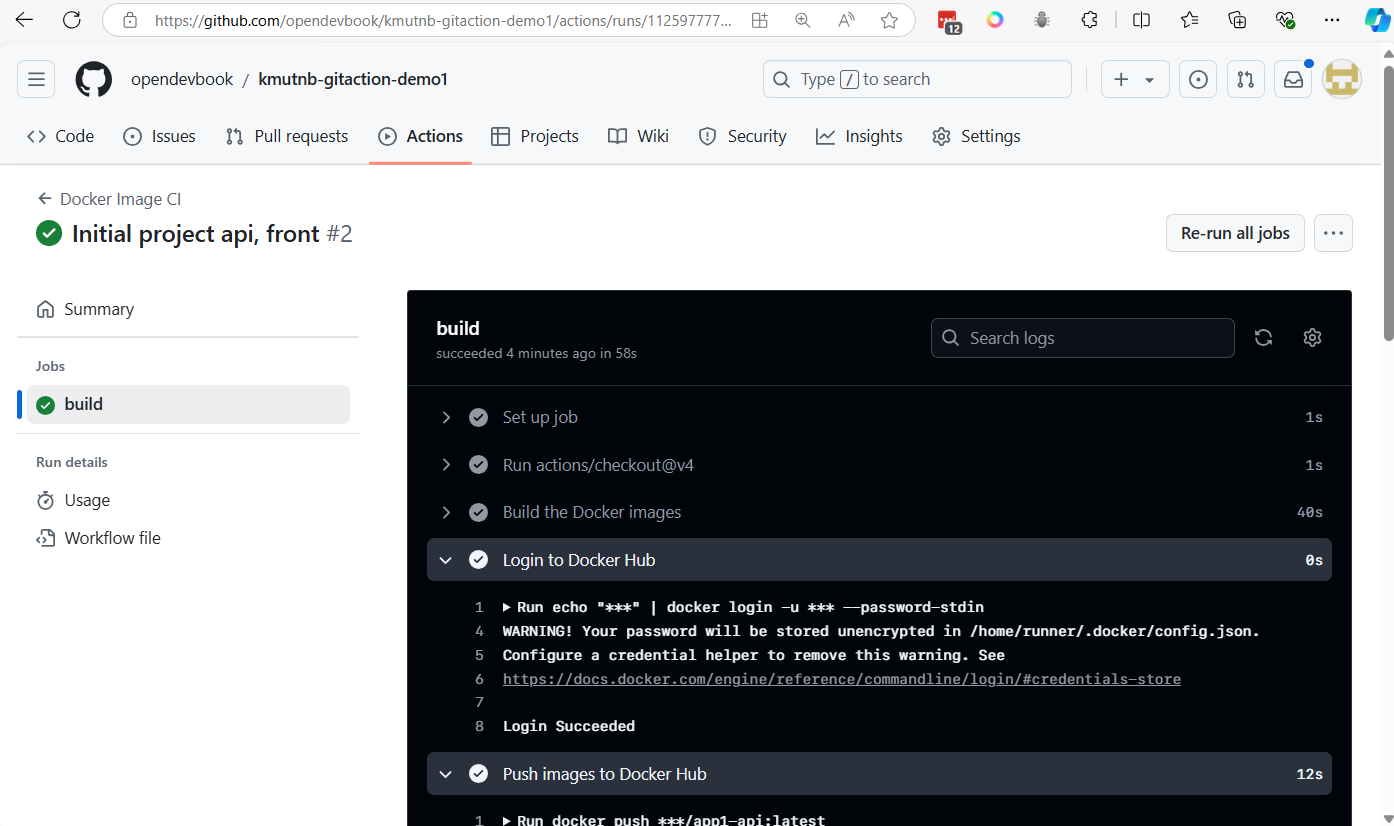
Go to dockerhub you will see image push to registry
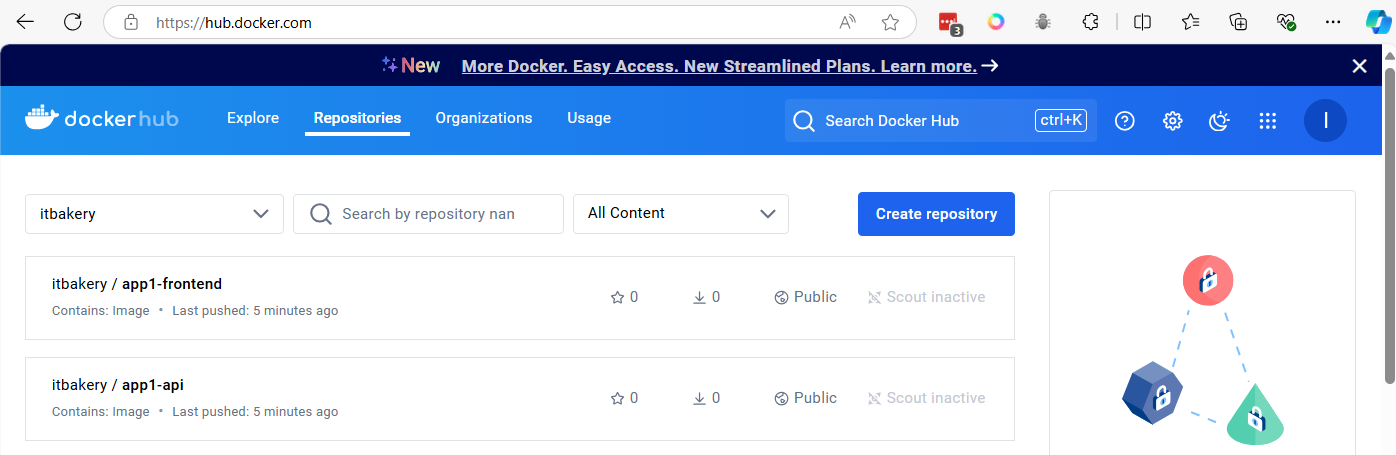
workshop 2
Learn to Create Document Share for your Development with mkdocs
https://www.mkdocs.org/getting-started/
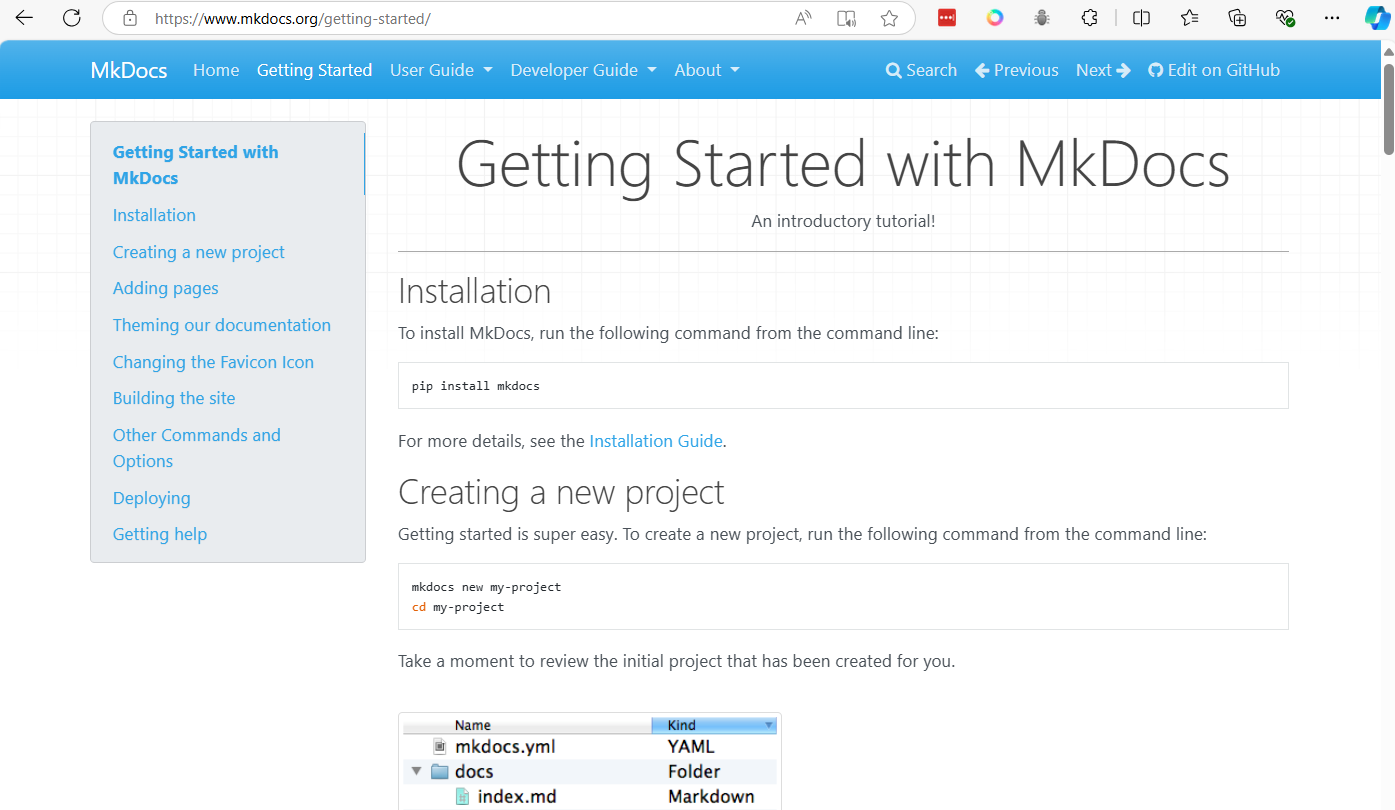
create project
mkdir mydevbook
cd mydevbook
python -m venv venv
venv\Scripts\activate
pip install mkdocs
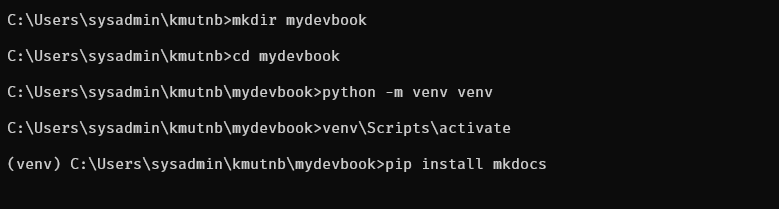
mkdocs new .
mkdocs serve
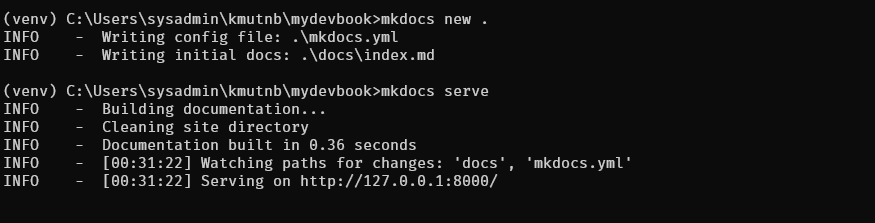
Result
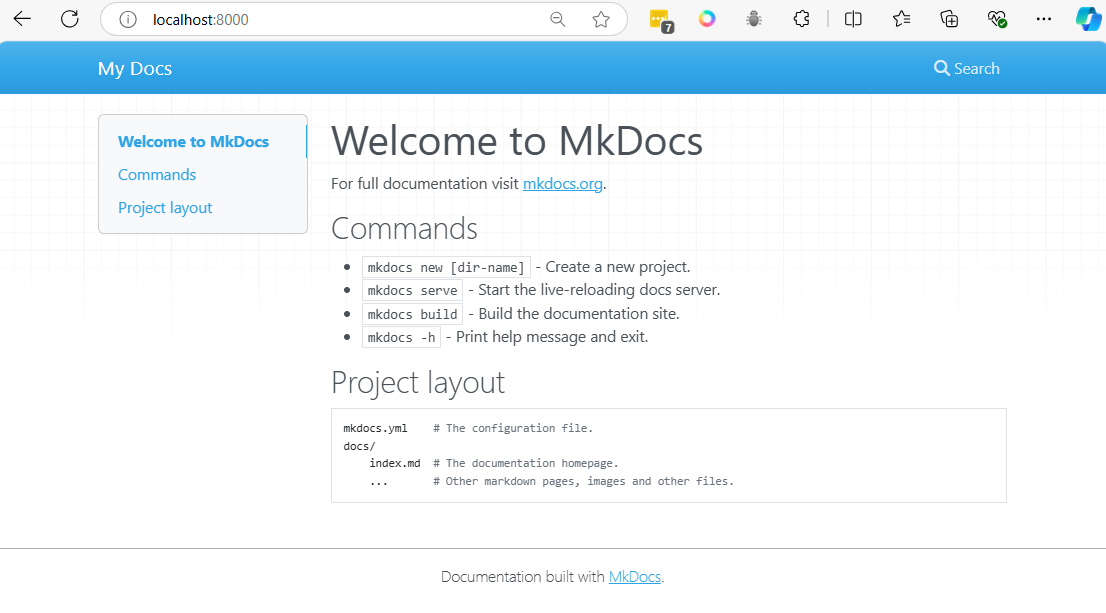
Control + C stop Server
Change themes to material
pip install mkdocs-material
Edit file mkdocs.yml in project
site_name: My Docs
theme:
name: material
markdown_extensions:
- pymdownx.highlight:
anchor_linenums: true
line_spans: __span
pygments_lang_class: true
- pymdownx.inlinehilite
- pymdownx.snippets
- pymdownx.superfences
- Restart Server again
mkdocs serve
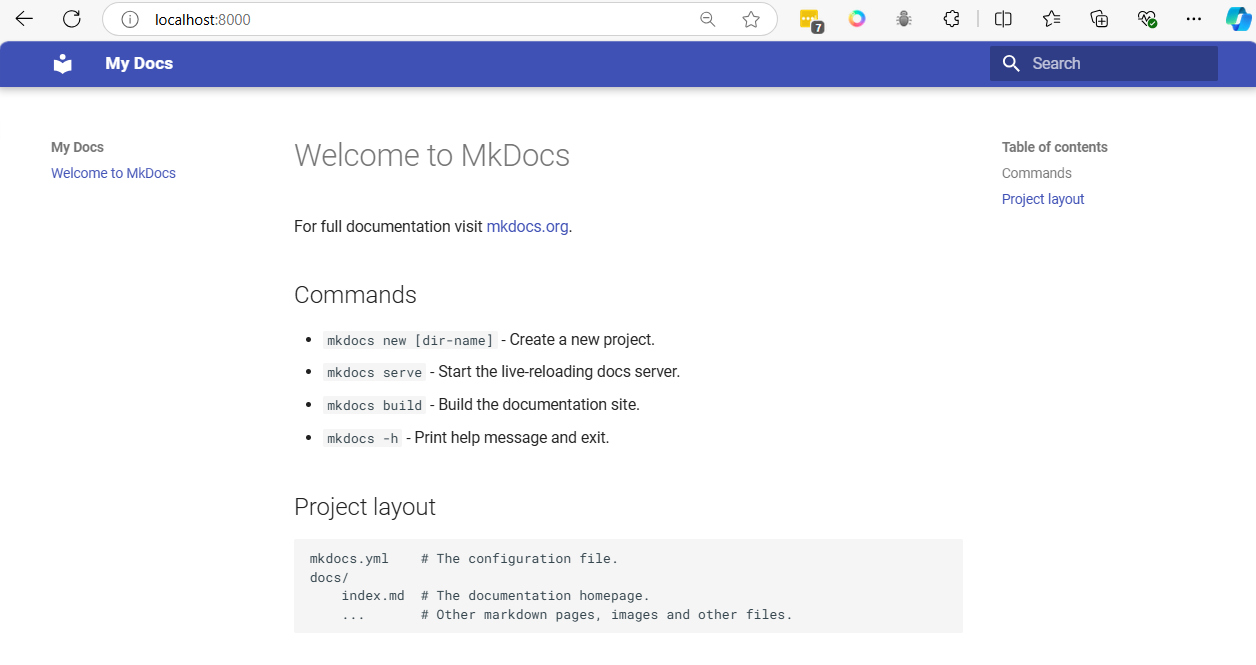
Create pages
- Create folder and inside folder crate markdown file
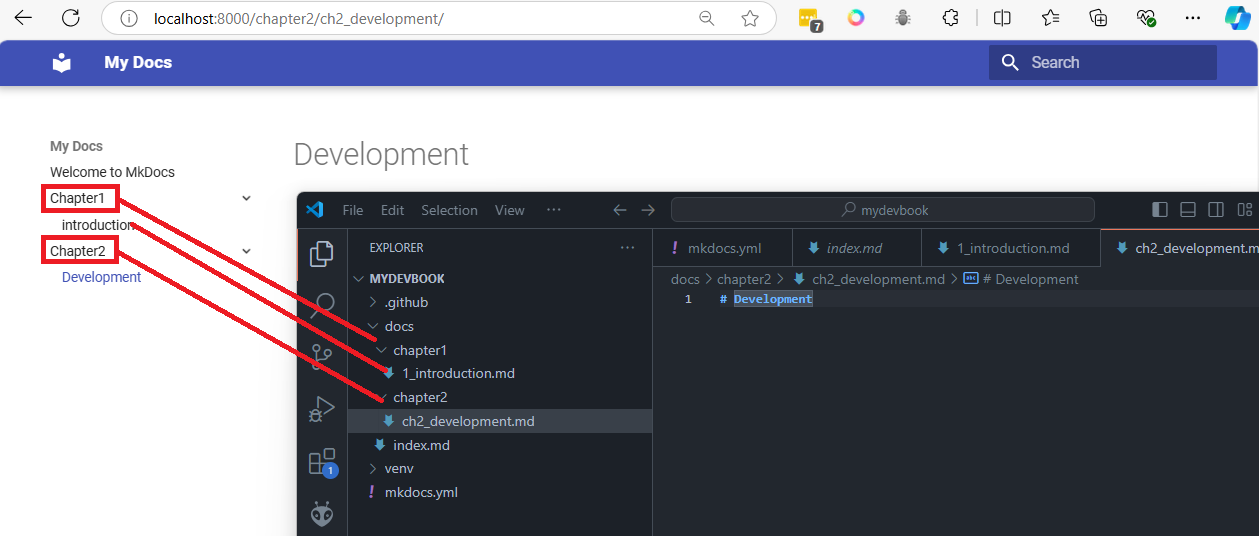
Add pipline ./github/workflows/ci.yml
mkdir .github
cd .github
mkdir workflows
cd workflows
touch ci.yml
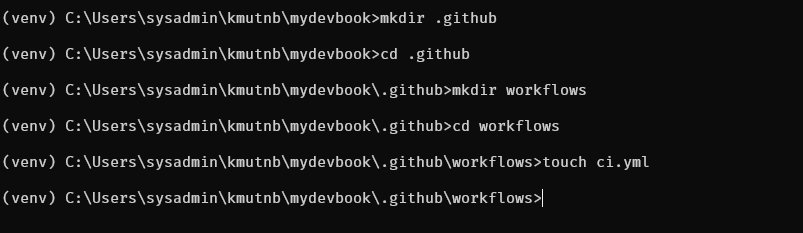
create file ci.yml
name: CI
on:
push:
branches:
- main
permissions:
contents: write
jobs:
deploy:
runs-on: ubuntu-latest
steps:
- name: Checkout code
uses: actions/checkout@v4
- name: Configure Git Credentials
run: |
git config user.name "github-actions[bot]"
git config user.email "41898282+github-actions[bot]@users.noreply.github.com"
- name: Set up Python
uses: actions/setup-python@v5
with:
python-version: '3.x'
- name: Cache MkDocs dependencies
run: echo "cache_id=$(date --utc '+%V')" >> $GITHUB_ENV
- uses: actions/cache@v4
with:
key: mkdocs-material-${{ env.cache_id }}
path: .cache
- name: Install MkDocs and dependencies
run: |
pip install mkdocs-material
- name: Build and Deploy MkDocs
run: mkdocs gh-deploy --force
Create project in github name mydevbook
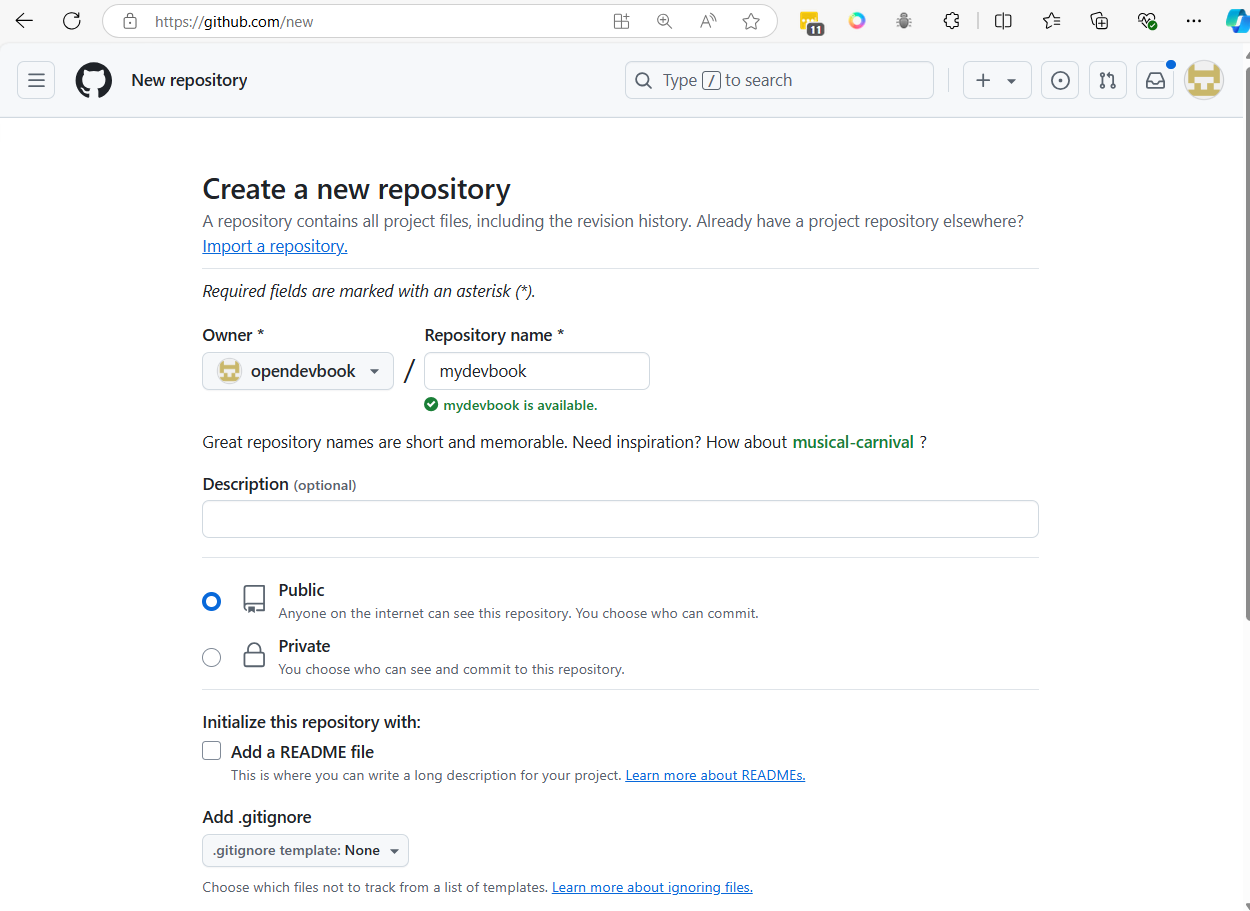
- Copy script to project
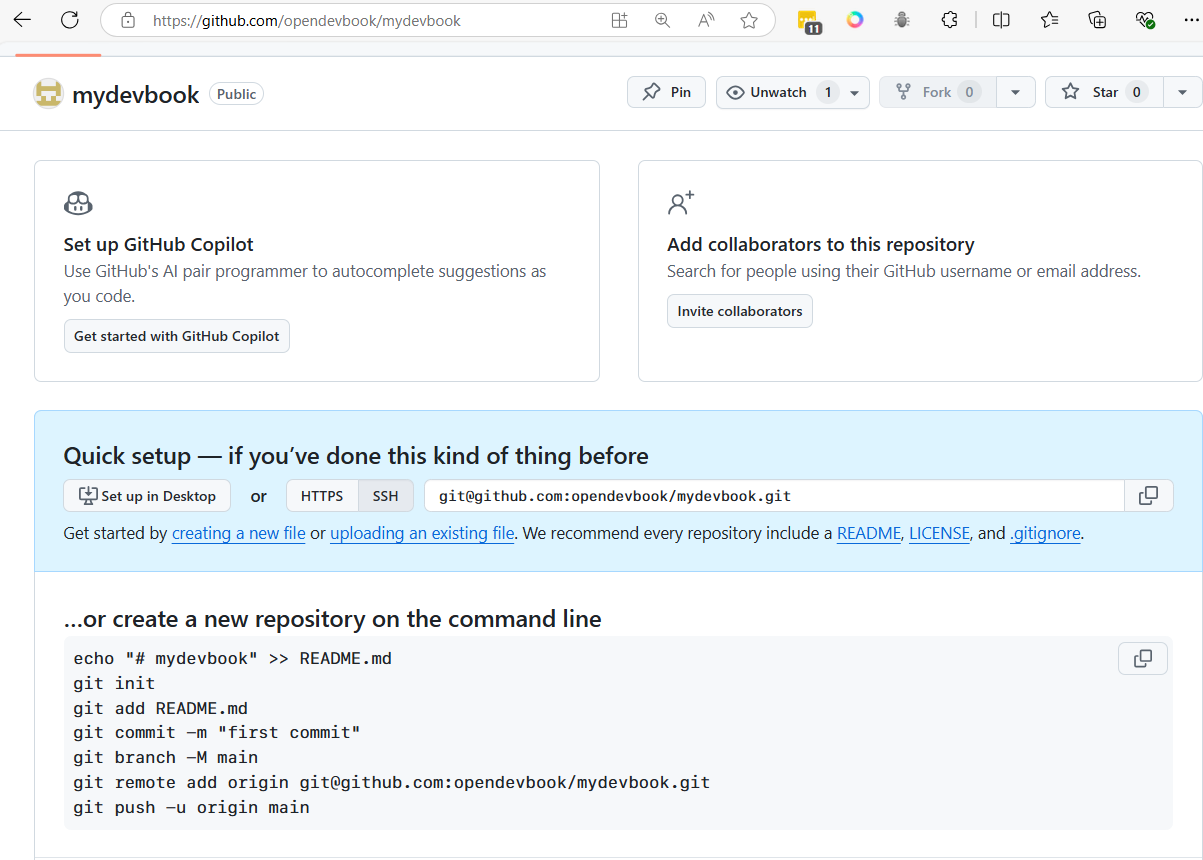
cd mydevbook
touch .gitignore
add venv to .gitignore (with vscode)
venv

git init .
git add .
git commit -m "Initial project"
git remote add origin git@github.com:<youraccount>/mydevbook.git
git push origin main
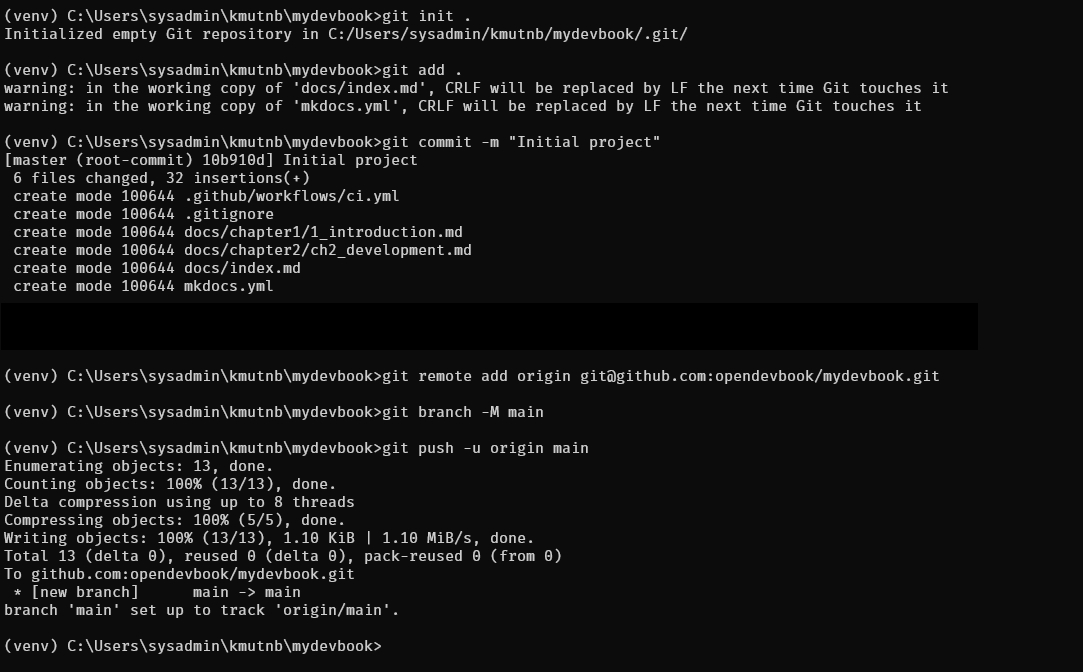
-
Go to git Actions to check pipeline
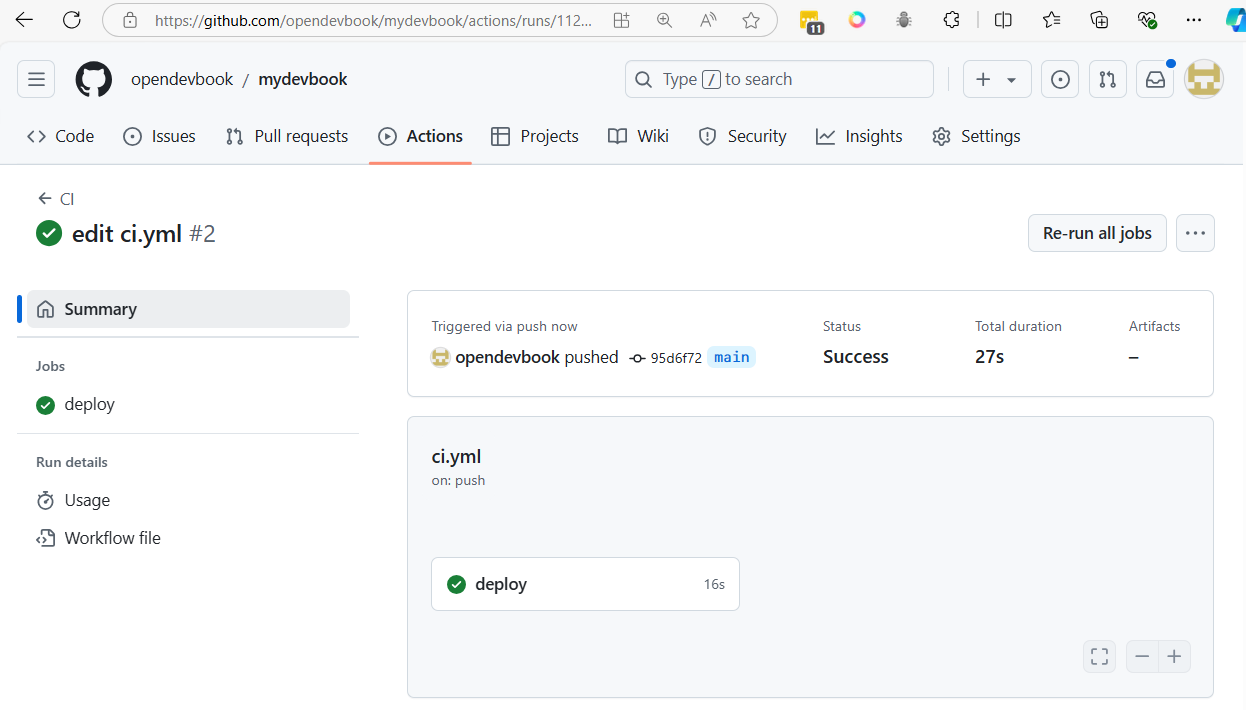
-
Go to Settings > Pages and select Branch gh-pages and save
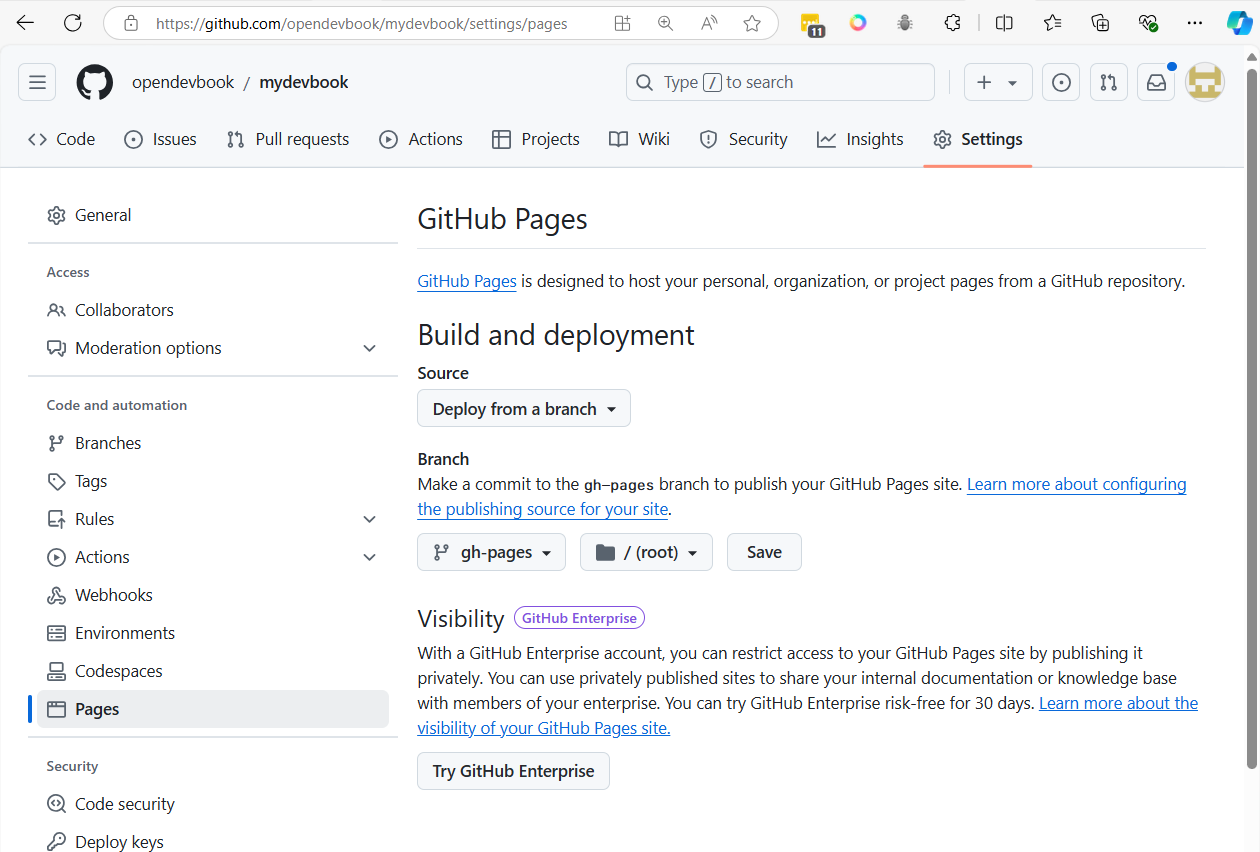
- Go back to actions it will generate action
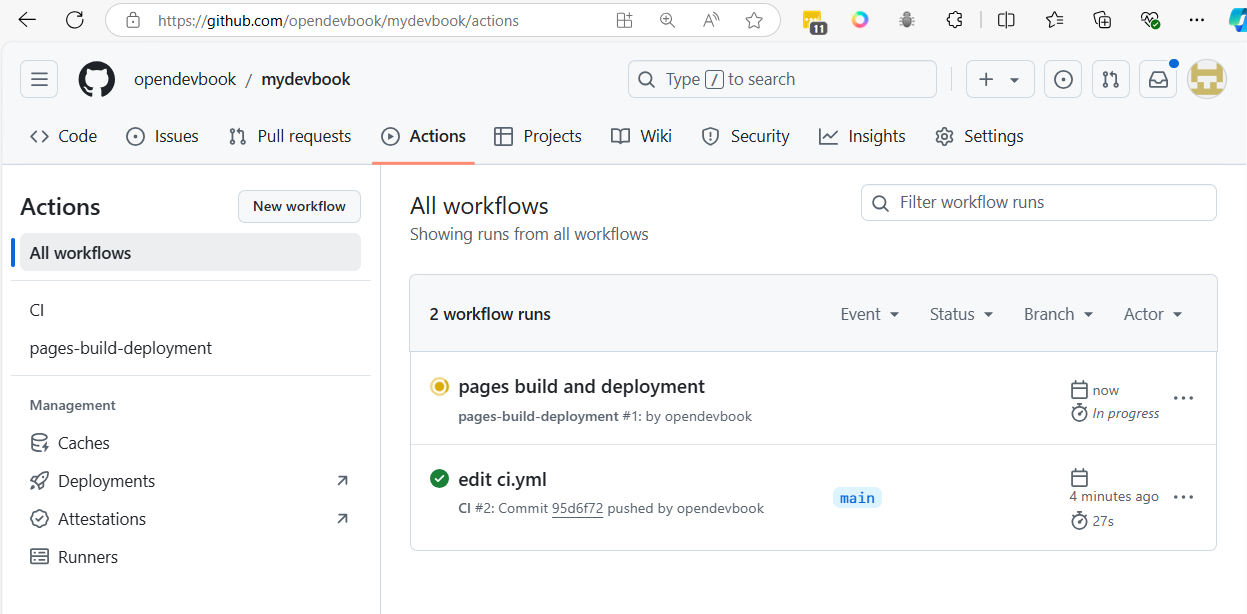
- Go back to Settings > Pages again
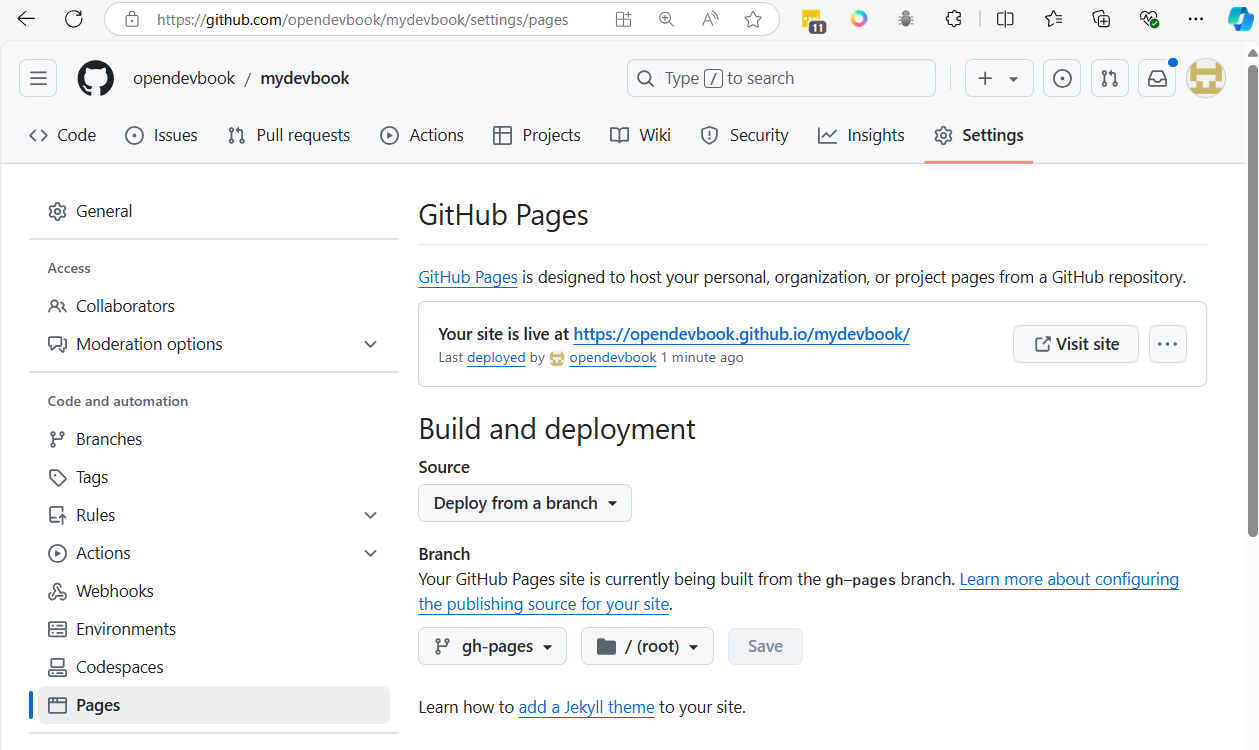
Git will provide link to web
[https://opendevbook.github.io/mydevbook/][https://opendevbook.github.io/mydevbook/]
workshop 3 image proces with opencv on Python project
- Clone project
git clone https://github.com/opendevbook/pathumthani-water-level-api-2.git
- add python environment
cd pathumthani-water-level-api-2
rmdir /s /q .git
python -m venv venv
venv\Scripts\activate
pip install -r requirements.txt
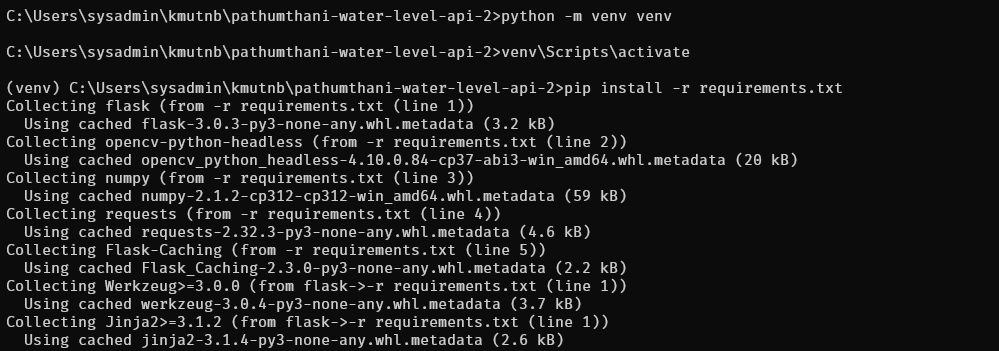
- Start application
python app.py

- Open browser http://127.0.0.1
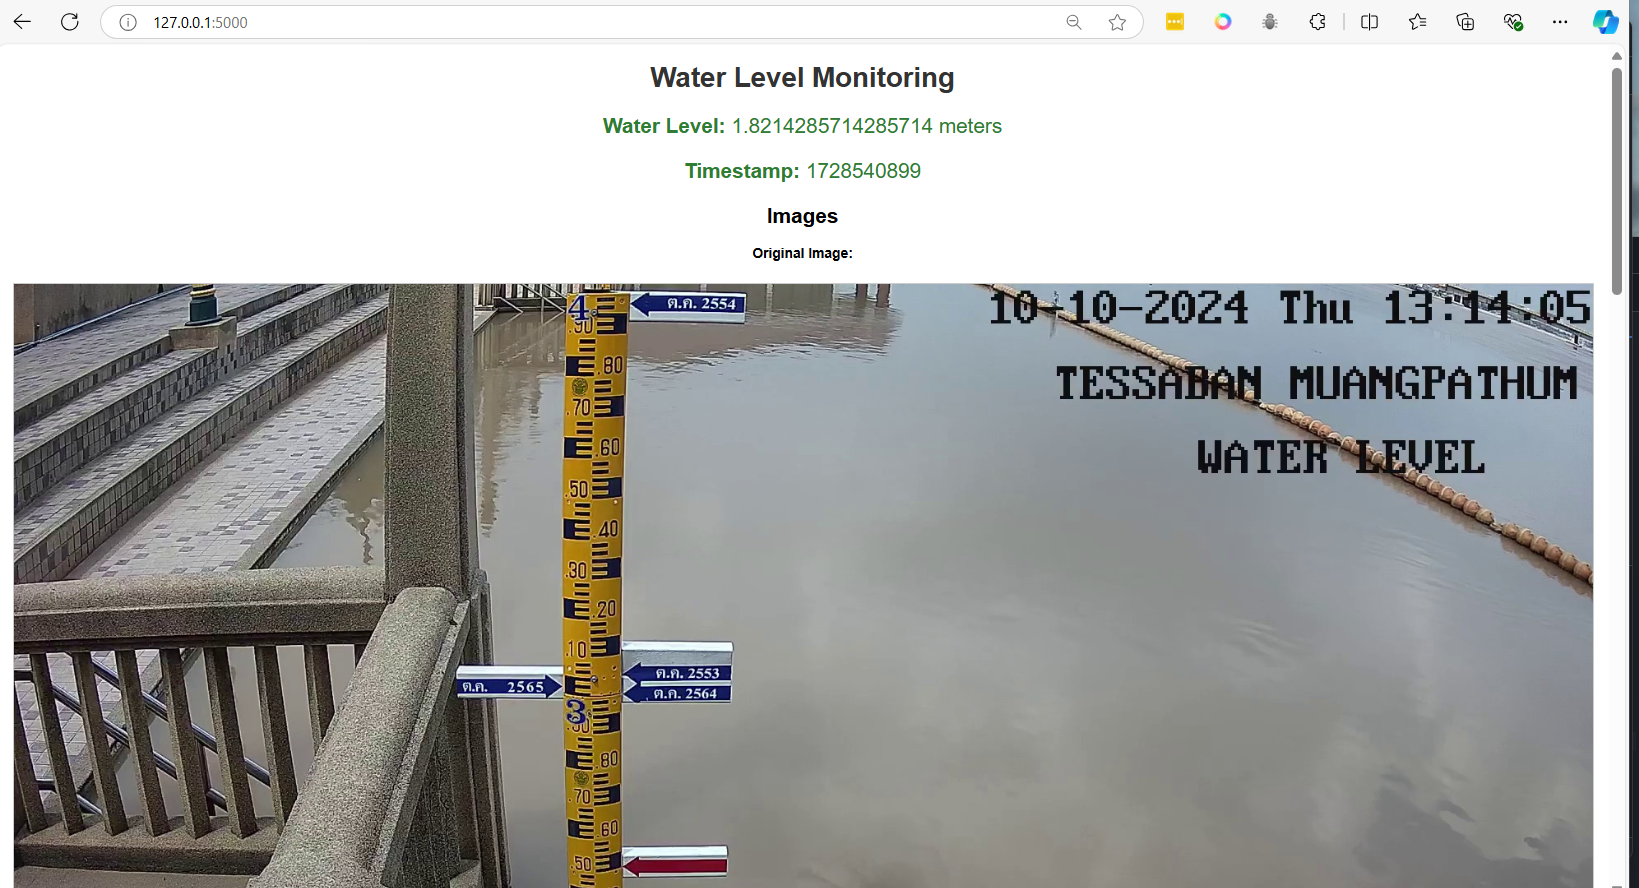
- Open browser http://127.0.0.1/status

change .github/workflows/docker-build.yml
name: Docker Image CI pathumthani-water-level
on:
push:
branches: [ "main" ]
pull_request:
branches: [ "main" ]
jobs:
build:
runs-on: ubuntu-latest
steps:
- uses: actions/checkout@v4
- name: Build the Docker images
run: |
docker build . -t ${{ secrets.DOCKER_HUB_ACCOUNT }}/pathumthani-water-level:latest
- name: Login to Docker Hub
run: |
echo "${{ secrets.DOCKER_HUB_PASSWORD }}" | docker login -u ${{ secrets.DOCKER_HUB_ACCOUNT }} --password-stdin
- name: Push images to Docker Hub
run: |
docker push ${{ secrets.DOCKER_HUB_ACCOUNT }}/pathumthani-water-level:latest