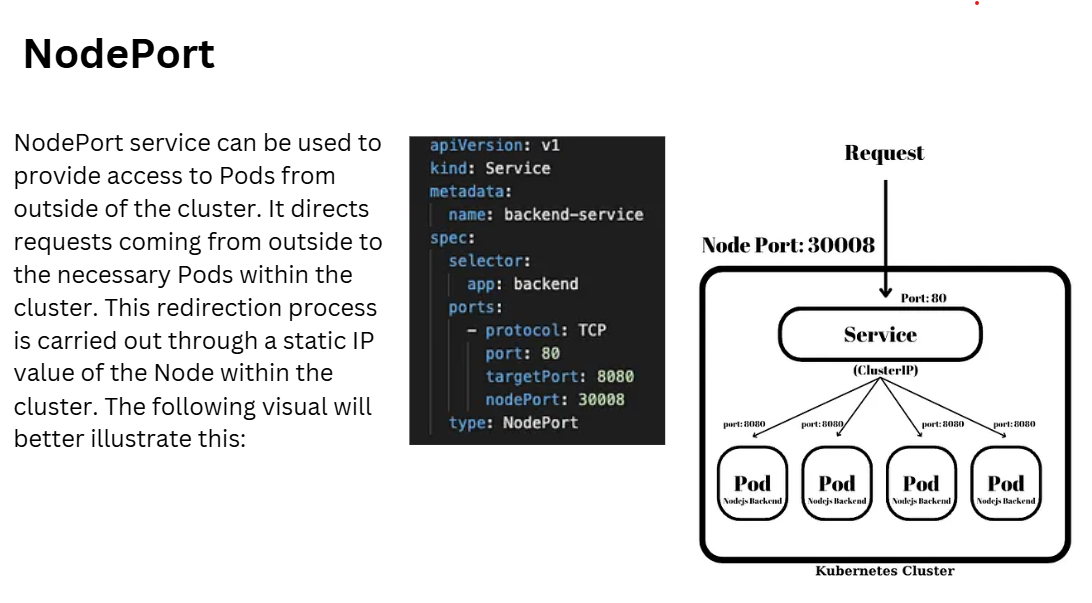
Basic Deployment with NodePort
![]()
Beginners A basic Kubernetes lab setup for beginners to understand how to deploy, scale, and manage applications in a Kubernetes cluster. In this example, we'll deploy an Nginx web server.
Step 1. Prerequisites Ensure you have the following:
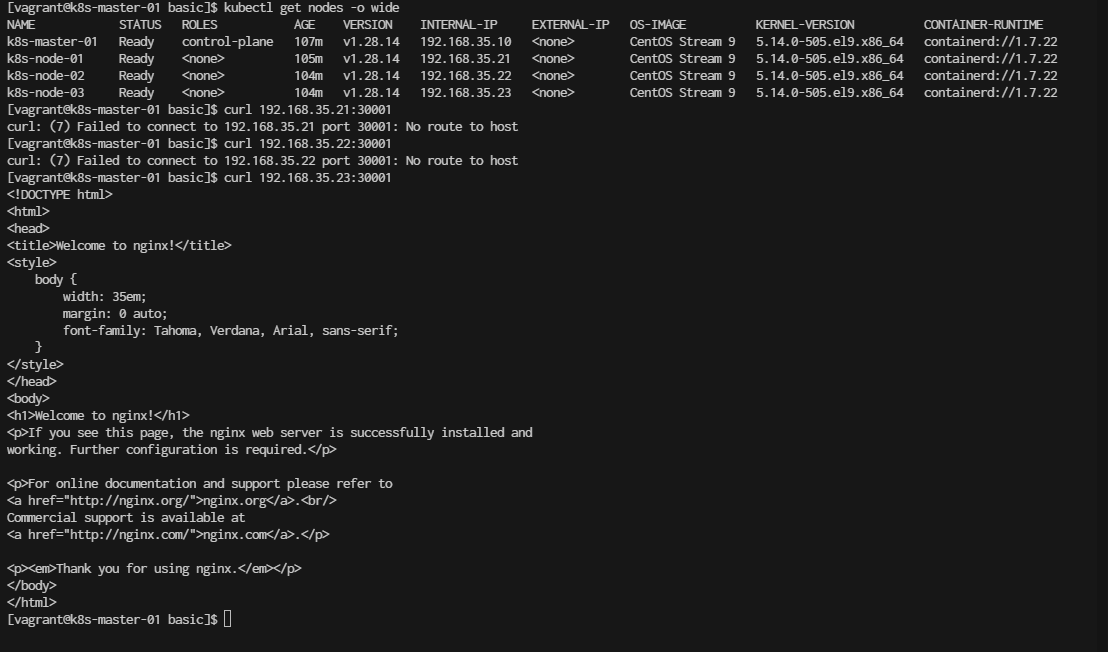
[vagrant@k8s-master-01 basic]$ kubectl  get nodes -o wide
NAME            STATUS   ROLES           AGE     VERSION    INTERNAL-IP     EXTERNAL-IP   OS-IMAGE          KERNEL-VERSION          CONTAINER-RUNTIME
k8s-master-01   NotReady   control-plane   28m     v1.28.13   192.168.35.10   <none>        CentOS Stream 9   5.14.0-503.el9.x86_64   containerd://1.7.21
k8s-node-01     Ready      <none>          9m59s   v1.28.13   192.168.35.21   <none>        CentOS Stream 9   5.14.0-503.el9.x86_64   containerd://1.7.21
k8s-node-02     Ready      <none>          8m16s   v1.28.13   192.168.35.22   <none>        CentOS Stream 9   5.14.0-503.el9.x86_64   containerd://1.7.21
k8s-node-03     Ready      <none>          7m36s   v1.28.13   192.168.35.23   <none>        CentOS Stream 9   5.14.0-503.el9.x86_64   containerd://1.7.21
Result output:

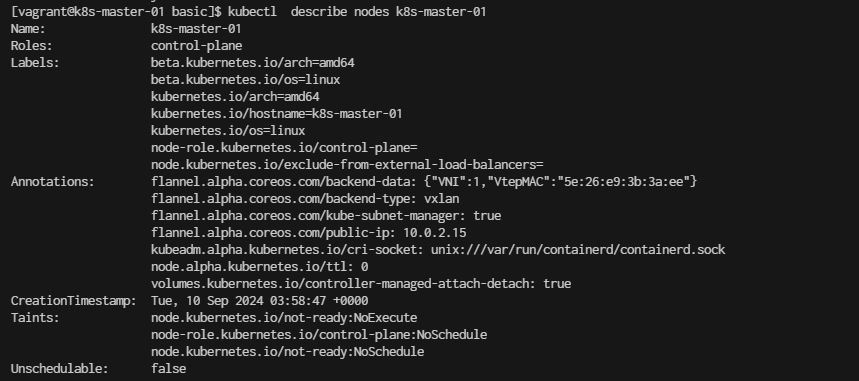
[vagrant@k8s-master-01 basic]$ kubectl describe nodes k8s-master-01
Start workshop 5: Basic Deployment
Step 1. Prepare folder
cd ~
mkdir basic
cd basic
Step 2. Create a Namespace
Namespaces are used to logically separate resources within a Kubernetes cluster. kubectl create namespace my-lab
[vagrant@k8s-master-01 ~]$ kubectl create namespace my-lab
namespace/my-lab created
Step 3. Deploy an Nginx Application We'll create a deployment resource for Nginx, which is a simple web server.
- 3.1 Create a Deployment YAML File Create a file called nginx-deployment.yaml:
cat << EOF | tee nginx-deployment.yaml
apiVersion: apps/v1
kind: Deployment
metadata:
  name: nginx-deployment
  namespace: my-lab
  labels:
    app: nginx
spec:
  replicas: 3
  selector:
    matchLabels:
      app: nginx
  template:
    metadata:
      labels:
        app: nginx
    spec:
      containers:
      - name: nginx
        image: nginx:1.17
        ports:
        - containerPort: 80
EOF
- 3.2 Apply the Deployment
Run the following command to create the Nginx deployment:
kubectl apply -f nginx-deployment.yaml
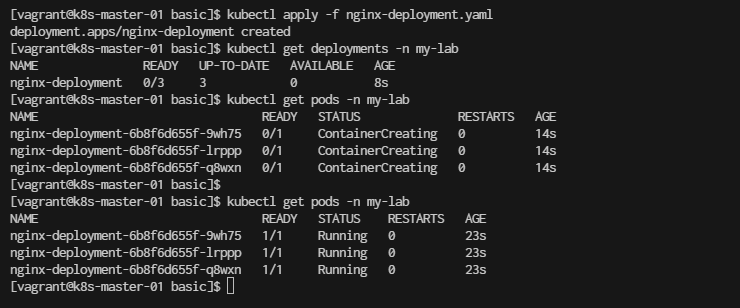
[vagrant@k8s-master-01 basic]$ kubectl apply -f nginx-deployment.yaml
deployment.apps/nginx-deployment created
Verify
[vagrant@k8s-master-01 basic]$ kubectl get deployments -n my-lab

[vagrant@k8s-master-01 basic]$ kubectl get pods -n my-lab
wait until STATUS is Running
Step 4. Next We Expose the Nginx Application Create a Service to expose the Nginx application.
- 4.1 Create a Service YAML File Create a file called nginx-service.yaml:
cat <<EOF |  tee nginx-service.yaml
apiVersion: v1
kind: Service
metadata:
  name: nginx-service
  namespace: my-lab
spec:
  selector:
    app: nginx
  ports:
    - protocol: TCP
      port: 80
      targetPort: 80
  type: NodePort

EOF
- 4.2 Apply the Service
Run the following command to create the service:
kubectl apply -f nginx-service.yaml
[vagrant@k8s-master-01 basic]$ kubectl apply -f nginx-service.yaml
service/nginx-service created
Check the service: kubectl get services -n my-lab
[vagrant@k8s-master-01 basic]$ kubectl get services -n my-lab
[vagrant@k8s-master-01 basic]$ kubectl get services -n my-lab -o wide

- 4.3 Access the Nginx Application Find the NodePort assigned to your service:
[vagrant@k8s-master-01 basic]$ kubectl get svc nginx-service -n my-lab
- From file
nginx-service.yamlport will random select. We will fix nodeport
[vagrant@k8s-master-01 basic]$ kubectl delete -f nginx-service.yaml
create nginx-service-nodeport.yaml fix nodeport 30001
cat <<EOF  | tee nginx-service-nodeport.yaml
apiVersion: v1
kind: Service
metadata:
  name: nginx-nodeport
  namespace: my-lab
spec:
  type: NodePort
  selector:
    app: nginx  # Same selector as in the LoadBalancer service
  ports:
    - protocol: TCP
      port: 80         # Service Port
      targetPort: 80   # Container Port in the nginx pod
      nodePort: 30001  # NodePort for external access
EOF
- apply service
[vagrant@k8s-master-01 basic]$ kubectl apply -f nginx-service-nodeport.yaml

- verify
kubectl get svc
[vagrant@k8s-master-01 basic]$ kubectl get svc nginx-nodeport -n my-lab
[vagrant@k8s-master-01 basic]$ kubectl get svc nginx-nodeport -n my-lab -o wide

You can now access Nginx using your node’s IP and the assigned port:
http://<node-ip>:<node-port>
(try to connect to every node ip)
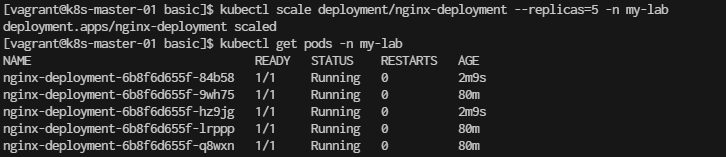
Step 5. Scale the Nginx Deployment You can scale the deployment to run more replicas of Nginx:
[vagrant@k8s-master-01 basic]$ kubectl scale deployment/nginx-deployment --replicas=5 -n my-lab
deployment.apps/nginx-deployment scaled
[vagrant@k8s-master-01 basic]$ kubectl get pods -n my-lab
Result Output:
Step 6. View Nginx Logs
Check the logs of a specific Nginx pod: kubectl logs <nginx-pod-name> -n my-lab
[vagrant@k8s-master-01 basic]$ kubectl logs nginx-deployment-6b8f6d655f-84b58 -n my-lab
Step 7. Clean up, Delete All Resources Once you're done with the lab, you can delete the resources:
[vagrant@k8s-master-01 basic]$ kubectl delete deployment nginx-deployment -n my-lab
deployment.apps "nginx-deployment" deleted

[vagrant@k8s-master-01 basic]$ kubectl delete service nginx-nodeport -n my-lab
service "nginx-nodeport" deleted

[vagrant@k8s-master-01 basic]$ kubectl delete namespace my-lab
namespace "my-lab" deleted
:)