Chapter 1
Infrastructure
vagrantfile
# -*- mode: ruby -*-
# vi: set ft=ruby :
# All Vagrant configuration is done below. The "2" in Vagrant.configure
# configures the configuration version (we support older styles for
# backwards compatibility). Please don't change it unless you know what
# you're doing.
$base=<<-SCRIPT
echo ">>> Run Kubernetes Base script"
echo "-----------------------------------------------"
echo "\nStep-1 Enable ssh password authentication"
echo $(whoami)
sed -i 's/PasswordAuthentication no/PasswordAuthentication yes/g' /etc/ssh/sshd_config
systemctl restart sshd.service
echo "\nStep-2 Enable firewall"
sudo dnf update -y
sudo dnf install -y firewalld socat
sudo systemctl enable --now firewalld
# Step-3 Disable SELinux
echo "\nStep-3 Disable SELinux"
sudo setenforce 0
sudo sed -i 's/^SELINUX=enforcing$/SELINUX=permissive/' /etc/selinux/config
# Step-4 manage kernel module
echo "\nStep-4 manage kernel module"
cat <<EOF | sudo tee /etc/sysctl.d/k8s.conf
net.ipv4.ip_forward = 1
net.bridge.bridge-nf-call-ip6tables = 1
net.bridge.bridge-nf-call-iptables = 1
EOF
sudo "show sysctl -p"
sudo sysctl -p
sudo sysctl --system
# Load kernel module
cat <<EOF | sudo tee /etc/modules-load.d/k8s.conf
overlay
br_netfilter
ip_vs
ip_vs_rr
ip_vs_wrr
ip_vs_sh
EOF
sudo modprobe br_netfilter
sudo modprobe ip_vs
sudo modprobe ip_vs_rr
sudo modprobe ip_vs_wrr
sudo modprobe ip_vs_sh
sudo modprobe overlay
# Step-5: Disable swap permanently
echo "\nStep-5: Disable swap permanently"
sudo swapoff -a
sudo sed -e '/swap/s/^/#/g' -i /etc/fstab
# Step-6: Enable Enable firewall port
echo "\nStep-6: Enable Enable firewall port"
sudo firewall-cmd --zone=public --permanent --add-port=443/tcp
sudo firewall-cmd --zone=public --permanent --add-port=6443/tcp
sudo firewall-cmd --zone=public --permanent --add-port=2379-2380/tcp
sudo firewall-cmd --zone=public --permanent --add-port=10250/tcp
sudo firewall-cmd --zone=public --permanent --add-port=10251/tcp
sudo firewall-cmd --zone=public --permanent --add-port=10252/tcp
sudo firewall-cmd --zone=public --permanent --add-port=10255/tcp
sudo firewall-cmd --zone=public --permanent --add-port=5473/tcp
sudo firewall-cmd --permanent --add-port 10250/tcp --add-port 30000-32767/tcp
# Flannel port
sudo firewall-cmd --permanent --add-port=8472/udp
# Etcd port
sudo firewall-cmd --permanent --add-port=2379-2380/tcp
sudo firewall-cmd --reload
# Step-7: Enable Hostname
echo "Step7 Enable Hostname"
cat <<EOF | sudo tee /etc/hosts
127.0.0.1 localhost localhost.localdomain localhost4 localhost4.localdomain4
::1 localhost localhost.localdomain localhost6 localhost6.localdomain6
127.0.0.1 centos9s.localdomain
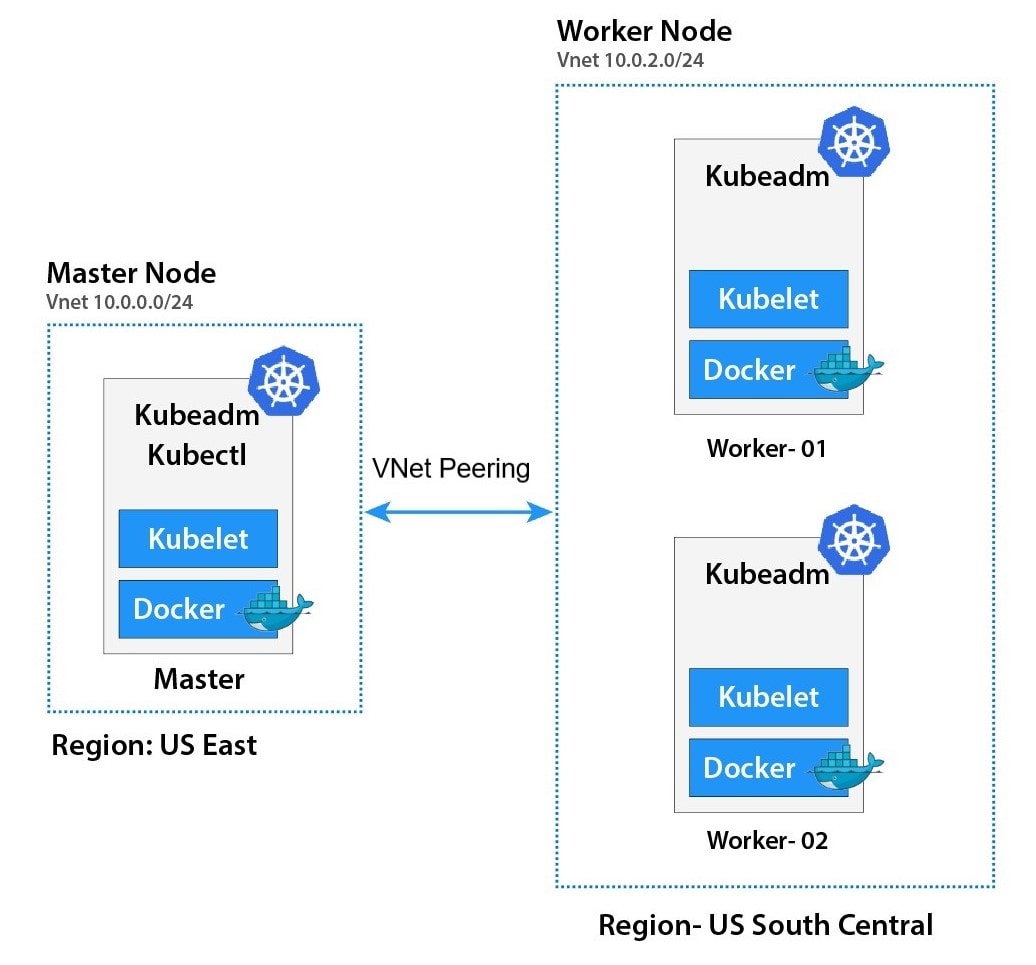
192.168.35.10 k8s-master-01 k8s-master-01
192.168.35.21 k8s-node-01 k8s-node-01
192.168.35.22 k8s-node-02 k8s-node-02
192.168.35.23 k8s-node-03 k8s-node-03
EOF
SCRIPT
$node_crio=<<-SCRIPT
echo ">>> Run Kubernetes node script"
echo "-----------------------------------------------"
echo "\nStep1 Install crio engine"
# Install crio engine
cat <<EOF | sudo tee /etc/yum.repos.d/crio.repo
[cri-o]
name=CRI-O
baseurl=https://pkgs.k8s.io/addons:/cri-o:/prerelease:/main/rpm/
enabled=1
gpgcheck=1
gpgkey=https://pkgs.k8s.io/addons:/cri-o:/prerelease:/main/rpm/repodata/repomd.xml.key
EOF
sudo dnf install -y cri-o
sudo systemctl enable crio --now
sudo systemctl status crio
sudo journalctl -u crio
# Install kubenetest
echo "\nStep2 Install kubenetest"
cat <<EOF | sudo tee /etc/yum.repos.d/kubernetes.repo
[kubernetes]
name=Kubernetes
baseurl=https://pkgs.k8s.io/core:/stable:/v1.28/rpm/
enabled=1
gpgcheck=1
gpgkey=https://pkgs.k8s.io/core:/stable:/v1.28/rpm/repodata/repomd.xml.key
exclude=kubelet kubeadm kubectl cri-tools kubernetes-cni
EOF
sudo dnf install -y kubelet kubeadm kubectl --disableexcludes=kubernetes
sudo systemctl enable --now kubelet
echo "\nRun command: sudo systemctl status kubelet"
sudo systemctl status kubelet
# Enable Bash completion for kubernetes command
source <(kubectl completion bash)
sudo kubectl completion bash | sudo tee /etc/bash_completion.d/kubectl
SCRIPT
$node_containerd=<<-SCRIPT
echo ">>> Run Kubernetes node script"
echo "-----------------------------------------------"
echo "\nStep1 Install containerd engine"
# Install docker engine
sudo dnf config-manager --add-repo=https://download.docker.com/linux/centos/docker-ce.repo
sudo dnf install -y docker-ce docker-ce-cli containerd.io
sudo systemctl enable --now docker
sudo usermod -aG docker vagrant
# install containerd daemon
sudo dnf install -y containerd.io
sudo systemctl enable --now containerd
# Install kubenetest
echo "\nStep2 Install kubenetest"
cat <<EOF | sudo tee /etc/yum.repos.d/kubernetes.repo
[kubernetes]
name=Kubernetes
baseurl=https://pkgs.k8s.io/core:/stable:/v1.28/rpm/
enabled=1
gpgcheck=1
gpgkey=https://pkgs.k8s.io/core:/stable:/v1.28/rpm/repodata/repomd.xml.key
exclude=kubelet kubeadm kubectl cri-tools kubernetes-cni
EOF
sudo dnf install -y kubelet kubeadm kubectl --disableexcludes=kubernetes
sudo systemctl enable --now kubelet
echo "\nRun command: sudo systemctl status kubelet"
sudo systemctl status kubelet
source <(kubectl completion bash)
sudo kubectl completion bash | sudo tee /etc/bash_completion.d/kubectl
echo "\nStep3 Config containerd with systemdCroup"
sudo mv /etc/containerd/config.toml /etc/containerd/config.toml.orgi
sudo containerd config default | sudo tee /etc/containerd/config.toml
sudo sed -i 's/SystemdCgroup = false/SystemdCgroup = true/g' /etc/containerd/config.toml
sudo systemctl restart containerd
sudo systemctl status containerd.service
echo "\mStep4 Test pull and run image"
sudo ctr image pull docker.io/library/hello-world:latest
sudo ctr run --rm docker.io/library/hello-world:latest test
SCRIPT
Vagrant.configure("2") do |config|
# The most common configuration options are documented and commented below.
# For a complete reference, please see the online documentation at
# https://docs.vagrantup.com.
config.vm.box = "generic/centos9s"
config.vm.define "k8s-master-01" do |control|
control.vm.hostname = "k8s-master-01"
control.vm.network "private_network", ip: "192.168.35.10"
control.vm.provider "virtualbox" do |vb|
vb.memory = "4096"
vb.cpus = 4
end
control.vm.provision "shell", inline: $base
control.vm.provision "shell", inline: $node_containerd
end
config.vm.define "k8s-node-01" do |node1|
node1.vm.hostname = "k8s-node-01"
node1.vm.network "private_network", ip: "192.168.35.21"
node1.vm.provider "virtualbox" do |vb|
vb.memory = "2048"
vb.cpus = 2
end
node1.vm.provision "shell", inline: $base
node1.vm.provision "shell", inline: $node_containerd
end
config.vm.define "k8s-node-02" do |node2|
node2.vm.hostname = "k8s-node-02"
node2.vm.network "private_network", ip: "192.168.35.22"
node2.vm.provider "virtualbox" do |vb|
vb.memory = "2048"
vb.cpus = 2
end
node2.vm.provision "shell", inline: $base
node2.vm.provision "shell", inline: $node_containerd
end
config.vm.define "k8s-node-03" do |node3|
node3.vm.hostname = "k8s-node-03"
node3.vm.network "private_network", ip: "192.168.35.23"
node3.vm.provider "virtualbox" do |vb|
vb.memory = "2048"
vb.cpus = 2
end
node3.vm.provision "shell", inline: $base
node3.vm.provision "shell", inline: $node_containerd
end
#config.vm.synced_folder ".", "/vagrant"
end
or Download from Raw Vagrantfile
jump to manual Lab installation
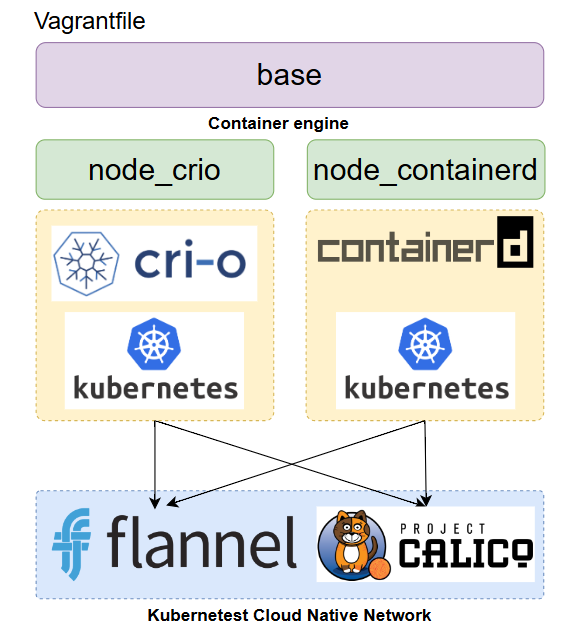
Vagrantfile Structure
- Under picture will explain how Vagrantfile structure for Kubernetest Home lab
Create infrastructure
- vagrantfile in above section seperate script into 2 parts
- base script: For prepare Linux VM (Centos 9 stream) to get ready before install container engine type and kubernetest
- node_crio: Install crio + kubernetest
- node_containerd: Install containerd + kubernetest
after run script then we install kubernetests with kubeamd init and select network (flannel or Calico) in master node. after that we join worker node to master node
Start vagrant up and create snapshot first to save time in development
> vagrant up
> vagrant status
> vagrant halt
> vagrant snapshot save origin_state1
> vagrant snapshot list
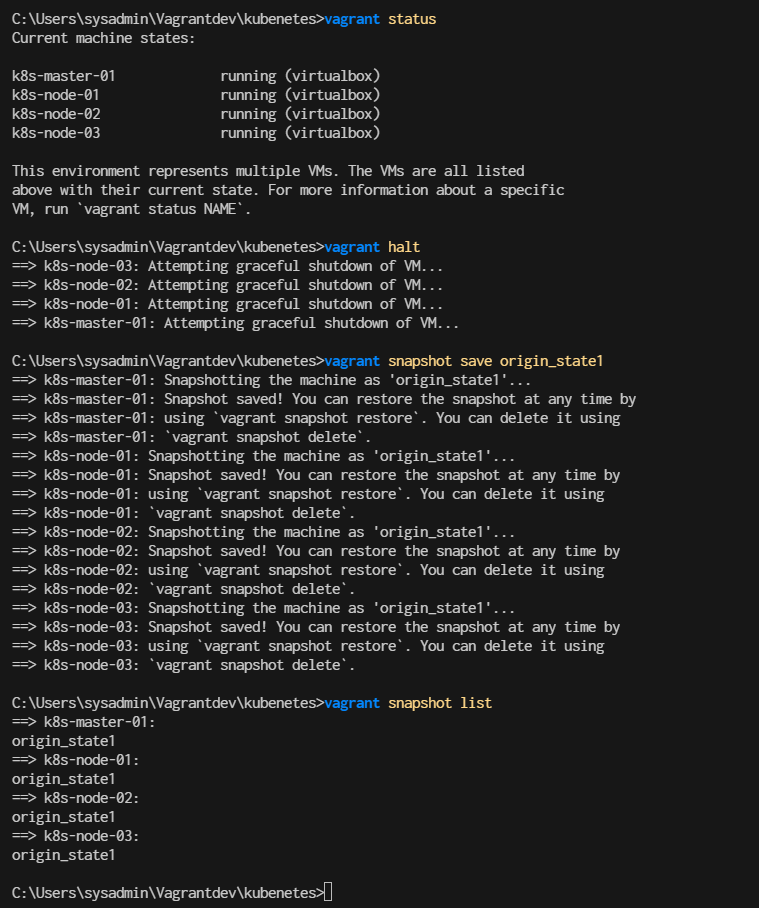
Snapshot technic will help you to setup clean point
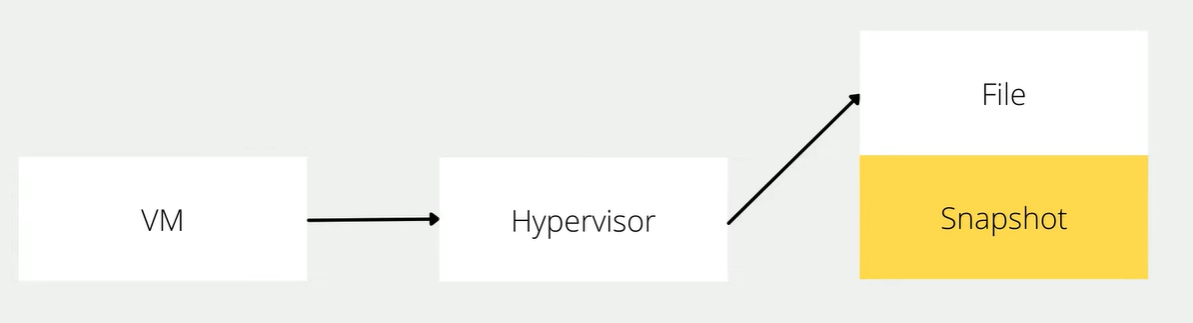
- When we creat snapshot hypervisor will write change in to new files, and when we restore snapshot. hypervision will quickly discard change and get back to when we created our snapshot
- Snapshots provides a method to lock virtual machine data
- After create snapshot we restore snapshot and continue to work
> vagrant snapshot restore origin_state1
jump to manual Lab installation

Explaination in Vagrant ssh script (Every Steps run by vagrant already)
Part 1 Base script
- Base section script to prepare node for kubernetest Step-1 Enable ssh password authentication
sed -i 's/PasswordAuthentication no/PasswordAuthentication yes/g' /etc/ssh/sshd_config
systemctl restart sshd.service
Step-2 Enable firewall
sudo dnf update -y
sudo dnf install -y firewalld socat
sudo systemctl enable --now firewalld
Step-3 Disable SELinux
# Disable Selinux
sudo setenforce 0
sudo sed -i 's/^SELINUX=enforcing$/SELINUX=permissive/' /etc/selinux/config
#Step-4 manage kernel module"
cat <<EOF | sudo /etc/modules-load.d/k8s.conf
overlay
br_netfilter
ip_vs
ip_vs_rr
ip_vs_wrr
ip_vs_sh
EOF
    sudo modprobe br_netfilter
    sudo modprobe ip_vs
    sudo modprobe ip_vs_rr
    sudo modprobe ip_vs_wrr
    sudo modprobe ip_vs_sh
    sudo modprobe overlay
Step-5: Disable swap permanently
# Disable Swap
sudo swapoff -a
sudo sed -i '/ swap / s/^\(.*\)$/#\1/g' /etc/fstab
Step-6: Enable Enable firewall port
sudo firewall-cmd --zone=public --permanent --add-port=443/tcp
sudo firewall-cmd --zone=public --permanent --add-port=6443/tcp
sudo firewall-cmd --zone=public --permanent --add-port=2379-2380/tcp
sudo firewall-cmd --zone=public --permanent --add-port=10250/tcp
sudo firewall-cmd --zone=public --permanent --add-port=10251/tcp
sudo firewall-cmd --zone=public --permanent --add-port=10252/tcp
sudo firewall-cmd --zone=public --permanent --add-port=10255/tcp
sudo firewall-cmd --zone=public --permanent --add-port=5473/tcp
sudo firewall-cmd --permanent --add-port 10250/tcp --add-port 30000-32767/tcp
# Flannel port
sudo firewall-cmd --permanent --add-port=8472/udp
# Etcd port
sudo firewall-cmd --permanent --add-port=2379-2380/tcp
sudo firewall-cmd --reload
Next part we can choose
- node_crio for Crio as Container engine
- node_container for Containerd ad container engine
Next part we can choose
Crio and containerd are both container runtimes used to manage containerized applications, but they have different focuses and use cases. Here's a brief overview of each:
Crio
- Purpose: Crio (Container Runtime Interface Open) is designed to be a lightweight, Kubernetes-native container runtime specifically for running containers in Kubernetes clusters. Its primary focus is to provide a high-performance and stable runtime for Kubernetes without unnecessary overhead.
- Integration: It is tightly integrated with Kubernetes and adheres to the Kubernetes Container Runtime Interface (CRI) specification. This means it can be used as a direct replacement for Docker in Kubernetes environments.
- Features:
- Simplifies the Kubernetes container lifecycle management.
- Supports Kubernetes features like PodSandbox.
- Has a smaller footprint compared to Docker, as it is tailored specifically for Kubernetes.
containerd
- Purpose: containerd is a core component of the container ecosystem that provides a high-level API for managing container lifecycle, including image transfer, container execution, and storage. It's more general-purpose compared to Crio.
- Integration: containerd can be used as the container runtime for Kubernetes but is not limited to it. It can also be used in other contexts, such as standalone container management.
- Features:
- Manages container images and metadata.
- Handles container execution and supervision.
- Supports different image formats and can work with various container runtimes.
- Used as a building block for other container runtimes like Docker and Cri-o.
In summary, Crio is specialized for Kubernetes environments, while containerd provides a more general-purpose container management solution that can be integrated into various container-based systems.
in Vagrantfile need to be select backend of kubernetest by change line in every node
    control.vm.provision "shell", inline: $base
    control.vm.provision "shell", inline: $node_containerd
-or-
    control.vm.provision "shell", inline: $base
    control.vm.provision "shell", inline: $node_crio
- node_crio for Crio as Container engine
- node_container for Containerd ad container engine
node_crio script (Run by Vagrant already)
- Step1 Install crio engine
    # Install crio engine
cat <<EOF | sudo tee /etc/yum.repos.d/crio.repo
[cri-o]
name=CRI-O
baseurl=https://pkgs.k8s.io/addons:/cri-o:/prerelease:/main/rpm/
enabled=1
gpgcheck=1
gpgkey=https://pkgs.k8s.io/addons:/cri-o:/prerelease:/main/rpm/repodata/repomd.xml.key
EOF
    sudo dnf install -y cri-o
    sudo systemctl enable crio --now
    sudo systemctl status crio
    sudo journalctl -u crio
- Step2 Install kubenetest
cat <<EOF | sudo tee /etc/yum.repos.d/kubernetes.repo
[kubernetes]
name=Kubernetes
baseurl=https://pkgs.k8s.io/core:/stable:/v1.28/rpm/
enabled=1
gpgcheck=1
gpgkey=https://pkgs.k8s.io/core:/stable:/v1.28/rpm/repodata/repomd.xml.key
exclude=kubelet kubeadm kubectl cri-tools kubernetes-cni
EOF


    sudo dnf install -y kubelet kubeadm kubectl --disableexcludes=kubernetes
    sudo systemctl enable --now kubelet

    echo "\nRun command: sudo systemctl status kubelet"
    sudo systemctl status kubelet

    source <(kubectl completion bash)
    sudo kubectl completion bash | sudo tee  /etc/bash_completion.d/kubectl
node_containerd script (Run by Vagrant already)
- Step1 Install containerd engine
    sudo dnf config-manager --add-repo=https://download.docker.com/linux/centos/docker-ce.repo
    sudo dnf install -y docker-ce docker-ce-cli containerd.io
    sudo systemctl enable --now docker
    sudo usermod -aG docker vagrant

    # install containerd daemon
    sudo dnf install -y containerd.io
    sudo systemctl enable --now containerd
- Step2 Install kubenetest
    # Install kubenetest
cat <<EOF | sudo tee /etc/yum.repos.d/kubernetes.repo
[kubernetes]
name=Kubernetes
baseurl=https://pkgs.k8s.io/core:/stable:/v1.28/rpm/
enabled=1
gpgcheck=1
gpgkey=https://pkgs.k8s.io/core:/stable:/v1.28/rpm/repodata/repomd.xml.key
exclude=kubelet kubeadm kubectl cri-tools kubernetes-cni
EOF


    sudo dnf install -y kubelet kubeadm kubectl --disableexcludes=kubernetes
    sudo systemctl enable --now kubelet

    echo "\nRun command: sudo systemctl status kubelet"
    sudo systemctl status kubelet

    source <(kubectl completion bash)
    sudo kubectl completion bash | sudo tee  /etc/bash_completion.d/kubectl
- Step3 Config containerd with systemdCroup
    sudo mv /etc/containerd/config.toml  /etc/containerd/config.toml.orgi
    sudo containerd config default | sudo tee /etc/containerd/config.toml
    sudo sed -i 's/SystemdCgroup = false/SystemdCgroup = true/g' /etc/containerd/config.toml

    sudo systemctl restart containerd
    sudo systemctl status containerd.service
- Step4 Test pull and run image
    echo "\mStep4 Test pull and run image"
    sudo ctr image pull docker.io/library/hello-world:latest
    sudo ctr run --rm docker.io/library/hello-world:latest test
Kubernetest Firewall (For Reading)
- Kubernetes uses following service ports at Master node. Therefore, you need to allow these service ports in Linux firewall.
| Port | Protocol | Purpose |
|---|---|---|
| 6443 | TCP | Kubernetes API server |
| 2379-2380 | TCP | etcd server client API |
| 10250 | TCP | Kubelet API |
| 10251 | TCP | kube-scheduler |
| 10252 | TCP | kube-controller-manager |
| 8472 | TCP | Flannel |
Here's a brief explanation of the ports and protocols related to Kubernetes components:
-
6443/TCP: This is the Kubernetes API server port. It is the main entry point for all REST commands used to control the cluster.
-
2379-2380/TCP: These ports are used by the etcd server client API. etcd is a distributed key-value store that Kubernetes uses to store all its cluster data.
-
10250/TCP: This port is for the Kubelet API. The Kubelet is responsible for managing individual nodes in the Kubernetes cluster and communicates with the API server.
-
10251/TCP: This port is used by the kube-scheduler. The scheduler is responsible for deciding which nodes will host newly created Pods.
-
10252/TCP: This port is for the kube-controller-manager. The controller manager is responsible for managing the various controllers that regulate the state of the cluster.
-
8472 (UDP): Flannel VXLAN traffic
-
2379-2380 (TCP): etcd (if applicable)
Start
## Manual install will Start Here
Run only in k8s-master-01
- First Check kubelet
$ sudo systemctl status kubelet.service
- use kubeadm init to create control plain.
- pull image
- create cluster
$ sudo kubeadm config images pull

$ sudo kubeadm init \
  --control-plane-endpoint=192.168.35.10 \
  --pod-network-cidr=10.244.0.0/16 \
  --apiserver-advertise-address=192.168.35.10
-
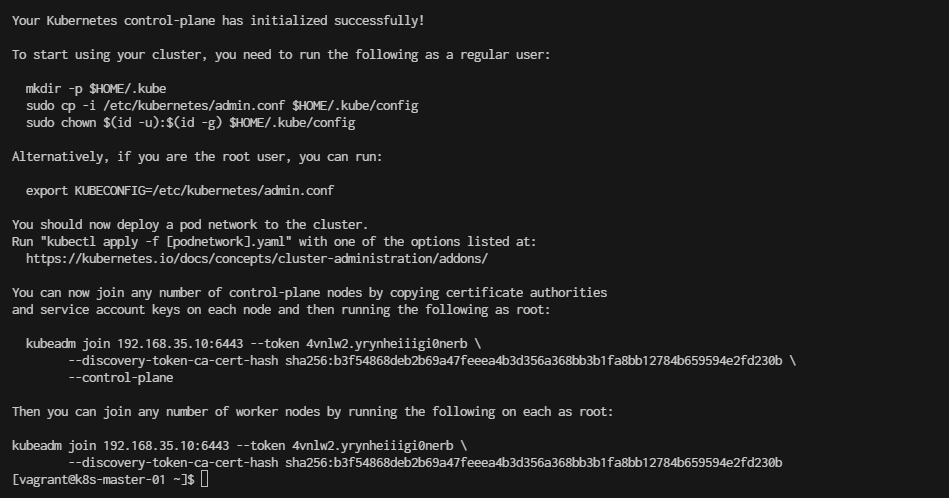
For flannel to work correctly, you must pass --pod-network-cidr=10.244.0.0/16 to kubeadm init. Result Screen:
-
Run as vagrant use or normal user. we need to copy file admin.conf to vagrant use,, by run command
mkdir -p $HOME/.kube
sudo cp -i /etc/kubernetes/admin.conf /home/vagrant/.kube/config
sudo chown $(id -u vagrant):$(id -g vagrant) /home/vagrant/.kube/config
- Note: Regenerate again when everv you want to create join string. we can copy result from previous images or run follow command every time you needed, Recommand copy from result to nodepad
- Run result show onscreen
sudo kubeadm token create --print-join-command
- Run result save to file and scp copy over to node
sudo kubeadm token create --print-join-command  > kubeadm_join_cmd.sh
scp kubeadm_join_cmd.sh  vagrant@192.168.33.21
scp kubeadm_join_cmd.sh  vagrant@192.168.33.22
scp kubeadm_join_cmd.sh  vagrant@192.168.33.23
- Run Command
kubectl get nodes
kubectl  get nodes
NAME            STATUS     ROLES           AGE     VERSION
k8s-master-01   NotReady   control-plane   4m15s   v1.28.13
- Test get nodes (server)
$ kubectl get nodes -o wide
- Test get componentstatus
$ kubectl get componentstatus
- Test Cluster-info
$ kubectl cluster-info
Install Pod network flannel
Install a Pod Network Addon: You need to deploy a network plugin that matches the --pod-network-cidr you specified. For Flannel, you can apply the Flannel YAML file:
$ kubectl apply -f https://raw.githubusercontent.com/flannel-io/flannel/master/Documentation/kube-flannel.yml

namespace/kube-flannel created
serviceaccount/flannel created
clusterrole.rbac.authorization.k8s.io/flannel created
clusterrolebinding.rbac.authorization.k8s.io/flannel created
configmap/kube-flannel-cfg created
daemonset.apps/kube-flannel-ds created
Check master node after add flannel
[vagrant@k8s-master-01 ~]$ kubectl get daemonset kube-flannel-ds -n kube-flannel
Add Kubernetes node workload to master
now our master node is already runing
- Then you can join any number of worker nodes by running the following on each as root:
- Run command in k8s-node-01,k8s-node-02,k8s-node-03
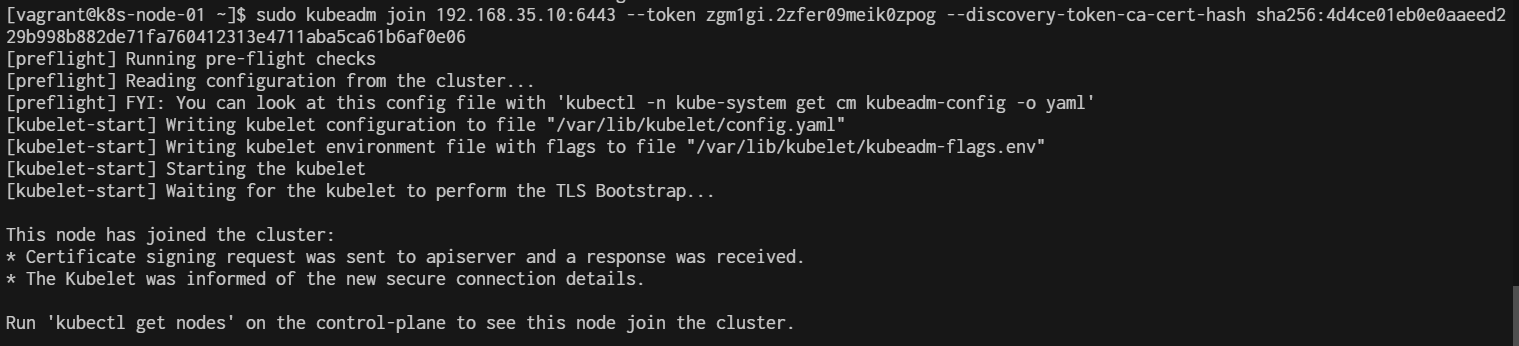
Now Join Cluster with kubeadm join
- Vagrant ssh to k8s-node-01 ( Repeat this stop in k8s-node-02, k8s-node-03)
$ vagrant ssh k8s-node-01
- Run Join
sudo kubeadm join 192.168.35.10:6443 --token qe6ayo.xg49osbs08nwddi9 \
        --discovery-token-ca-cert-hash sha256:dd83a4c4dc1f95f33ccfb705fe1d16aa68f63102b145603ce6c9bc83b3fcad5f
Repeat in k8s-node-02, k8s-node-03
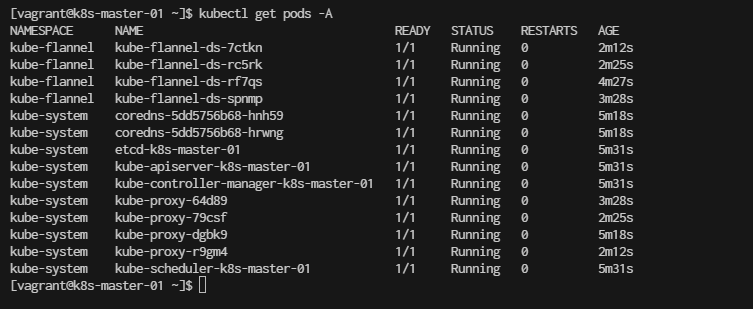
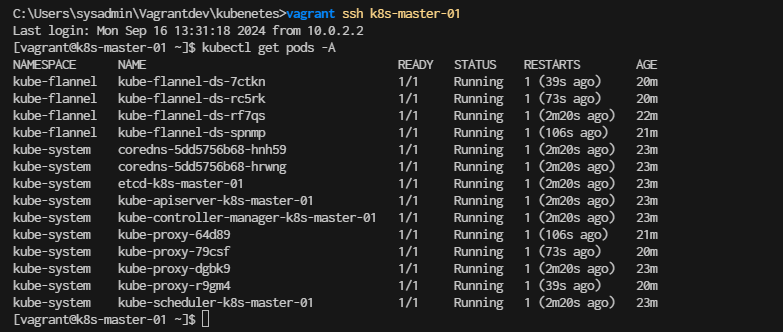
Verify pods After join Worker node
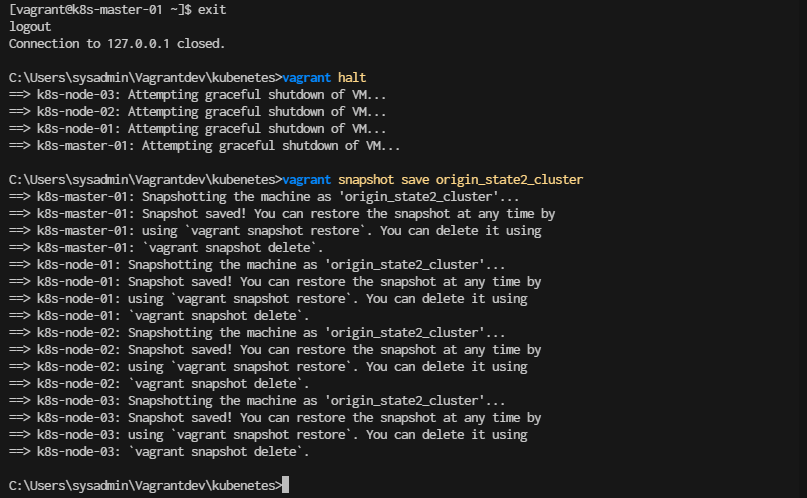
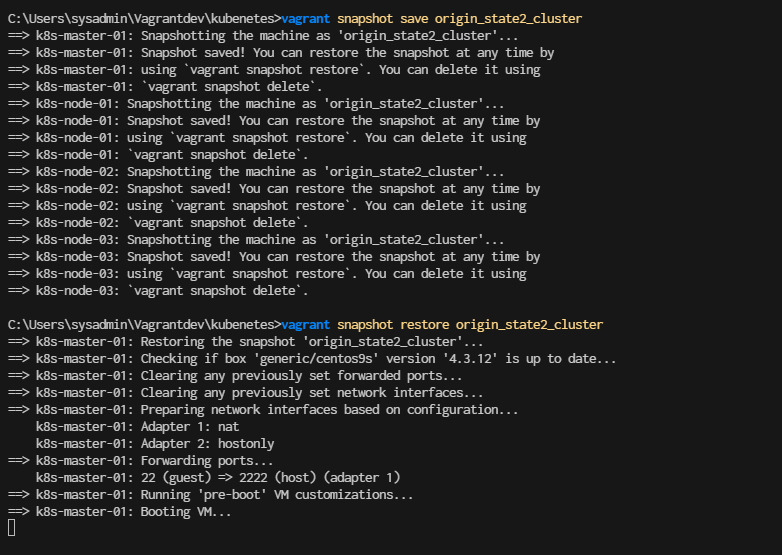
Consider to Save State of Cluster
exit from master node again the stop all node
[vagrant@k8s-master-01 ~]$ exit

> vagrant halt
> vagrant snapshot save origin_state2_cluster
Restore Cluster and continue to run mext lab
- add this point of snapshot is clean kubernetes cluster
> vagrant snapshot restore origin_state2_cluster
Check kubernetes cluster help
Chapter 1
Infrastructure
vagrantfile
# -*- mode: ruby -*-
# vi: set ft=ruby :

# All Vagrant configuration is done below. The "2" in Vagrant.configure
# configures the configuration version (we support older styles for
# backwards compatibility). Please don't change it unless you know what
# you're doing.

$base=<<-SCRIPT
    echo ">>> Run Kubernetes Base script"
    echo "-----------------------------------------------"
    echo "\nStep-1 Enable ssh password authentication"
    echo $(whoami)
    sed -i 's/PasswordAuthentication no/PasswordAuthentication yes/g' /etc/ssh/sshd_config
    systemctl restart sshd.service
    echo "\nStep-2 Enable firewall"
    sudo dnf update -y
    sudo dnf install -y firewalld socat
    sudo systemctl enable --now firewalld

    # Step-3 Disable SELinux
    echo "\nStep-3 Disable SELinux"
    sudo setenforce 0
    sudo sed -i 's/^SELINUX=enforcing$/SELINUX=permissive/' /etc/selinux/config


    # Step-4 manage kernel module
    echo "\nStep-4 manage kernel module"
cat <<EOF | sudo tee /etc/sysctl.d/k8s.conf
net.ipv4.ip_forward = 1
net.bridge.bridge-nf-call-ip6tables = 1
net.bridge.bridge-nf-call-iptables = 1
EOF

    sudo "show sysctl -p"
    sudo sysctl -p
    sudo sysctl --system

    # Load kernel module
cat <<EOF | sudo tee /etc/modules-load.d/k8s.conf
overlay
br_netfilter
ip_vs
ip_vs_rr
ip_vs_wrr
ip_vs_sh
EOF
    sudo modprobe br_netfilter
    sudo modprobe ip_vs
    sudo modprobe ip_vs_rr
    sudo modprobe ip_vs_wrr
    sudo modprobe ip_vs_sh
    sudo modprobe overlay

    # Step-5: Disable swap permanently
    echo "\nStep-5: Disable swap permanently"
    sudo swapoff -a
    sudo sed -e '/swap/s/^/#/g' -i /etc/fstab

    # Step-6: Enable Enable firewall port
    echo "\nStep-6: Enable Enable firewall port"
    sudo firewall-cmd --zone=public --permanent --add-port=443/tcp
    sudo firewall-cmd --zone=public --permanent --add-port=6443/tcp
    sudo firewall-cmd --zone=public --permanent --add-port=2379-2380/tcp
    sudo firewall-cmd --zone=public --permanent --add-port=10250/tcp
    sudo firewall-cmd --zone=public --permanent --add-port=10251/tcp
    sudo firewall-cmd --zone=public --permanent --add-port=10252/tcp
    sudo firewall-cmd --zone=public --permanent --add-port=10255/tcp
    sudo firewall-cmd --zone=public --permanent --add-port=5473/tcp
    sudo firewall-cmd --permanent --add-port 10250/tcp --add-port 30000-32767/tcp

    # Flannel port
    sudo firewall-cmd --permanent --add-port=8472/udp
    # Etcd port
    sudo firewall-cmd --permanent --add-port=2379-2380/tcp
    sudo firewall-cmd --reload


    # Step-7: Enable Hostname

    echo "Step7 Enable Hostname"
cat <<EOF | sudo tee /etc/hosts
127.0.0.1   localhost localhost.localdomain localhost4 localhost4.localdomain4
::1         localhost localhost.localdomain localhost6 localhost6.localdomain6

127.0.0.1 centos9s.localdomain

192.168.35.10  k8s-master-01 k8s-master-01
192.168.35.21  k8s-node-01  k8s-node-01
192.168.35.22  k8s-node-02  k8s-node-02
192.168.35.23  k8s-node-03  k8s-node-03
EOF

SCRIPT


$node_crio=<<-SCRIPT
    echo ">>> Run Kubernetes node script"
    echo "-----------------------------------------------"
    echo "\nStep1 Install crio engine"
    # Install crio engine
cat <<EOF | sudo tee /etc/yum.repos.d/crio.repo
[cri-o]
name=CRI-O
baseurl=https://pkgs.k8s.io/addons:/cri-o:/prerelease:/main/rpm/
enabled=1
gpgcheck=1
gpgkey=https://pkgs.k8s.io/addons:/cri-o:/prerelease:/main/rpm/repodata/repomd.xml.key
EOF
    sudo dnf install -y cri-o
    sudo systemctl enable crio --now
    sudo systemctl status crio
    sudo journalctl -u crio

    # Install kubenetest
    echo "\nStep2 Install kubenetest"
cat <<EOF | sudo tee /etc/yum.repos.d/kubernetes.repo
[kubernetes]
name=Kubernetes
baseurl=https://pkgs.k8s.io/core:/stable:/v1.28/rpm/
enabled=1
gpgcheck=1
gpgkey=https://pkgs.k8s.io/core:/stable:/v1.28/rpm/repodata/repomd.xml.key
exclude=kubelet kubeadm kubectl cri-tools kubernetes-cni
EOF


    sudo dnf install -y kubelet kubeadm kubectl --disableexcludes=kubernetes
    sudo systemctl enable --now kubelet

    echo "\nRun command: sudo systemctl status kubelet"
    sudo systemctl status kubelet

    # Enable Bash completion for kubernetes command
    source <(kubectl completion bash)
    sudo kubectl completion bash | sudo tee  /etc/bash_completion.d/kubectl
SCRIPT

$node_containerd=<<-SCRIPT
    echo ">>> Run Kubernetes node script"
    echo "-----------------------------------------------"
    echo "\nStep1 Install containerd engine"
    # Install docker engine
    sudo dnf config-manager --add-repo=https://download.docker.com/linux/centos/docker-ce.repo
    sudo dnf install -y docker-ce docker-ce-cli containerd.io
    sudo systemctl enable --now docker
    sudo usermod -aG docker vagrant

    # install containerd daemon
    sudo dnf install -y containerd.io
    sudo systemctl enable --now containerd

    # Install kubenetest
    echo "\nStep2 Install kubenetest"
cat <<EOF | sudo tee /etc/yum.repos.d/kubernetes.repo
[kubernetes]
name=Kubernetes
baseurl=https://pkgs.k8s.io/core:/stable:/v1.28/rpm/
enabled=1
gpgcheck=1
gpgkey=https://pkgs.k8s.io/core:/stable:/v1.28/rpm/repodata/repomd.xml.key
exclude=kubelet kubeadm kubectl cri-tools kubernetes-cni
EOF


    sudo dnf install -y kubelet kubeadm kubectl --disableexcludes=kubernetes
    sudo systemctl enable --now kubelet

    echo "\nRun command: sudo systemctl status kubelet"
    sudo systemctl status kubelet

    source <(kubectl completion bash)
    sudo kubectl completion bash | sudo tee  /etc/bash_completion.d/kubectl

    echo "\nStep3 Config containerd with systemdCroup"
    sudo mv /etc/containerd/config.toml  /etc/containerd/config.toml.orgi
    sudo containerd config default | sudo tee /etc/containerd/config.toml
    sudo sed -i 's/SystemdCgroup = false/SystemdCgroup = true/g' /etc/containerd/config.toml

    sudo systemctl restart containerd
    sudo systemctl status containerd.service
    echo "\mStep4 Test pull and run image"
    sudo ctr image pull docker.io/library/hello-world:latest
    sudo ctr run --rm docker.io/library/hello-world:latest test
SCRIPT

Vagrant.configure("2") do |config|
  # The most common configuration options are documented and commented below.
  # For a complete reference, please see the online documentation at
  # https://docs.vagrantup.com.
  config.vm.box = "generic/centos9s"

  config.vm.define "k8s-master-01" do |control|
    control.vm.hostname = "k8s-master-01"
    control.vm.network "private_network", ip: "192.168.35.10"
    control.vm.provider "virtualbox" do |vb|
      vb.memory = "4096"
      vb.cpus = 4
    end

    control.vm.provision "shell", inline: $base
    control.vm.provision "shell", inline: $node_containerd
  end

  config.vm.define "k8s-node-01" do |node1|
    node1.vm.hostname = "k8s-node-01"
    node1.vm.network "private_network", ip: "192.168.35.21"
    node1.vm.provider "virtualbox" do |vb|
      vb.memory = "2048"
      vb.cpus = 2
    end

    node1.vm.provision "shell", inline: $base
    node1.vm.provision "shell", inline: $node_containerd
  end

  config.vm.define "k8s-node-02" do |node2|
    node2.vm.hostname = "k8s-node-02"
    node2.vm.network "private_network", ip: "192.168.35.22"
    node2.vm.provider "virtualbox" do |vb|
      vb.memory = "2048"
      vb.cpus = 2
    end
    node2.vm.provision "shell", inline: $base
    node2.vm.provision "shell", inline: $node_containerd
  end

  config.vm.define "k8s-node-03" do |node3|
    node3.vm.hostname = "k8s-node-03"
    node3.vm.network "private_network", ip: "192.168.35.23"
    node3.vm.provider "virtualbox" do |vb|
      vb.memory = "2048"
      vb.cpus = 2
    end
    node3.vm.provision "shell", inline: $base
    node3.vm.provision "shell", inline: $node_containerd
  end

  #config.vm.synced_folder ".", "/vagrant"


end
or Download from Raw Vagrantfile
jump to manual Lab installation
Vagrantfile Structure
- Under picture will explain how Vagrantfile structure for Kubernetest Home lab
Create infrastructure
- vagrantfile in above section seperate script into 2 parts
- base script: For prepare Linux VM (Centos 9 stream) to get ready before install container engine type and kubernetest
- node_crio: Install crio + kubernetest
- node_containerd: Install containerd + kubernetest
after run script then we install kubernetests with kubeamd init and select network (flannel or Calico) in master node. after that we join worker node to master node
Start vagrant up and create snapshot first to save time in development
> vagrant up
> vagrant status
> vagrant halt
> vagrant snapshot save origin_state1
> vagrant snapshot list
Snapshot technic will help you to setup clean point
- When we creat snapshot hypervisor will write change in to new files, and when we restore snapshot. hypervision will quickly discard change and get back to when we created our snapshot
- Snapshots provides a method to lock virtual machine data
- After create snapshot we restore snapshot and continue to work
> vagrant snapshot restore origin_state1
jump to manual Lab installation
Explaination in Vagrant ssh script (Every run by vagrant already)
Part 1 Base script
- Base section script to prepare node for kubernetest Step-1 Enable ssh password authentication
sed -i 's/PasswordAuthentication no/PasswordAuthentication yes/g' /etc/ssh/sshd_config
systemctl restart sshd.service
Step-2 Enable firewall
sudo dnf update -y
sudo dnf install -y firewalld socat
sudo systemctl enable --now firewalld
Step-3 Disable SELinux
# Disable Selinux
sudo setenforce 0
sudo sed -i 's/^SELINUX=enforcing$/SELINUX=permissive/' /etc/selinux/config
#Step-4 manage kernel module"
cat <<EOF | sudo /etc/modules-load.d/k8s.conf
overlay
br_netfilter
ip_vs
ip_vs_rr
ip_vs_wrr
ip_vs_sh
EOF
    sudo modprobe br_netfilter
    sudo modprobe ip_vs
    sudo modprobe ip_vs_rr
    sudo modprobe ip_vs_wrr
    sudo modprobe ip_vs_sh
    sudo modprobe overlay
Step-5: Disable swap permanently
# Disable Swap
sudo swapoff -a
sudo sed -i '/ swap / s/^\(.*\)$/#\1/g' /etc/fstab
Step-6: Enable Enable firewall port
sudo firewall-cmd --zone=public --permanent --add-port=443/tcp
sudo firewall-cmd --zone=public --permanent --add-port=6443/tcp
sudo firewall-cmd --zone=public --permanent --add-port=2379-2380/tcp
sudo firewall-cmd --zone=public --permanent --add-port=10250/tcp
sudo firewall-cmd --zone=public --permanent --add-port=10251/tcp
sudo firewall-cmd --zone=public --permanent --add-port=10252/tcp
sudo firewall-cmd --zone=public --permanent --add-port=10255/tcp
sudo firewall-cmd --zone=public --permanent --add-port=5473/tcp
sudo firewall-cmd --permanent --add-port 10250/tcp --add-port 30000-32767/tcp
# Flannel port
sudo firewall-cmd --permanent --add-port=8472/udp
# Etcd port
sudo firewall-cmd --permanent --add-port=2379-2380/tcp
sudo firewall-cmd --reload
Next part we can choose
Crio and containerd are both container runtimes used to manage containerized applications, but they have different focuses and use cases. Here's a brief overview of each:
Crio
- Purpose: Crio (Container Runtime Interface Open) is designed to be a lightweight, Kubernetes-native container runtime specifically for running containers in Kubernetes clusters. Its primary focus is to provide a high-performance and stable runtime for Kubernetes without unnecessary overhead.
- Integration: It is tightly integrated with Kubernetes and adheres to the Kubernetes Container Runtime Interface (CRI) specification. This means it can be used as a direct replacement for Docker in Kubernetes environments.
- Features:
- Simplifies the Kubernetes container lifecycle management.
- Supports Kubernetes features like PodSandbox.
- Has a smaller footprint compared to Docker, as it is tailored specifically for Kubernetes.
containerd
- Purpose: containerd is a core component of the container ecosystem that provides a high-level API for managing container lifecycle, including image transfer, container execution, and storage. It's more general-purpose compared to Crio.
- Integration: containerd can be used as the container runtime for Kubernetes but is not limited to it. It can also be used in other contexts, such as standalone container management.
- Features:
- Manages container images and metadata.
- Handles container execution and supervision.
- Supports different image formats and can work with various container runtimes.
- Used as a building block for other container runtimes like Docker and Cri-o.
In summary, Crio is specialized for Kubernetes environments, while containerd provides a more general-purpose container management solution that can be integrated into various container-based systems.
in Vagrantfile need to be select backend of kubernetest by change line in every node
    control.vm.provision "shell", inline: $base
    control.vm.provision "shell", inline: $node_containerd
-or-
    control.vm.provision "shell", inline: $base
    control.vm.provision "shell", inline: $node_crio
- node_crio for Crio as Container engine
- node_container for Containerd ad container engine
node_crio script (Run by Vagrant already)
- Step1 Install crio engine
    # Install crio engine
cat <<EOF | sudo tee /etc/yum.repos.d/crio.repo
[cri-o]
name=CRI-O
baseurl=https://pkgs.k8s.io/addons:/cri-o:/prerelease:/main/rpm/
enabled=1
gpgcheck=1
gpgkey=https://pkgs.k8s.io/addons:/cri-o:/prerelease:/main/rpm/repodata/repomd.xml.key
EOF
    sudo dnf install -y cri-o
    sudo systemctl enable crio --now
    sudo systemctl status crio
    sudo journalctl -u crio
- Step2 Install kubenetest
cat <<EOF | sudo tee /etc/yum.repos.d/kubernetes.repo
[kubernetes]
name=Kubernetes
baseurl=https://pkgs.k8s.io/core:/stable:/v1.28/rpm/
enabled=1
gpgcheck=1
gpgkey=https://pkgs.k8s.io/core:/stable:/v1.28/rpm/repodata/repomd.xml.key
exclude=kubelet kubeadm kubectl cri-tools kubernetes-cni
EOF


    sudo dnf install -y kubelet kubeadm kubectl --disableexcludes=kubernetes
    sudo systemctl enable --now kubelet

    echo "\nRun command: sudo systemctl status kubelet"
    sudo systemctl status kubelet

    source <(kubectl completion bash)
    sudo kubectl completion bash | sudo tee  /etc/bash_completion.d/kubectl
node_containerd script (Run by Vagrant already)
- Step1 Install containerd engine
    sudo dnf config-manager --add-repo=https://download.docker.com/linux/centos/docker-ce.repo
    sudo dnf install -y docker-ce docker-ce-cli containerd.io
    sudo systemctl enable --now docker
    sudo usermod -aG docker vagrant

    # install containerd daemon
    sudo dnf install -y containerd.io
    sudo systemctl enable --now containerd
- Step2 Install kubenetest
    # Install kubenetest
cat <<EOF | sudo tee /etc/yum.repos.d/kubernetes.repo
[kubernetes]
name=Kubernetes
baseurl=https://pkgs.k8s.io/core:/stable:/v1.28/rpm/
enabled=1
gpgcheck=1
gpgkey=https://pkgs.k8s.io/core:/stable:/v1.28/rpm/repodata/repomd.xml.key
exclude=kubelet kubeadm kubectl cri-tools kubernetes-cni
EOF


    sudo dnf install -y kubelet kubeadm kubectl --disableexcludes=kubernetes
    sudo systemctl enable --now kubelet

    echo "\nRun command: sudo systemctl status kubelet"
    sudo systemctl status kubelet

    source <(kubectl completion bash)
    sudo kubectl completion bash | sudo tee  /etc/bash_completion.d/kubectl
- Step3 Config containerd with systemdCroup
    sudo mv /etc/containerd/config.toml  /etc/containerd/config.toml.orgi
    sudo containerd config default | sudo tee /etc/containerd/config.toml
    sudo sed -i 's/SystemdCgroup = false/SystemdCgroup = true/g' /etc/containerd/config.toml

    sudo systemctl restart containerd
    sudo systemctl status containerd.service
- Step4 Test pull and run image
    echo "\mStep4 Test pull and run image"
    sudo ctr image pull docker.io/library/hello-world:latest
    sudo ctr run --rm docker.io/library/hello-world:latest test
Kubernetest Firewall (For Reading)
- Kubernetes uses following service ports at Master node. Therefore, you need to allow these service ports in Linux firewall.
| Port | Protocol | Purpose |
|---|---|---|
| 6443 | TCP | Kubernetes API server |
| 2379-2380 | TCP | etcd server client API |
| 10250 | TCP | Kubelet API |
| 10251 | TCP | kube-scheduler |
| 10252 | TCP | kube-controller-manager |
| 8472 | TCP | Flannel |
Here's a brief explanation of the ports and protocols related to Kubernetes components:
-
6443/TCP: This is the Kubernetes API server port. It is the main entry point for all REST commands used to control the cluster.
-
2379-2380/TCP: These ports are used by the etcd server client API. etcd is a distributed key-value store that Kubernetes uses to store all its cluster data.
-
10250/TCP: This port is for the Kubelet API. The Kubelet is responsible for managing individual nodes in the Kubernetes cluster and communicates with the API server.
-
10251/TCP: This port is used by the kube-scheduler. The scheduler is responsible for deciding which nodes will host newly created Pods.
-
10252/TCP: This port is for the kube-controller-manager. The controller manager is responsible for managing the various controllers that regulate the state of the cluster.
-
8472 (UDP): Flannel VXLAN traffic
-
2379-2380 (TCP): etcd (if applicable)
Congratuation!! Next part we will install kubenetest Cluster
 https://github.com/kubernetes/kubeadm
Start
Manual install will Start Here
Run only in k8s-master-01
- First Check kubelet
$ sudo systemctl status kubelet.service
- use kubeadm init to create control plain.
- pull image
- create cluster
$ sudo kubeadm config images pull
$ sudo kubeadm init \
  --control-plane-endpoint=192.168.35.10 \
  --pod-network-cidr=10.244.0.0/16 \
  --apiserver-advertise-address=192.168.35.10
-
For flannel to work correctly, you must pass --pod-network-cidr=10.244.0.0/16 to kubeadm init. Result Screen:
-
Run as vagrant use or normal user. we need to copy file admin.conf to vagrant use,, by run command
mkdir -p $HOME/.kube
sudo cp -i /etc/kubernetes/admin.conf /home/vagrant/.kube/config
sudo chown $(id -u vagrant):$(id -g vagrant) /home/vagrant/.kube/config
- Note: Regenerate again when everv you want to create join string. we can copy result from previous images or run follow command every time you needed, Recommand copy from result to nodepad
- Run result show onscreen
sudo kubeadm token create --print-join-command
- Run result save to file and scp copy over to node
sudo kubeadm token create --print-join-command  > kubeadm_join_cmd.sh
scp kubeadm_join_cmd.sh  vagrant@192.168.33.21
scp kubeadm_join_cmd.sh  vagrant@192.168.33.22
scp kubeadm_join_cmd.sh  vagrant@192.168.33.23
- Run Command
kubectl get nodes
kubectl  get nodes
NAME            STATUS     ROLES           AGE     VERSION
k8s-master-01   NotReady   control-plane   4m15s   v1.28.13
- Test get nodes (server)
$ kubectl get nodes -o wide
- Test get componentstatus
$ kubectl get componentstatus
- Test Cluster-info
$ kubectl cluster-info
** Install Pod network Calico
https://docs.tigera.io/calico/latest/getting-started/kubernetes/quickstart
Install the Tigera Calico operator and custom resource definitions.
$ kubectl create -f https://raw.githubusercontent.com/projectcalico/calico/v3.28.1/manifests/tigera-operator.yaml
Install Calico by creating the necessary custom resource. For more information on configuration options available in this manifest
$ wget  https://raw.githubusercontent.com/projectcalico/calico/v3.28.1/manifests/custom-resources.yaml
$ cat   custom_calico_network.png
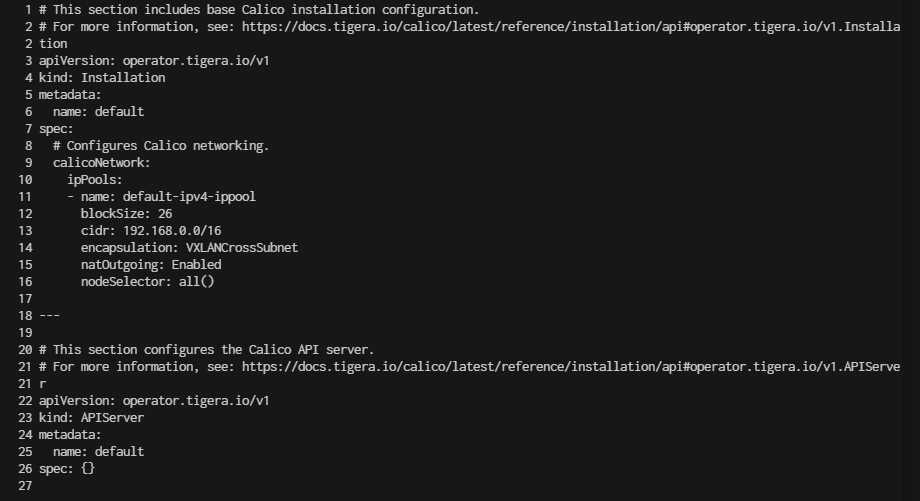
- Adjust CIDR setting in custom resources file
10.244.0.0/16
$ sed -i 's/cidr: 192\.168\.0\.0\/16/cidr: 10.244.0.0\/16/g' custom-resources.yaml
- Finally, After we custom cidr already. time to create the Calico custom resources:
$ kubectl create -f custom-resources.yaml
Result:
installation.operator.tigera.io/default created
apiserver.operator.tigera.io/default created
- Check network use
ip aafter install network
$ sudo ip a
- Run
watch kubectl get pods -Ato keep watch command, watch is linux command to open session for monitor
[vagrant@k8s-master-01 ~]$ watch kubectl get pods -A
- or
[vagrant@k8s-master-01 ~]$ watch kubectl get pods -n calico-system
- The Tigera operator installs resources in the calico-system namespace.
join Kubernetes node workload to master
- Then you can``` join any number of worker nodes by running the following on each as root:
- Run command in k8s-node-01,k8s-node-02,k8s-node-03
- on master node, run the following command to generate join command along with token
sudo kubeadm token create --print-join-command
[vagrant@k8s-master-01 ~]$ sudo kubeadm token create --print-join-command
kubeadm join process
Format
sudo kubeadm join <MASTER_IP>:<MASTER_PORT> --token <TOKEN> --discovery-token-ca-cert-hash <DISCOVERY_TOKEN_CA_CERT_HASH>
- Vagrant ssh to k8s-node-01 ( Repeat this stop in k8s-node-02, k8s-node-03)
$ vagrant ssh k8s-node-01
- Run Join
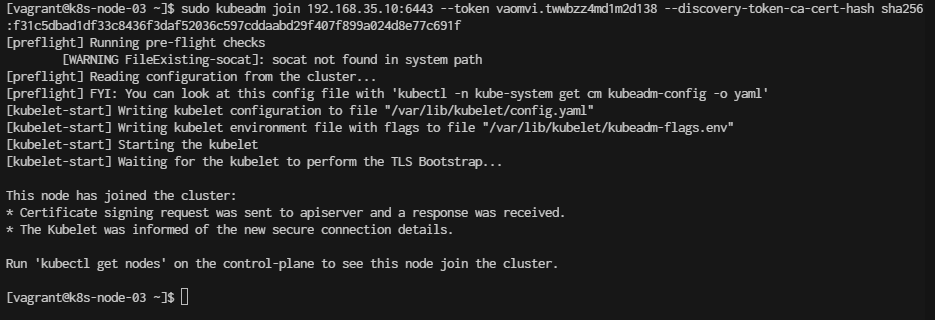
sudo kubeadm join 192.168.35.10:6443 --token vaomvi.twwbzz4md1m2d138 --discovery-token-ca-cert-hash sha256:f31c5dbad1df33c8436f3daf52036c597cddaabd29f407f899a024d8e77c691f

Deploy first deployment
- Run on Master node
vagrant ssh k8s-master-01
create project folder
[vagrant@k8s-master-01 ~]$ mkdir controller
[vagrant@k8s-master-01 ~]$ cd controller
[vagrant@k8s-master-01 ~]$ vim nginx-deployment.yml
apiVersion: apps/v1
kind: Deployment
metadata:
  name: nginx-deployment
spec:
  selector:
    matchLabels:
      app: nginx
  replicas: 2 # tells deployment to run 2 pods matching the template
  template:
    metadata:
      labels:
        app: nginx
    spec:
      containers:
      - name: nginx
        image: nginx:1.14.2
        ports:
        - containerPort: 80
- Create a Deployment based on the YAML file:
[vagrant@k8s-master-01 controller]$ kubectl apply -f nginx-deployment.yml
deployment.apps/nginx-deployment created
- Display information about the Deployment:
kubectl describe deployment nginx-deployment
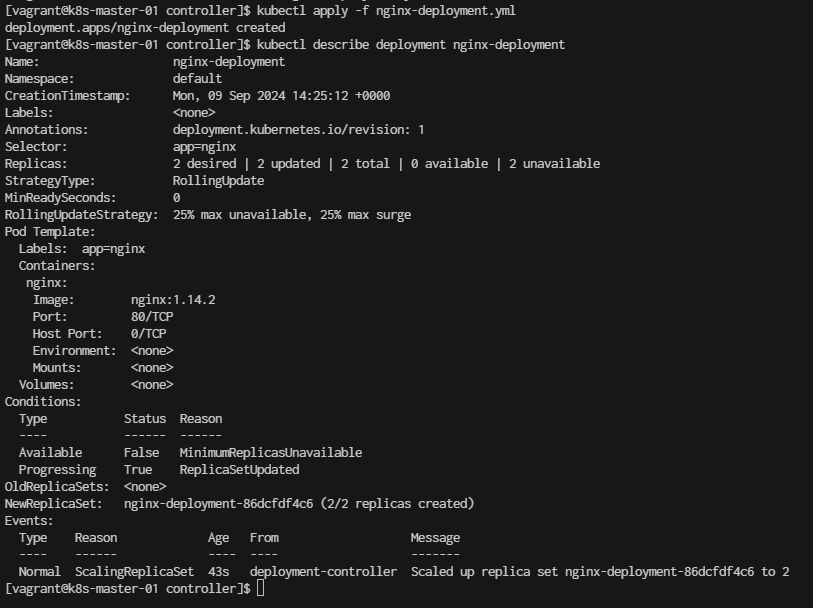
Run kubectl get deployments to check if the Deployment was created.
If the Deployment is still being created, the output is similar to the following:
[vagrant@k8s-master-01 controller]$ kubectl get deployments
When you inspect the Deployments in your cluster, the following fields are displayed:
- NAME lists the names of the Deployments in the namespace.
- READY displays how many replicas of the application are available to your users. It follows the pattern ready/desired.
- UP-TO-DATE displays the number of replicas that have been updated to achieve the desired state.
- AVAILABLE displays how many replicas of the application are available to your users.
- AGE displays the amount of time that the application has been running.
Notice how the number of desired replicas is 3 according to .spec.replicas field.
- To see the ReplicaSet (rs) created by the Deployment, run kubectl get rs. The output is similar to this:
[vagrant@k8s-master-01 controller]$ kubectl get rs
ReplicaSet output shows the following fields:
-
NAME lists the names of the ReplicaSets in the namespace.
-
DESIRED displays the desired number of replicas of the application, which you define when you create the Deployment. This is the desired state.
-
CURRENT displays how many replicas are currently running.
-
READY displays how many replicas of the application are available to your users.
-
AGE displays the amount of time that the application has been running.-
-
To see the labels automatically generated for each Pod, run kubectl get pods --show-labels. The output is similar to:
[vagrant@k8s-master-01 controller]$ kubectl get pods --show-labels
-Running get pods should now show only the new Pods kubctl get pods
[vagrant@k8s-master-01 controller]$ kubectl get pods
- To see network run
kubectl get services
[vagrant@k8s-master-01 ~]$ kubectl get services
- Delete deployment
[vagrant@k8s-master-01 ~]$ kubectl delete deployments.apps nginx-deployment
deployment.apps "nginx-deployment" deleted
[vagrant@k8s-master-01 ~]$ kubectl delete pods  --all
No resources found
Reset Cluster
Run command $ sudo kubeadm reset --force in every note
Prerequistion
- because last installation have conflic between flannel and cni
[vagrant@k8s-master-01 ]$ kubeadm reset --force
[vagrant@k8s-master-01 ]$ ip a
1: lo: <LOOPBACK,UP,LOWER_UP> mtu 65536 qdisc noqueue state UNKNOWN group default qlen 1000
    link/loopback 00:00:00:00:00:00 brd 00:00:00:00:00:00
    inet 127.0.0.1/8 scope host lo
       valid_lft forever preferred_lft forever
2: eth0: <BROADCAST,MULTICAST,UP,LOWER_UP> mtu 1500 qdisc fq_codel state UP group default qlen 1000
    link/ether 08:00:27:b3:a2:9c brd ff:ff:ff:ff:ff:ff
    altname enp0s3
    inet 10.0.2.15/24 brd 10.0.2.255 scope global dynamic noprefixroute eth0
       valid_lft 80933sec preferred_lft 80933sec
3: eth1: <BROADCAST,MULTICAST,UP,LOWER_UP> mtu 1500 qdisc fq_codel state UP group default qlen 1000
    link/ether 08:00:27:09:7a:78 brd ff:ff:ff:ff:ff:ff
    altname enp0s8
    inet 192.168.35.10/24 brd 192.168.35.255 scope global noprefixroute eth1
       valid_lft forever preferred_lft forever
4: docker0: <NO-CARRIER,BROADCAST,MULTICAST,UP> mtu 1500 qdisc noqueue state DOWN group default
    link/ether 02:42:89:05:8d:27 brd ff:ff:ff:ff:ff:ff
    inet 172.17.0.1/16 brd 172.17.255.255 scope global docker0
       valid_lft forever preferred_lft forever
5: flannel.1: <BROADCAST,MULTICAST,UP,LOWER_UP> mtu 1450 qdisc noqueue state UNKNOWN group default
    link/ether ba:bf:d5:f2:ee:87 brd ff:ff:ff:ff:ff:ff
    inet 10.244.0.0/32 scope global flannel.1
       valid_lft forever preferred_lft forever
6: cni0: <NO-CARRIER,BROADCAST,MULTICAST,UP> mtu 1500 qdisc noqueue state DOWN group default qlen 1000
    link/ether 72:54:39:49:7f:0c brd ff:ff:ff:ff:ff:ff
    inet 10.244.0.1/24 brd 10.244.0.255 scope global cni0
       valid_lft forever preferred_lft forever
- Stop network Down Interface cni0 and flannel.1.
[vagrant@k8s-master-01 ]$ sudo ifconfig cni0 down
[vagrant@k8s-master-01 ]$ sudo ifconfig flannel.1 down
- Delete Interface cni0 and flannel.1.
[vagrant@k8s-master-01 ]$ sudo ip link delete cni0
[vagrant@k8s-master-01 ]$ sudo ip link delete flannel.1
[vagrant@k8s-master-01 ~]$ ip a
1: lo: <LOOPBACK,UP,LOWER_UP> mtu 65536 qdisc noqueue state UNKNOWN group default qlen 1000
    link/loopback 00:00:00:00:00:00 brd 00:00:00:00:00:00
    inet 127.0.0.1/8 scope host lo
       valid_lft forever preferred_lft forever
2: eth0: <BROADCAST,MULTICAST,UP,LOWER_UP> mtu 1500 qdisc fq_codel state UP group default qlen 1000
    link/ether 08:00:27:b3:a2:9c brd ff:ff:ff:ff:ff:ff
    altname enp0s3
    inet 10.0.2.15/24 brd 10.0.2.255 scope global dynamic noprefixroute eth0
       valid_lft 80547sec preferred_lft 80547sec
3: eth1: <BROADCAST,MULTICAST,UP,LOWER_UP> mtu 1500 qdisc fq_codel state UP group default qlen 1000
    link/ether 08:00:27:09:7a:78 brd ff:ff:ff:ff:ff:ff
    altname enp0s8
    inet 192.168.35.10/24 brd 192.168.35.255 scope global noprefixroute eth1
       valid_lft forever preferred_lft forever
4: docker0: <NO-CARRIER,BROADCAST,MULTICAST,UP> mtu 1500 qdisc noqueue state DOWN group default
    link/ether 02:42:89:05:8d:27 brd ff:ff:ff:ff:ff:ff
    inet 172.17.0.1/16 brd 172.17.255.255 scope global docker0
       valid_lft forever preferred_lft forever
- Remove all items within /etc/cni/net.d/.
[vagrant@k8s-master-01 ]$ sudo rm -rf /etc/cni/net.d/
$ sudo kubeadm init \
  --control-plane-endpoint=192.168.35.10 \
  --pod-network-cidr=10.244.0.0/16 \
  --apiserver-advertise-address=192.168.35.10
  rm -rf /home/vagrant/.kube
  mkdir -p /home/vagrant/.kube
  sudo cp -i /etc/kubernetes/admin.conf /home/vagrant/.kube/config
  sudo chown -R vagrant:vagrant /home/vagrant/.kube/config
install flannel
kubectl  apply -f https://github.com/flannel-io/flannel/releases/latest/download/kube-flannel.yml
namespace/kube-flannel created
serviceaccount/flannel created
clusterrole.rbac.authorization.k8s.io/flannel created
clusterrolebinding.rbac.authorization.k8s.io/flannel created
configmap/kube-flannel-cfg created
daemonset.apps/kube-flannel-ds created
re-run
[vagrant@k8s-master-01 ~]$  kubeadm token create --print-join-command

kubeadm join 192.168.35.10:6443 --token x7cucg.42w7cx46w24bk800 --discovery-token-ca-cert-hash sha256:b3f54868deb2b69a47feeea4b3d356a368bb3b1fa8bb12784b659594e2fd230b
Go to k8s-node-01
[vagrant@k8s-node-01 ~]$ sudo kubeadm join 192.168.35.10:6443 --token x7cucg.42w7cx46w24bk800 --discovery-token-ca-cert-hash sha256:b3f54868deb2b69a47feeea4b3d356a368bb3b1fa8bb12784b659594e2fd230b

[preflight] Running pre-flight checks
[preflight] Reading configuration from the cluster...
[preflight] FYI: You can look at this config file with 'kubectl -n kube-system get cm kubeadm-config -o yaml'
[kubelet-start] Writing kubelet configuration to file "/var/lib/kubelet/config.yaml"
[kubelet-start] Writing kubelet environment file with flags to file "/var/lib/kubelet/kubeadm-flags.env"
[kubelet-start] Starting the kubelet
[kubelet-start] Waiting for the kubelet to perform the TLS Bootstrap...

This node has joined the cluster:
* Certificate signing request was sent to apiserver and a response was received.
* The Kubelet was informed of the new secure connection details.

Run 'kubectl get nodes' on the control-plane to see this node join the cluster.
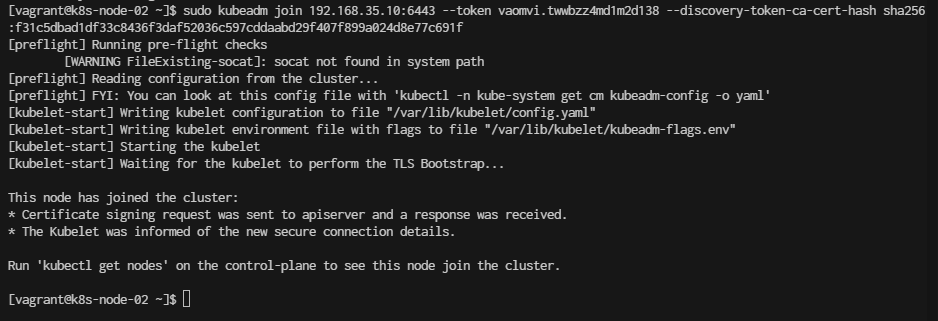
Go to k8s-node-02
[vagrant@k8s-node-02 ~]$ sudo kubeadm join 192.168.35.10:6443 --token x7cucg.42w7cx46w24bk800 --discovery-token-ca-cert-hash sha256:b3f54868deb2b69a47feeea4b3d356a368bb3b1fa8bb12784b659594e2fd230b
[preflight] Running pre-flight checks
[preflight] Reading configuration from the cluster...
[preflight] FYI: You can look at this config file with 'kubectl -n kube-system get cm kubeadm-config -o yaml'
[kubelet-start] Writing kubelet configuration to file "/var/lib/kubelet/config.yaml"
[kubelet-start] Writing kubelet environment file with flags to file "/var/lib/kubelet/kubeadm-flags.env"
[kubelet-start] Starting the kubelet
[kubelet-start] Waiting for the kubelet to perform the TLS Bootstrap...

This node has joined the cluster:
* Certificate signing request was sent to apiserver and a response was received.
* The Kubelet was informed of the new secure connection details.

Run 'kubectl get nodes' on the control-plane to see this node join the cluster.
[vagrant@k8s-master-01 ~]$ kubectl get nodes -o wide
NAME            STATUS     ROLES           AGE     VERSION    INTERNAL-IP     EXTERNAL-IP   OS-IMAGE          KERNEL-VERSION          CONTAINER-RUNTIME
k8s-master-01   NotReady   control-plane   20m     v1.28.13   192.168.35.10   <none>        CentOS Stream 9   5.14.0-503.el9.x86_64   containerd://1.7.21
k8s-node-01     Ready      <none>          2m37s   v1.28.13   192.168.35.21   <none>        CentOS Stream 9   5.14.0-503.el9.x86_64   containerd://1.7.21
k8s-node-02     Ready      <none>          54s     v1.28.13   192.168.35.22   <none>        CentOS Stream 9   5.14.0-503.el9.x86_64   containerd://1.7.21
k8s-node-03     Ready      <none>          14s     v1.28.13   192.168.35.23   <none>        CentOS Stream 9   5.14.0-503.el9.x86_64   containerd://1.7.21
Wordpress deployment
cd
mkdir wordpress
cd wordpress
cat <<EOF | tee kustomization.yaml
secretGenerator:
- name: mysql-pass
  literals:
  - password=YOUR_PASSWORD
EOF
cat <<EOF | tee mysql-deployment.yaml
apiVersion: v1
kind: Service
metadata:
  name: wordpress-mysql
  labels:
    app: wordpress
spec:
  ports:
    - port: 3306
  selector:
    app: wordpress
    tier: mysql
  clusterIP: None
---
apiVersion: v1
kind: PersistentVolumeClaim
metadata:
  name: mysql-pv-claim
  labels:
    app: wordpress
spec:
  accessModes:
    - ReadWriteOnce
  resources:
    requests:
      storage: 20Gi
---
apiVersion: apps/v1
kind: Deployment
metadata:
  name: wordpress-mysql
  labels:
    app: wordpress
spec:
  selector:
    matchLabels:
      app: wordpress
      tier: mysql
  strategy:
    type: Recreate
  template:
    metadata:
      labels:
        app: wordpress
        tier: mysql
    spec:
      containers:
      - image: mysql:8.0
        name: mysql
        env:
        - name: MYSQL_ROOT_PASSWORD
          valueFrom:
            secretKeyRef:
              name: mysql-pass
              key: password
        - name: MYSQL_DATABASE
          value: wordpress
        - name: MYSQL_USER
          value: wordpress
        - name: MYSQL_PASSWORD
          valueFrom:
            secretKeyRef:
              name: mysql-pass
              key: password
        ports:
        - containerPort: 3306
          name: mysql
        volumeMounts:
        - name: mysql-persistent-storage
          mountPath: /var/lib/mysql
      volumes:
      - name: mysql-persistent-storage
        persistentVolumeClaim:
          claimName: mysql-pv-claim

EOF
cat <<EOF | tee wordpress-deployment.yaml
apiVersion: v1
kind: Service
metadata:
  name: wordpress
  labels:
    app: wordpress
spec:
  ports:
    - port: 80
  selector:
    app: wordpress
    tier: frontend
  type: LoadBalancer
---
apiVersion: v1
kind: PersistentVolumeClaim
metadata:
  name: wp-pv-claim
  labels:
    app: wordpress
spec:
  accessModes:
    - ReadWriteOnce
  resources:
    requests:
      storage: 20Gi
---
apiVersion: apps/v1
kind: Deployment
metadata:
  name: wordpress
  labels:
    app: wordpress
spec:
  selector:
    matchLabels:
      app: wordpress
      tier: frontend
  strategy:
    type: Recreate
  template:
    metadata:
      labels:
        app: wordpress
        tier: frontend
    spec:
      containers:
      - image: wordpress:6.2.1-apache
        name: wordpress
        env:
        - name: WORDPRESS_DB_HOST
          value: wordpress-mysql
        - name: WORDPRESS_DB_PASSWORD
          valueFrom:
            secretKeyRef:
              name: mysql-pass
              key: password
        - name: WORDPRESS_DB_USER
          value: wordpress
        ports:
        - containerPort: 80
          name: wordpress
        volumeMounts:
        - name: wordpress-persistent-storage
          mountPath: /var/www/html
      volumes:
      - name: wordpress-persistent-storage
        persistentVolumeClaim:
          claimName: wp-pv-claim
EOF
- Add resource to
kustomization.yaml
cat <<EOF >> kustomization.yaml
resources:
  - mysql-deployment.yaml
  - wordpress-deployment.yaml
EOF
- Folder Structure
[vagrant@k8s-master-01 wordpress]$ tree .
.
├── kustomization.yaml
├── mysql-deployment.yaml
└── wordpress-deployment.yaml
- Apply and Verify
kubectl apply -k ./
[vagrant@k8s-master-01 wordpress]$ kubectl apply -k ./
secret/mysql-pass-5m26tmdb5k created
service/wordpress created
service/wordpress-mysql created
persistentvolumeclaim/mysql-pv-claim created
persistentvolumeclaim/wp-pv-claim created
deployment.apps/wordpress created
deployment.apps/wordpress-mysql created
- get deployment
kubectl get deployments
[vagrant@k8s-master-01 wordpress]$ kubectl get deployments
Verify
- Verify that the Secret exists by running the following command:
kubectl get secrets
[vagrant@k8s-master-01 wordpress]$ kubectl get secrets
- Verify that a PersistentVolume got dynamically provisioned.
kubectl get pvc
[vagrant@k8s-master-01 wordpress]$ kubectl get pvc
NAME             STATUS    VOLUME   CAPACITY   ACCESS MODES   STORAGECLASS   AGE
- Verify that the Pod is running by running the following command:
kubectl get pods
[vagrant@k8s-master-01 wordpress]$ kubectl get pods
- Verify Service wordpress
kubectl get services wordpress
[vagrant@k8s-master-01 wordpress]$ kubectl get services wordpress
- Verify All service
kubectl describe service
[vagrant@k8s-master-01 wordpress]$ kubectl describe service
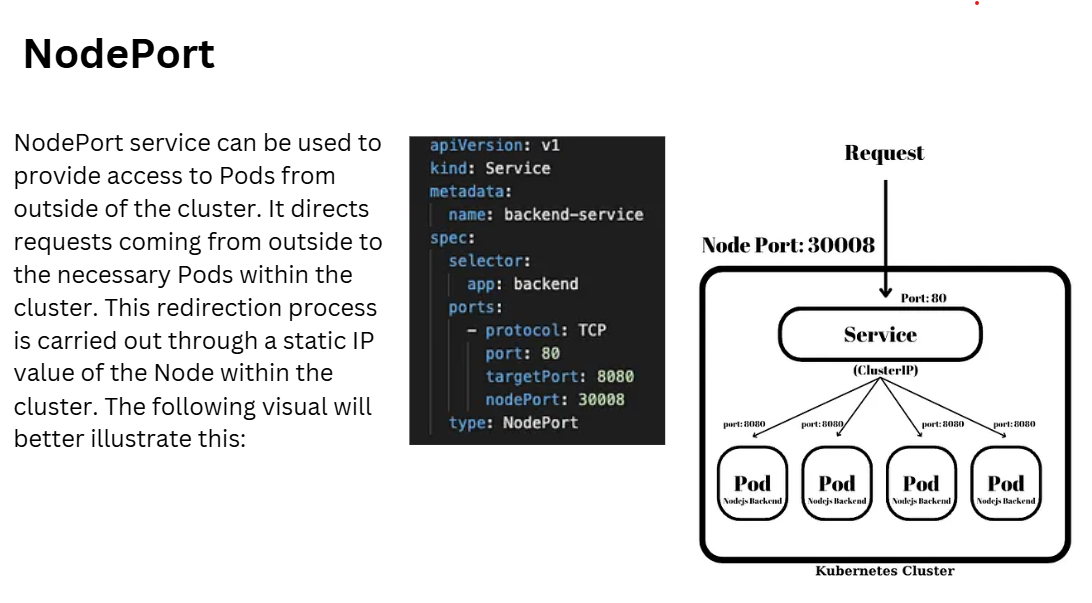
Basic Deployment with NodePort
![]()
Beginners A basic Kubernetes lab setup for beginners to understand how to deploy, scale, and manage applications in a Kubernetes cluster. In this example, we'll deploy an Nginx web server.
Step 1. Prerequisites Ensure you have the following:
[vagrant@k8s-master-01 basic]$ kubectl  get nodes -o wide
NAME            STATUS   ROLES           AGE     VERSION    INTERNAL-IP     EXTERNAL-IP   OS-IMAGE          KERNEL-VERSION          CONTAINER-RUNTIME
k8s-master-01   NotReady   control-plane   28m     v1.28.13   192.168.35.10   <none>        CentOS Stream 9   5.14.0-503.el9.x86_64   containerd://1.7.21
k8s-node-01     Ready      <none>          9m59s   v1.28.13   192.168.35.21   <none>        CentOS Stream 9   5.14.0-503.el9.x86_64   containerd://1.7.21
k8s-node-02     Ready      <none>          8m16s   v1.28.13   192.168.35.22   <none>        CentOS Stream 9   5.14.0-503.el9.x86_64   containerd://1.7.21
k8s-node-03     Ready      <none>          7m36s   v1.28.13   192.168.35.23   <none>        CentOS Stream 9   5.14.0-503.el9.x86_64   containerd://1.7.21
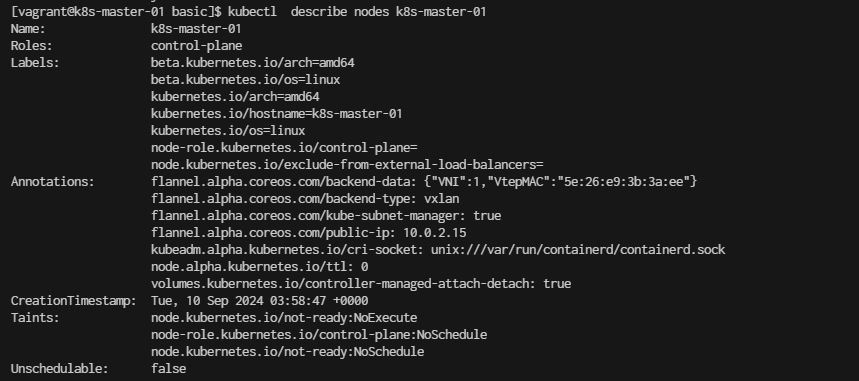
Result output:

[vagrant@k8s-master-01 basic]$ kubectl describe nodes k8s-master-01
Start workshop 5: Basic Deployment
Step 1. Prepare folder
cd ~
mkdir basic
cd basic
Step 2. Create a Namespace
Namespaces are used to logically separate resources within a Kubernetes cluster. kubectl create namespace my-lab
[vagrant@k8s-master-01 ~]$ kubectl create namespace my-lab
namespace/my-lab created
Step 3. Deploy an Nginx Application We'll create a deployment resource for Nginx, which is a simple web server.
- 3.1 Create a Deployment YAML File Create a file called nginx-deployment.yaml:
cat << EOF | tee nginx-deployment.yaml
apiVersion: apps/v1
kind: Deployment
metadata:
  name: nginx-deployment
  namespace: my-lab
  labels:
    app: nginx
spec:
  replicas: 3
  selector:
    matchLabels:
      app: nginx
  template:
    metadata:
      labels:
        app: nginx
    spec:
      containers:
      - name: nginx
        image: nginx:1.17
        ports:
        - containerPort: 80
EOF
- 3.2 Apply the Deployment
Run the following command to create the Nginx deployment:
kubectl apply -f nginx-deployment.yaml
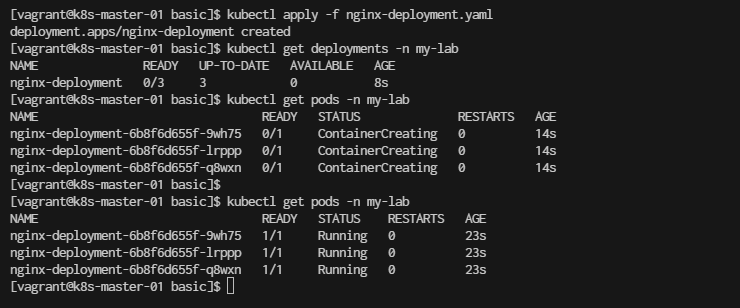
[vagrant@k8s-master-01 basic]$ kubectl apply -f nginx-deployment.yaml
deployment.apps/nginx-deployment created
Verify
[vagrant@k8s-master-01 basic]$ kubectl get deployments -n my-lab
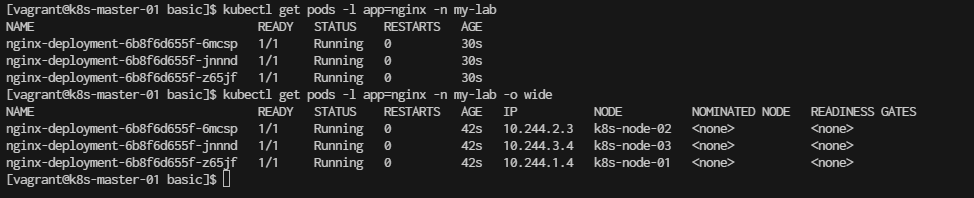
[vagrant@k8s-master-01 basic]$ kubectl get pods -n my-lab
wait until STATUS is Running
Step 4. Next We Expose the Nginx Application Create a Service to expose the Nginx application.
- 4.1 Create a Service YAML File Create a file called nginx-service.yaml:
cat <<EOF |  tee nginx-service.yaml
apiVersion: v1
kind: Service
metadata:
  name: nginx-service
  namespace: my-lab
spec:
  selector:
    app: nginx
  ports:
    - protocol: TCP
      port: 80
      targetPort: 80
  type: NodePort

EOF
- 4.2 Apply the Service
Run the following command to create the service:
kubectl apply -f nginx-service.yaml
[vagrant@k8s-master-01 basic]$ kubectl apply -f nginx-service.yaml
service/nginx-service created
Check the service: kubectl get services -n my-lab
[vagrant@k8s-master-01 basic]$ kubectl get services -n my-lab
[vagrant@k8s-master-01 basic]$ kubectl get services -n my-lab -o wide

- 4.3 Access the Nginx Application Find the NodePort assigned to your service:
[vagrant@k8s-master-01 basic]$ kubectl get svc nginx-service -n my-lab
- From file
nginx-service.yamlport will random select. We will fix nodeport
[vagrant@k8s-master-01 basic]$ kubectl delete -f nginx-service.yaml
create nginx-service-nodeport.yaml fix nodeport 30001
cat <<EOF  | tee nginx-service-nodeport.yaml
apiVersion: v1
kind: Service
metadata:
  name: nginx-nodeport
  namespace: my-lab
spec:
  type: NodePort
  selector:
    app: nginx  # Same selector as in the LoadBalancer service
  ports:
    - protocol: TCP
      port: 80         # Service Port
      targetPort: 80   # Container Port in the nginx pod
      nodePort: 30001  # NodePort for external access
EOF
- apply service
[vagrant@k8s-master-01 basic]$ kubectl apply -f nginx-service-nodeport.yaml

- verify
kubectl get svc
[vagrant@k8s-master-01 basic]$ kubectl get svc nginx-nodeport -n my-lab
[vagrant@k8s-master-01 basic]$ kubectl get svc nginx-nodeport -n my-lab -o wide

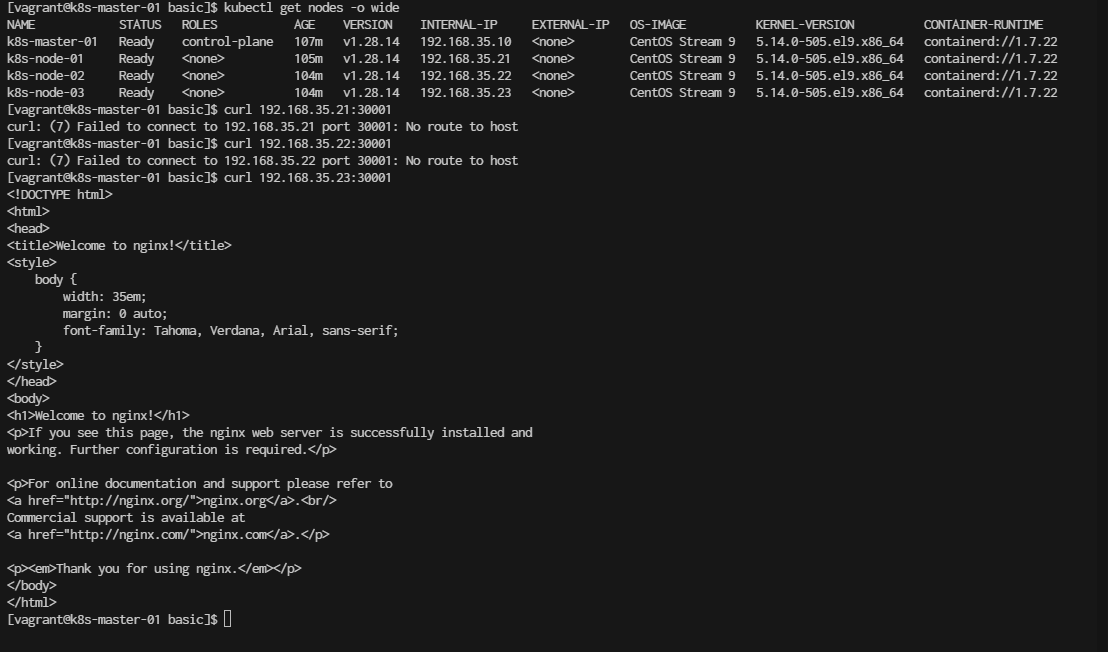
You can now access Nginx using your node’s IP and the assigned port:
http://<node-ip>:<node-port>
(try to connect to every node ip)
Step 5. Scale the Nginx Deployment You can scale the deployment to run more replicas of Nginx:
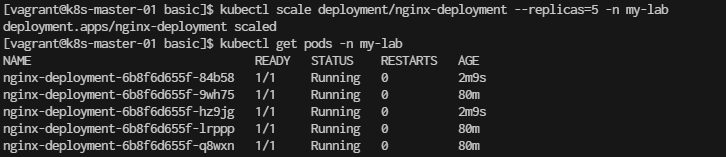
[vagrant@k8s-master-01 basic]$ kubectl scale deployment/nginx-deployment --replicas=5 -n my-lab
deployment.apps/nginx-deployment scaled
[vagrant@k8s-master-01 basic]$ kubectl get pods -n my-lab
Result Output:
Step 6. View Nginx Logs
Check the logs of a specific Nginx pod: kubectl logs <nginx-pod-name> -n my-lab
[vagrant@k8s-master-01 basic]$ kubectl logs nginx-deployment-6b8f6d655f-84b58 -n my-lab
Step 7. Clean up, Delete All Resources Once you're done with the lab, you can delete the resources:
[vagrant@k8s-master-01 basic]$ kubectl delete deployment nginx-deployment -n my-lab
deployment.apps "nginx-deployment" deleted

[vagrant@k8s-master-01 basic]$ kubectl delete service nginx-nodeport -n my-lab
service "nginx-nodeport" deleted

[vagrant@k8s-master-01 basic]$ kubectl delete namespace my-lab
namespace "my-lab" deleted
:)
ClusterIP Network

Nginx with a ClusterIP Service
cd ~
mkdir clusterip
cd clusterip
1. create nginx-deployment.yaml
cat <<EOF | tee nginx-deployment.yaml
apiVersion: apps/v1
kind: Deployment
metadata:
  name: nginx-deployment
  labels:
    app: nginx
spec:
  replicas: 3
  selector:
    matchLabels:
      app: nginx  # This selector ensures the services will target these pods
  template:
    metadata:
      labels:
        app: nginx  # Label that matches the selector in services
    spec:
      containers:
      - name: nginx
        image: nginx:latest
        ports:
        - containerPort: 80
EOF
Explanation:
- apiVersion: apps/v1 is the current version used for deployments.
- kind: Defines that this resource is a Deployment.
- metadata: The deployment name is nginx-deployment.
- replicas: Specifies that 2 replicas (pods) of Nginx will be created.
- selector: -matchLabels: app: nginx ensures that the pods managed by this deployment are targeted by services with the same selector.
- template:
- metadata: The label app: nginx is applied to the pods created by the deployment. This is critical because services use this label to route traffic to these pods.
- containers: Defines the container inside the pod, in this case, using the nginx:latest image, and exposing port 80 (the default Nginx port).
Deploy the Nginx Deployment
To apply this deployment, run the following command:
kubectl apply -f nginx-deployment.yaml
[vagrant@k8s-master-01 clusterip]$ kubectl apply -f nginx-deployment.yaml
verify by kubectl get deployments.apps
[vagrant@k8s-master-01 clusterip]$ kubectl get deployments.apps
NAME               READY   UP-TO-DATE   AVAILABLE   AGE
nginx-deployment   0/2     2            0           9s
This deployment ensures that the Nginx pods will be accessible via the NodePort, LoadBalancer, or ClusterIP services you've set up, as all of them have the same selector: app: nginx.
2. Create a ClusterIP Service for Nginx
- create file
nginx-service-clusterip.yaml
cat <<EOF | tee nginx-service-clusterip.yaml
apiVersion: v1
kind: Service
metadata:
  name: nginx-clusterip
spec:
  type: ClusterIP
  selector:
    app: nginx
  ports:
    - protocol: TCP
      port: 80         # Service port
      targetPort: 80   # Port inside the Nginx pod
EOF
Explanation:
- Type: ClusterIP — This exposes the service on an internal IP in the cluster, only accessible from other services or pods within the cluster.
- The selector (app: nginx) ensures that traffic is routed to the Nginx pods.
Apply the clusterIP service
[vagrant@k8s-master-01 clusterip]$ kubectl apply -f nginx-service-clusterip.yaml
Check the service
Once the ClusterIP service is created, you can check the details of the service, including the cluster-internal IP address:
[vagrant@k8s-master-01 clusterip]$ kubectl get svc nginx-clusterip
NAME              TYPE        CLUSTER-IP      EXTERNAL-IP   PORT(S)   AGE
nginx-clusterip   ClusterIP   10.97.229.165   <none>        80/TCP    10s
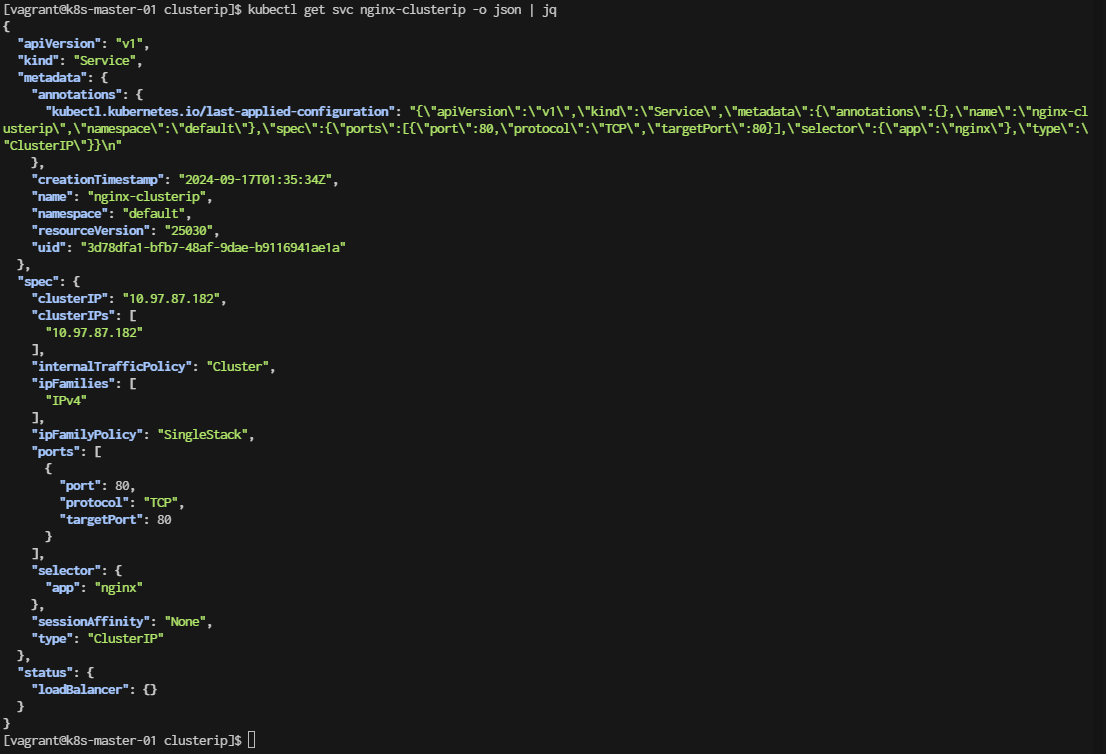
Result output:

[vagrant@k8s-master-01 clusterip]$ kubectl get svc nginx-clusterip -o json | jq
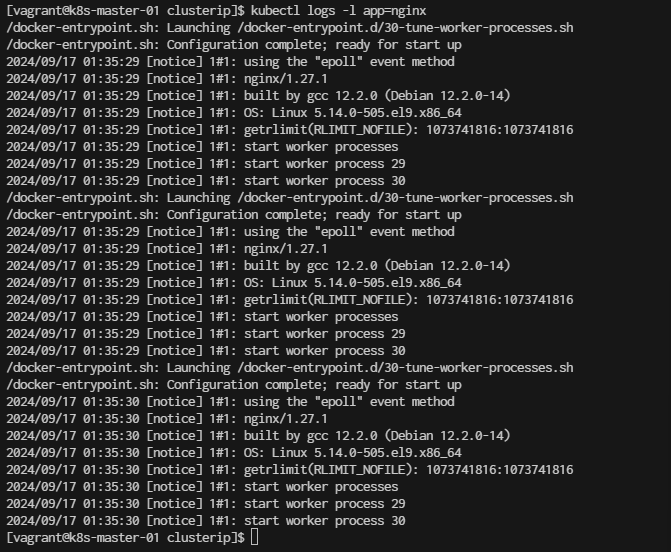
Check pods logs
[vagrant@k8s-master-01 clusterip]$ kubectl logs -l app=nginx
Test ClusterIP Since this is a ClusterIP service, it’s accessible only within the cluster. You can test access to it by running a temporary pod or using another service in the cluster that can reach it.
To test the service, you can run a temporary pod like this:
[vagrant@k8s-master-01 clusterip]$ kubectl run -it --rm --image=busybox test-pod -- sh
Once inside the pod, you can use wget or curl to access the service:
# wget -qO- http://10.96.103.66

Config Kubernetes Network Nginx
- Step 1: Create a Deployment for Nginx First, create a Kubernetes deployment to manage the Nginx pods.
cd ~
mkdir kubernetest_network
cd kubernetest_network
cat <<EOF | tee nginx-deployment.yaml
apiVersion: apps/v1
kind: Deployment
metadata:
  name: nginx-deployment
spec:
  replicas: 2
  selector:
    matchLabels:
      app: nginx
  template:
    metadata:
      labels:
        app: nginx
    spec:
      containers:
      - name: nginx
        image: nginx:latest
        ports:
        - containerPort: 80
EOF
- Deploy Nginx Pod
$ kubectl apply -f nginx-deployment.yaml
- Step 2: Expose the Deployment as a Service
2.1 Expose Using NodePort Now, expose the Nginx deployment using a NodePort service, which makes the service accessible on a port of each node in the cluster.
cat <<EOF | tee nginx-service-nodeport.yaml
apiVersion: v1
kind: Service
metadata:
  name: nginx-nodeport
spec:
  type: NodePort
  selector:
    app: nginx         # Same selector as in the LoadBalancer service
  ports:
    - protocol: TCP
      port: 80         # Service Port
      targetPort: 80   # Container Port in the nginx pod
      nodePort: 30001  # NodePort for external access,  specify a NodePort in the range 30000-32767
EOF
Apply nodeport
$ kubectl apply -f nginx-service-nodeport.yaml
2.2 get the Node IP of the nodes in your Kubernetes cluster, you can use the following methods:
$ kubectl get nodes -o wide
2.3 Expose pod and enable external access by using LoadBalance
cat <<EOF | tee nginx-service-loadbalancer.yaml
apiVersion: v1
kind: Service
metadata:
  name: nginx-loadbalancer
spec:
  type: LoadBalancer
  selector:
    app: nginx  # This must match the selector used in nginx-nodeport.yaml
  ports:
    - protocol: TCP
      port: 80         # Service Port
      targetPort: 80   # Container Port in the nginx pod
EOF
Explanation:
- Both the NodePort and LoadBalancer services target the same pods (those with the label app: nginx).
- The selector (app: nginx) is common in both services and matches the labels defined in the nginx-deployment pods.
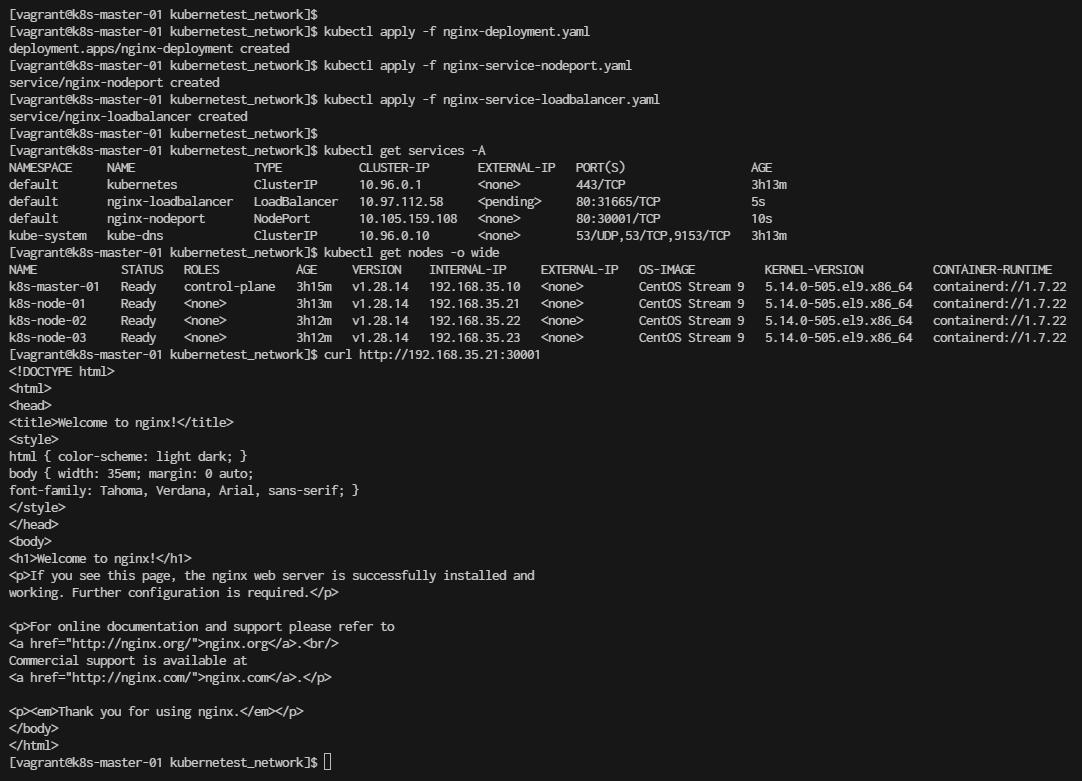
Next we Apply loadbalance
$ kubectl apply -f nginx-service-loadbalancer.yaml
Check the external IP assigned to the LoadBalancer:
$ kubectl get svc nginx-loadbalancer

You should see the service with TYPE: LoadBalancer and its CLUSTER-IP (in this case, 10.97.112.58).
Check Service endpoint (pod) is running
$ kubectl get pods -l app=nginx
NAME                                READY   STATUS    RESTARTS   AGE
nginx-deployment-7c79c4bf97-jphp8   1/1     Running   0          9m42s
nginx-deployment-7c79c4bf97-mn6hw   1/1     Running   0          9m42s
Summary Command:
- Step3 Verification
For NodePort, use a browser or curl to access Nginx via http://<node-ip>:30001.
For LoadBalancer, once the external IP is available, access Nginx via http://<external-ip>.
Observations:
- nginx-loadbalancer: This service type is LoadBalancer, but its EXTERNAL-IP is still pending. This typically means the cluster is waiting for a cloud provider or load balancer to assign an external IP.
- nginx-nodeport: This service type is NodePort, which exposes the service on a port across all nodes. It uses port 30001 on each node, which you can use to access the service externally by hitting http://
:30001.
However, your EXTERNAL-IP is still in a pending state, which means Kubernetes is waiting for a cloud provider to assign it an external IP. This won’t work if you’re not using a supported cloud provider.
Use kubectl port-forward You can forward a port from your local machine to the service running in the cluster. This allows you to access the service locally without needing an external IP.
Run the following command:
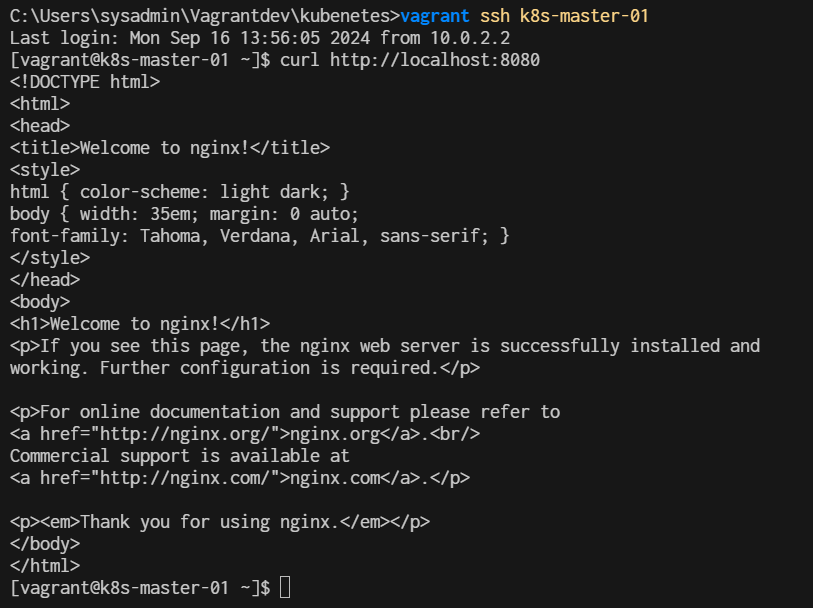
$ kubectl port-forward svc/nginx-loadbalancer 8080:80
Forwarding from 127.0.0.1:8080 -> 80
Open Second teminal and ssh to k8s-master-01
$ curl http://localhost:8080
- Clean Up Once you're done, delete the resources:
$ kubectl delete -f nginx-deployment.yaml
$ kubectl delete -f nginx-service-nodeport.yaml
$ kubectl delete -f nginx-service-loadbalancer.yaml
Kubenetes Dashboard
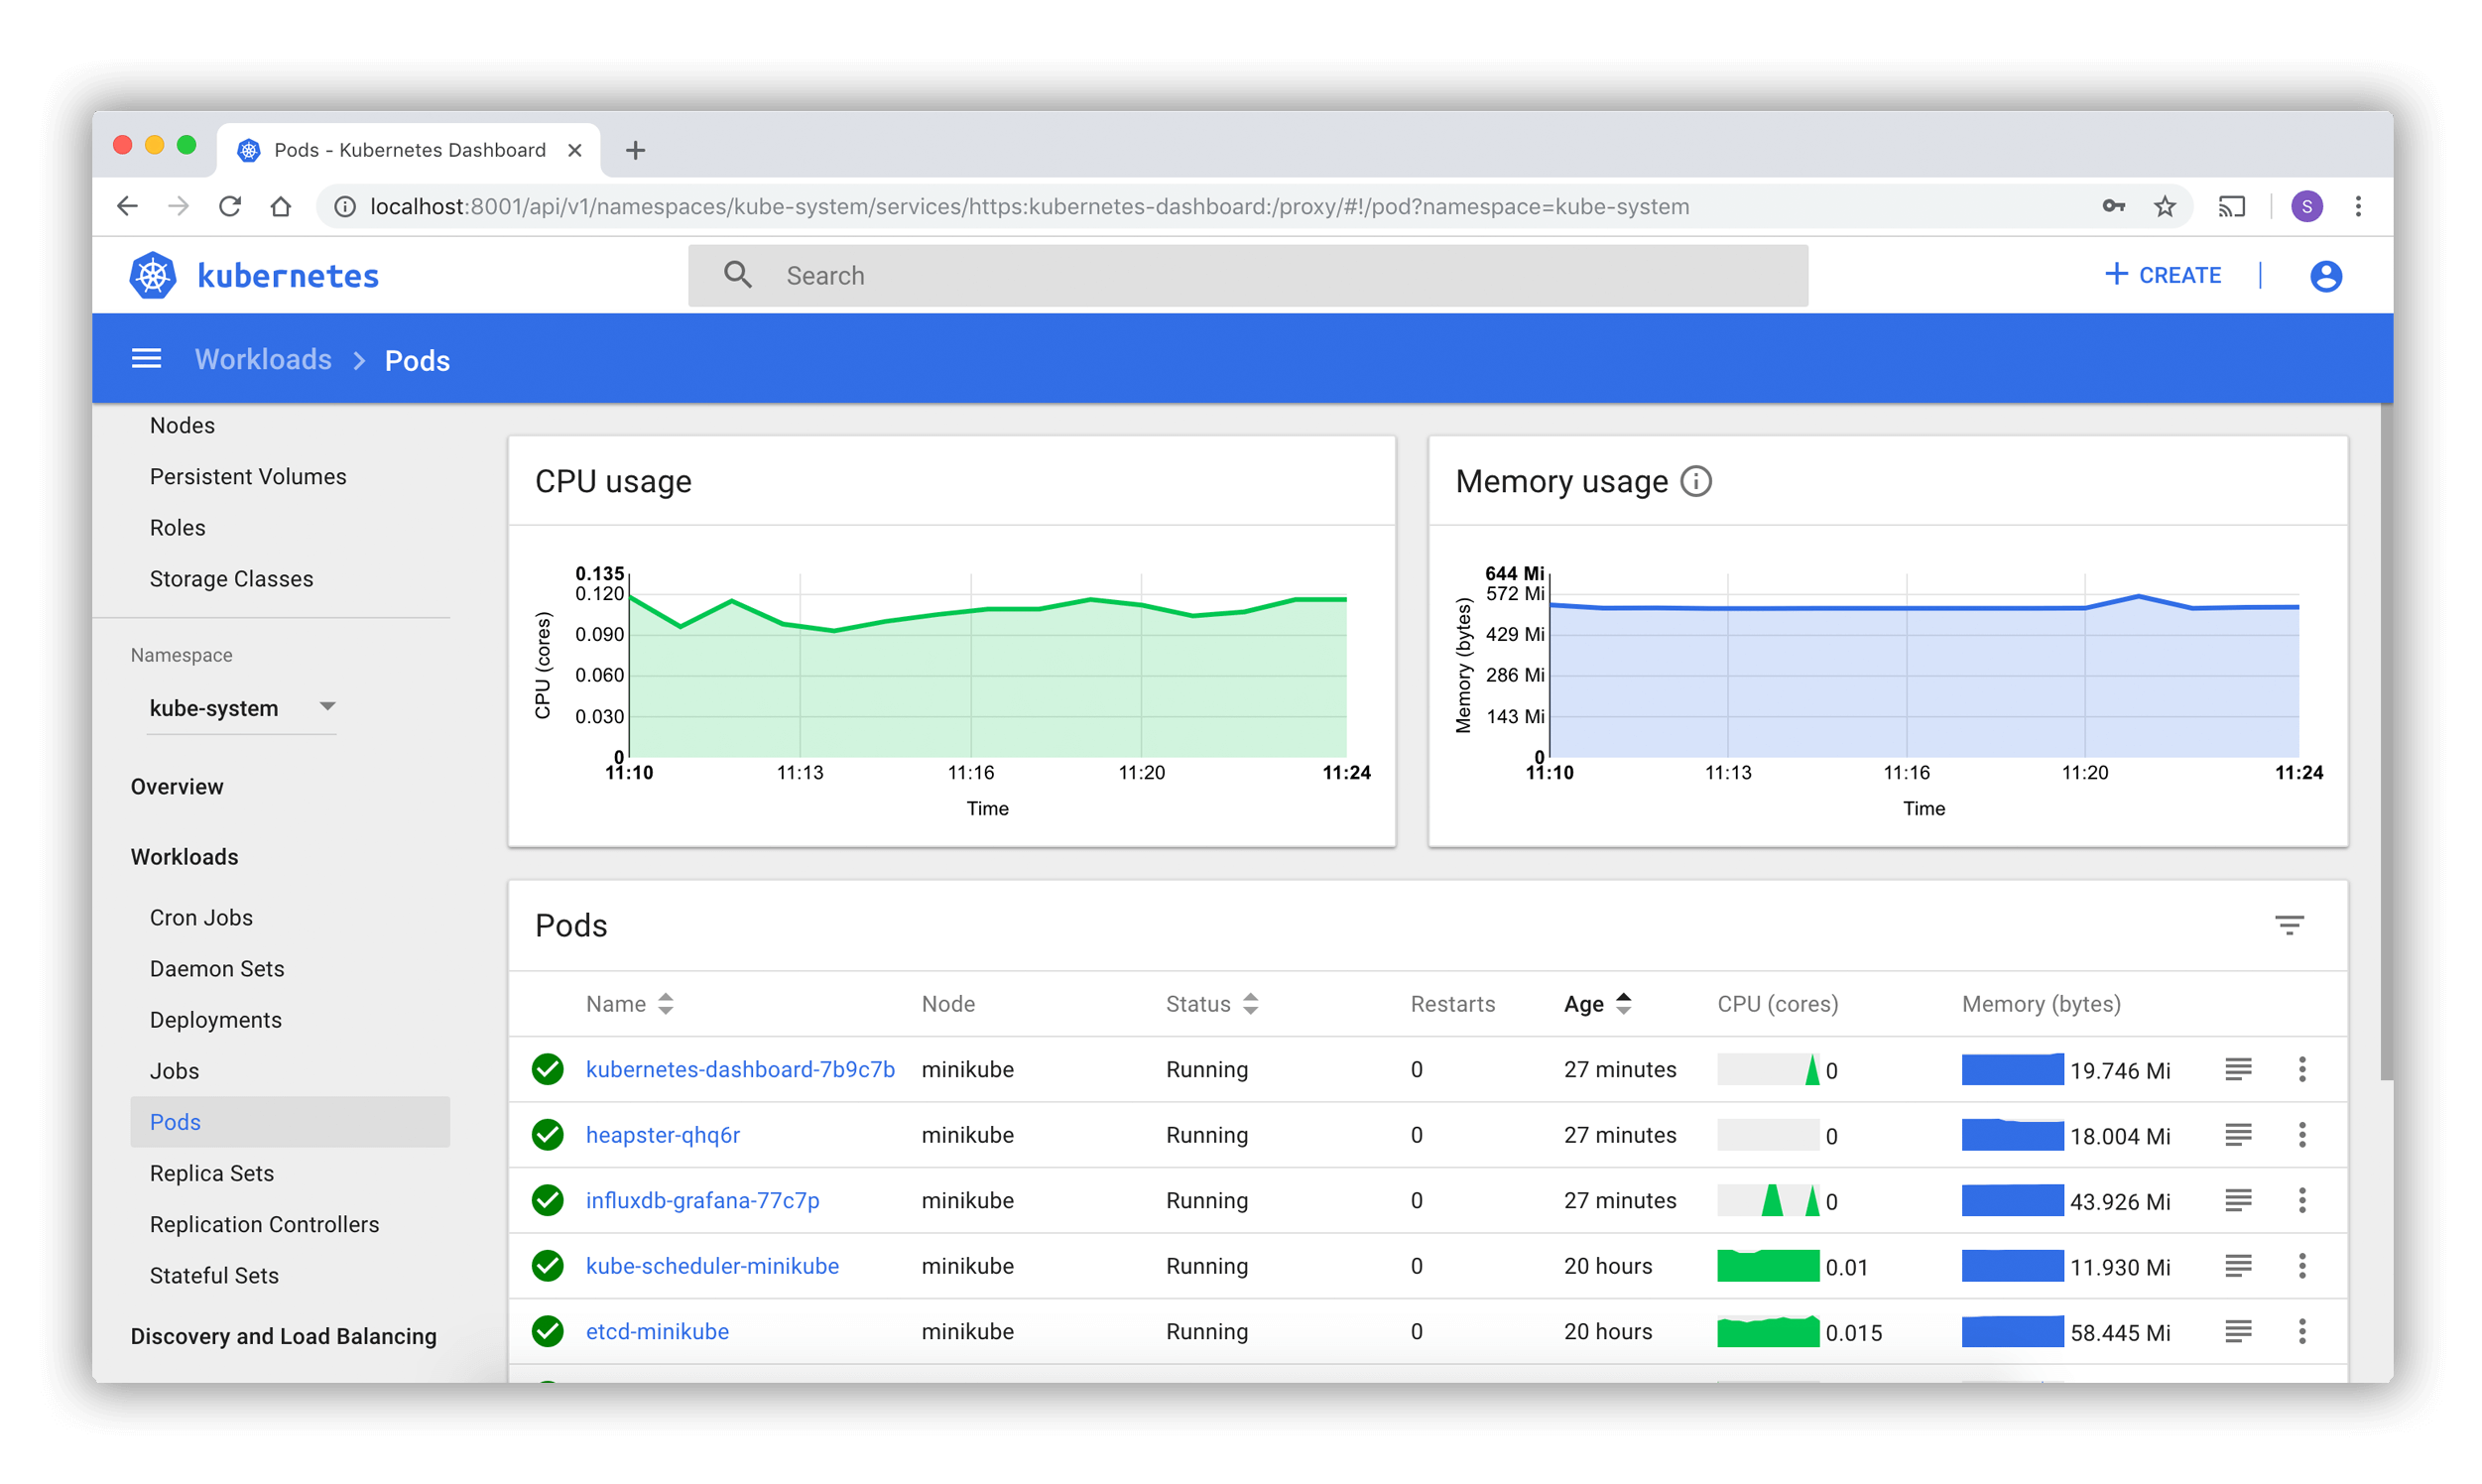
1. Deploy the Kubernetes Dashboard Run the following command to install the official Kubernetes Dashboard:
$ kubectl apply -f https://raw.githubusercontent.com/kubernetes/dashboard/v2.7.0/aio/deploy/recommended.yaml
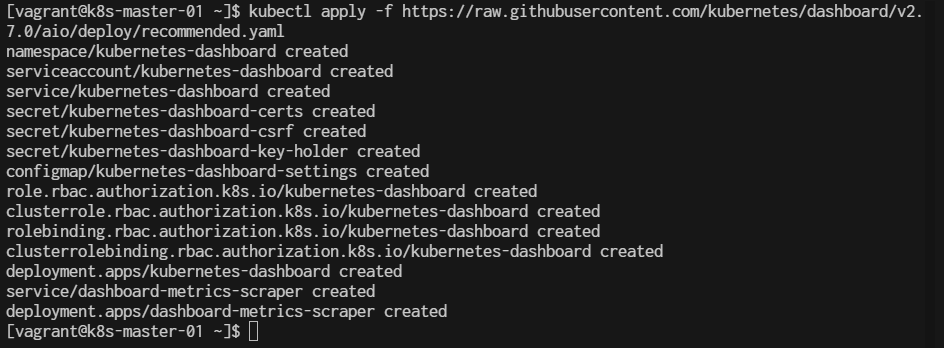
This command installs the latest stable version of the Kubernetes Dashboard and creates all the necessary resources like the kubernetes-dashboard service, deployment, and necessary RBAC (Role-Based Access Control) permissions.
2. Create a Service Account and ClusterRoleBinding You need a service account with proper permissions to access the dashboard. You can create an admin user with this command:
$ kubectl create serviceaccount dashboard-admin-sa -n kubernetes-dashboard

$ kubectl create clusterrolebinding dashboard-admin-sa \
  --clusterrole=cluster-admin \
  --serviceaccount=kubernetes-dashboard:dashboard-admin-sa

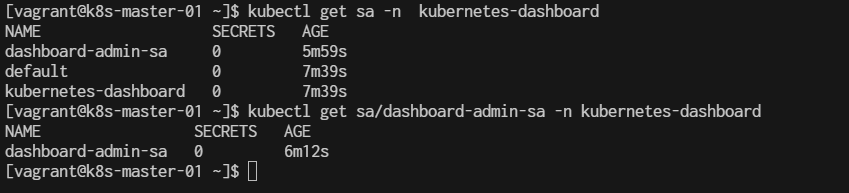
Verify account
$ kubectl get sa -n  kubernetes-dashboard
$ kubectl get sa/dashboard-admin-sa -n kubernetes-dashboard
3. Create a Secret for the Service Account Run the following command to create a secret with a token for the dashboard-admin-sa service account:
$ kubectl create token dashboard-admin-sa -n kubernetes-dashboard

$ kubectl get secrets -n kubernetes-dashboard

4. Verify the Token If you still need to create a secret token manually (for versions where kubectl create token isn't available), you can do it with the following steps:
Create a Secret:
cat <<EOF | tee dashboard-admin-sa-secret.yaml
apiVersion: v1
kind: Secret
metadata:
  name: dashboard-admin-sa-token
  namespace: kubernetes-dashboard
  annotations:
    kubernetes.io/service-account.name: "dashboard-admin-sa"
type: kubernetes.io/service-account-token
EOF
Apply:
$ kubectl apply -f dashboard-admin-sa-secret.yaml
Retrieve the Token:
$ kubectl describe secret dashboard-admin-sa-token -n kubernetes-dashboard
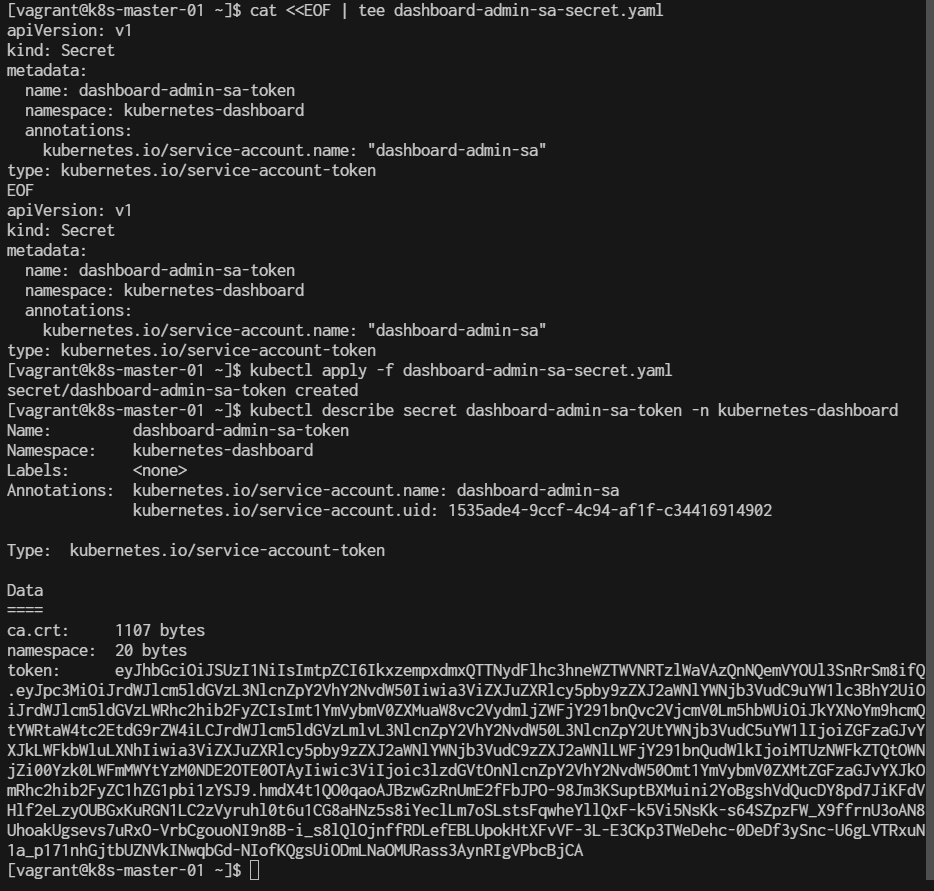 In the output, look for the token field, which will contain the bearer token for logging into the Kubernetes dashboard.
5. Access the Dashboard The Kubernetes Dashboard is not exposed on an external IP by default for security reasons. You can access it via kubectl proxy:
$ kubectl proxy
Starting to serve on 127.0.0.1:8001
This command allows you to access the dashboard at the following URL:
http://localhost:8001/api/v1/namespaces/kubernetes-dashboard/services/https:kubernetes-dashboard:/proxy/
7 login to Dashboard
- Open a browser and go to the URL from step 4.
- Choose the Token option for login and paste the token you retrieved earlier. Optional: Expose the Dashboard Externally For testing or easy access, you can expose the dashboard using a NodePort service. Be aware that this exposes your cluster to the public if not properly secured.
To do this:
$ kubectl edit service kubernetes-dashboard -n kubernetes-dashboard
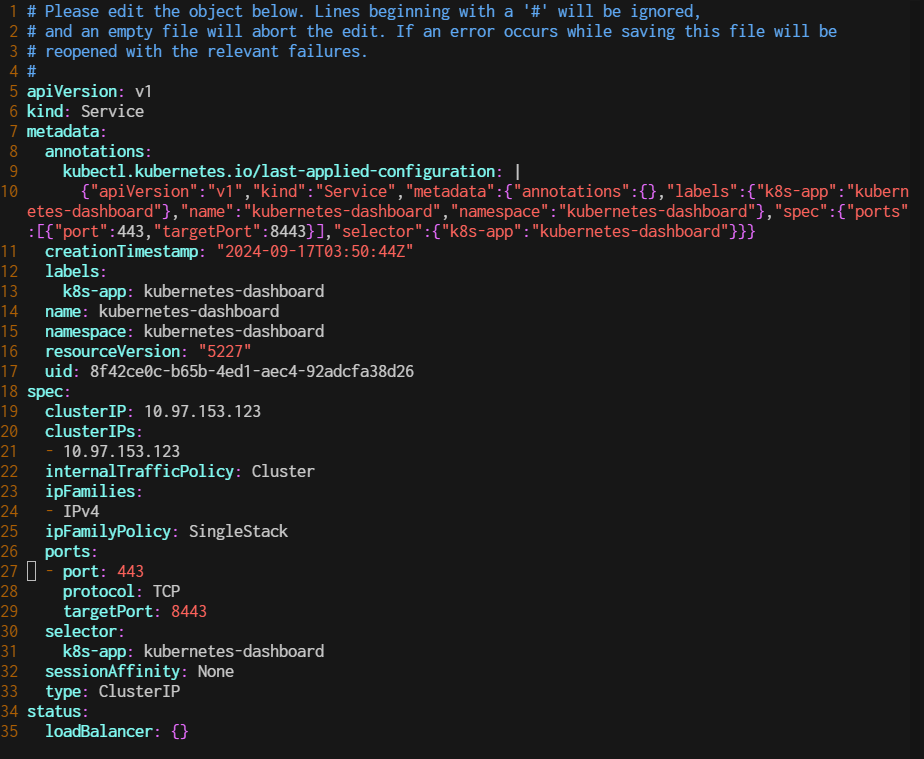
Change the type from ClusterIP to NodePort.
 Then, access the dashboard to nodeport
**-option use ** or use ```kubectl patch``
kubectl patch svc kubernetes-dashboard -n kubernetes-dashboard -p '{"spec":{"type":"NodePort"}}'
Check nodeport:
$ kubectl get svc -n kubernetes-dashboard
 This will show all the services in the kubernetes-dashboard namespace. Look for the service of type NodePort, and under the PORT(S) column, you will see something like 443:XXXXX/TCP, where XXXXX is the NodePort assigned.
For more detailed information, including all port mappings, run:
$ kubectl describe svc kubernetes-dashboard -n kubernetes-dashboard
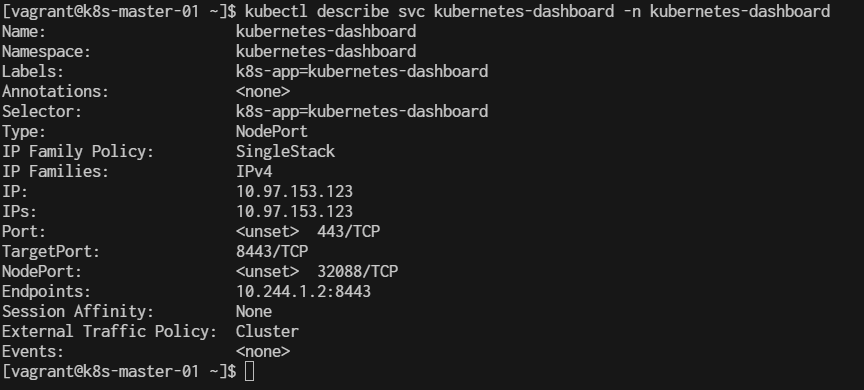
This will show you the NodePort under the Port section in the output, like this:
Type:                     NodePort
Port:                     <Service_Port>  443/TCP
NodePort:                 <NodePort_Assigned>  <XXXXX>/TCP
You can then access the Kubernetes Dashboard using: https://<Node_IP>:<NodePort_Assigned>
https://192.168.35.21:32088/
**Summary Steps to Change the NodePort (Repeat) ** (options)
- Edit the Service and Set NodePort Manually
You can manually edit the service to ensure that a NodePort is set. Run the following command to edit the service:
$ kubectl edit svc kubernetes-dashboard -n kubernetes-dashboard
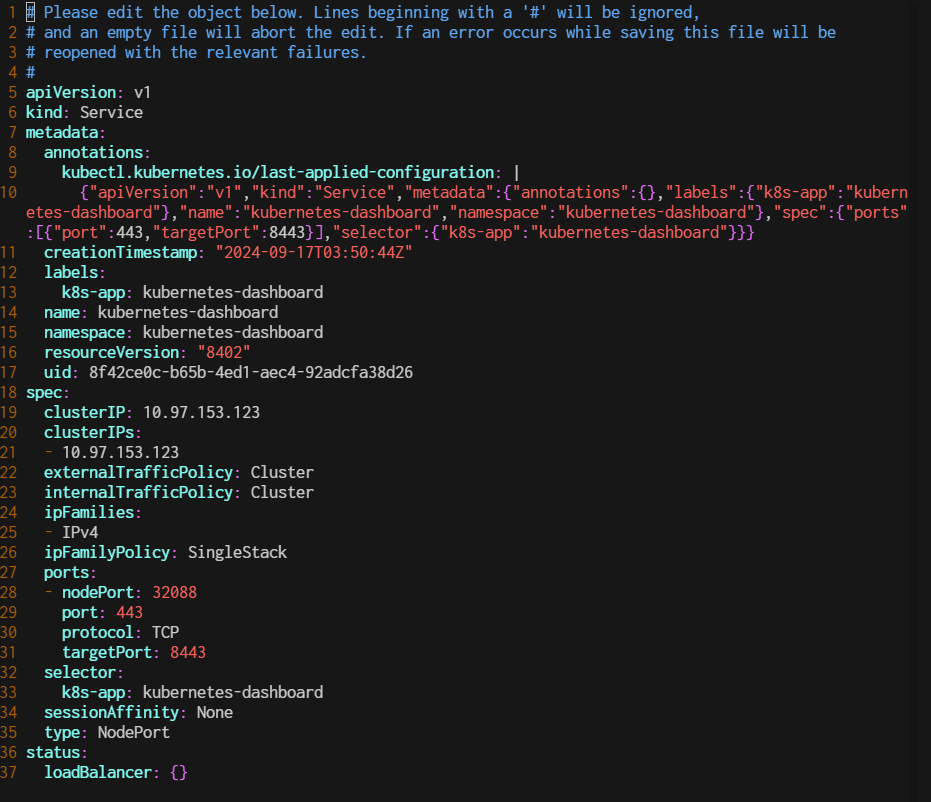
2. Set the NodePort Manaual
ports:
- port: 443
  targetPort: 8443
  protocol: TCP
  nodePort: 32080  # Set the NodePort manually or remove this line to let Kubernetes auto-assign it.
3 Save the Changes
After editing, save and close the editor. Kubernetes will automatically apply the changes.
4 Verify the NodePort
After applying the changes, verify that the NodePort is correctly set by running:
$ kubectl get svc kubernetes-dashboard -n kubernetes-dashboard
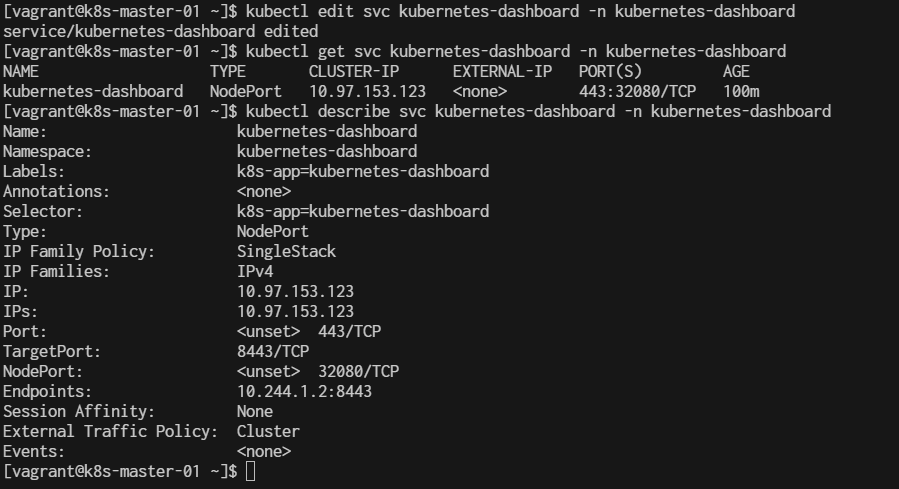
Open browser
https://192.168.35.21:32080/
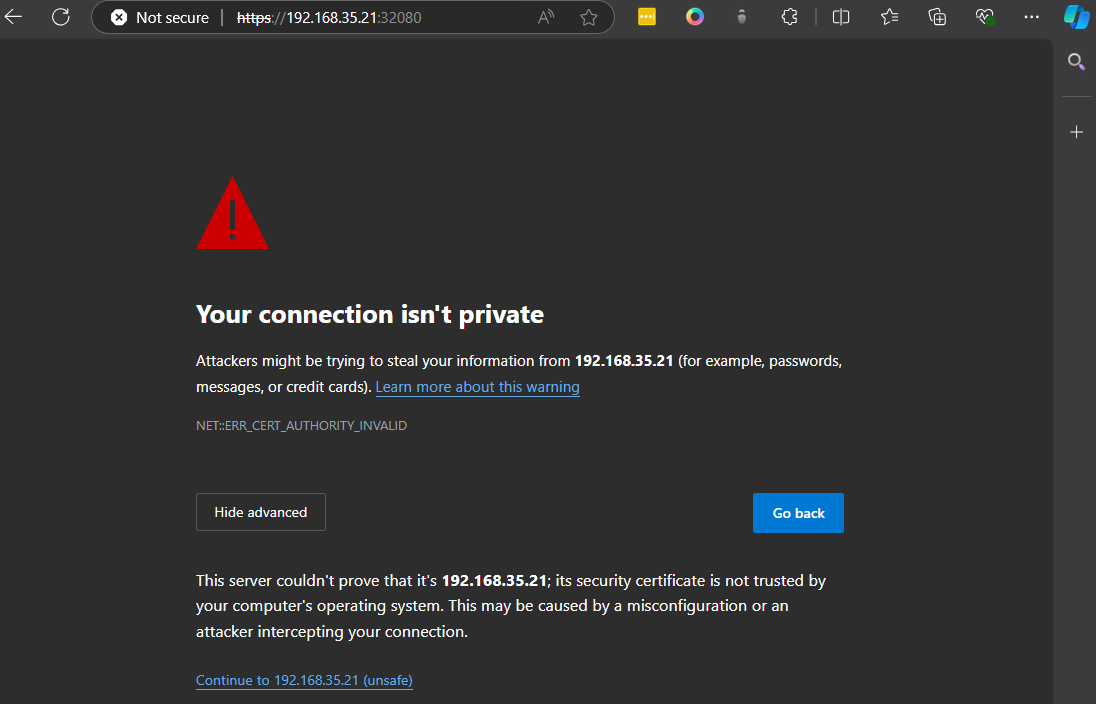
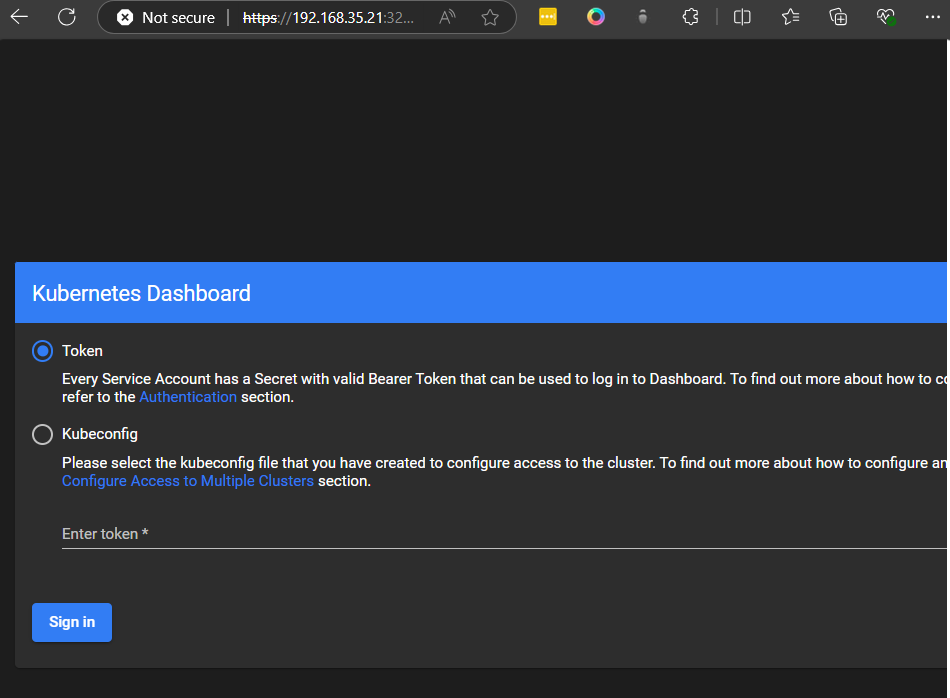 copy paste token and click sign in
eyJhbGciOiJSUzI1NiIsImtpZCI6IkxzempxdmxQTTNydFlhc3hneWZTWVNRTzlWaVAzQnNQemVYOUl3SnRrSm8ifQ.eyJhdWQiOlsiaHR0cHM6Ly9rdWJlcm5ldGVzLmRlZmF1bHQuc3ZjLmNsdXN0ZXIubG9jYWwiXSwiZXhwIjoxNzI2NTU1NjYxLCJpYXQiOjE3MjY1NTIwNjEsImlzcyI6Imh0dHBzOi8va3ViZXJuZXRlcy5kZWZhdWx0LnN2Yy5jbHVzdGVyLmxvY2FsIiwia3ViZXJuZXRlcy5pbyI6eyJuYW1lc3BhY2UiOiJrdWJlcm5ldGVzLWRhc2hib2FyZCIsInNlcnZpY2VhY2NvdW50Ijp7Im5hbWUiOiJkYXNoYm9hcmQtYWRtaW4tc2EiLCJ1aWQiOiIxNTM1YWRlNC05Y2NmLTRjOTQtYWYxZi1jMzQ0MTY5MTQ5MDIifX0sIm5iZiI6MTcyNjU1MjA2MSwic3ViIjoic3lzdGVtOnNlcnZpY2VhY2NvdW50Omt1YmVybmV0ZXMtZGFzaGJvYXJkOmRhc2hib2FyZC1hZG1pbi1zYSJ9.S2iNcL4dLEkQqKDnTZaeCfY_IOUts88WcPd-go18aA2ktB3pp3ASHx7hOzp8AQOYJ3Ysk8fCZgGjRK4mlRs8Tq7sXoNDL-tWecBWfxoO15z5RFMgC882_uBS-_AUB2FVeM41yPIhGnbSJOXbpdntH1fLEgWRf1IzRHS_UuVl6-EvsiC7C7DUzT2Zqa63YF7pSwHnGBo52YsLYYLJzeZk_S7unuA1EfvjISrWkdvyxkGJwCMCjJNMWB3zED08f61iLxlNV2wozMMivwrOBu2mCUd2va66p7jKwkyyw4yTPlmmAplf0AHAEI_VqW45q_MgVXacdpC5kgiyKA7JPHwH1g
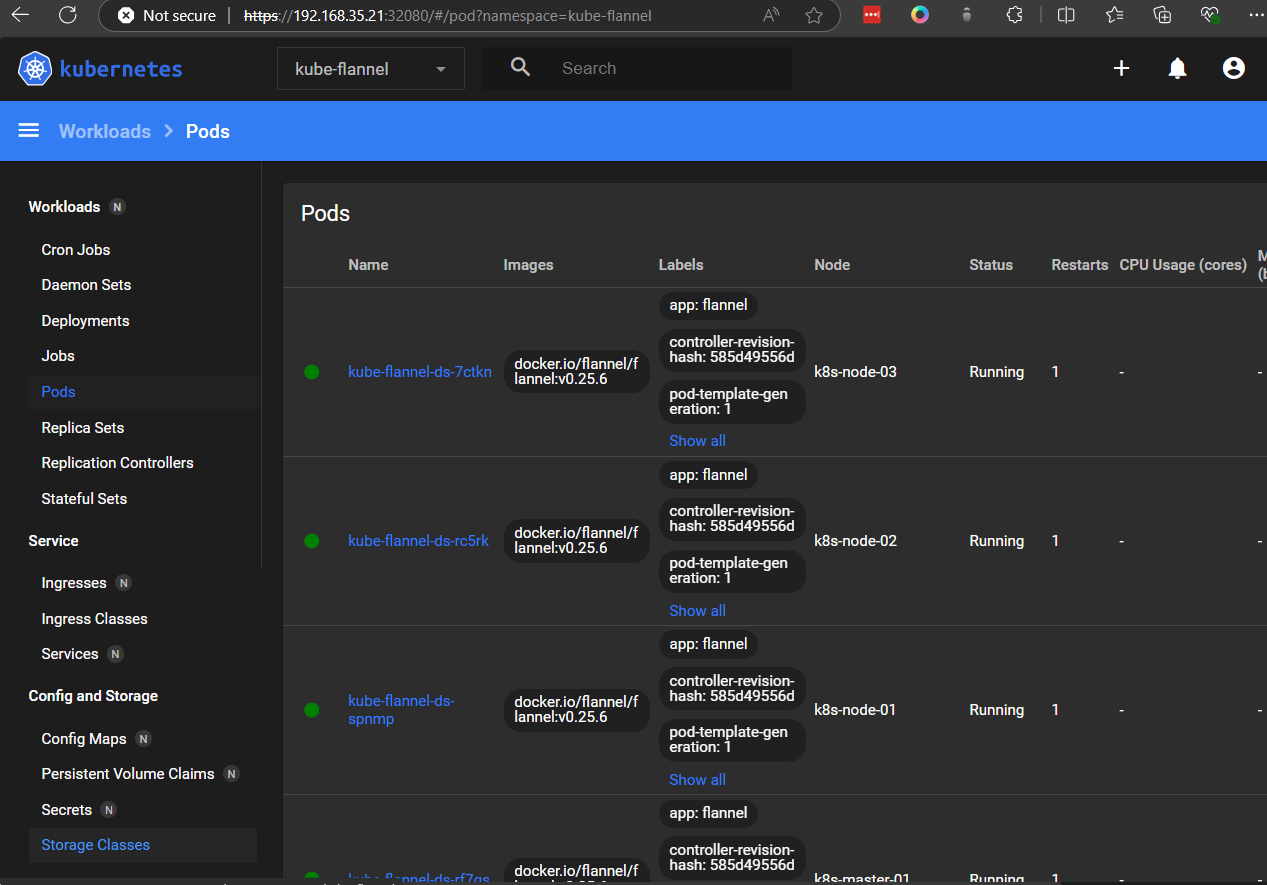
Workshop1 kubernetes
##prepare##
sudo dnf install docker-ce -y
Step1 Start minikube start
$ kubectl version
Client Version: v1.28.14
Kustomize Version: v5.0.4-0.20230601165947-6ce0bf390ce3
Server Version: v1.28.14
Step2 Cluster pods
see all the pods running in the minikube cluster using the command
$ kubectl get pods -A
Step3 Cluster Version
$ kubectl version --client -o json
{
  "clientVersion": {
    "major": "1",
    "minor": "28",
    "gitVersion": "v1.28.14",
    "gitCommit": "66f3325d5562da565def802b8bacf431b082991d",
    "gitTreeState": "clean",
    "buildDate": "2024-09-11T08:27:29Z",
    "goVersion": "go1.22.6",
    "compiler": "gc",
    "platform": "linux/amd64"
  },
  "kustomizeVersion": "v5.0.4-0.20230601165947-6ce0bf390ce3"
}
Step4 list manage
$ kubectl get pods --all-namespaces -o jsonpath="{.items[*].spec['initContainers', 'containers'][*].image}" |\
tr -s '[[:space:]]' '\n' |\
sort |\
uniq -c
      4 docker.io/flannel/flannel-cni-plugin:v1.5.1-flannel2
      8 docker.io/flannel/flannel:v0.25.6
      3 nginxdemos/nginx-hello:latest
      1 quay.io/metallb/controller:v0.14.8
      4 quay.io/metallb/speaker:v0.14.8
      2 registry.k8s.io/coredns/coredns:v1.10.1
      1 registry.k8s.io/etcd:3.5.15-0
      1 registry.k8s.io/kube-apiserver:v1.28.14
      1 registry.k8s.io/kube-controller-manager:v1.28.14
      4 registry.k8s.io/kube-proxy:v1.28.14
      1 registry.k8s.io/kube-scheduler:v1.28.14
Step5 Build Docker image
$ sudo dnf install git -y
$ git clone https://github.com/OctopusSamples/octopus-underwater-app.git
$ cd octopus-underwater-app
$ docker build . -t underwater
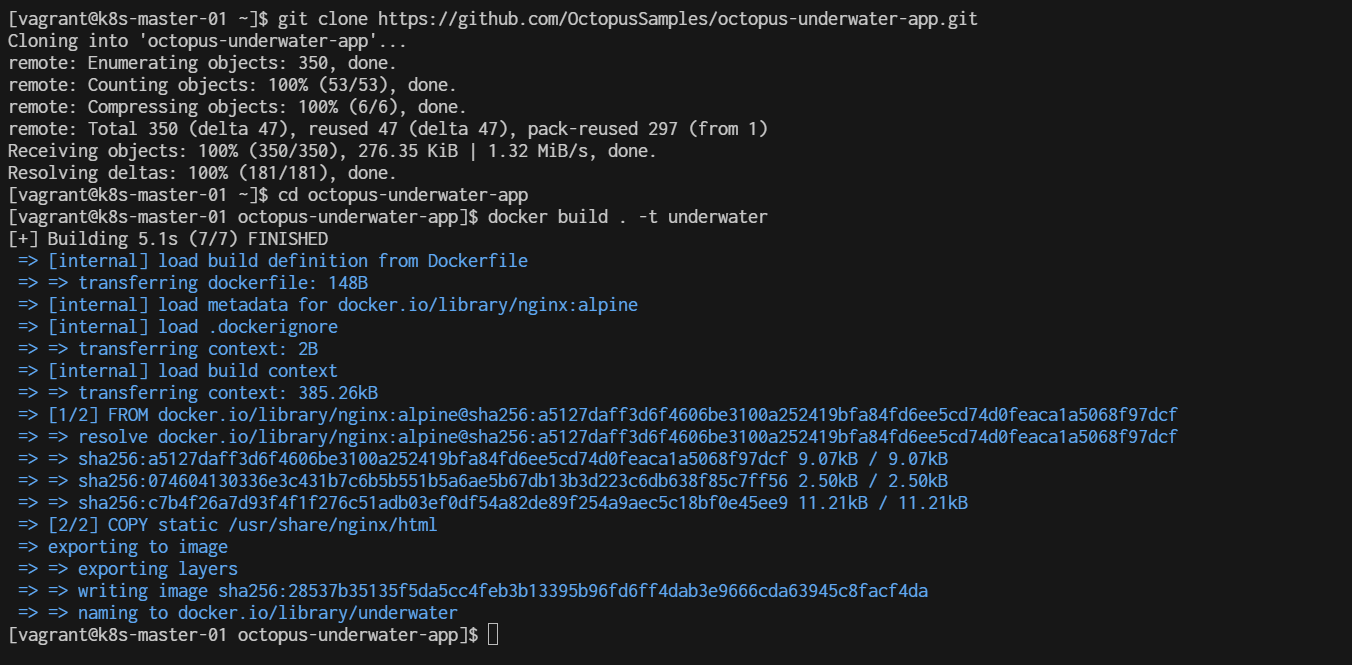
$ docker images
REPOSITORY                    TAG       IMAGE ID       CREATED          SIZE
REPOSITORY               TAG       IMAGE ID       CREATED              SIZE
underwater               latest    28537b35135f   About a minute ago   43.6MB
Step6 Finally, run the Docker image with the command:
$ docker run -rm -p 5000:80 underwater
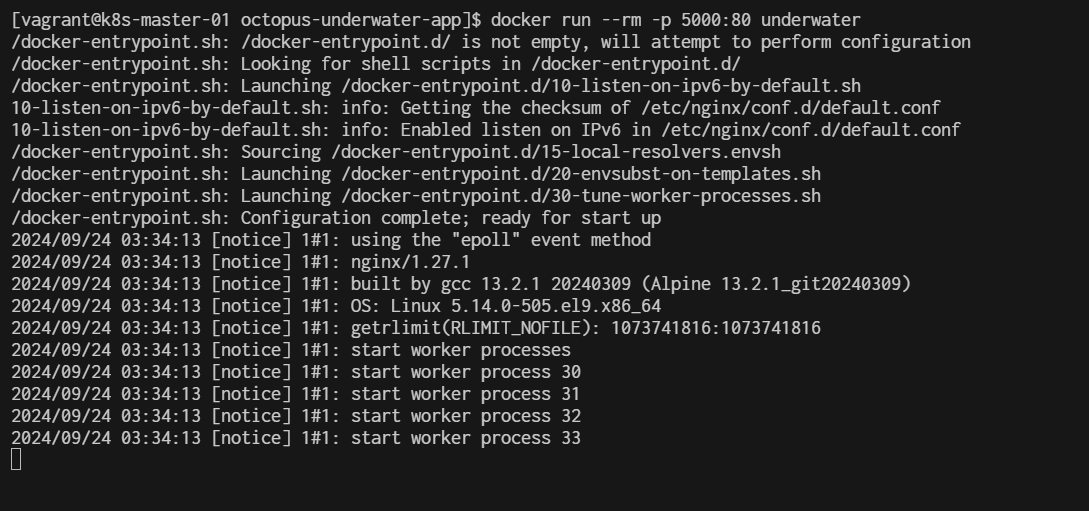
Step7 Test by open other windows terminal create ssh forwardport
>ssh -L 5000:localhost:5000 vagrant@192.168.35.10
vagrant@192.168.40.10's password:
Last login: Thu Sep 19 03:31:32 2024 from 192.168.40.10
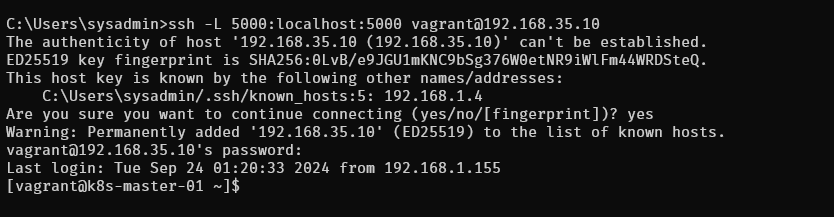
The command you've provided is used to set up SSH port forwarding. Here’s what it does:
- ssh: This is the SSH command to log in to a remote machine.
- -L 5000:localhost:5000: This sets up local port forwarding. It forwards port 5000 on your local machine to port 5000 on the remote machine (in this case, localhost refers to the remote machine).
- vagrant@192.168.40.10: This specifies the user (vagrant) and the remote host's IP address (192.168.40.10) that you're connecting to. Once this command is executed, you can access services running on port 5000 of the remote machine through port 5000 of your local machine. For example, if the remote machine is running a web application on port 5000, you can access it locally by opening http://localhost:5000 in your browser.
Step8 Test from browser after ssh reverse

Ctrl+C to stop running container. then container will be remove with option --rm

Step9 Push image to registry
- crate account on docker.io
docker cli login:
$ docker login -u username
example:

- tag image
$ docker tag underwater <registry-address>/underwater:latest
$ docker images
example:
$ docker tag underwater itbakery/underwater:latest
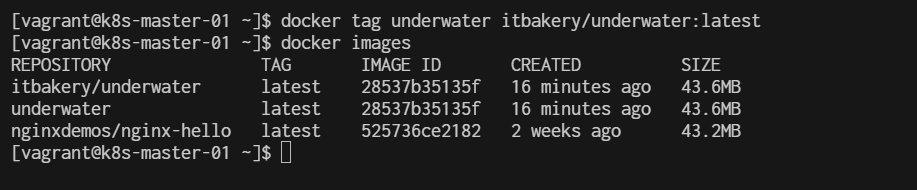
- Docker push to registry
$ docker push underwater <registry-address>/underwater:latest
example:
$ docker push itbakery/underwater:latest
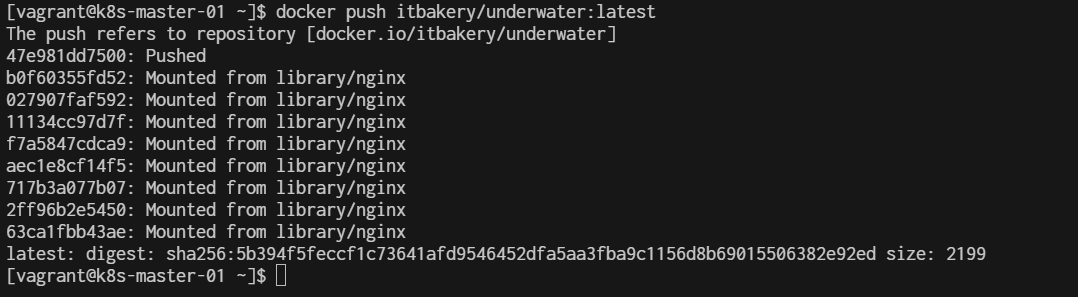
Step19 create deployment yaml
cd ~
mkdir deployment
cd deployment
cat <<EOF | tee underwater.yaml
apiVersion: apps/v1
kind: Deployment
metadata:
  name: underwater-deployment
spec:
  replicas: 1
  selector:
    matchLabels:
      app: underwater
  template:
    metadata:
      labels:
        app: underwater
    spec:
      containers:
      - name: underwater
        image: <registry-address>/underwater:latest
        ports:
        - containerPort: 80  # Adjust this port according to your application

---
apiVersion: v1
kind: Service
metadata:
  name: underwater-service
spec:
  selector:
    app: underwater
  ports:
    - protocol: TCP
      port: 80          # Port exposed by the service
      targetPort: 80    # Port on which the container is listening
  type: NodePort  # Change this to LoadBalancer or ClusterIP if needed

EOF
- change registry-address to yours
Then deploy the app with the command:
$ kubectl apply -f underwater.yaml
deployment.apps/underwater-deployment created
service/underwater-service created
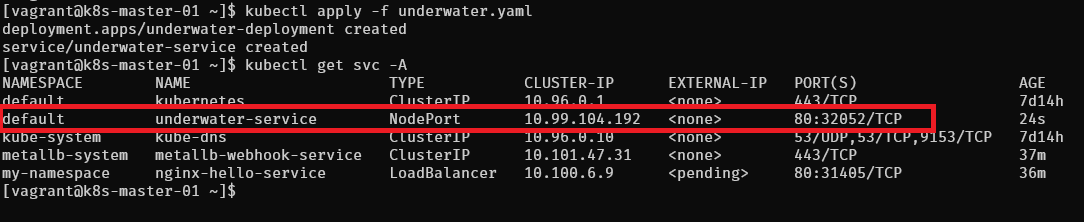
open browser http://192.168.35.21:32052/
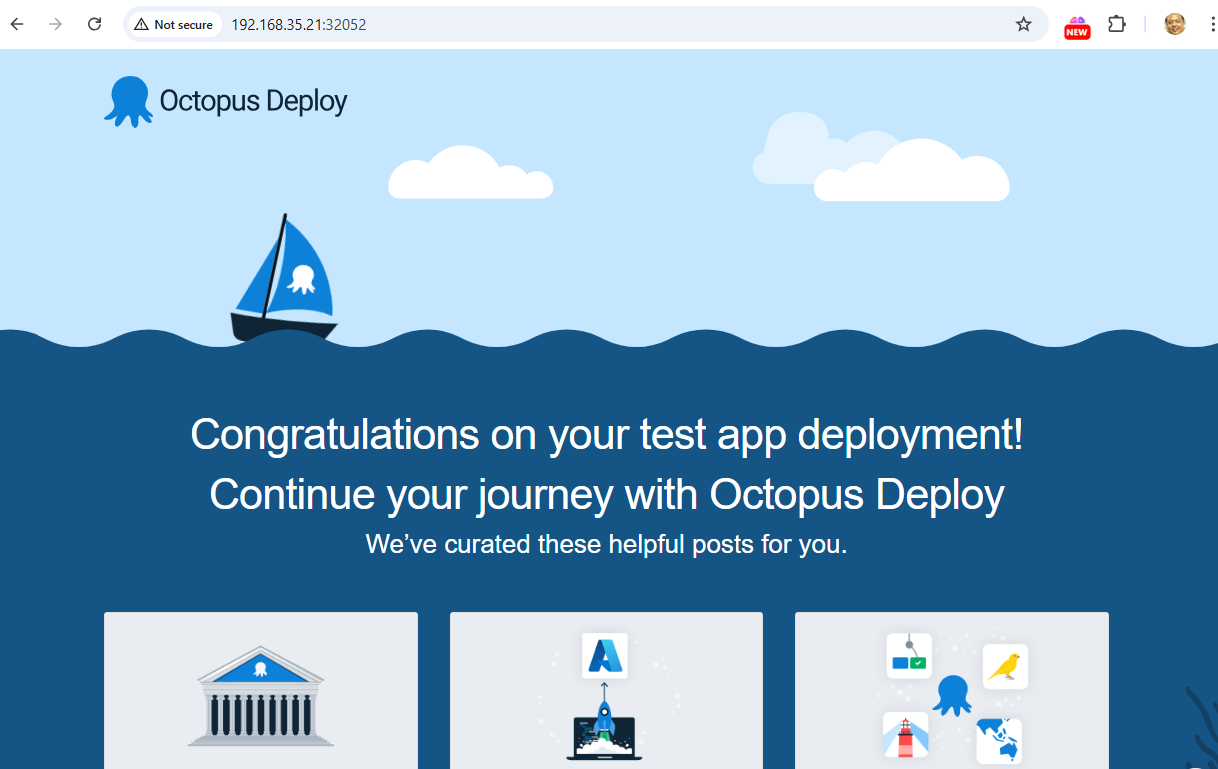
Nodeport network
Create Loadbalancer
We use nginxdemos/nginx-hello to test loadbalance
https://github.com/nginxinc/NGINX-Demos/tree/master/nginx-hello-nonroot
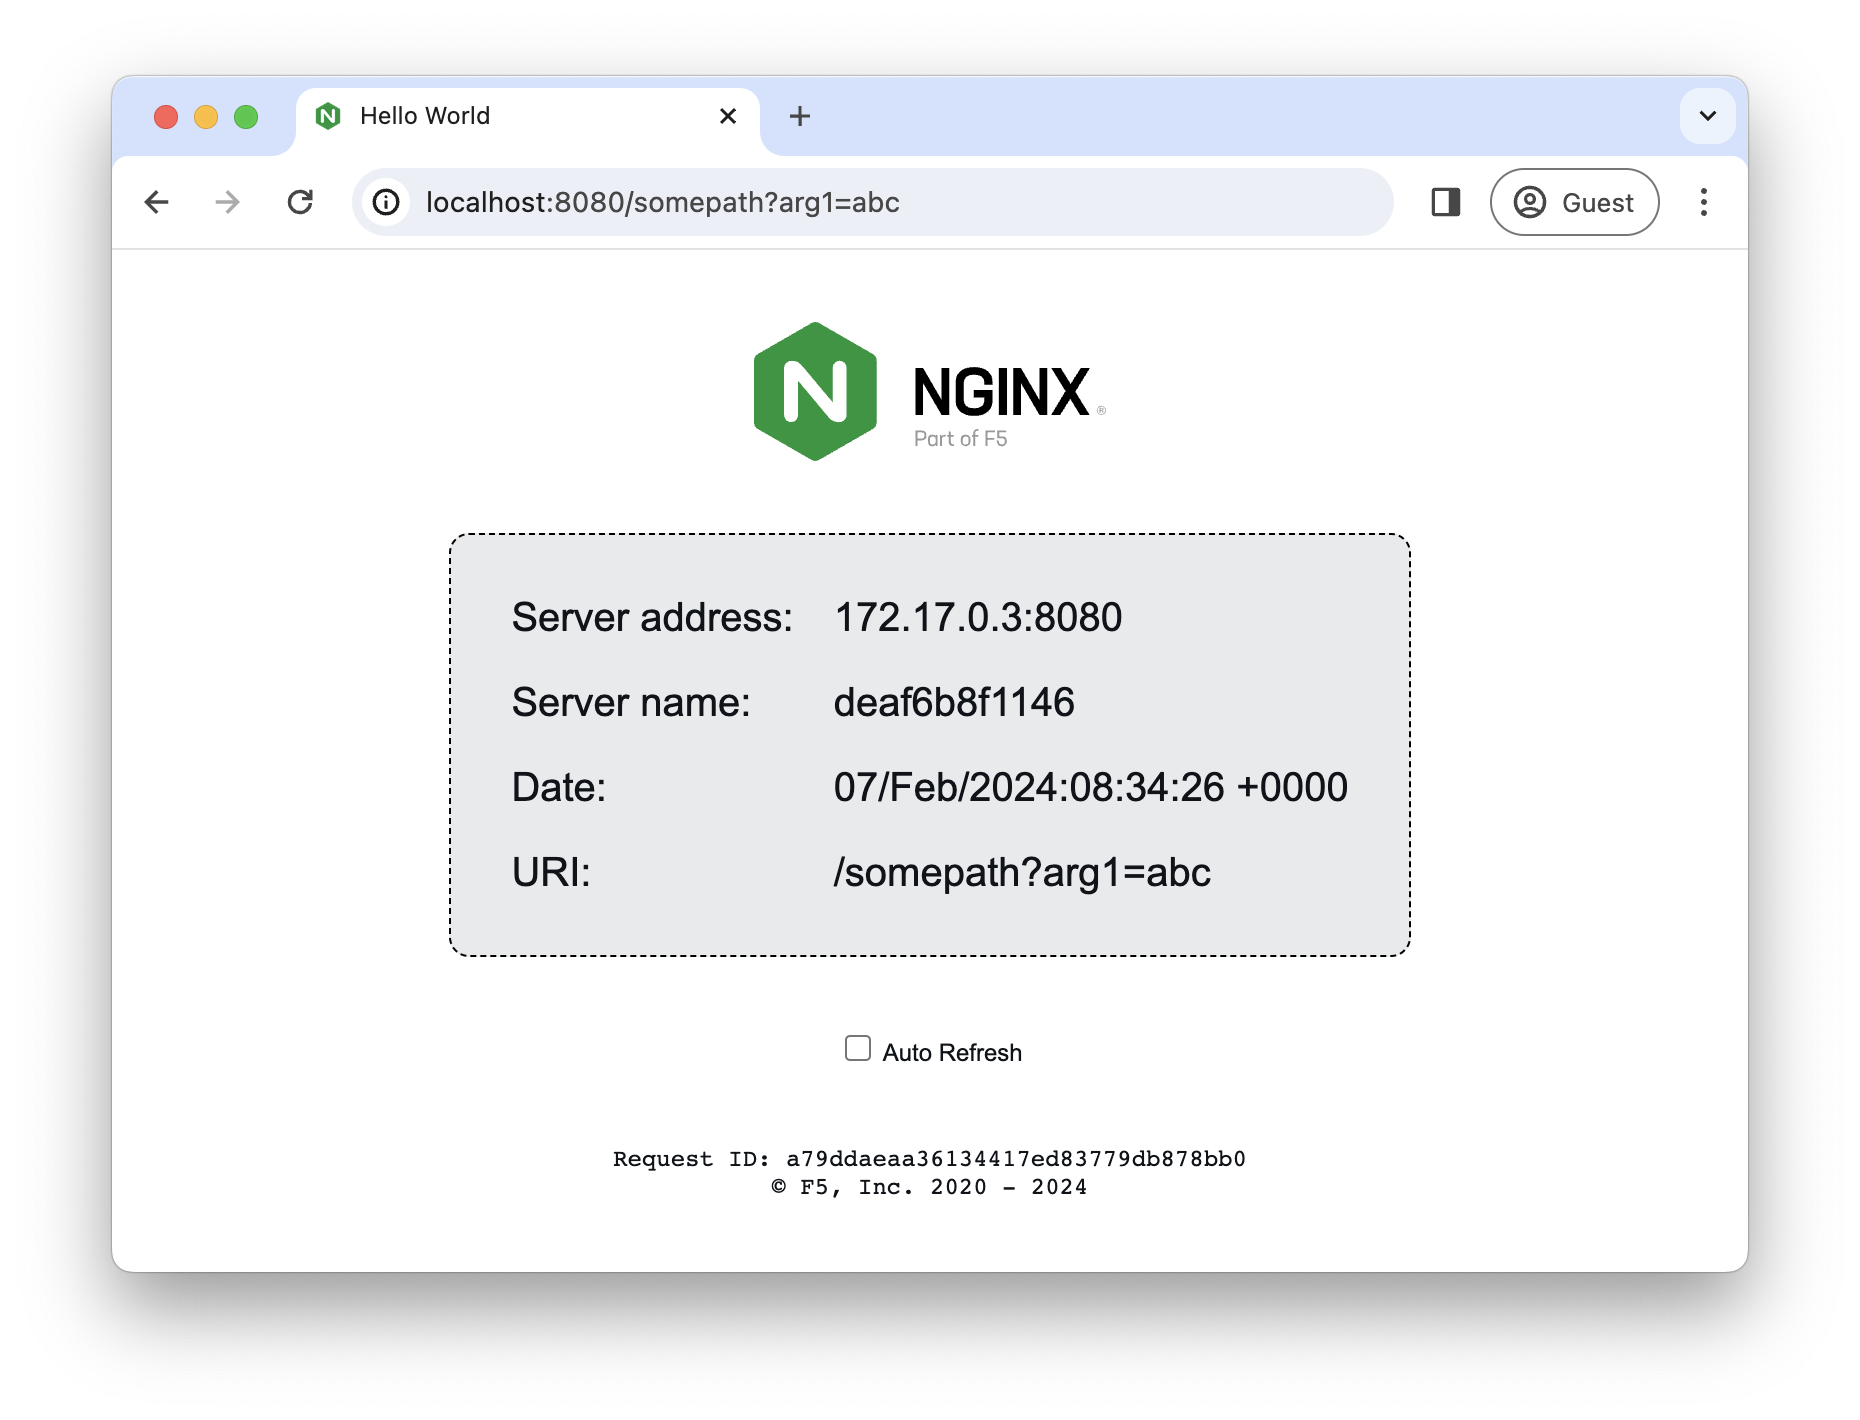
How to run with docker: (run in kube master)
$ docker run -P -d nginxdemos/nginx-hello

Run follow command:
$ ip address show docker0
$ docker ps
$ docker network ls
$ docker inspect happy_hugle | jq '.[0].NetworkSettings'
- Dockers create bridge network for containers to connect
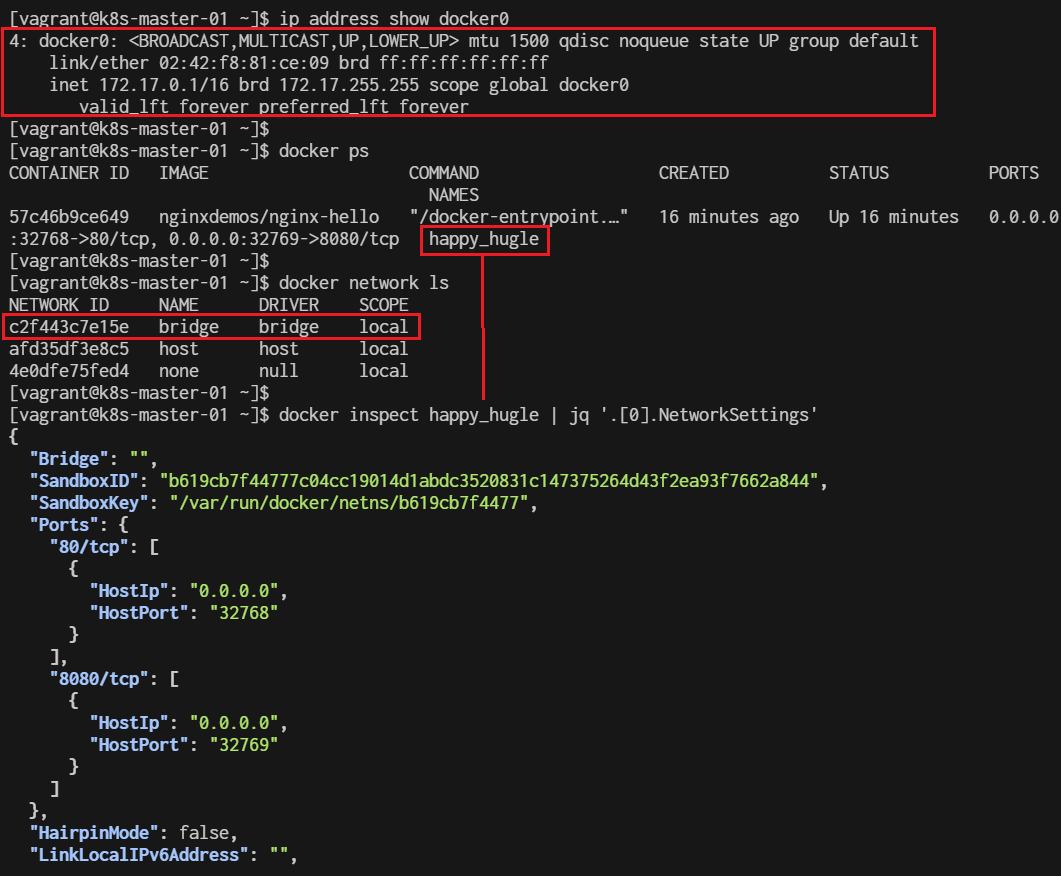
go bellow part of output. it will show ip of Container with connect to bride
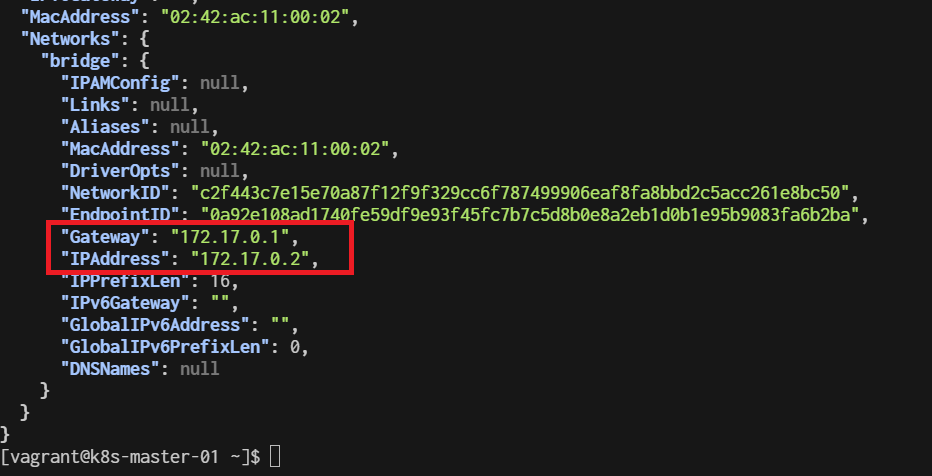
Test Container nginx by open curl ip:port
curl http://172.17.0.2:8080
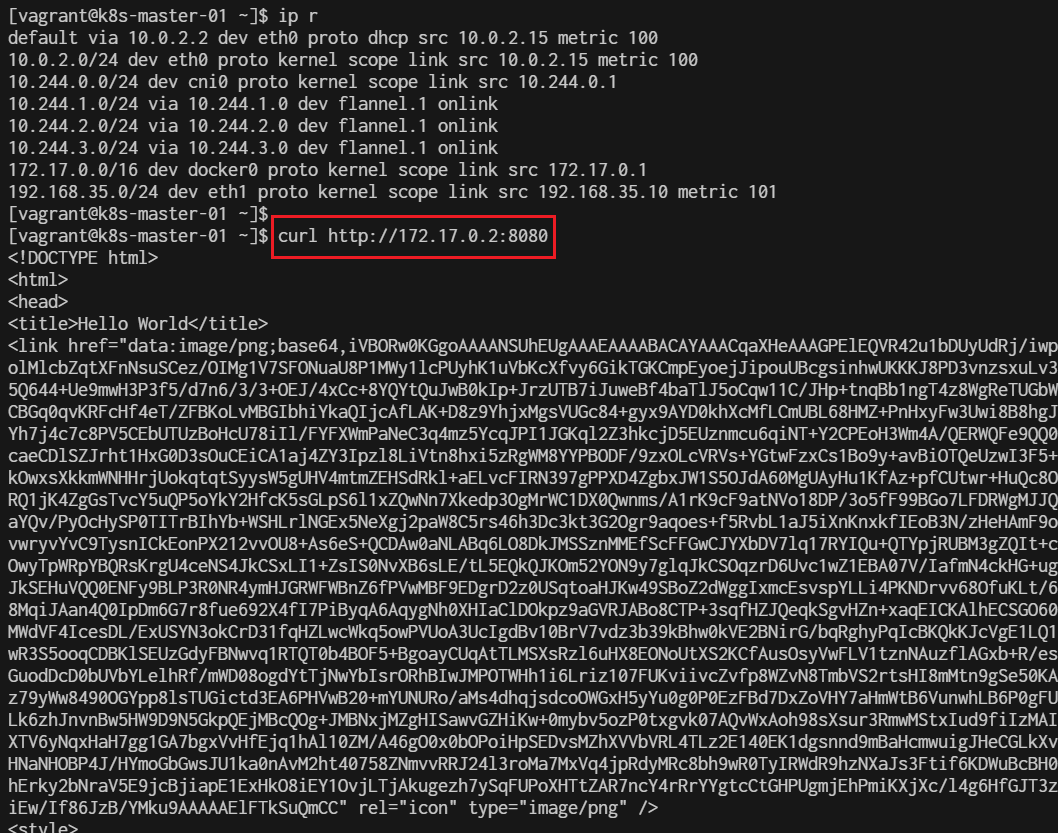
Run container in Kubernetes Cluster
$ kubectl create namespace my-namespace
$ kubectl run nginx --image nginxdemos/nginx-hello  -n my-namespace
- Create namespace name my-namespace It will create a Kubernetes Pod named nginx with the image nginxdemos/nginx-hello in namespace. However, this command in its default form may not expose the application to external traffic.
$ kubectl get pods -n my-namespace
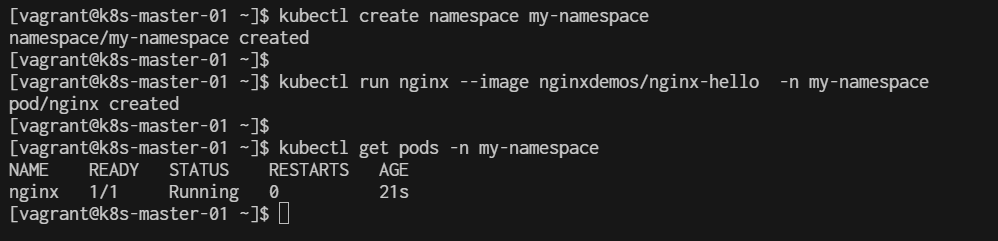
Exposing the pod
If you want to expose this nginx pod on a specific port so that it can be accessed externally, you can do so using a Service.
You can expose the Pod using the following command:
$ kubectl expose pod nginx --type=NodePort --port=8080 -n my-namespace
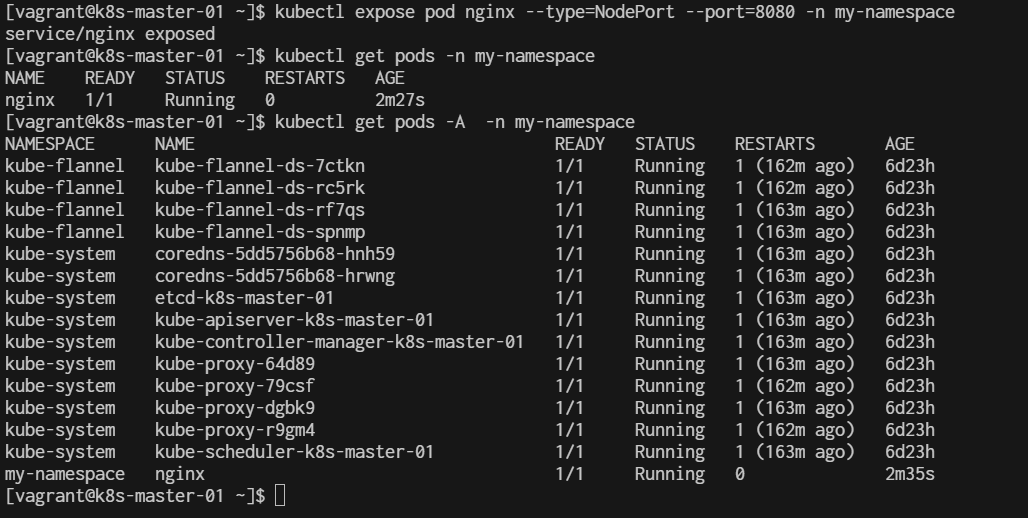
Here’s a breakdown of what each part of this command does:
- kubectl expose pod nginx: Exposes the pod named nginx by creating a service.
- --type=NodePort: Specifies the service type as NodePort, which will expose the service on a port accessible from outside the cluster.
- --port=8080: Maps the pod's port to the service's port (8080 in this case).
- -n my-namespace: Targets the my-namespace namespace where the nginx pod resides.
Verify the service:
$ kubectl get services -n my-namespace

- The output should show the nginx service with a NodePort assigned (:30843), which will be accessible from outside the cluster using the node's IP address and the specified port.
- port of pod is 8080
To locat which node that pod install into:
$ kubectl get pods -n my-namespace -o wide

To Descript pod
$ kubectl describe pod nginx -n my-namespace
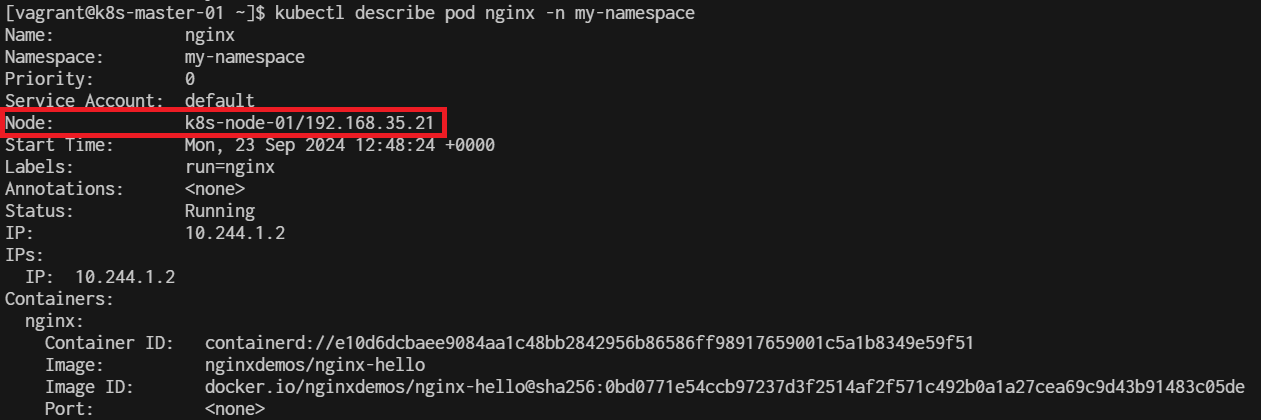
To Get ip of node:
$ kubectl get node -A -o wide

To Open Browser http://192.168.35.21:30843/
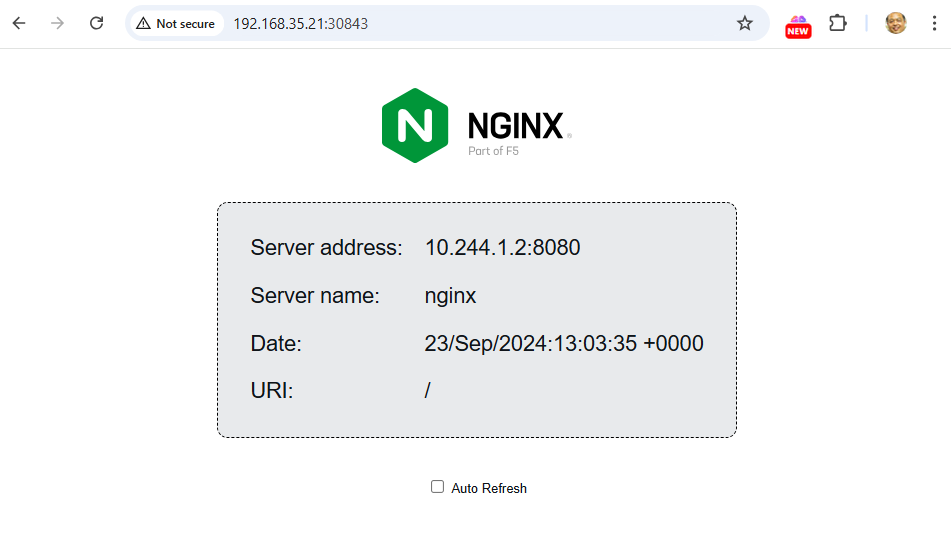
Jenkin menifest
https://www.jenkins.io/doc/book/installing/kubernetes/
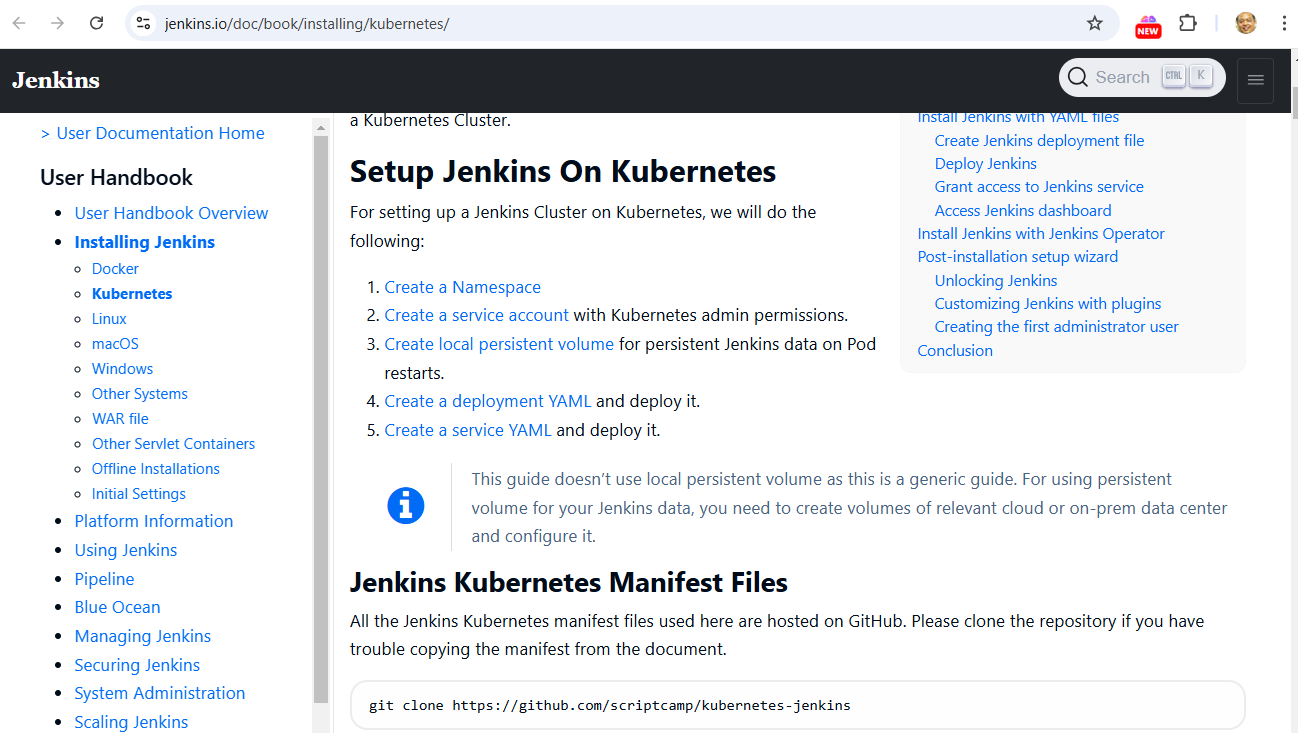
All the Jenkins Kubernetes manifest files used here are hosted on GitHub. Please clone the repository if you have trouble copying the manifest from the document.
-
Create a Namespace
-
Create a service account with Kubernetes admin permissions.
-
Create local persistent volume for persistent Jenkins data on Pod restarts.
-
Create a deployment YAML and deploy it.
-
Create a service YAML and deploy it.
git clone https://github.com/scriptcamp/kubernetes-jenkins
Kubernetes Jenkins Deployment
Let’s get started with deploying Jenkins on Kubernetes.
Step 1: Create a Namespace for Jenkins. It is good to categorize all the DevOps tools as a separate namespace from other applications.
$ kubectl create namespace devops-tools
namespace/devops-tools created
Step 2: Create a 'serviceAccount.yaml' file and copy the following admin service account manifest.
cat <<EOF | tee serviceAccount.yaml
---
apiVersion: rbac.authorization.k8s.io/v1
kind: ClusterRole
metadata:
  name: jenkins-admin
rules:
  - apiGroups: [""]
    resources: ["*"]
    verbs: ["*"]
---
apiVersion: v1
kind: ServiceAccount
metadata:
  name: jenkins-admin
  namespace: devops-tools
---
apiVersion: rbac.authorization.k8s.io/v1
kind: ClusterRoleBinding
metadata:
  name: jenkins-admin
roleRef:
  apiGroup: rbac.authorization.k8s.io
  kind: ClusterRole
  name: jenkins-admin
subjects:
- kind: ServiceAccount
  name: jenkins-admin
  namespace: devops-tools
EOF
The 'serviceAccount.yaml' creates a 'jenkins-admin' clusterRole, 'jenkins-admin' ServiceAccount and binds the 'clusterRole' to the service account.
The 'jenkins-admin' cluster role has all the permissions to manage the cluster components. You can also restrict access by specifying individual resource actions.
Now create the service account using kubectl.
$ kubectl apply -f serviceAccount.yaml
clusterrole.rbac.authorization.k8s.io/jenkins-admin created
serviceaccount/jenkins-admin created
clusterrolebinding.rbac.authorization.k8s.io/jenkins-admin created
Step 3: Create 'volume.yaml' and copy the following persistent volume manifest.
cat <<EOF | tee volume.yaml
kind: StorageClass
apiVersion: storage.k8s.io/v1
metadata:
  name: local-storage
provisioner: kubernetes.io/no-provisioner
volumeBindingMode: WaitForFirstConsumer
---
apiVersion: v1
kind: PersistentVolume
metadata:
  name: jenkins-pv-volume
  labels:
    type: local
spec:
  storageClassName: local-storage
  claimRef:
    name: jenkins-pv-claim
    namespace: devops-tools
  capacity:
    storage: 10Gi
  accessModes:
    - ReadWriteOnce
  local:
    path: /mnt
  nodeAffinity:
    required:
      nodeSelectorTerms:
      - matchExpressions:
        - key: kubernetes.io/hostname
          operator: In
          values:
          - k8s-node-01
---
apiVersion: v1
kind: PersistentVolumeClaim
metadata:
  name: jenkins-pv-claim
  namespace: devops-tools
spec:
  storageClassName: local-storage
  accessModes:
    - ReadWriteOnce
  resources:
    requests:
      storage: 3Gi
EOF
Replace 'k8s-node-01' with any one of your cluster worker nodes hostname.
You can get the worker node hostname using the kubectl.
$ kubectl get nodes
Let’s create the volume using kubectl:
$ kubectl create -f volume.yaml
storageclass.storage.k8s.io/local-storage created
persistentvolume/jenkins-pv-volume created
persistentvolumeclaim/jenkins-pv-claim created
Step 4: Create a Deployment file named 'jenkins-deployment.yaml' and copy the following deployment manifest.
cat <<EOF | tee jenkins-deployment.yaml
apiVersion: apps/v1
kind: Deployment
metadata:
  name: jenkins
  namespace: devops-tools
spec:
  replicas: 1
  selector:
    matchLabels:
      app: jenkins-server
  template:
    metadata:
      labels:
        app: jenkins-server
    spec:
      securityContext:
            fsGroup: 1000
            runAsUser: 1000
      serviceAccountName: jenkins-admin
      containers:
        - name: jenkins
          image: jenkins/jenkins:lts
          resources:
            limits:
              memory: "2Gi"
              cpu: "1000m"
            requests:
              memory: "500Mi"
              cpu: "500m"
          ports:
            - name: httpport
              containerPort: 8080
            - name: jnlpport
              containerPort: 50000
          livenessProbe:
            httpGet:
              path: "/login"
              port: 8080
            initialDelaySeconds: 90
            periodSeconds: 10
            timeoutSeconds: 5
            failureThreshold: 5
          readinessProbe:
            httpGet:
              path: "/login"
              port: 8080
            initialDelaySeconds: 60
            periodSeconds: 10
            timeoutSeconds: 5
            failureThreshold: 3
          volumeMounts:
            - name: jenkins-data
              mountPath: /var/jenkins_home
      volumes:
        - name: jenkins-data
          persistentVolumeClaim:
              claimName: jenkins-pv-claim
EOF
Create the deployment using kubectl.
$ kubectl apply -f jenkins-deployment.yaml
deployment.apps/jenkins created
Check deployemt status:
$ kubectl get deployments -n devops-tools
Now, you can get the deployment details using the following command.
$ kubectl describe deployments --namespace=devops-tools
create service.yaml
cat <<EOF | tee jenkins-service.yaml
apiVersion: v1
kind: Service
metadata:
  name: jenkins-service
  namespace: devops-tools
  annotations:
      prometheus.io/scrape: 'true'
      prometheus.io/path:   /
      prometheus.io/port:   '8080'
spec:
  selector:
    app: jenkins-server
  type: NodePort
  ports:
    - port: 8080
      targetPort: 8080
      nodePort: 32000
EOF
apply service
$ kubectl apply -f jenkins-service.yaml
service/jenkins-service created
$ kubectl get pods -A

$ kubectl get svc -A

login nodeport 32000
http://192.168.35.21:32000/
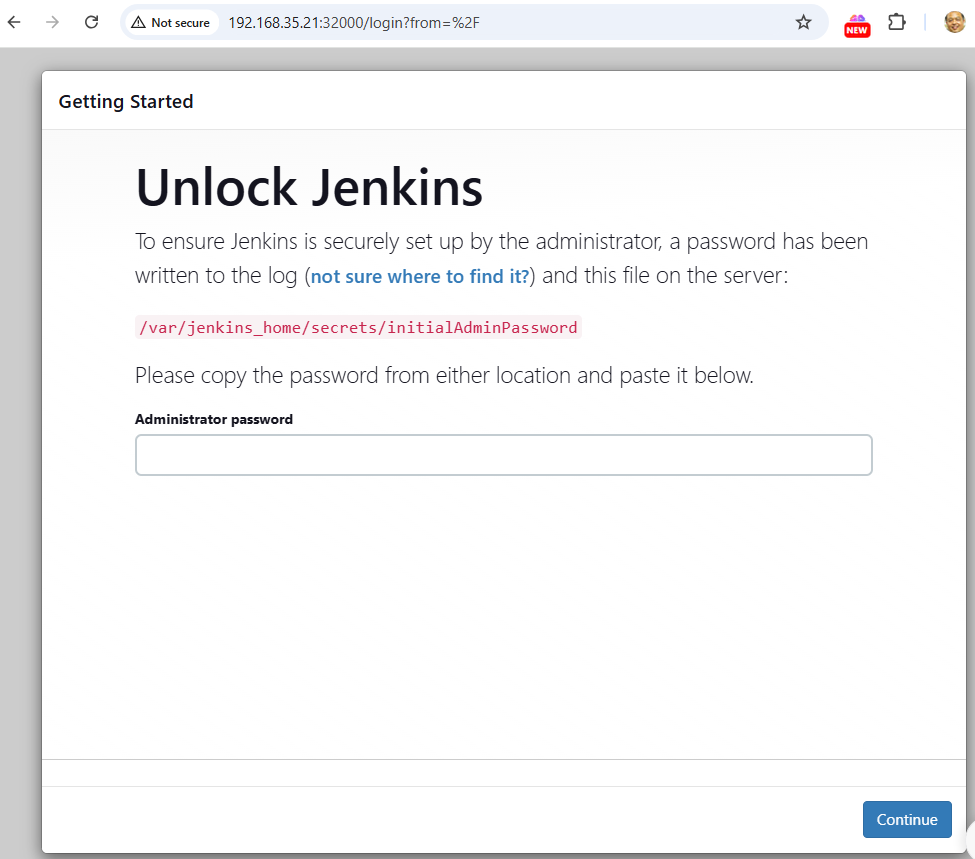
how to get /var/jenkins_home/secrets/initialAdminPassword
$ kubectl get pods -n devops-tools
NAME                      READY   STATUS    RESTARTS   AGE
jenkins-bf6b8d5fb-cwv8p   1/1     Running   0          74m
$ kubectl exec jenkins-bf6b8d5fb-cwv8p -n devops-tools  -- cat /var/jenkins_home/secrets/initialAdminPassword
f416325f94b54c5b91f4befc85c1baf9
[vagrant@k8s-master-01 ~]$

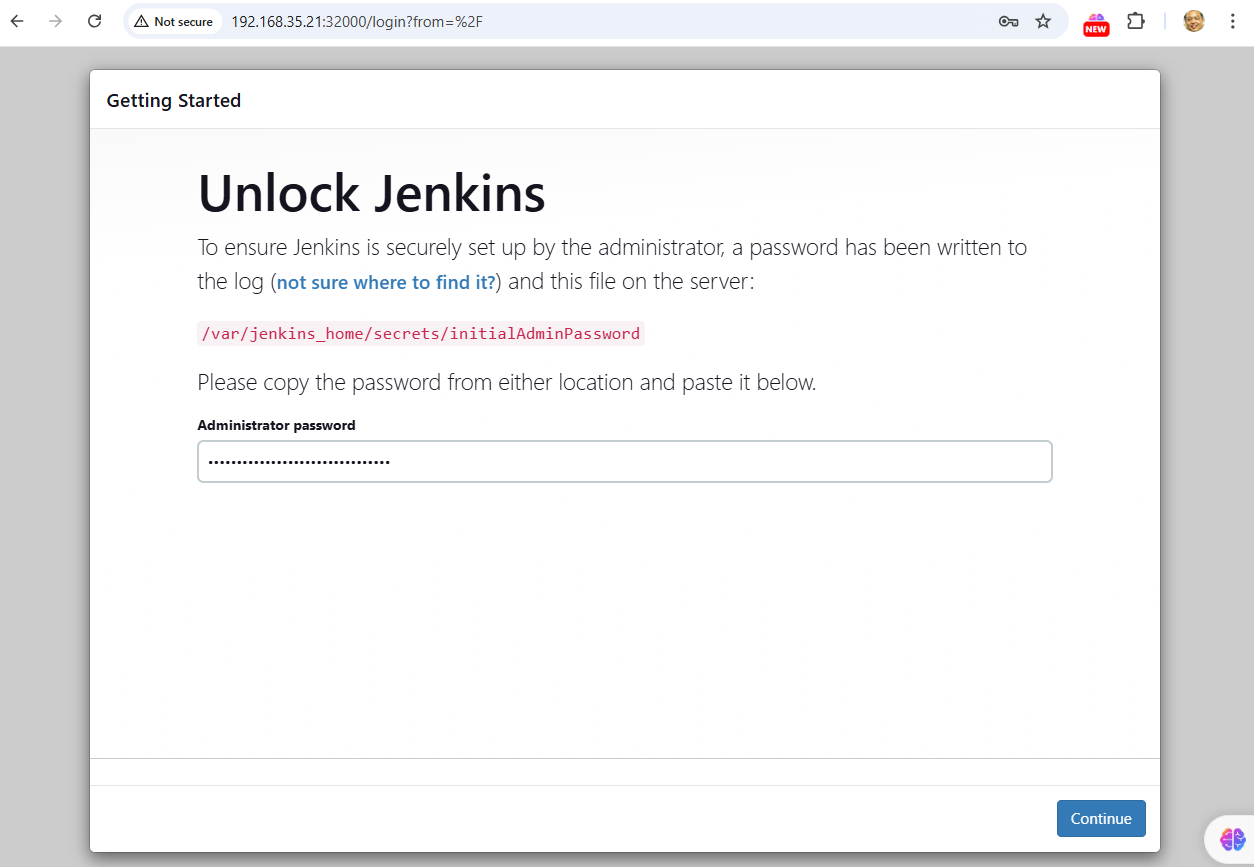
- f416325f94b54c5b91f4befc85c1baf9
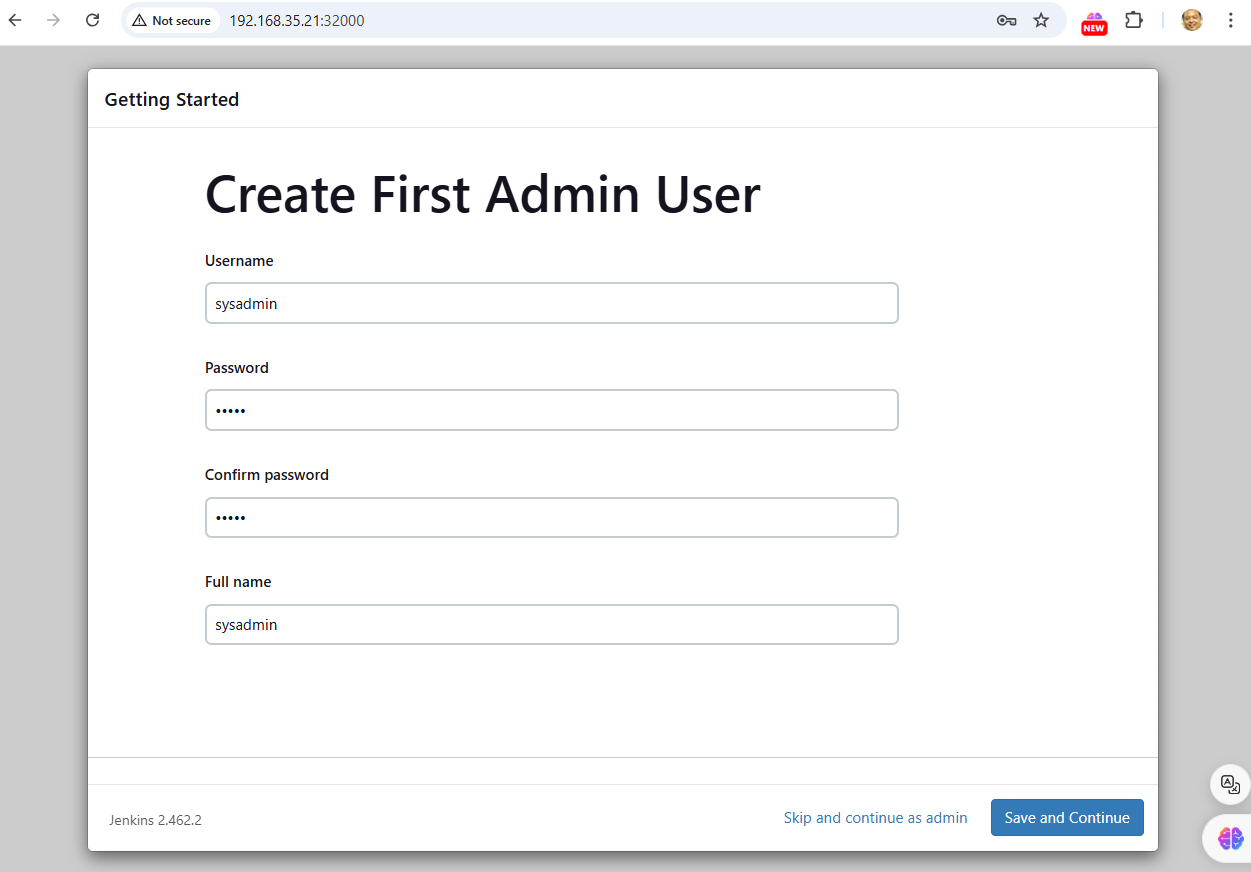

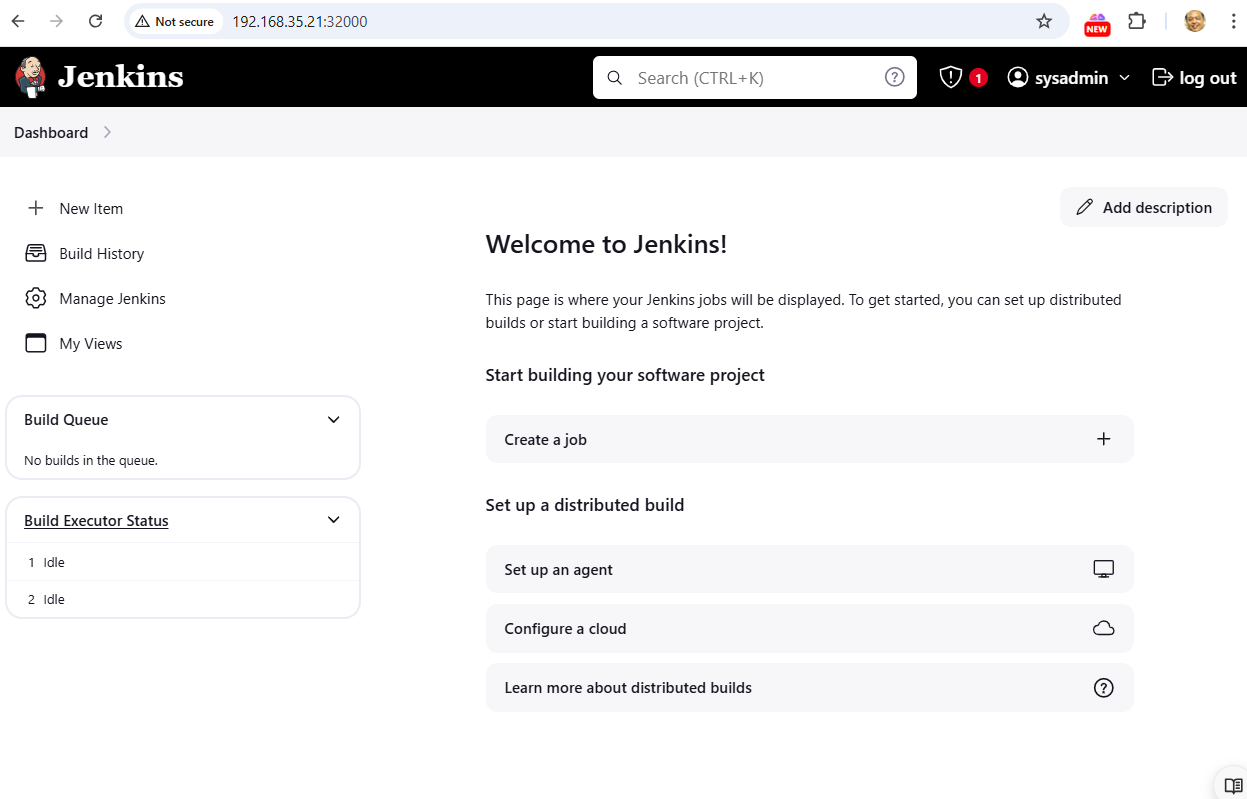
Edit Vagrantfile
VBoxManage list bridgedifs
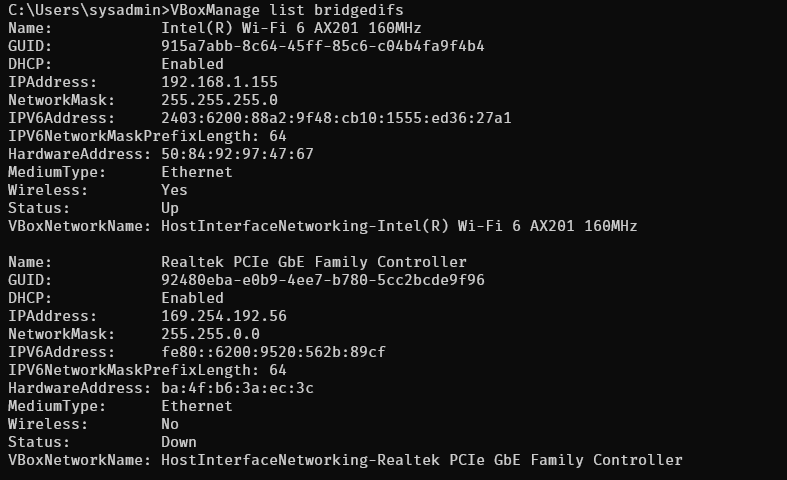
Edit vagrantfile add public interface
# -*- mode: ruby -*-
# vi: set ft=ruby :

# All Vagrant configuration is done below. The "2" in Vagrant.configure
# configures the configuration version (we support older styles for
# backwards compatibility). Please don't change it unless you know what
# you're doing.

$base=<<-SCRIPT
    echo ">>> Run Kubernetes Base script"
    echo "-----------------------------------------------"
    echo "\nStep-1 Enable ssh password authentication"
    echo $(whoami)
    sed -i 's/PasswordAuthentication no/PasswordAuthentication yes/g' /etc/ssh/sshd_config
    systemctl restart sshd.service
    echo "\nStep-2 Enable firewall"
    sudo dnf update -y
    sudo dnf install -y firewalld socat
    sudo systemctl enable --now firewalld

    # Step-3 Disable SELinux
    echo "\nStep-3 Disable SELinux"
    sudo setenforce 0
    sudo sed -i 's/^SELINUX=enforcing$/SELINUX=permissive/' /etc/selinux/config


    # Step-4 manage kernel module
    echo "\nStep-4 manage kernel module"
cat <<EOF | sudo tee /etc/sysctl.d/k8s.conf
net.ipv4.ip_forward = 1
net.bridge.bridge-nf-call-ip6tables = 1
net.bridge.bridge-nf-call-iptables = 1
EOF

    sudo "show sysctl -p"
    sudo sysctl -p
    sudo sysctl --system

    # Load kernel module
cat <<EOF | sudo tee /etc/modules-load.d/k8s.conf
overlay
br_netfilter
ip_vs
ip_vs_rr
ip_vs_wrr
ip_vs_sh
EOF
    sudo modprobe br_netfilter
    sudo modprobe ip_vs
    sudo modprobe ip_vs_rr
    sudo modprobe ip_vs_wrr
    sudo modprobe ip_vs_sh
    sudo modprobe overlay

    # Step-5: Disable swap permanently
    echo "\nStep-5: Disable swap permanently"
    sudo swapoff -a
    sudo sed -e '/swap/s/^/#/g' -i /etc/fstab

    # Step-6: Enable Enable firewall port
    echo "\nStep-6: Enable Enable firewall port"
    sudo firewall-cmd --zone=public --permanent --add-port=8001/tcp
    sudo firewall-cmd --zone=public --permanent --add-port=443/tcp
    sudo firewall-cmd --zone=public --permanent --add-port=6443/tcp
    sudo firewall-cmd --zone=public --permanent --add-port=2379-2380/tcp
    sudo firewall-cmd --zone=public --permanent --add-port=10250/tcp
    sudo firewall-cmd --zone=public --permanent --add-port=10251/tcp
    sudo firewall-cmd --zone=public --permanent --add-port=10252/tcp
    sudo firewall-cmd --zone=public --permanent --add-port=10255/tcp
    sudo firewall-cmd --zone=public --permanent --add-port=5473/tcp
    sudo firewall-cmd --permanent --add-port 10250/tcp --add-port 30000-32767/tcp

    # Flannel port
    sudo firewall-cmd --permanent --add-port=8472/udp
    # Etcd port
    sudo firewall-cmd --permanent --add-port=2379-2380/tcp
    sudo firewall-cmd --reload


    # Step-7: Enable Hostname

    echo "Step7 Enable Hostname"
cat <<EOF | sudo tee /etc/hosts
127.0.0.1   localhost localhost.localdomain localhost4 localhost4.localdomain4
::1         localhost localhost.localdomain localhost6 localhost6.localdomain6

127.0.0.1 centos9s.localdomain

192.168.35.10  k8s-master-01 k8s-master-01
192.168.35.21  k8s-node-01  k8s-node-01
192.168.35.22  k8s-node-02  k8s-node-02
192.168.35.23  k8s-node-03  k8s-node-03
EOF

SCRIPT


$node_crio=<<-SCRIPT
    echo ">>> Run Kubernetes node script"
    echo "-----------------------------------------------"
    echo "\nStep1 Install crio engine"
    # Install crio engine
cat <<EOF | sudo tee /etc/yum.repos.d/crio.repo
[cri-o]
name=CRI-O
baseurl=https://pkgs.k8s.io/addons:/cri-o:/prerelease:/main/rpm/
enabled=1
gpgcheck=1
gpgkey=https://pkgs.k8s.io/addons:/cri-o:/prerelease:/main/rpm/repodata/repomd.xml.key
EOF
    sudo dnf install -y cri-o
    sudo systemctl enable crio --now
    sudo systemctl status crio
    sudo journalctl -u crio

    # Install kubenetest
    echo "\nStep2 Install kubenetest"
cat <<EOF | sudo tee /etc/yum.repos.d/kubernetes.repo
[kubernetes]
name=Kubernetes
baseurl=https://pkgs.k8s.io/core:/stable:/v1.28/rpm/
enabled=1
gpgcheck=1
gpgkey=https://pkgs.k8s.io/core:/stable:/v1.28/rpm/repodata/repomd.xml.key
exclude=kubelet kubeadm kubectl cri-tools kubernetes-cni
EOF


    sudo dnf install -y kubelet kubeadm kubectl --disableexcludes=kubernetes
    sudo systemctl enable --now kubelet

    echo "\nRun command: sudo systemctl status kubelet"
    sudo systemctl status kubelet

    # Enable Bash completion for kubernetes command
    source <(kubectl completion bash)
    sudo kubectl completion bash | sudo tee  /etc/bash_completion.d/kubectl
SCRIPT

$node_containerd=<<-SCRIPT
    echo ">>> Run Kubernetes node script"
    echo "-----------------------------------------------"
    echo "\nStep1 Install containerd engine"
    # Install docker engine
    sudo dnf config-manager --add-repo=https://download.docker.com/linux/centos/docker-ce.repo
    sudo dnf install -y docker-ce docker-ce-cli containerd.io
    sudo systemctl enable --now docker
    sudo usermod -aG docker vagrant

    # install containerd daemon
    sudo dnf install -y containerd.io
    sudo systemctl enable --now containerd

    # Install kubenetest
    echo "\nStep2 Install kubenetest"
cat <<EOF | sudo tee /etc/yum.repos.d/kubernetes.repo
[kubernetes]
name=Kubernetes
baseurl=https://pkgs.k8s.io/core:/stable:/v1.28/rpm/
enabled=1
gpgcheck=1
gpgkey=https://pkgs.k8s.io/core:/stable:/v1.28/rpm/repodata/repomd.xml.key
exclude=kubelet kubeadm kubectl cri-tools kubernetes-cni
EOF


    sudo dnf install -y kubelet kubeadm kubectl --disableexcludes=kubernetes
    sudo systemctl enable --now kubelet

    echo "\nRun command: sudo systemctl status kubelet"
    sudo systemctl status kubelet

    source <(kubectl completion bash)
    sudo kubectl completion bash | sudo tee  /etc/bash_completion.d/kubectl

    echo "\nStep3 Config containerd with systemdCroup"
    sudo mv /etc/containerd/config.toml  /etc/containerd/config.toml.orgi
    sudo containerd config default | sudo tee /etc/containerd/config.toml
    sudo sed -i 's/SystemdCgroup = false/SystemdCgroup = true/g' /etc/containerd/config.toml

    sudo systemctl restart containerd
    sudo systemctl status containerd.service
    echo "\mStep4 Test pull and run image"
    sudo ctr image pull docker.io/library/hello-world:latest
    sudo ctr run --rm docker.io/library/hello-world:latest test
SCRIPT

Vagrant.configure("2") do |config|
  # The most common configuration options are documented and commented below.
  # For a complete reference, please see the online documentation at
  # https://docs.vagrantup.com.
  config.vm.box = "generic/centos9s"

  config.vm.define "k8s-master-01" do |control|
    control.vm.hostname = "k8s-master-01"
    control.vm.network "public_network", bridge: "Intel(R) Wi-Fi 6 AX201 160MHz"
    control.vm.network "private_network", ip: "192.168.35.10"
    control.vm.provider "virtualbox" do |vb|
      vb.memory = "4096"
      vb.cpus = 4
    end

    control.vm.provision "shell", inline: $base
    control.vm.provision "shell", inline: $node_containerd
  end

  config.vm.define "k8s-node-01" do |node1|
    node1.vm.hostname = "k8s-node-01"
    node1.vm.network "public_network", bridge: "Intel(R) Wi-Fi 6 AX201 160MHz"
    node1.vm.network "private_network", ip: "192.168.35.21"
    node1.vm.provider "virtualbox" do |vb|
      vb.memory = "2048"
      vb.cpus = 2
    end

    node1.vm.provision "shell", inline: $base
    node1.vm.provision "shell", inline: $node_containerd
  end

  config.vm.define "k8s-node-02" do |node2|
    node2.vm.hostname = "k8s-node-02"
    node2.vm.network "public_network", bridge: "Intel(R) Wi-Fi 6 AX201 160MHz"
    node2.vm.network "private_network", ip: "192.168.35.22"
    node2.vm.provider "virtualbox" do |vb|
      vb.memory = "2048"
      vb.cpus = 2
    end
    node2.vm.provision "shell", inline: $base
    node2.vm.provision "shell", inline: $node_containerd
  end

  config.vm.define "k8s-node-03" do |node3|
    node3.vm.hostname = "k8s-node-03"
    node3.vm.network "public_network", bridge: "Intel(R) Wi-Fi 6 AX201 160MHz"
    node3.vm.network "private_network", ip: "192.168.35.23"
    node3.vm.provider "virtualbox" do |vb|
      vb.memory = "2048"
      vb.cpus = 2
    end
    node3.vm.provision "shell", inline: $base
    node3.vm.provision "shell", inline: $node_containerd
  end

  #config.vm.synced_folder ".", "/vagrant"


end
Run Vagrant reload:
> vagrant reload
Vagant ssh to node
> vagrant ssh k8s_master_01
Check ip
$ ip a
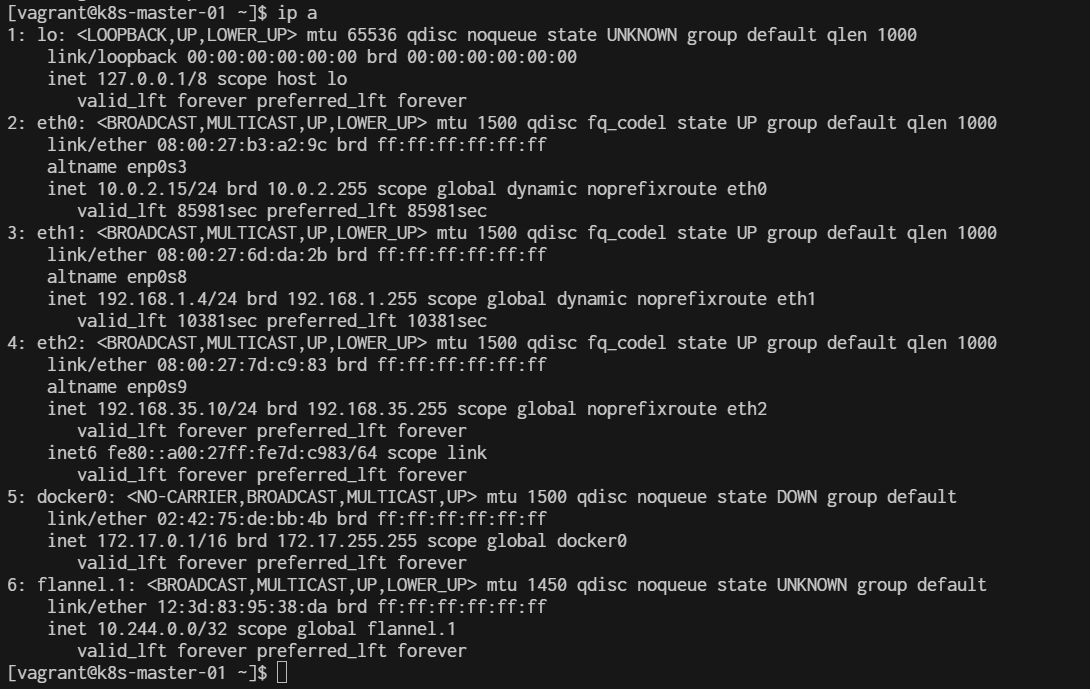
Create bride interface
ip addr show eth1
sudo dnf install bridge-utils
sudo cp /etc/sysconfig/network-scripts/ifcfg-eth1 /etc/sysconfig/network-scripts/ifcfg-eth1.bak
cat <<EOF | sudo tee /etc/sysconfig/network-scripts/ifcfg-br0
TYPE=Bridge
NAME=br0
DEVICE=br0
ONBOOT=yes
BOOTPROTO=static      # or 'dhcp' if you are using DHCP
IPADDR=192.168.1.4  # Set your static IP address for the bridge
NETMASK=255.255.255.0
GATEWAY=192.168.1.1  # Update this to match your network gateway
DNS1=8.8.8.8          # Set a DNS server
EOF
- change 192.168.1.4 to ip of eth1
cat <<EOF | sudo tee /etc/sysconfig/network-scripts/ifcfg-eth1
TYPE=Ethernet
NAME=eth1
DEVICE=eth1
ONBOOT=yes
BRIDGE=br0
EOF
sudo ip addr flush dev eth1
sudo brctl addif br0 eth1
sudo systemctl restart NetworkManager
$ brctl show
bridge name     bridge id               STP enabled     interfaces
br0             8000.0800276dda2b       no              eth1
docker0         8000.024216b8edbf       no
$ ping 192.168.1.1
$ ip r
Test ssh from windows
C:\Users\sysadmin>ssh vagrant@192.168.1.4
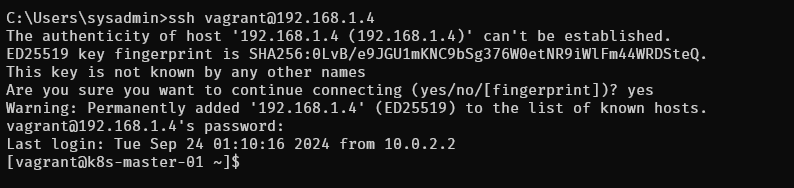
MetalLB
Why?
Kubernetes does not offer an implementation of network load balancers (Services of type LoadBalancer) for bare-metal clusters. The implementations of network load balancers that Kubernetes does ship with are all glue code that calls out to various IaaS platforms (GCP, AWS, Azure…). If you’re not running on a supported IaaS platform (GCP, AWS, Azure…), LoadBalancers will remain in the “pending” state indefinitely when created.
Bare-metal cluster operators are left with two lesser tools to bring user traffic into their clusters, “NodePort” and “externalIPs” services. Both of these options have significant downsides for production use, which makes bare-metal clusters second-class citizens in the Kubernetes ecosystem.
MetalLB aims to redress this imbalance by offering a network load balancer implementation that integrates with standard network equipment, so that external services on bare-metal clusters also “just work” as much as possible.
we simulate a LoadBalancer using MetalLB https://metallb.universe.tf/

Allow firewall: run on everynode
$ sudo firewall-cmd --add-port=7946/tcp --permanent
$ sudo firewall-cmd --add-port=7472/tcp --permanent
$ sudo firewall-cmd --add-port=8080/tcp --permanent
$ sudo firewall-cmd --add-icmp-block-inversion
$ sudo firewall-cmd --add-service=dhcp --permanent
$ sudo firewall-cmd --reload
$ sudo firewall-cmd --list-ports
- Speaker: Port 7946 (TCP) for communication and service management.
- Controller: Port 8080 (TCP) for managing IP allocation.
Preparation
kubectl get configmap kube-proxy -n kube-system -o yaml | \
sed -e "s/strictARP: false/strictARP: true/" | \
kubectl apply -f - -n kube-system
Installation Metallb by manifest
To install MetalLB, apply the manifest:
$ kubectl apply -f https://raw.githubusercontent.com/metallb/metallb/v0.14.8/config/manifests/metallb-native.yaml
https://github.com/metallb/metallb/
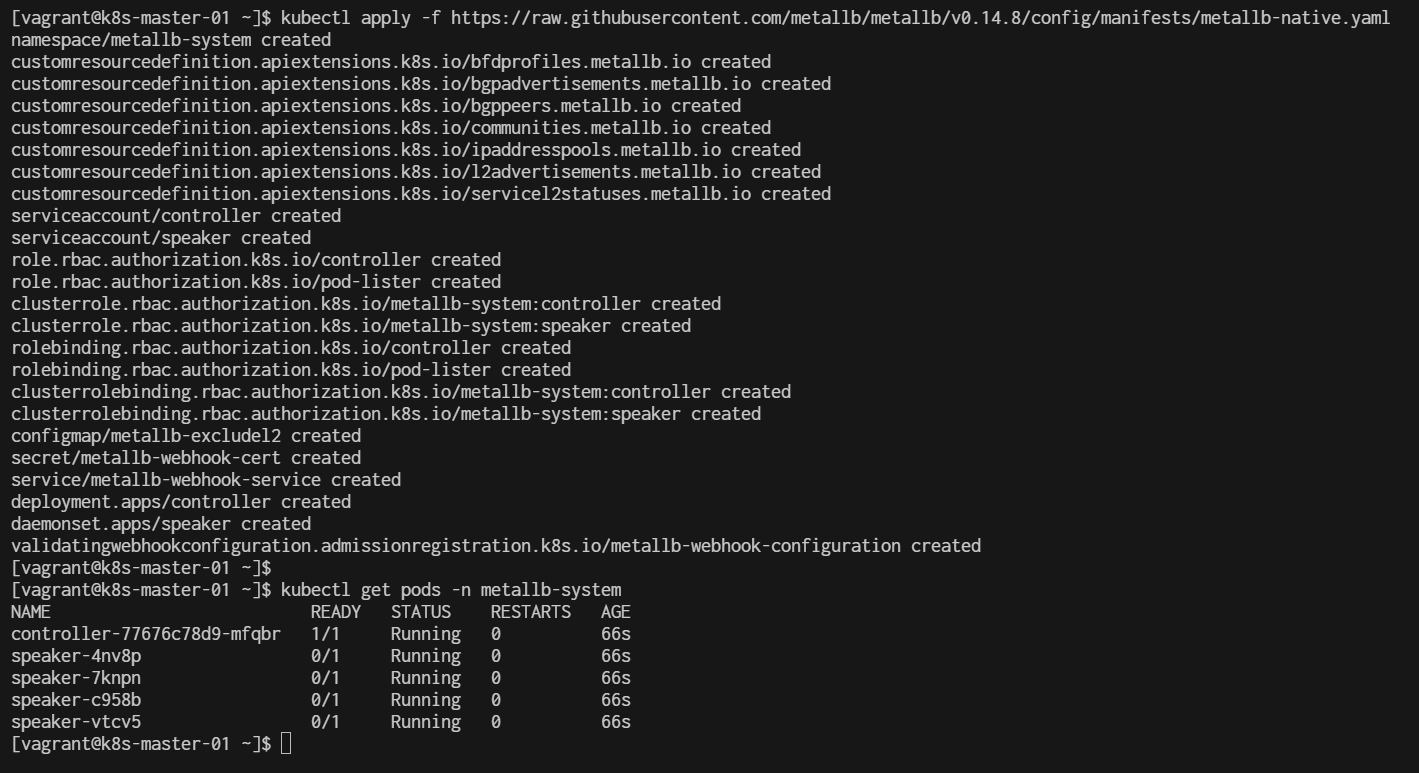
In the context of Kubernetes, a manifest is a YAML or JSON file that defines the desired state of a resource in the cluster. It describes the configuration and specifications of various Kubernetes objects, such as Pods, Services, Deployments, ConfigMaps, and more.
This command will create the necessary components for MetalLB, including the controller and speaker deployments.
Verify the Installation:
$ kubectl get pods -n metallb-system
NAME                          READY   STATUS    RESTARTS   AGE
controller-77676c78d9-wzwwm   1/1     Running   0          39m
speaker-7q7kw                 1/1     Running   0          39m
speaker-7t6hm                 1/1     Running   0          39m
speaker-gccwq                 1/1     Running   0          39m
speaker-wbwrh                 1/1     Running   0          39m
- 4 node will have 4
speaker-<speake-pod-name>
$ kubectl logs -n metallb-system <controller-pod-name>
$ kubectl logs -n metallb-system <speake-pod-name>
example:
kubectl logs -n metallb-system controller-77676c78d9-wzwwm
kubectl logs -n metallb-system speaker-7q7kw
show pods and log:
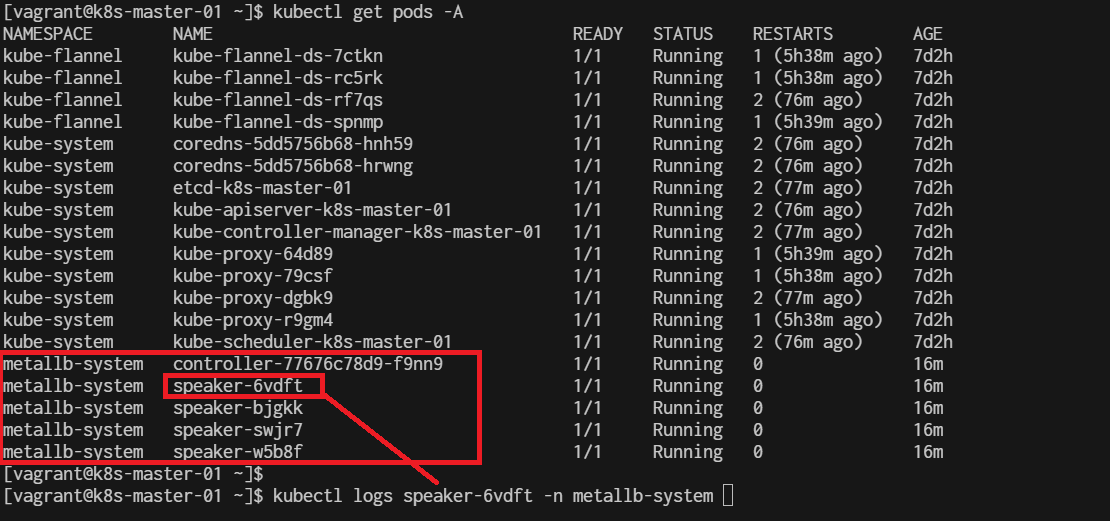
get event
$ kubectl get events -n metallb-system
Describe pod:
$ kubectl describe pods -n metallb-system
Configure MatalLB
MetalLB needs a configuration to know which IP addresses it can use. You can create a ConfigMap to specify a pool of IP addresses. Here’s an example:
Create a file named metallb-config.yaml with the following content:
cat <<EOF |  tee metallb-config.yaml
apiVersion: v1
kind: ConfigMap
metadata:
  namespace: metallb-system
  name: config
data:
  config: |
    address-pools:
    - name: default
      protocol: layer2
      addresses:
      - 192.168.1.200-192.168.1.210
EOF
apply configmap
$ kubectl apply -f metallb-config.yaml
$ kubectl get pods -A
verify config map
$ kubectl get configmap config -n metallb-system -o yaml
descripe
$ kubectl describe configmap config -n metallb-system
output to yml:

- if needed to delete please run command delete
kubectl delete configmaps config -n metallb-system
show how to log event:
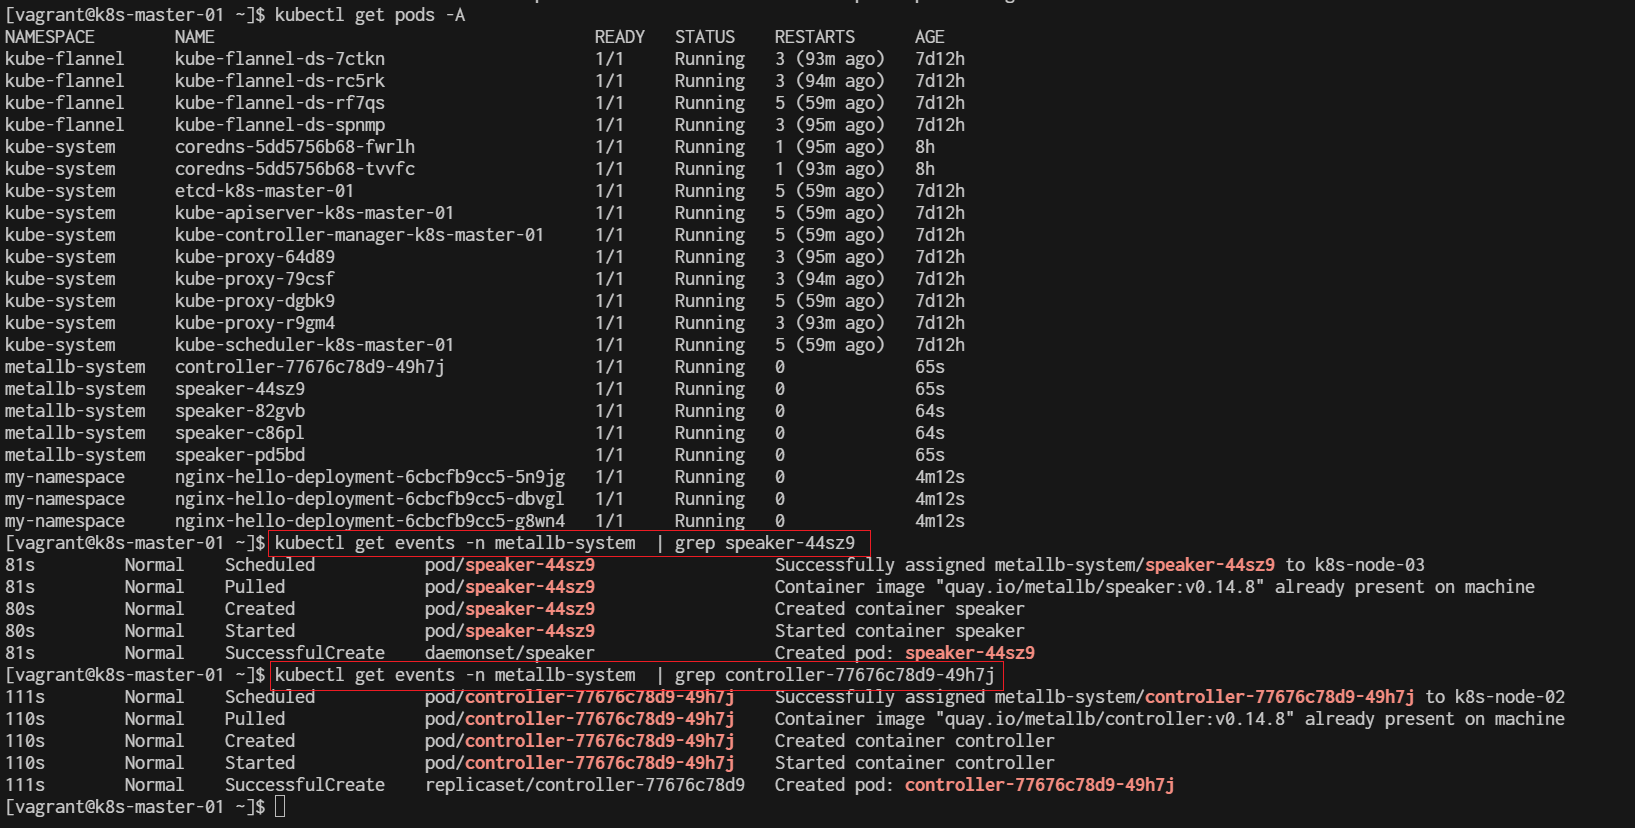
Create Deployment
cat <<EOF | tee nginx-deployment.yaml
apiVersion: apps/v1
kind: Deployment
metadata:
  name: nginx-hello-deployment
  namespace: my-namespace  # Replace with your namespace if necessary
spec:
  replicas: 3
  selector:
    matchLabels:
      app: nginx-hello
  template:
    metadata:
      labels:
        app: nginx-hello
    spec:
      containers:
      - name: nginx-hello
        image: nginxdemos/nginx-hello:latest
        ports:
        - containerPort: 80
---
apiVersion: v1
kind: Service
metadata:
  name: nginx-hello-service
  namespace: my-namespace  # Replace with your namespace if necessary
spec:
  selector:
    app: nginx-hello
  ports:
    - protocol: TCP
      port: 80
      targetPort: 80
  type: LoadBalancer
EOF
Apply menifest:
$ kubectl apply -f nginx-deployment.yaml
$ kubectl get pods -A
$ kubectl get pods -n my-namespace
$ kubectl get svc -n my-namespace
External IPs:
The kubectl describe svc and kubectl get svc commands will display the external IP of a Service.
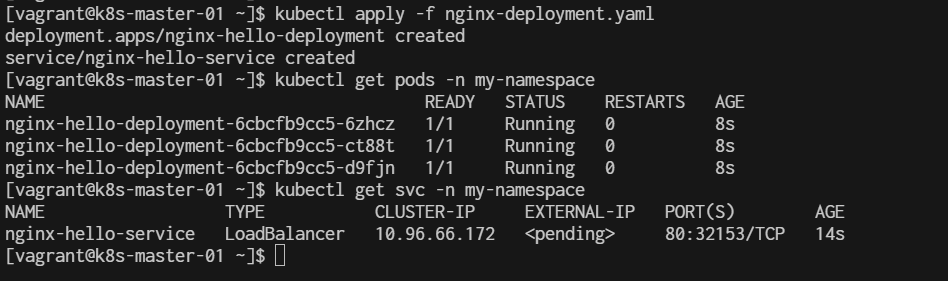
$ kubectl describe svc nginx-hello-service -n my-namespace
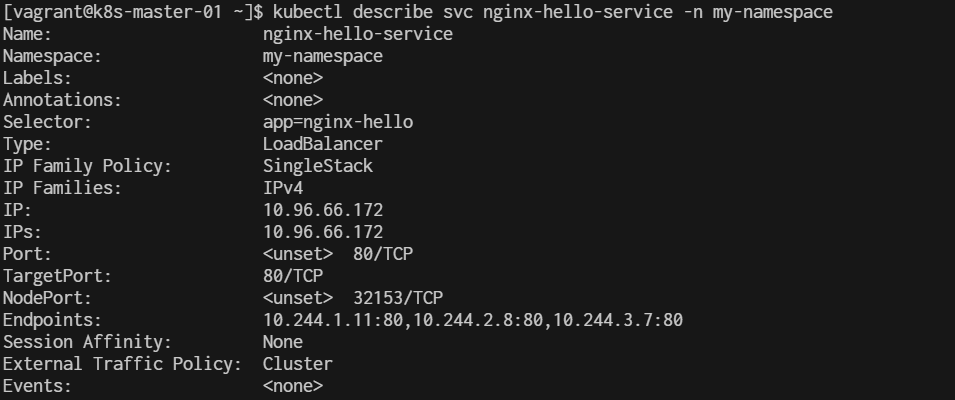
Summary kube command
kubectl get nodes -o wide
kubectl get all --all-namespaces
kubectl get all                                         # namespace defalut
kubectl get all -n metallb-system                       # namespace metallb-system
kubectl describe configmap config -n metallb-system     # configmap
kubectl describe configmap -n kube-system kube-proxy
kubectl describe pods -n metallb-system
Delete
$ kubectl delete -f https://raw.githubusercontent.com/metallb/metallb/v0.14.8/config/manifests/metallb-native.yaml
$ kubectl delete -f nginx-deployment.yaml  && kubectl delete -f metallb-config.yaml
Delete resource
$ kubectl get deployments -A
$ kubectl delete deployments nginx-hello-deployment -n my-namespace
$ kubectl delete pod -n metallb-system --all
$ kubectl delete  services -n my-namespace --all
Restart Metallb component
$ kubectl rollout restart daemonset speaker -n metallb-system
$ kubectl rollout restart deployment controller -n metallb-system
Check Metallb log
$ kubectl logs -n metallb-system daemonset/speaker
$ kubectl logs -n metallb-system deployment/controller
cat <<EOF | tee ipaddresspool.yaml
apiVersion: metallb.io/v1beta1
kind: IPAddressPool
metadata:
  name: ip-pool
  namespace: metallb-system
spec:
  addresses:
    - 192.168.1.100-192.168.1.120
EOF
workshop 1 build a CI/CD pipeline with GitHub Actions
Step1 Create github project
- Login to your github account
- Create project in Github name
muict-gitaction-demo1
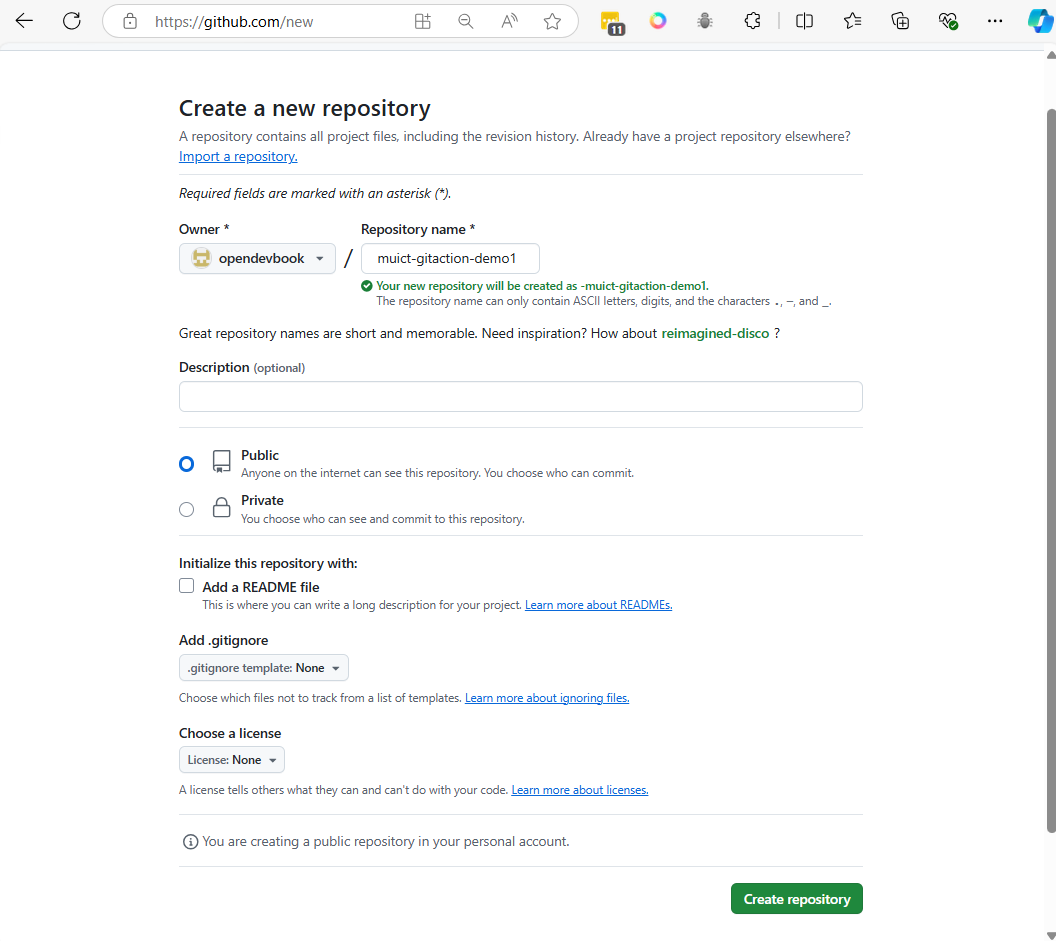
- Click Create repository

- please copy generated script from github to your notes. it will use later.
- and create folder
muict-gitaction-demo1
Create local project
mkdir muict-gitaction-demo1
cd muict-gitaction-demo1

echo "# muict-gitaction-demo1" >> README.md
git init
git add README.md
git commit -m "first commit"
git branch -M main
git remote add origin git@github.com:opendevbook/muict-gitaction-demo1.git
git push -u origin main
Example:

- After push code then Go to Github project
- click "Actions" menu on project menubar
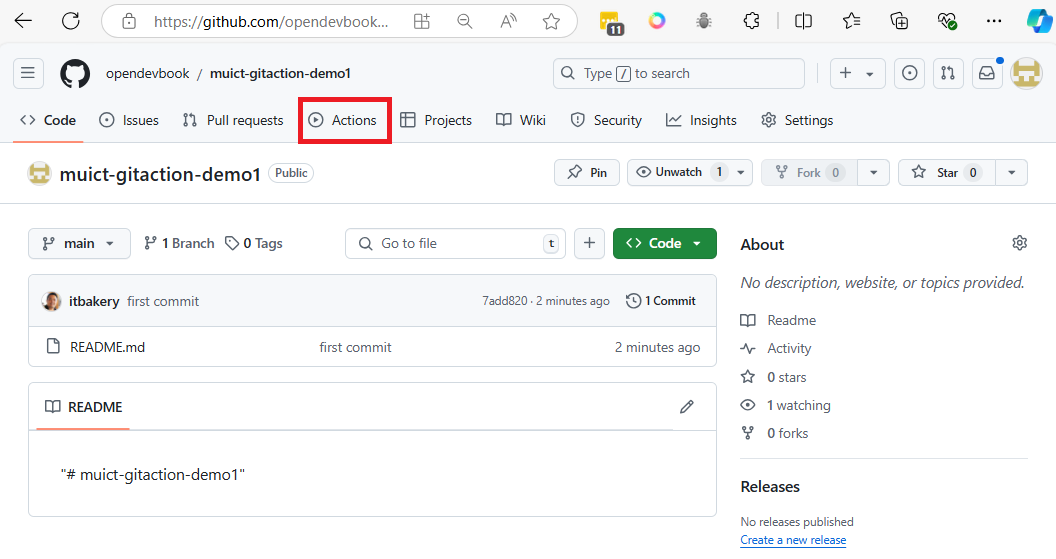
Get started with GitHub Actions
- Search action template name
dockers
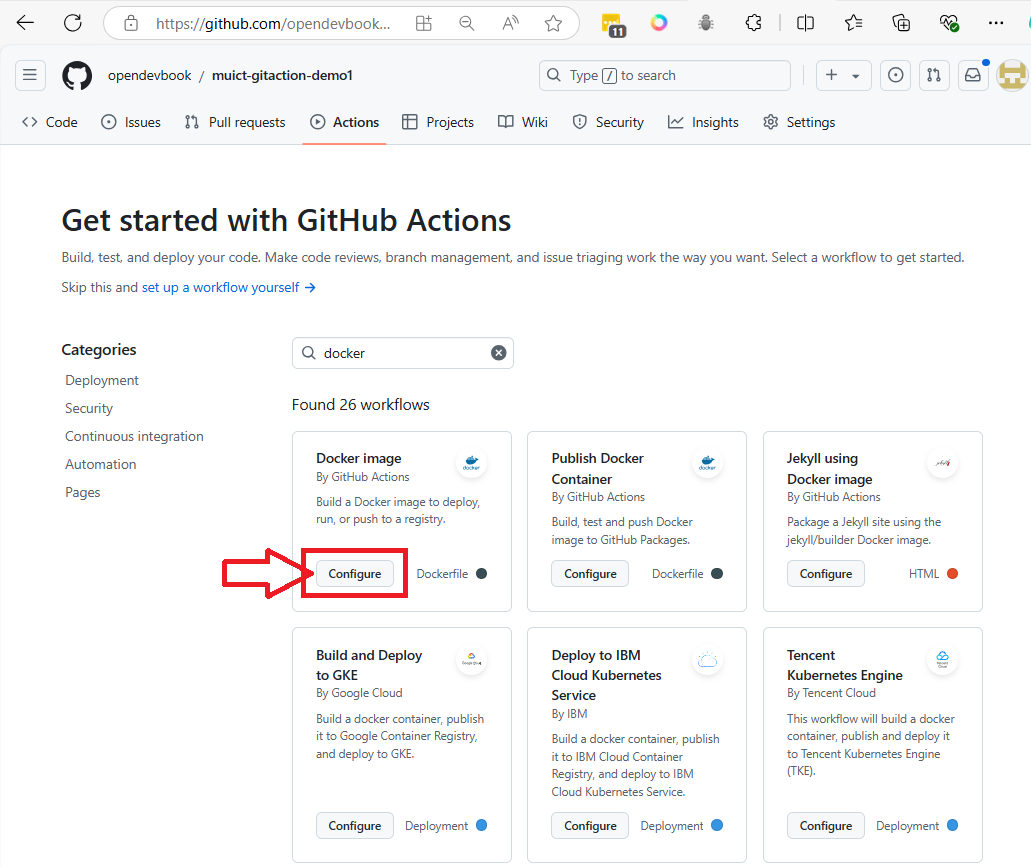
- Click button
Configurein Docker image box
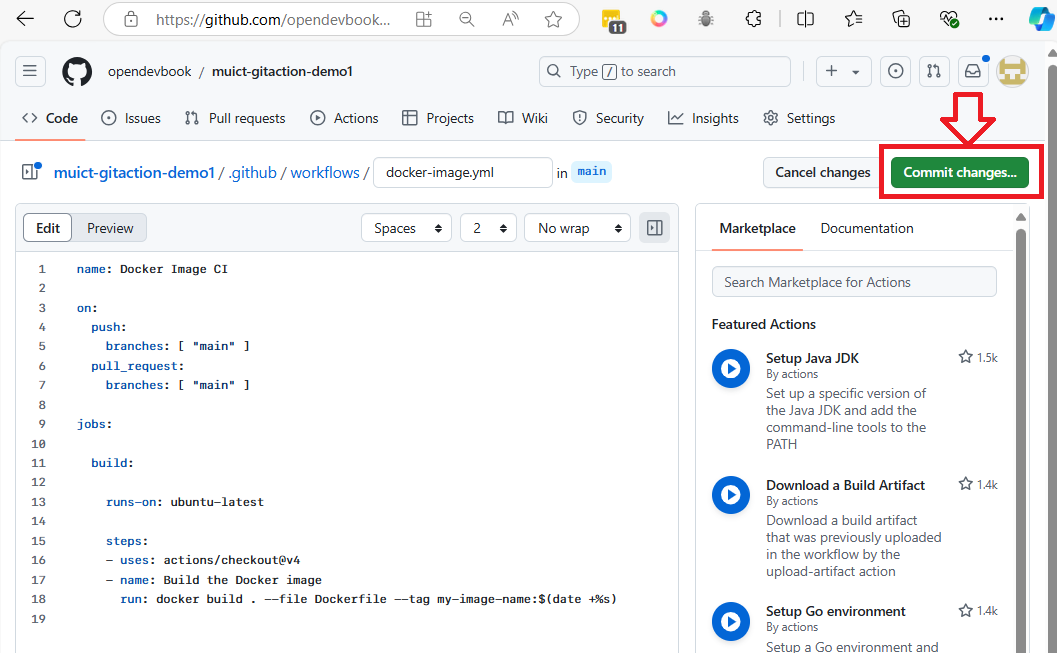
- We will not edit file yet (will do it later). Click
commit changeto add workflows to projects
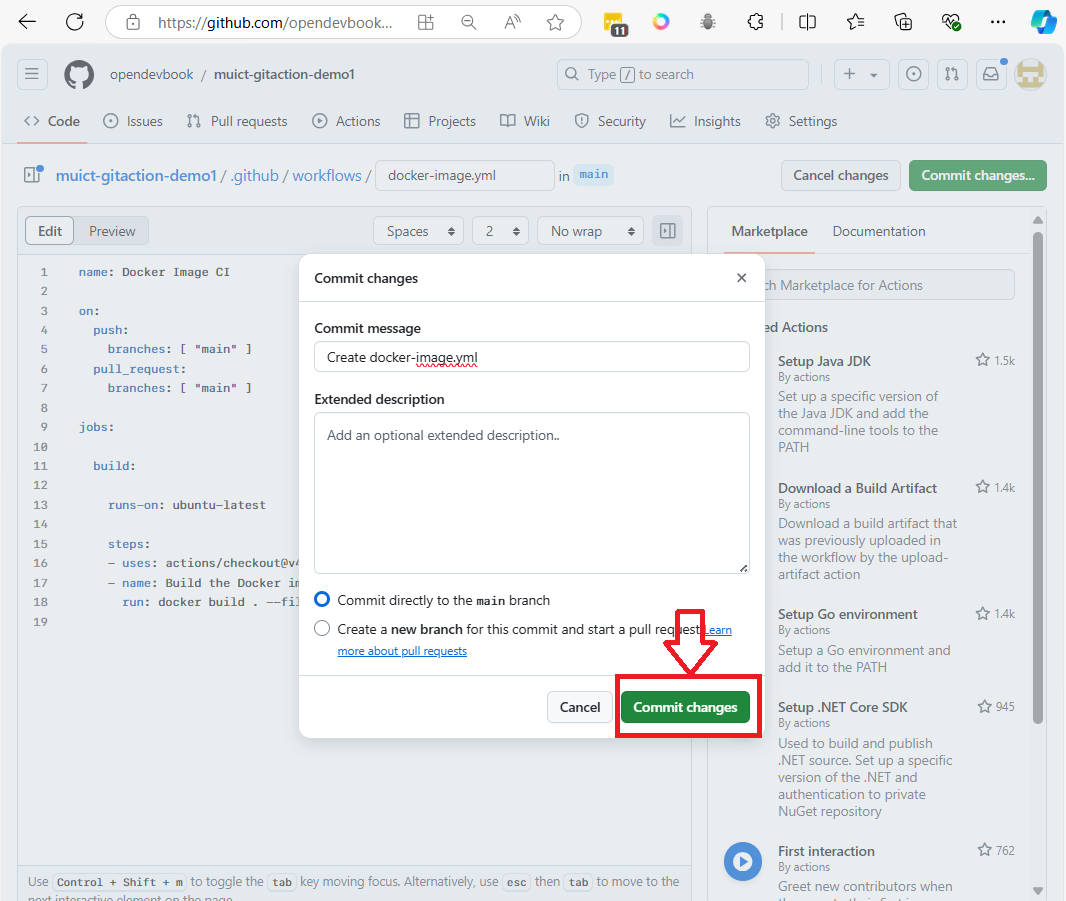 After we commit it will Result below:
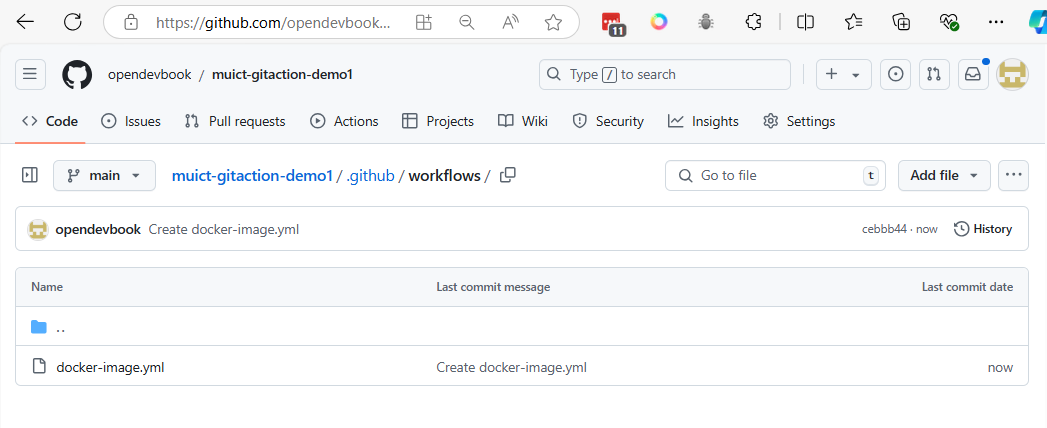
- github actions will add file
docker-image.ymlin folder.github/workflows
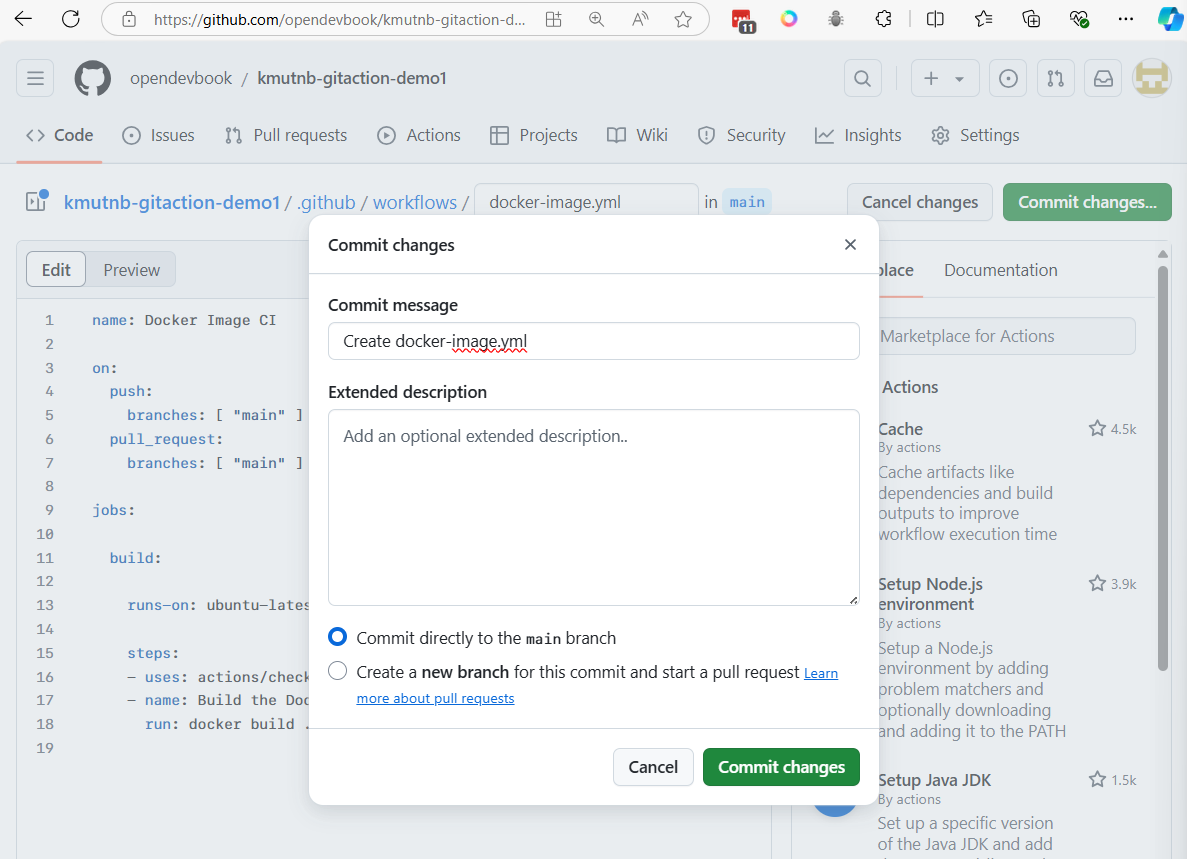
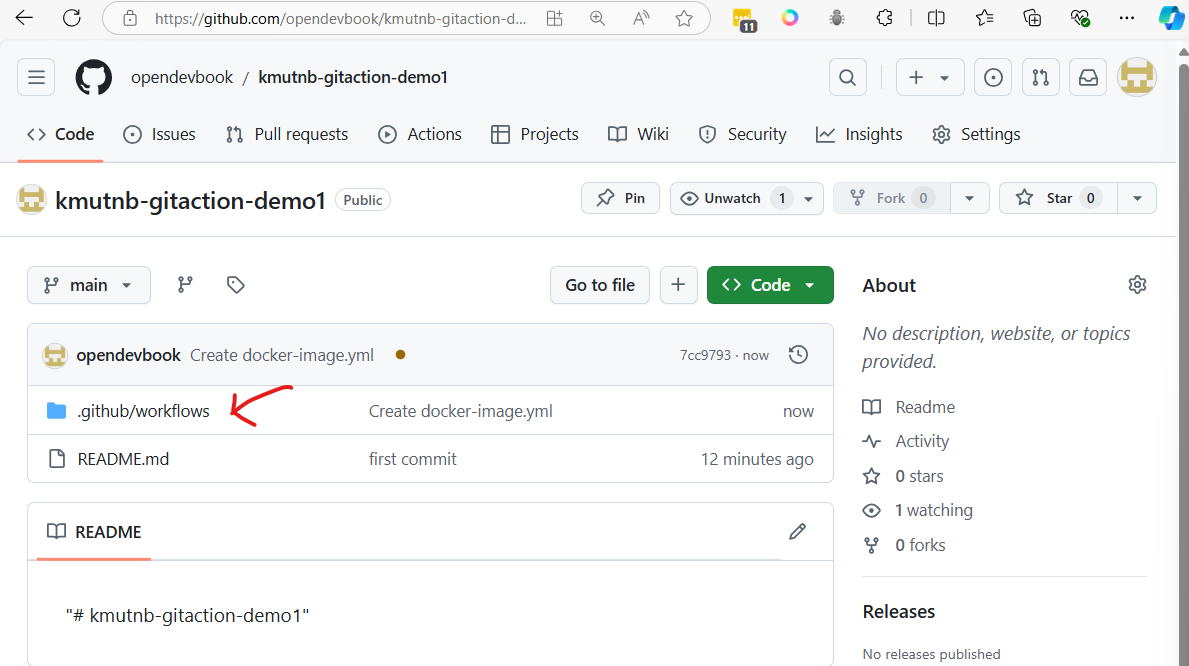
Pull down to pc
Git pull change to local repo (computer)
git pull

Summary Step1:
- create project in github
- pull project to your pc
Step 2 Change Git Actions Template to your application
- Use vscode editor to edit file
- Add Github Actions Extension to vscode help to edit file
https://marketplace.visualstudio.com/items?itemName=github.vscode-github-actions
- For your reading: how to use Extension https://chris-ayers.com/2023/08/29/github-actions-in-vscode
name: Docker Image CI

on:
  push:
    branches: [ "main" ]
  pull_request:
    branches: [ "main" ]

jobs:
  build:
    runs-on: ubuntu-latest

    steps:
    - uses: actions/checkout@v4
    - name: Build the Docker images
      run: |
        docker build ./api/ -t ${{ secrets.DOCKER_HUB_ACCOUNT }}/app1-api:latest
        docker build ./front/ -t ${{ secrets.DOCKER_HUB_ACCOUNT }}/app1-frontend:latest

    - name: Login to Docker Hub
      run: |
        echo "${{ secrets.DOCKER_HUB_PASSWORD }}" | docker login -u ${{ secrets.DOCKER_HUB_ACCOUNT }} --password-stdin

    - name: Push images to Docker Hub
      run: |
        docker push ${{ secrets.DOCKER_HUB_ACCOUNT }}/app1-api:latest
        docker push ${{ secrets.DOCKER_HUB_ACCOUNT }}/app1-frontend:latest
Because in github actions use variable name. To ensure that both DOCKER_HUB_ACCOUNT and DOCKER_HUB_PASSWORD, We will set in your GitHub repository secrets for this workflow to work properly.
Create Repository Secret
goto:
- Setting > Secrets and variable > Action > Repository Secret
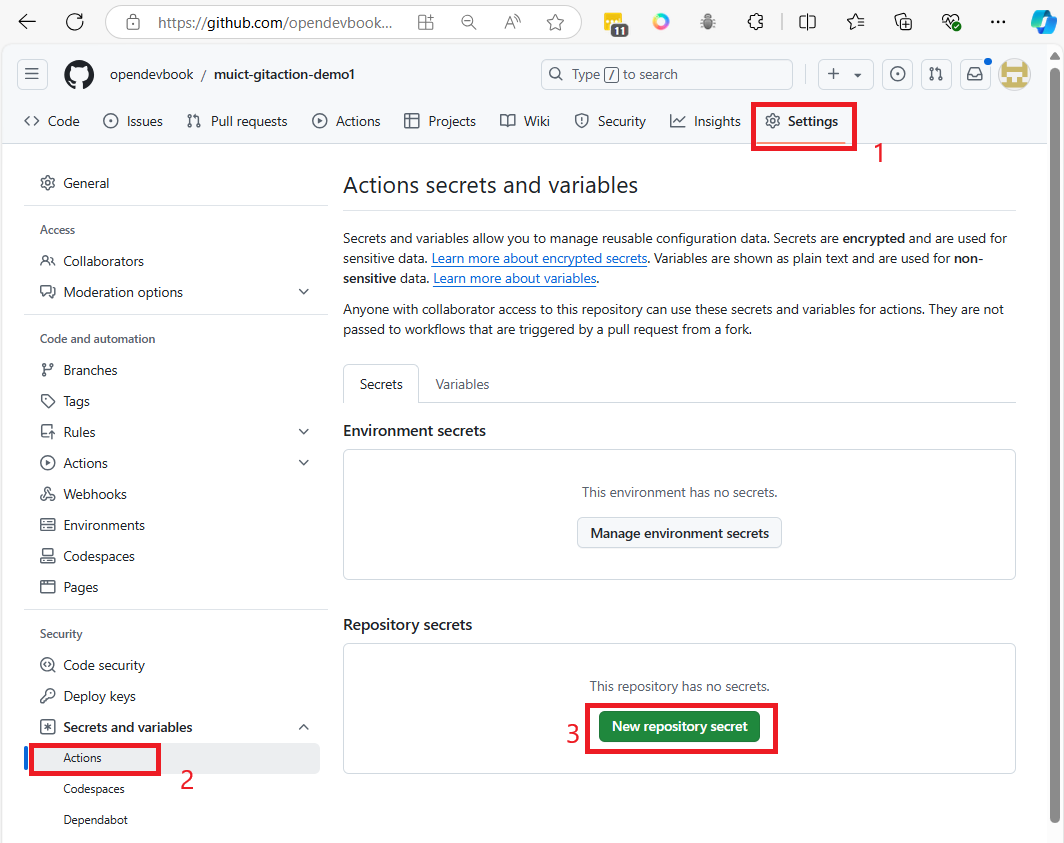
-
after click
New Repository secret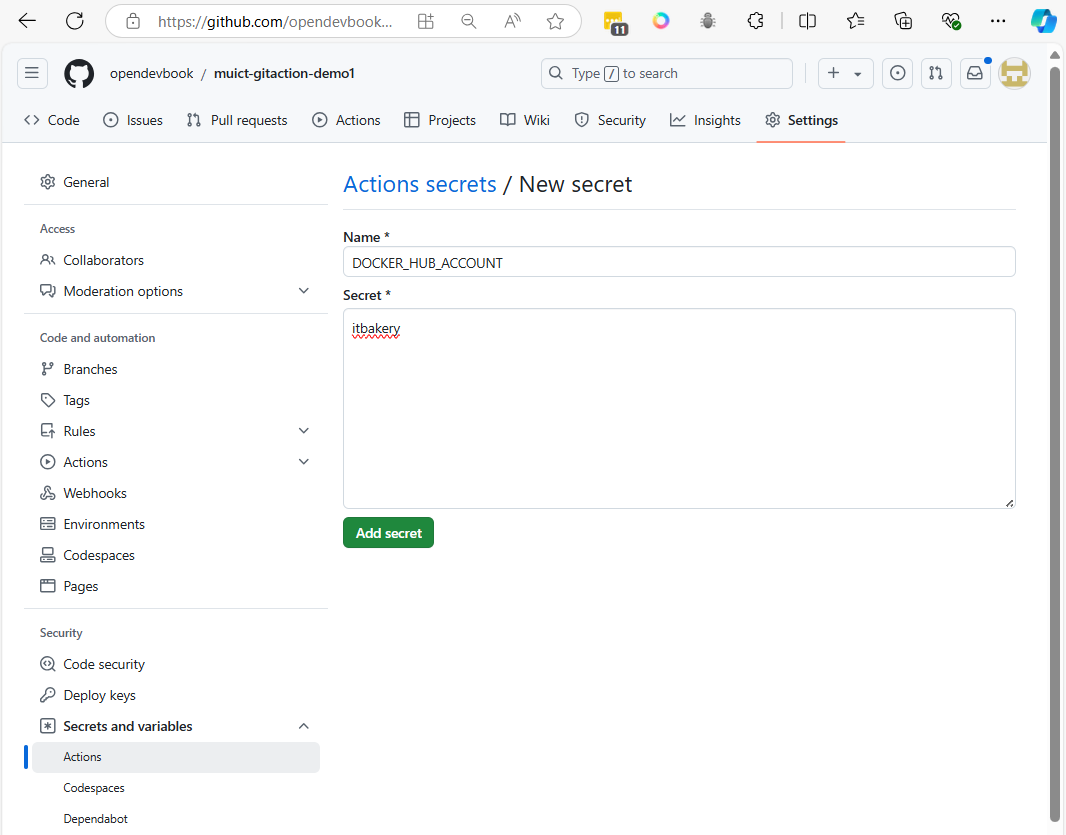
-
in above image, we add variable name , and variable value inbox above. and Click
Add secret
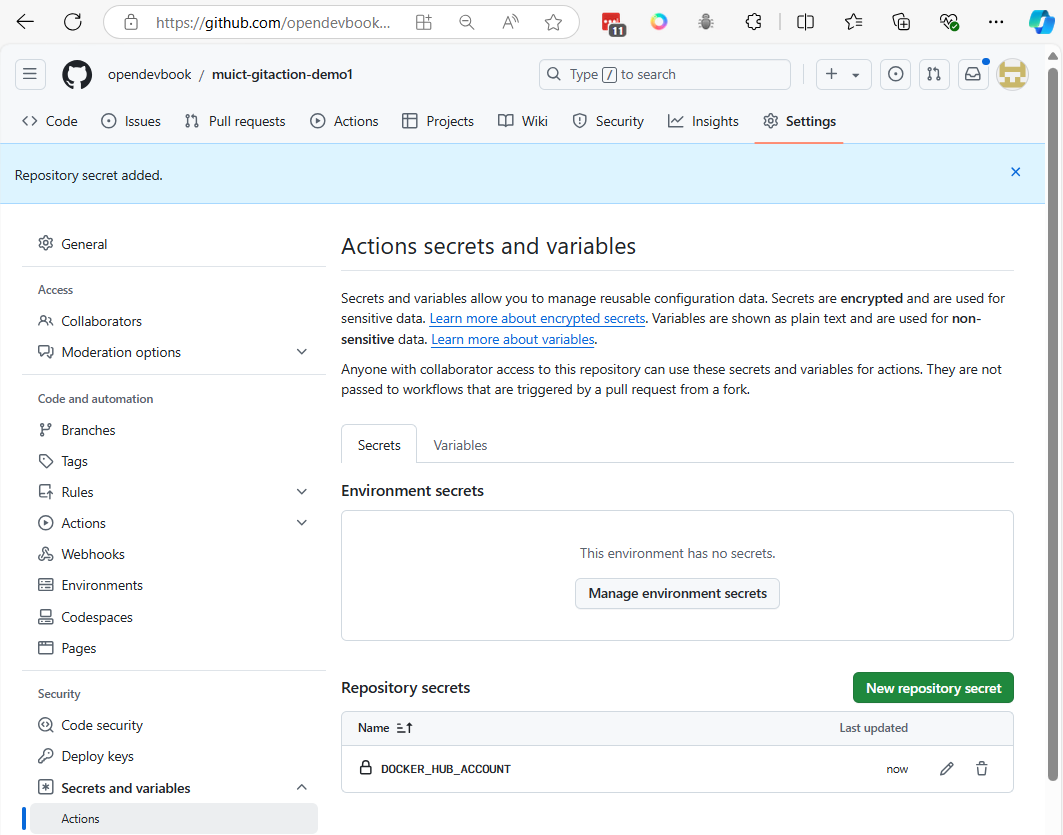
- Replace process again and add 2 variable DOCKER_HUB_PASSWORD.
- Result below
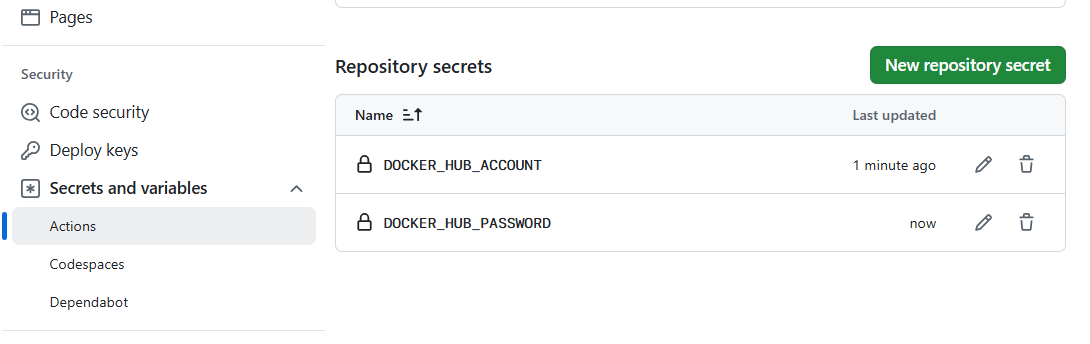
Note: For your reading
GitHub provides two types of secrets: Environment secrets and Repository secrets, and they are used to securely store sensitive information such as API keys, tokens, or passwords. Here's the difference between the two:
1. Repository Secrets:
-
Scope: Repository-level secrets are accessible to all workflows within the specific repository where they are defined.
-
Usage: If you define a secret at the repository level, it can be used across all workflows and jobs in that repository, regardless of which environment (production, staging, etc.) the job runs in.
-
Common Use: These secrets are often used when you have workflows that apply across the entire repository, such as Continuous Integration (CI), where you might push Docker images or deploy code. Example:
-
Docker Hub credentials (DOCKER_HUB_ACCOUNT, DOCKER_HUB_PASSWORD) used for pushing containers from any branch of the repository.
2. Environment Secrets:
-
Scope: Environment-level secrets are scoped to specific environments within a repository (e.g., "production," "staging," "development"). You can define different sets of secrets for each environment.
-
Usage: Environment secrets are tied to specific deployment or operational environments. A job that uses a specific environment will have access only to the secrets defined for that environment.
-
Common Use: These are useful when you have different secrets for different environments (like separate API keys for production and staging). Workflows can specify which environment they run in, and only the secrets for that environment will be accessible. Example:
-
Production API key for deployments running in the "production" environment, and a separate staging key for the "staging" environment. When to use each:
-
Repository Secrets are ideal for secrets that apply globally to all workflows and environments in the repository, such as shared access tokens or service credentials.
-
Environment Secrets are suitable when your workflows target different environments (e.g., production vs. staging), and you need to manage separate credentials for each environment.
Key Point: Environment secrets provide finer control and are more specific, making them useful in scenarios where environment-specific configuration is important.
Summary Step2:
- Edit origin git actions file
- Create variable in Githubs
Structure flow end-to-end ci/cd project
- target next step is create backend and frontend
- create backend and fronted docker image
- build image in Github actions
- push image to docker registry
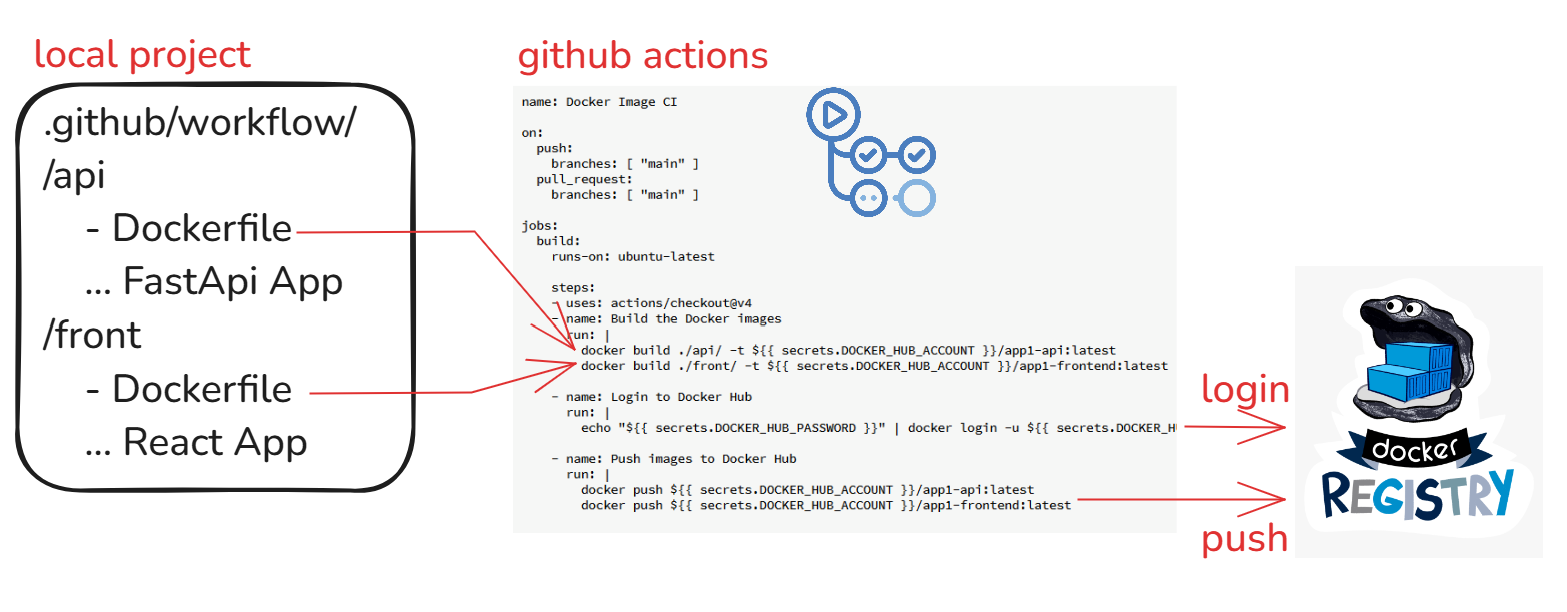
Step3 Create Dockerfile in /api
- Create /api/Dockerfile
# Use the official Python image from the DockerHub
FROM python:3.11-slim

# Set the working directory in the container
WORKDIR /app

# Copy the requirements file into the container
COPY requirements.txt .

# Install the Python dependencies
RUN pip install --no-cache-dir -r requirements.txt

# Copy the entire FastAPI app into the working directory
COPY . .

# Expose port 8000 to the outside world (FastAPI runs on 8000 by default)
EXPOSE 8000

# Command to run the FastAPI application using Uvicorn
CMD ["uvicorn", "main:app", "--host", "0.0.0.0", "--port", "8000"]
create api/main.py
from fastapi import FastAPI

# Create the FastAPI app instance
app = FastAPI()

# Define a root endpoint that returns a simple message
@app.get("/")
def read_root():
    return {"message": "Hello, World!"}

# Define a GET endpoint with a path parameter
# GET /items/5?q=test
@app.get("/items/{item_id}")
def read_item(item_id: int, q: str = None):
    return {"item_id": item_id, "q": q}

# Define a POST endpoint that accepts data in JSON format
# POST /create-item
@app.post("/create-item")
def create_item(item: dict):
    return {"message": "Item created", "item": item}

# Define a PUT endpoint for updating an item
@app.put("/update-item/{item_id}")
def update_item(item_id: int, item: dict):
    return {"message": "Item updated", "item_id": item_id, "updated_data": item}
To run the Fast API. We need to use ASGI server like uvicorn
- change directory to api folder
- Create virtual environment
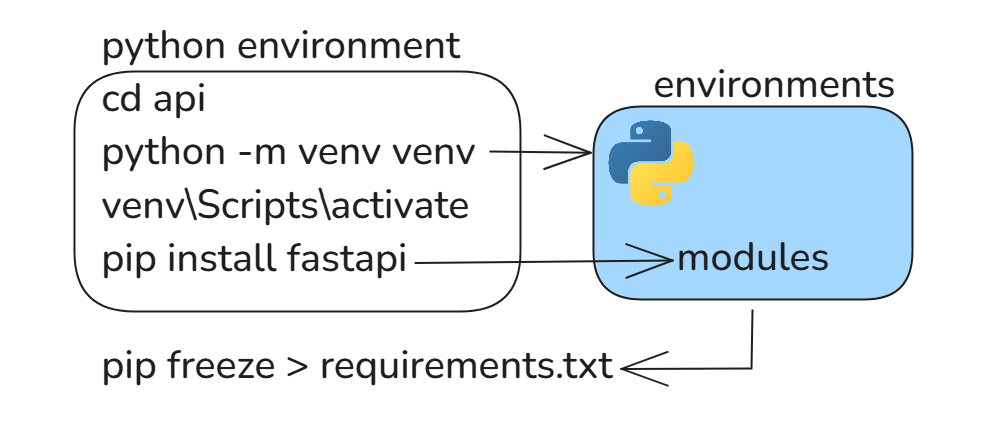
cd api
python -m venv venv
-
Activate virtual environment
- On windows
venv\Scripts\activate- On mac or linux
source venv/bin/activate -
install python package with pip command
pip install fastapi uvicorn
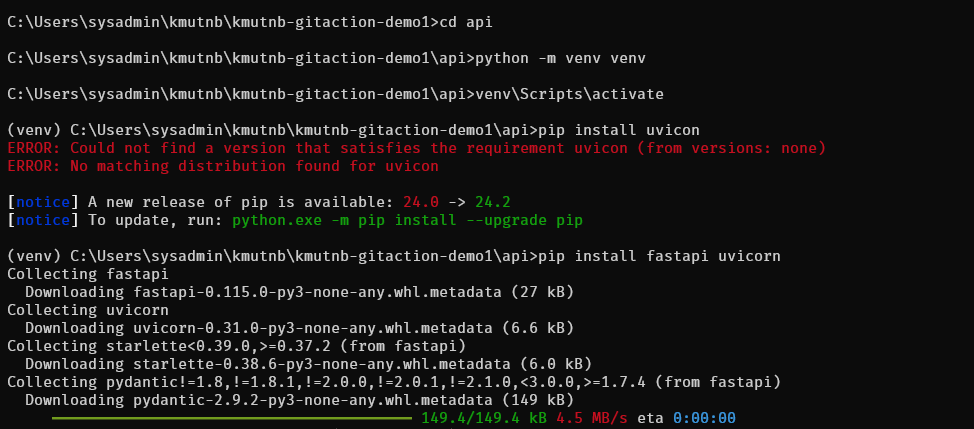
Run FastApi https://www.uvicorn.org/
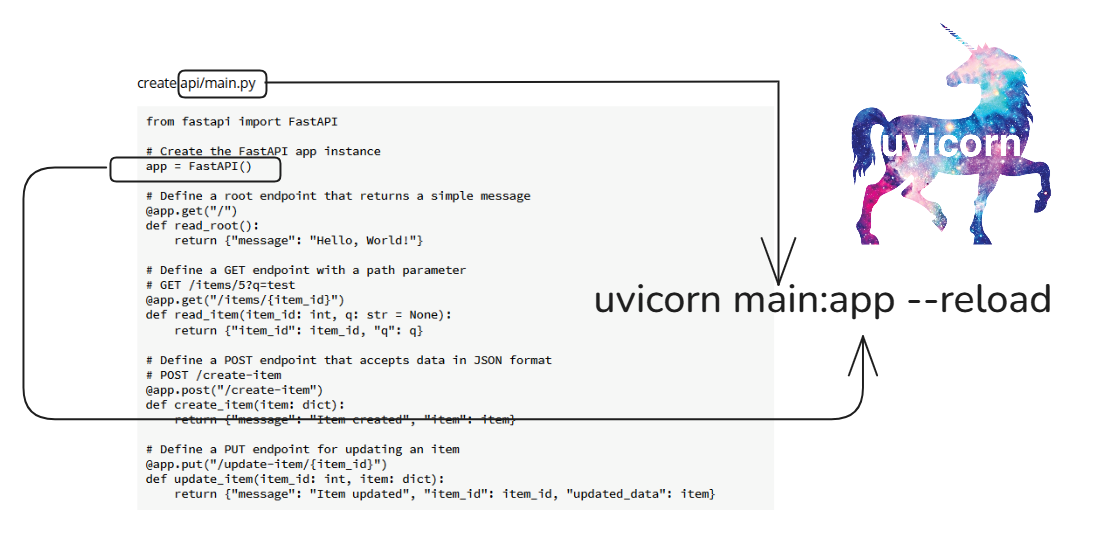
uvicorn main:app --reload

Test Fast Api with postman
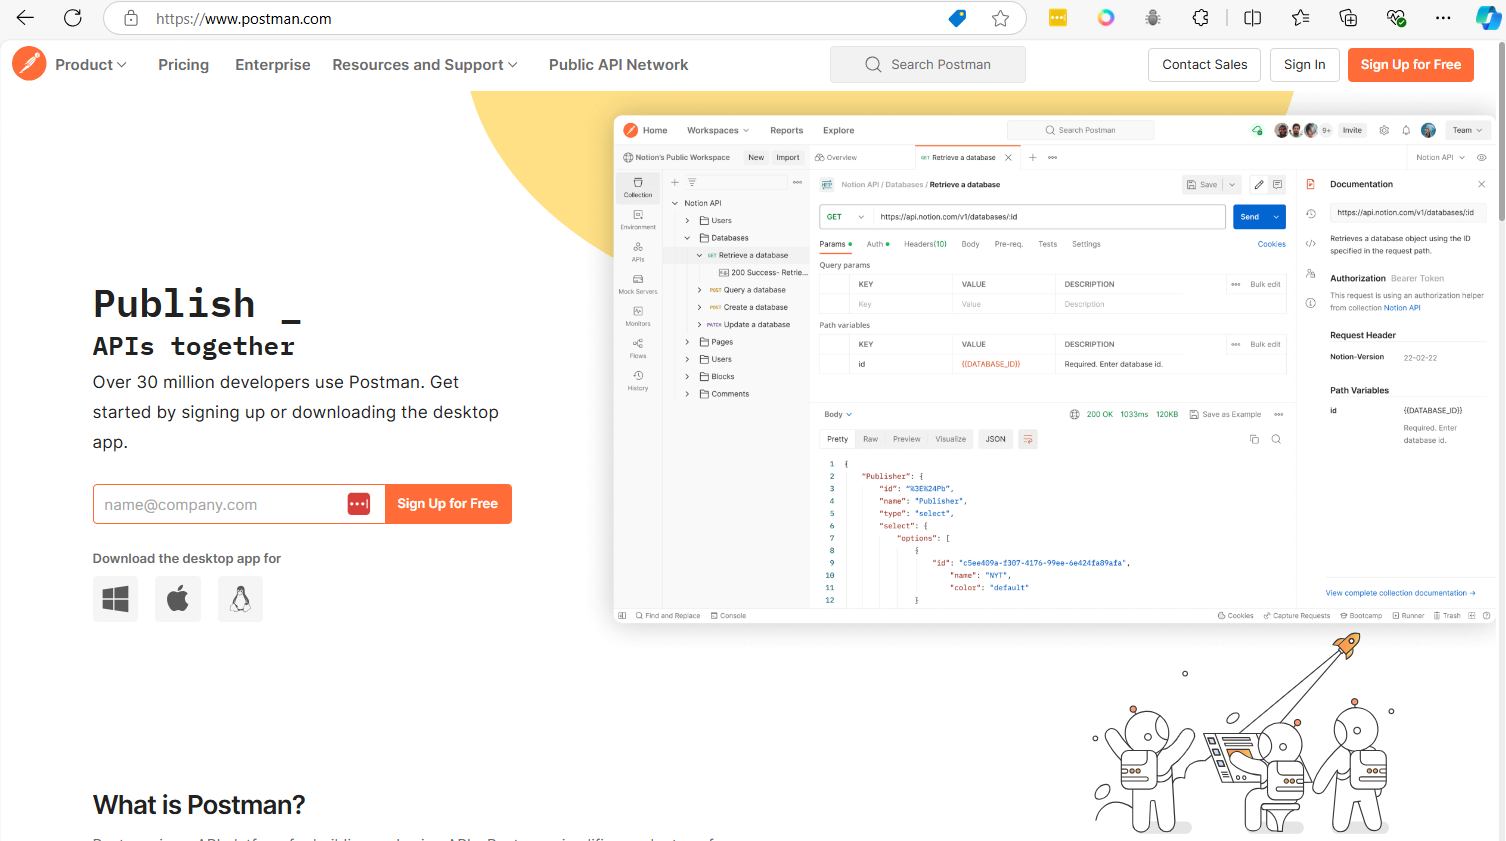
-
test1 GET /
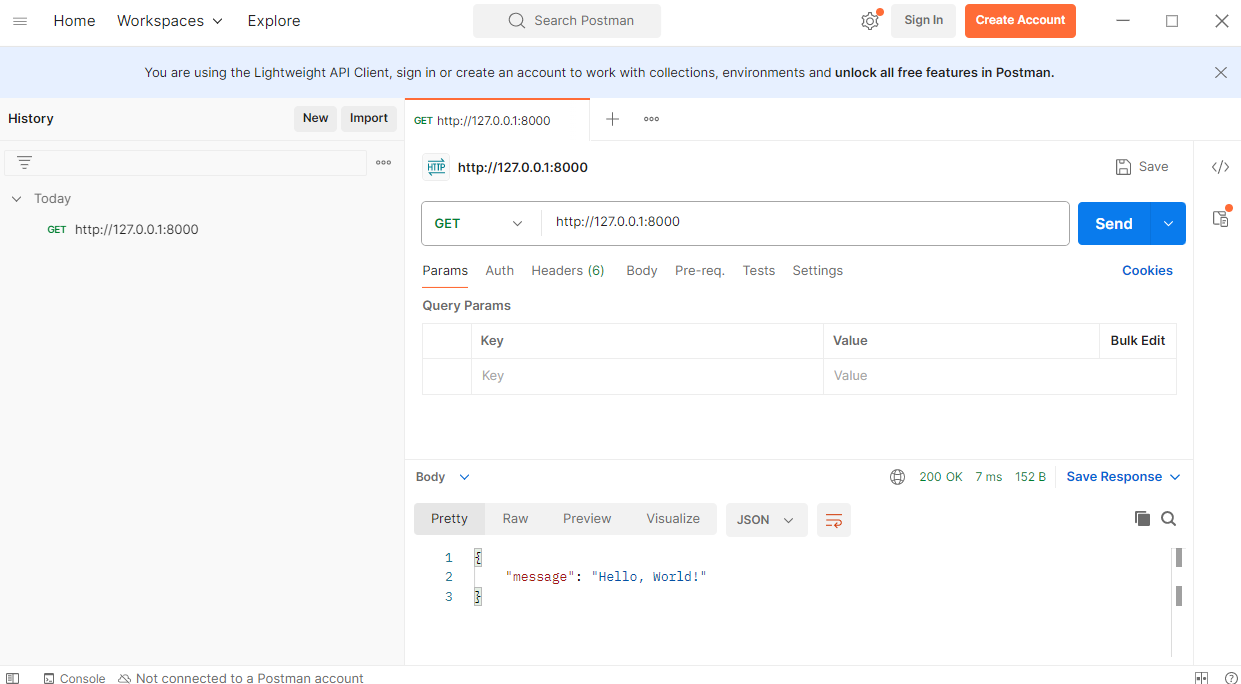
-
test2 GET /items/5?q=test
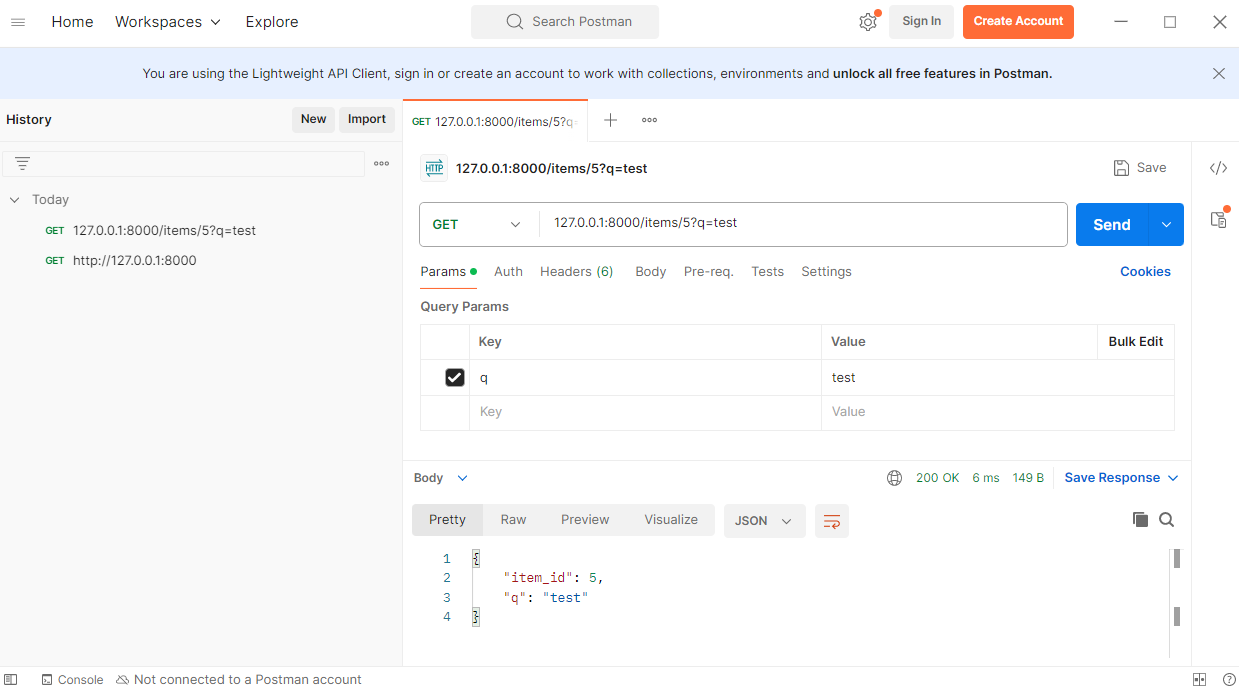
-
test3 POST Endpoint (POST /create-item):
- Request Body
{
    "name": "Item A",
    "price": 25
}
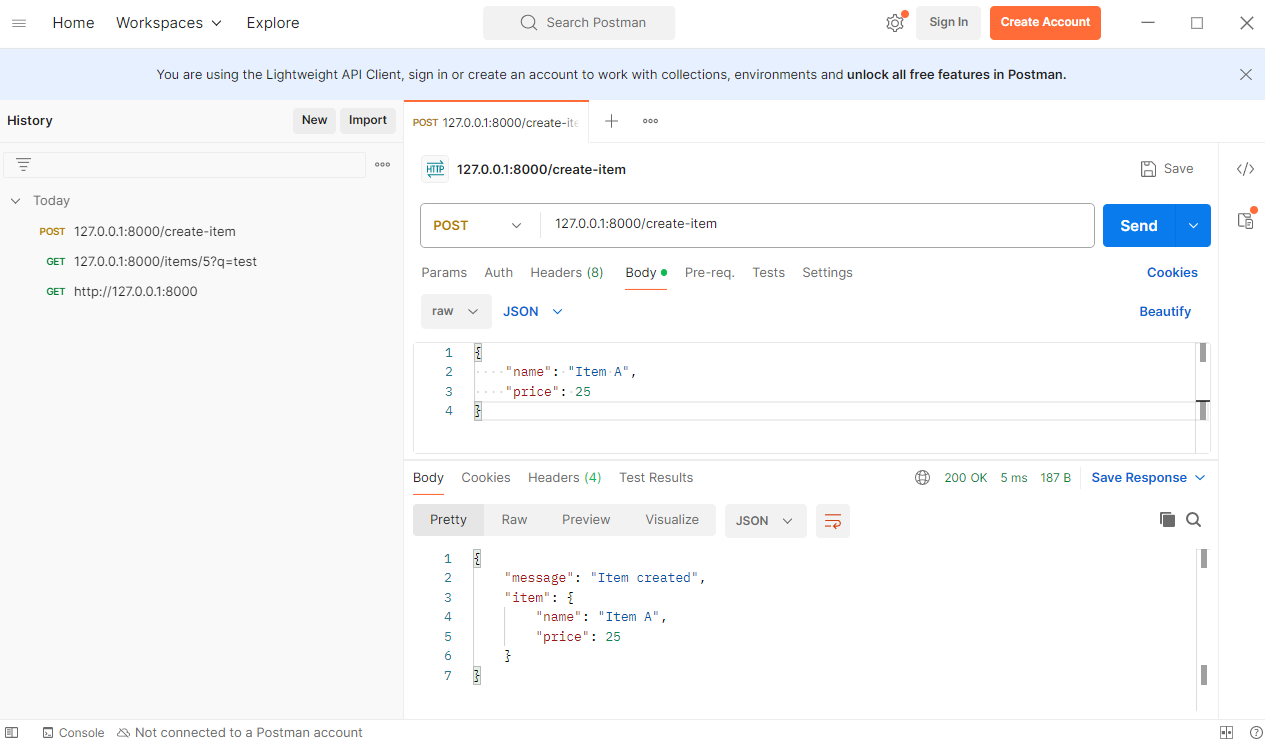
To Generate requirements.txt
This will capture the current environment's installed packages and their versions and save them to requirements.txt.
pip freeze > requirements.txt
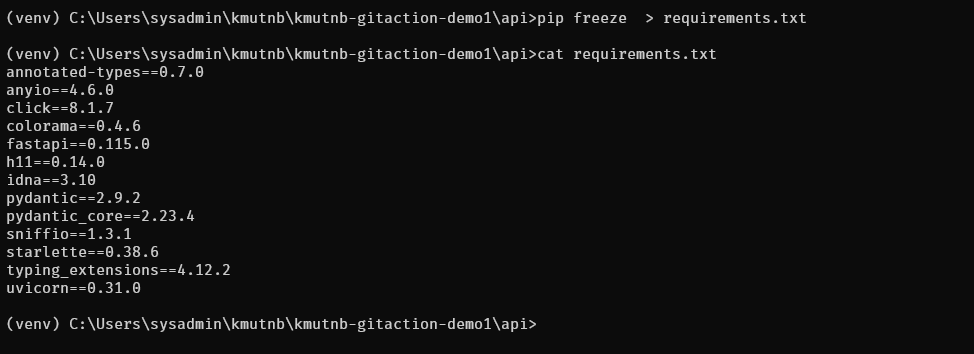
Note:
To restore package again pip install -r requirements.txt
Build Docker image on local (skip this if your windows don't have docker service)
To build and test your API image (which is developed using FastAPI), follow these steps:
Step 1: Build the API Docker Image
1.1 Navigate to your /api directory where the Dockerfile for the FastAPI application is located.
1.2. Run the following command to build the Docker image:
docker build -t fastapi-app .
- fastapi-app is the name of your Docker image.
- This command will build the FastAPI app using the Dockerfile located in the current directory.
Step 2: Run the Docker Container
2.1 Once the image is built, you need to run it:
docker run -p 8000:80 fastapi_app
- -d runs the container in detached mode.
- -p 8000:8000 exposes port 8000 of the container to port 8000 of your local machine, so you can access your FastAPI app through http://localhost:8000.
Summary Step3:
-
- Creat api backend with FashAPI
-
- Test api with postman
-
- Build image local to test Dockerfile
Step4 Create Dockerfile in /front (Dockerize Reactjs application)
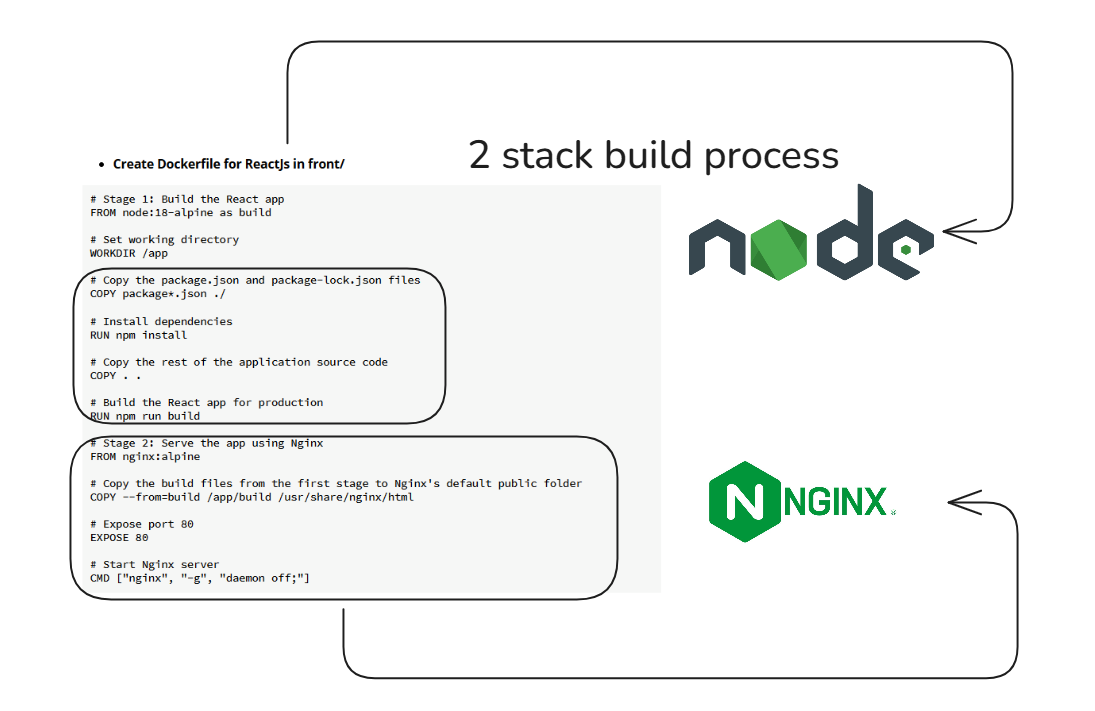
Create React project
- Check environment node
node -v
npm -v
cd front
npx create-react-app .

- Start Development Server
npm start
- Create Dockerfile for ReactJs in front/
# Stage 1: Build the React app
FROM node:18-alpine as build

# Set working directory
WORKDIR /app

# Copy the package.json and package-lock.json files
COPY package*.json ./

# Install dependencies
RUN npm install

# Copy the rest of the application source code
COPY . .

# Build the React app for production
RUN npm run build

# Stage 2: Serve the app using Nginx
FROM nginx:alpine

# Copy the build files from the first stage to Nginx's default public folder
COPY --from=build /app/build /usr/share/nginx/html

# Expose port 80
EXPOSE 80

# Start Nginx server
CMD ["nginx", "-g", "daemon off;"]
Explanation:
Stage 1 (Build):
- Base image: The Dockerfile uses
node:18-alpineas the base image, which is a lightweight Node.js image. - Working directory: Sets
/appas the working directory. - Install dependencies: Copies
package.jsonandpackage-lock.jsoninto the container and runsnpm installto install dependencies. - Copy application: The rest of the application files are copied into the container.
- Build the React app: Runs
npm run buildto create an optimized production build of the React app, which will be placed in thebuilddirectory.
Stage 2 (Serve with Nginx):
- Base image: Uses
nginx:alpine, a minimal Nginx image, to serve the static files. - Copy build files: The files generated from the build stage are copied to Nginx's default directory (
/usr/share/nginx/html). - Expose port 80: The container listens on port 80 for HTTP traffic.
- Start Nginx: Starts Nginx with the
daemon offdirective to keep it running in the foreground.
Multi-stage build:
This approach is a multi-stage build, which is more efficient because it keeps the final image small. The final image contains only the production-ready static files and Nginx, not the Node.js runtime or development dependencies.
To build and run the Docker container:
Build the image:
docker build -t test-react-app .
Run the container:
docker run -p 80:80 test-react-app
Step5 Git push to github
- Befor we push to git. we have to create file name
.gitignorein /api to ignore folder venv
touch api/.gitignore
- add name of python in file
venv
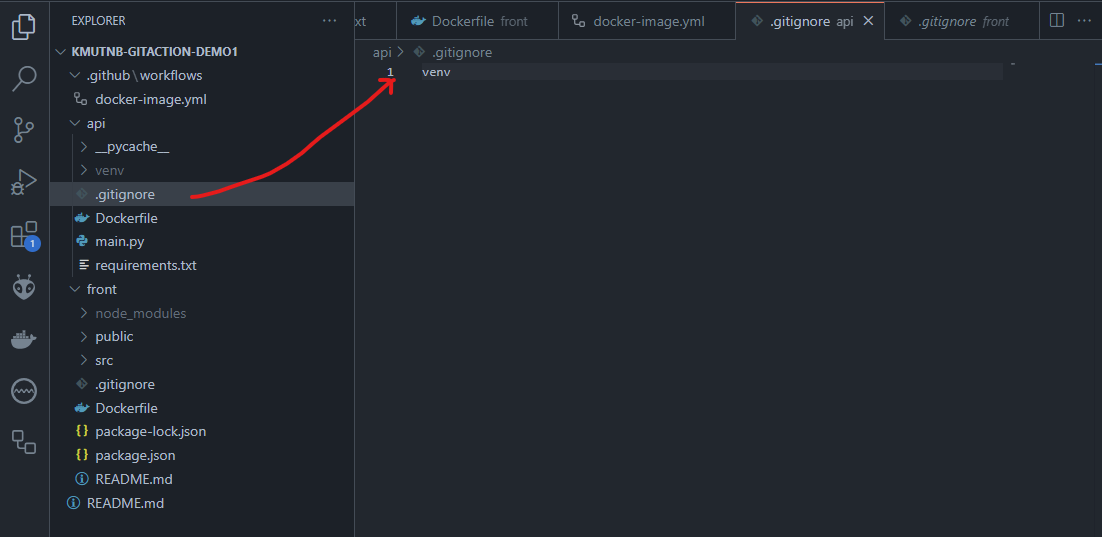
git add .
git commit -m "Initial project api, front"
git push origin main
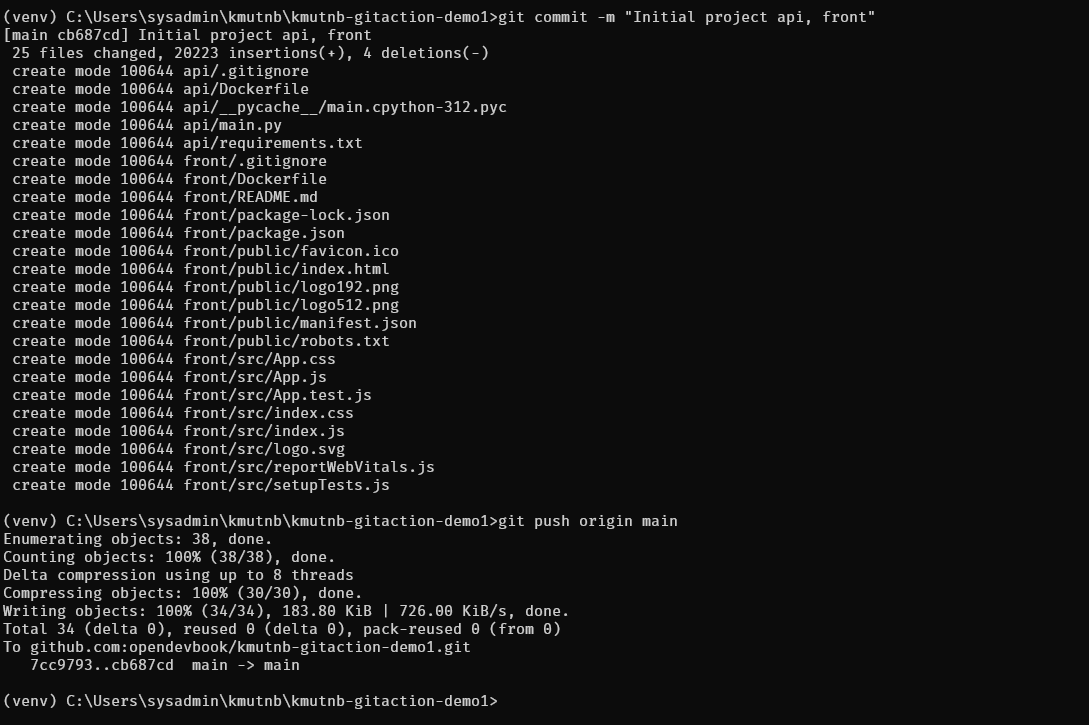
Go back to github
- Actions
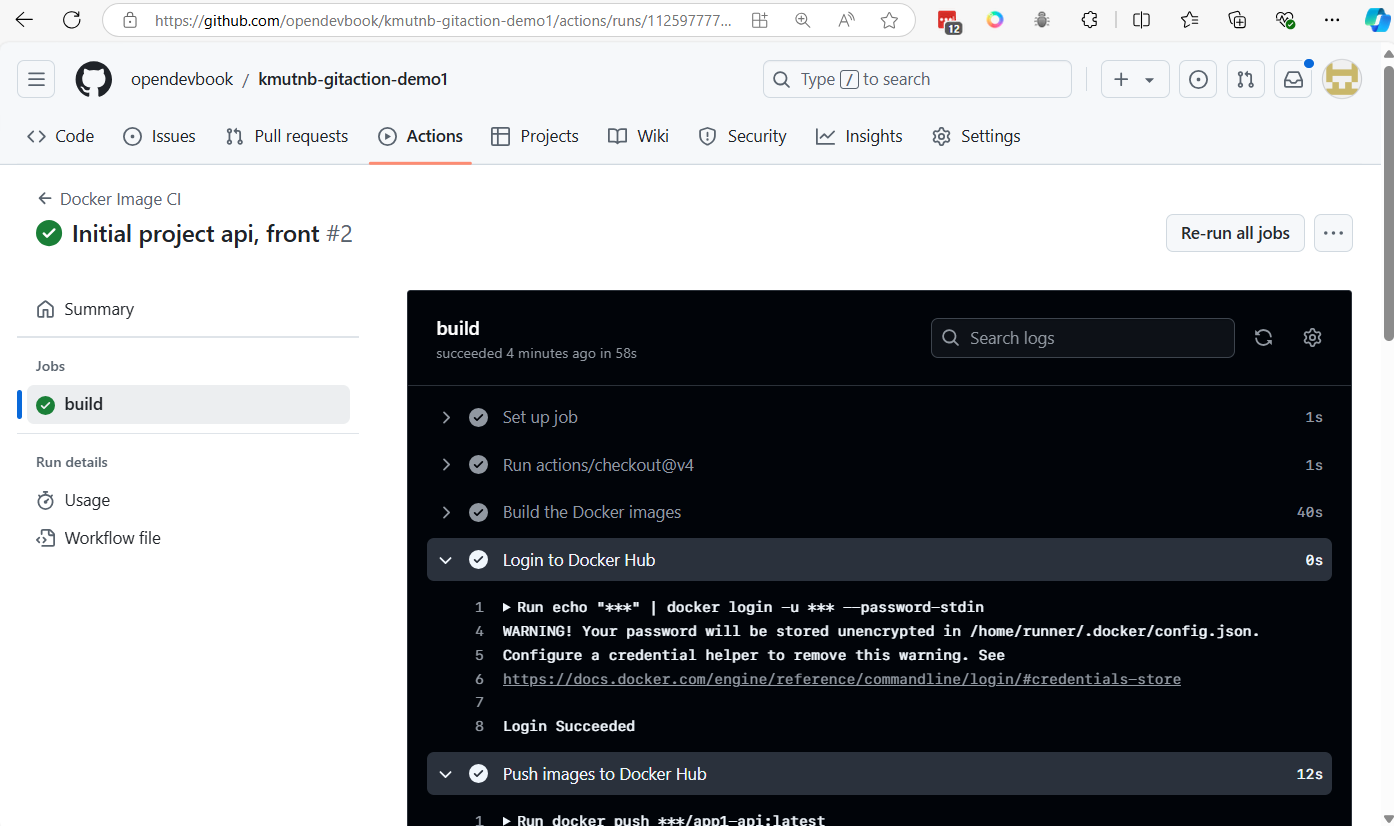
Go to dockerhub you will see image push to registry
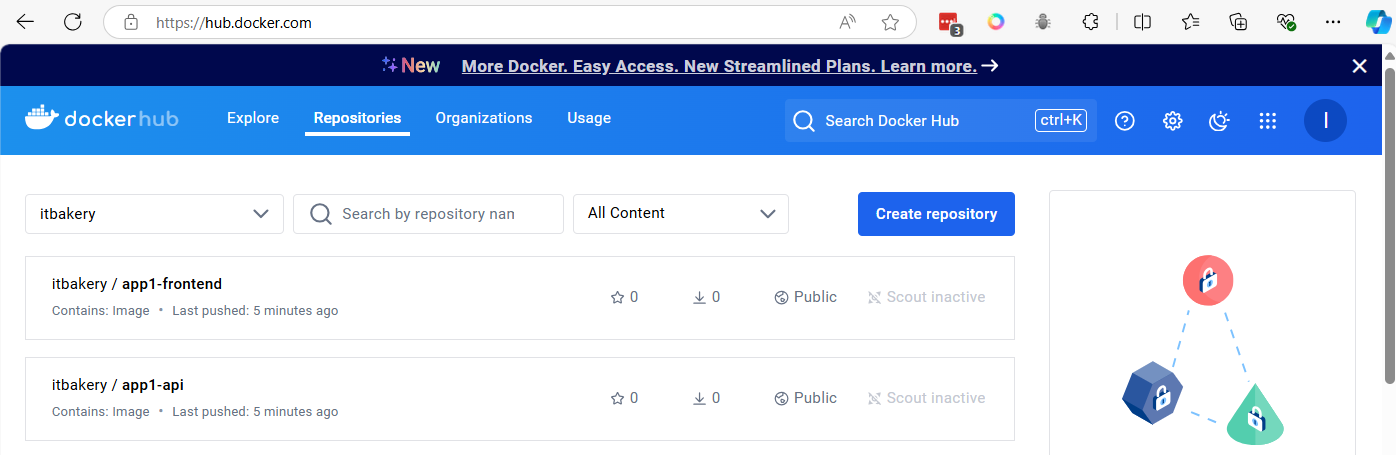
workshop 2
Learn to Create Document Share for your Development with mkdocs
https://www.mkdocs.org/getting-started/
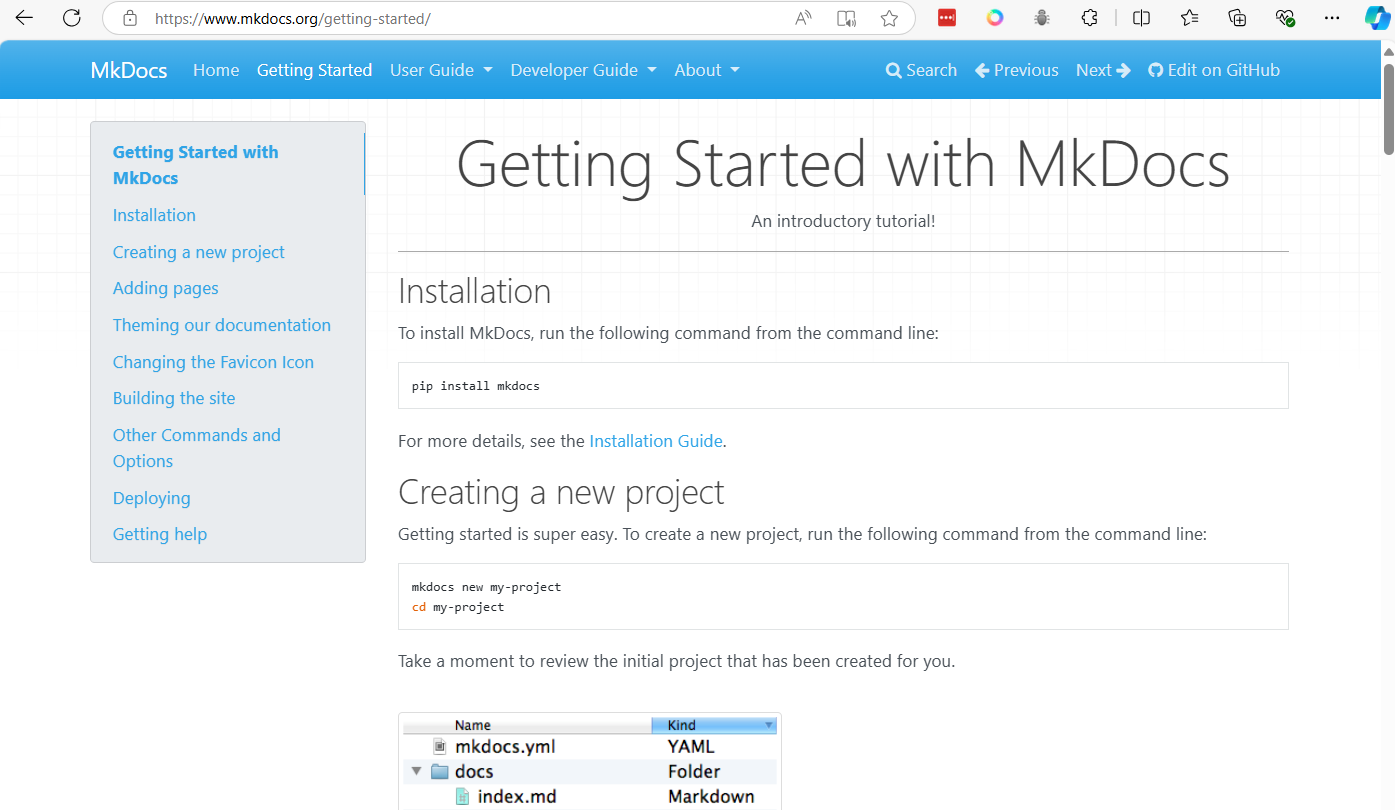
create project
mkdir mydevbook
cd mydevbook
python -m venv venv
venv\Scripts\activate
pip install mkdocs
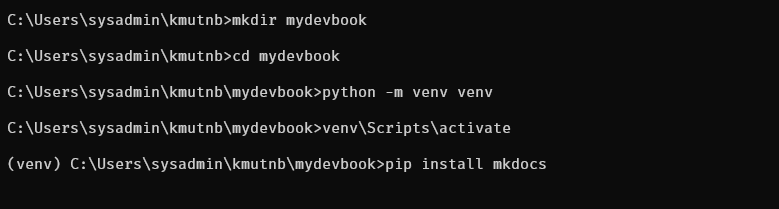
mkdocs new  .
mkdocs serve
Result
Control + C stop Server
Change themes to material
pip install mkdocs-material
Edit file mkdocs.yml in project
site_name: My Docs
theme:
  name: material

markdown_extensions:
  - pymdownx.highlight:
      anchor_linenums: true
      line_spans: __span
      pygments_lang_class: true
  - pymdownx.inlinehilite
  - pymdownx.snippets
  - pymdownx.superfences
- Restart Server again
mkdocs serve
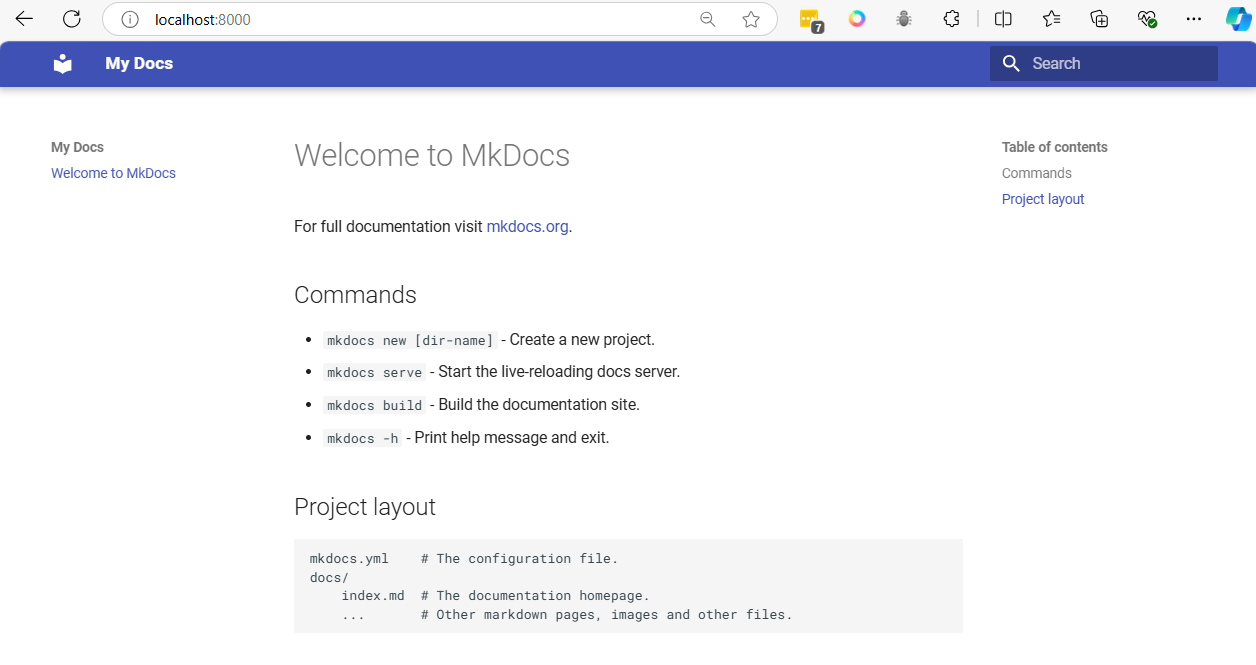
Create pages
- Create folder and inside folder crate markdown file
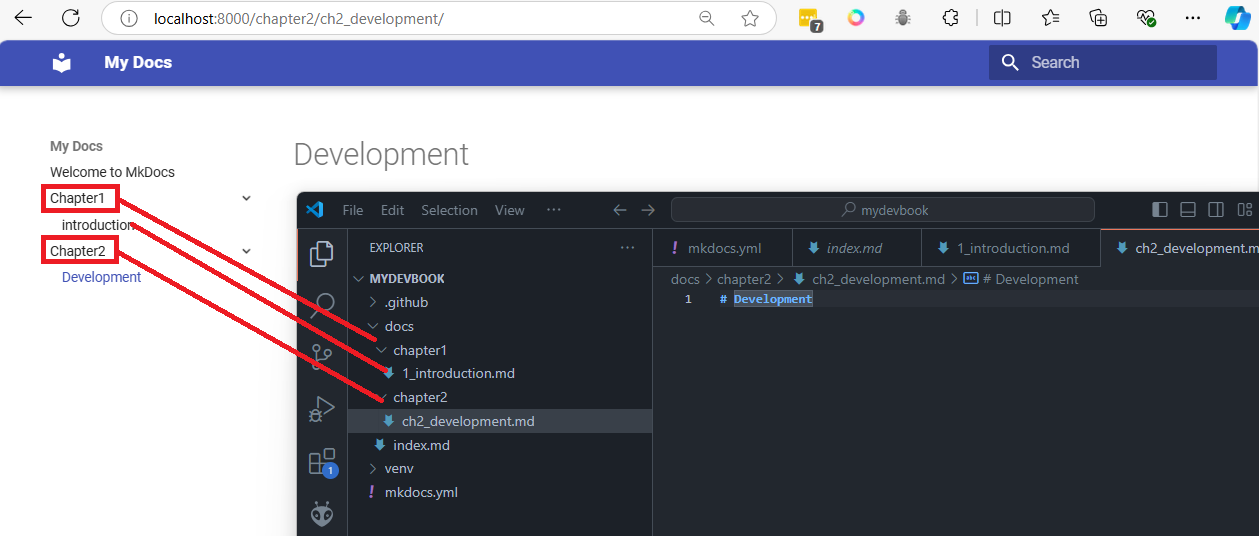
Add pipline ./github/workflows/ci.yml
mkdir .github
cd .github
mkdir workflows
cd workflows
touch ci.yml
create file ci.yml
name: CI

on:
  push:
    branches:
      - main

permissions:
  contents: write

jobs:
  deploy:
    runs-on: ubuntu-latest

    steps:
      - name: Checkout code
        uses: actions/checkout@v4

      - name: Configure Git Credentials
        run: |
          git config user.name "github-actions[bot]"
          git config user.email "41898282+github-actions[bot]@users.noreply.github.com"

      - name: Set up Python
        uses: actions/setup-python@v5
        with:
          python-version: '3.x'

      - name: Cache MkDocs dependencies
        run: echo "cache_id=$(date --utc '+%V')" >> $GITHUB_ENV

      - uses: actions/cache@v4
        with:
          key: mkdocs-material-${{ env.cache_id }}
          path: .cache

      - name: Install MkDocs and dependencies
        run: |
          pip install mkdocs-material

      - name: Build and Deploy MkDocs
        run: mkdocs gh-deploy --force
Create project in github name mydevbook
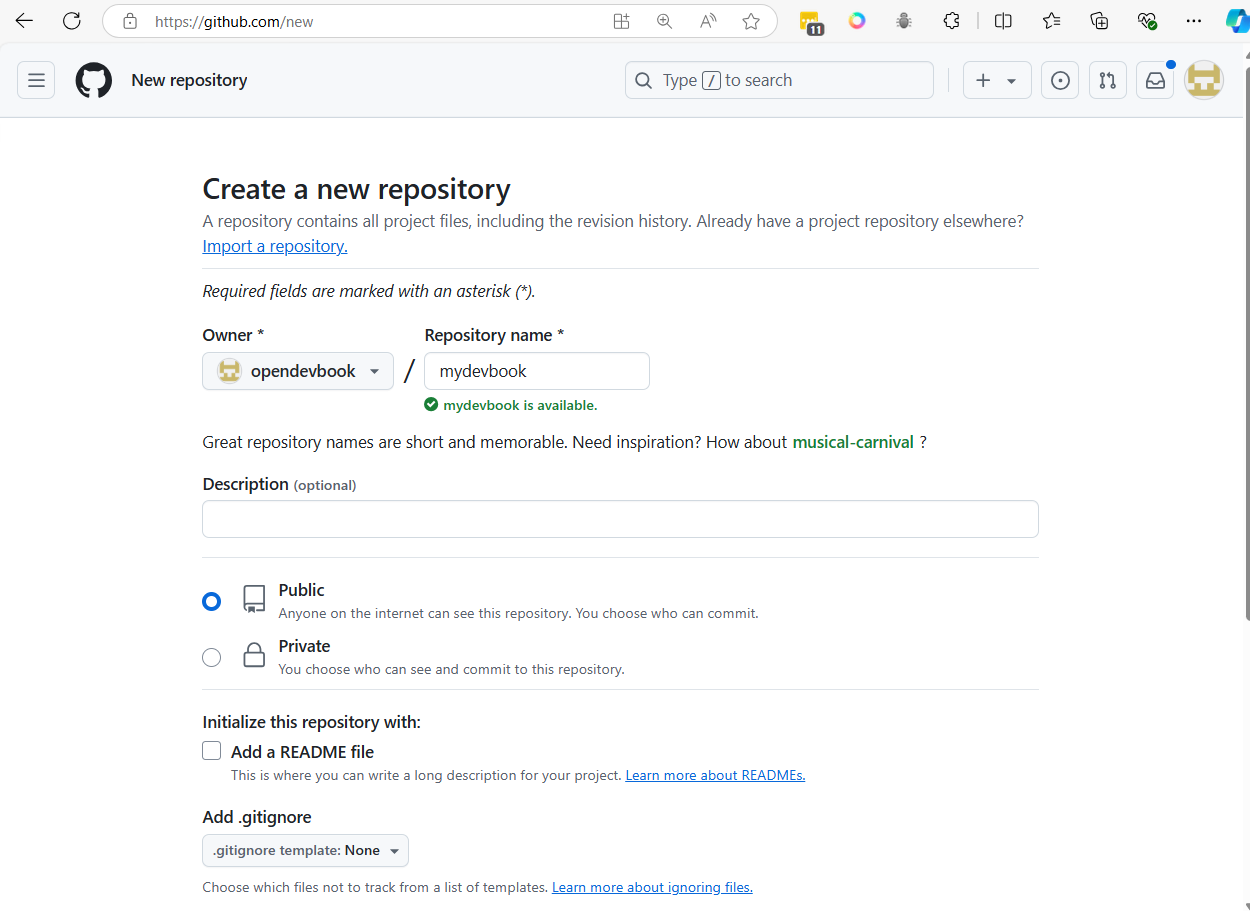
- Copy script to project
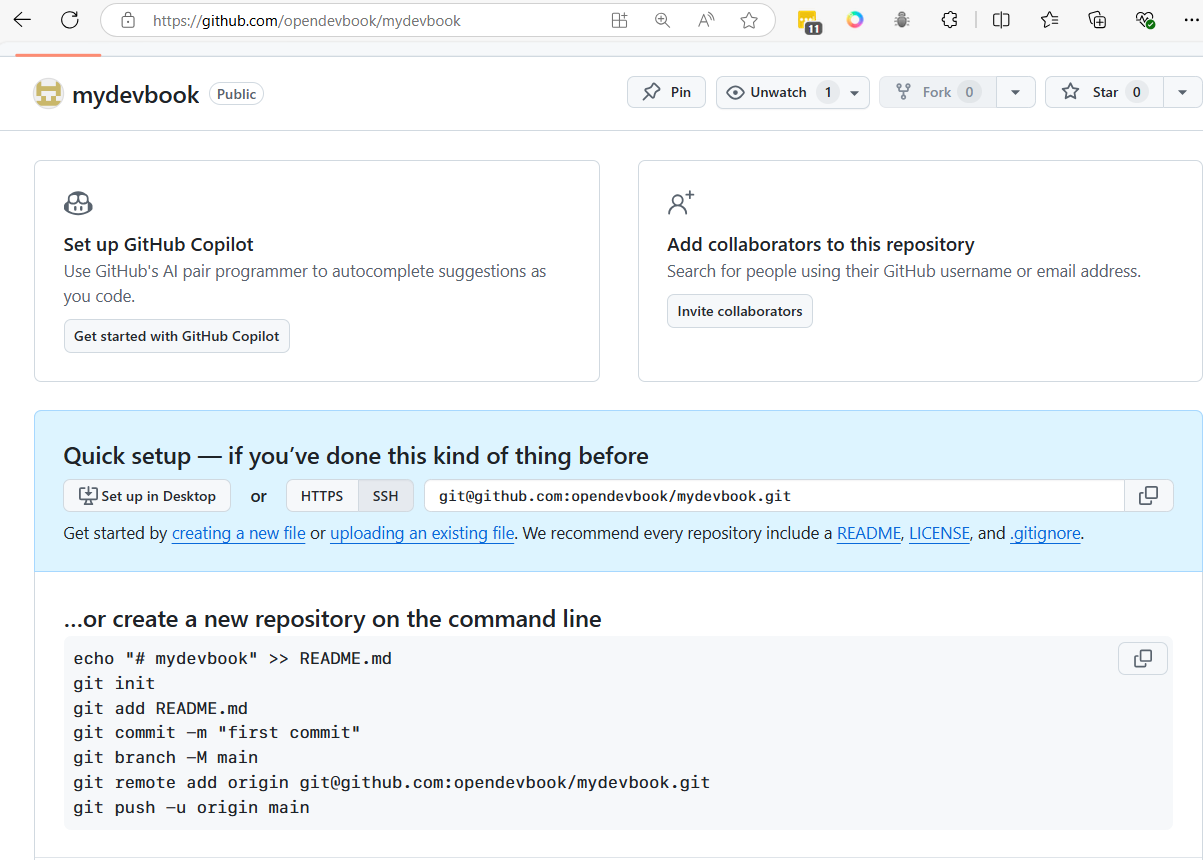
cd mydevbook
touch .gitignore
add venv to .gitignore (with vscode)
venv

git init .
git add .
git commit -m "Initial project"
git remote add origin git@github.com:<youraccount>/mydevbook.git
git push origin main
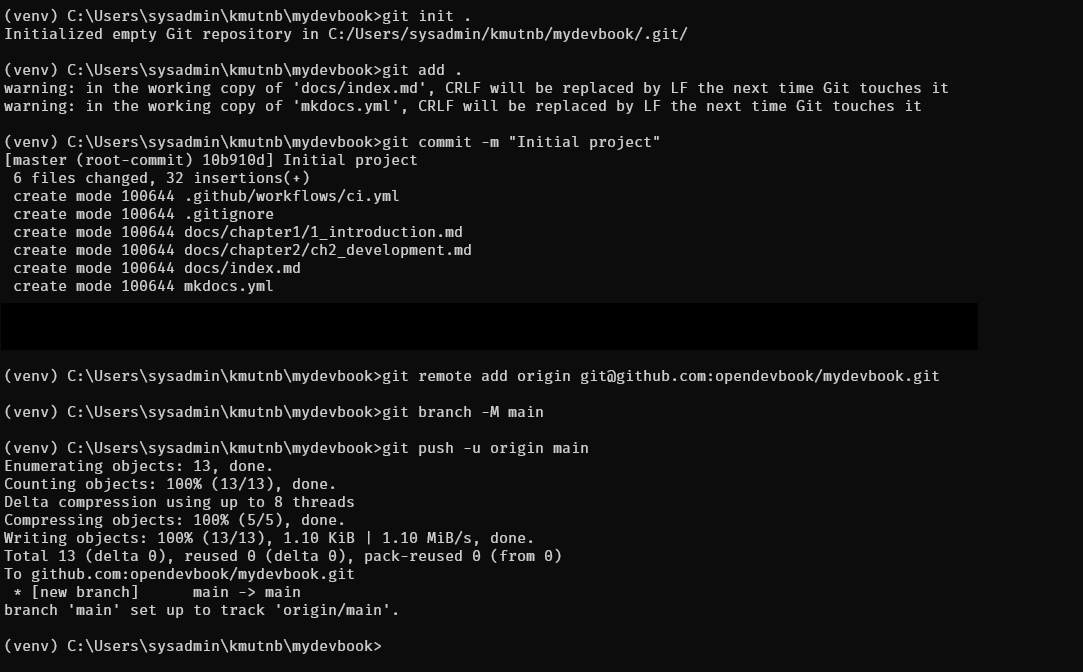
-
Go to git Actions to check pipeline

-
Go to Settings > Pages and select Branch gh-pages and save
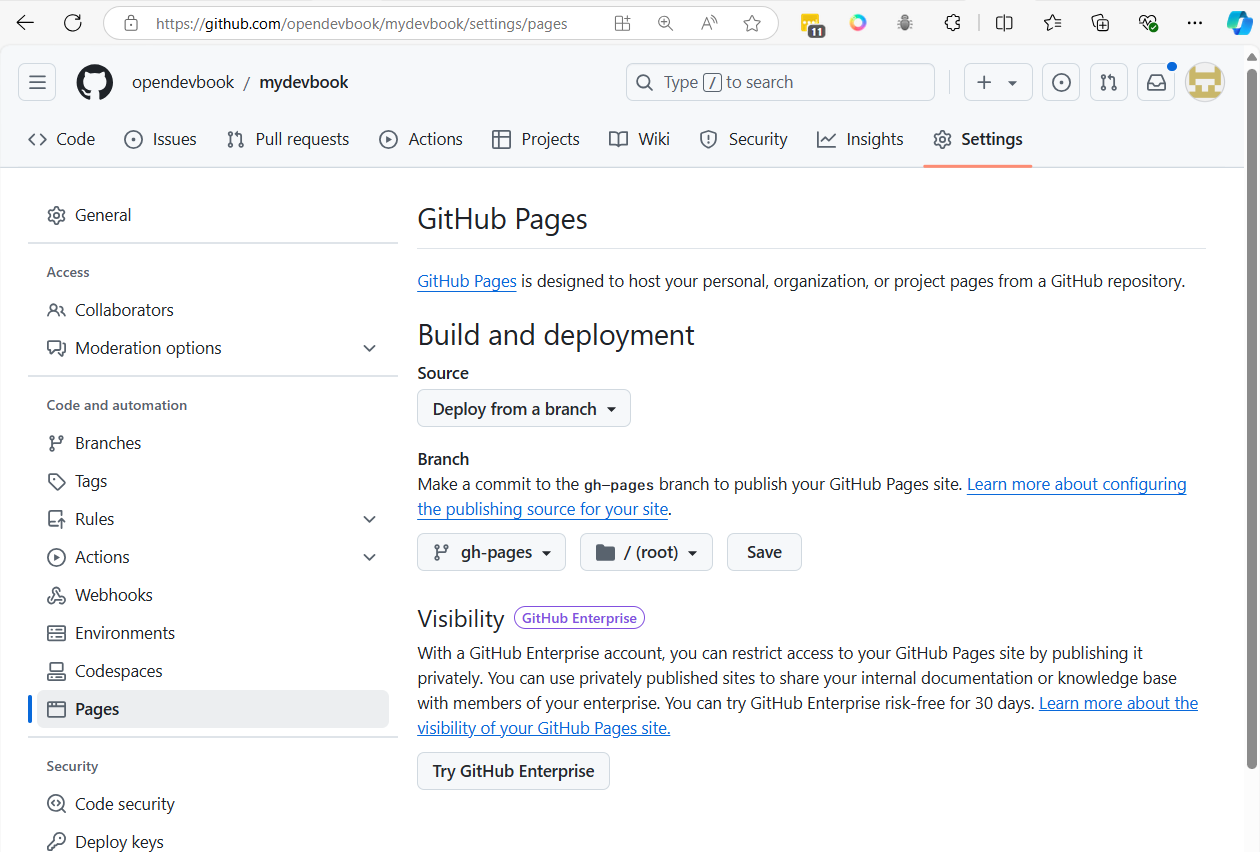
- Go back to actions it will generate action
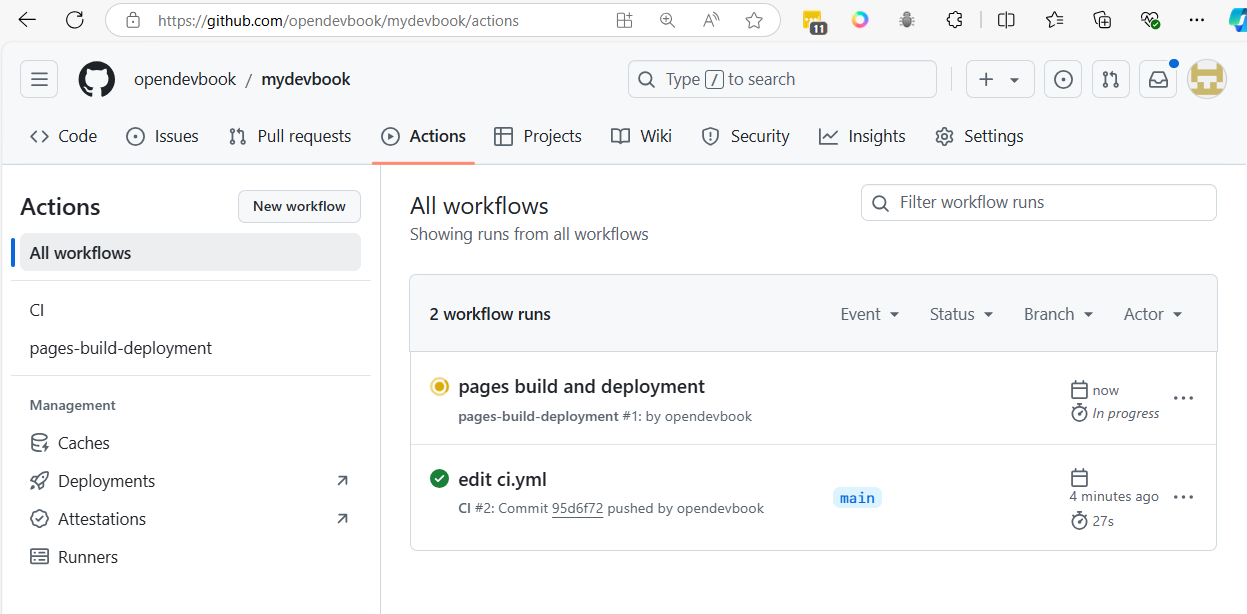
- Go back to Settings > Pages again
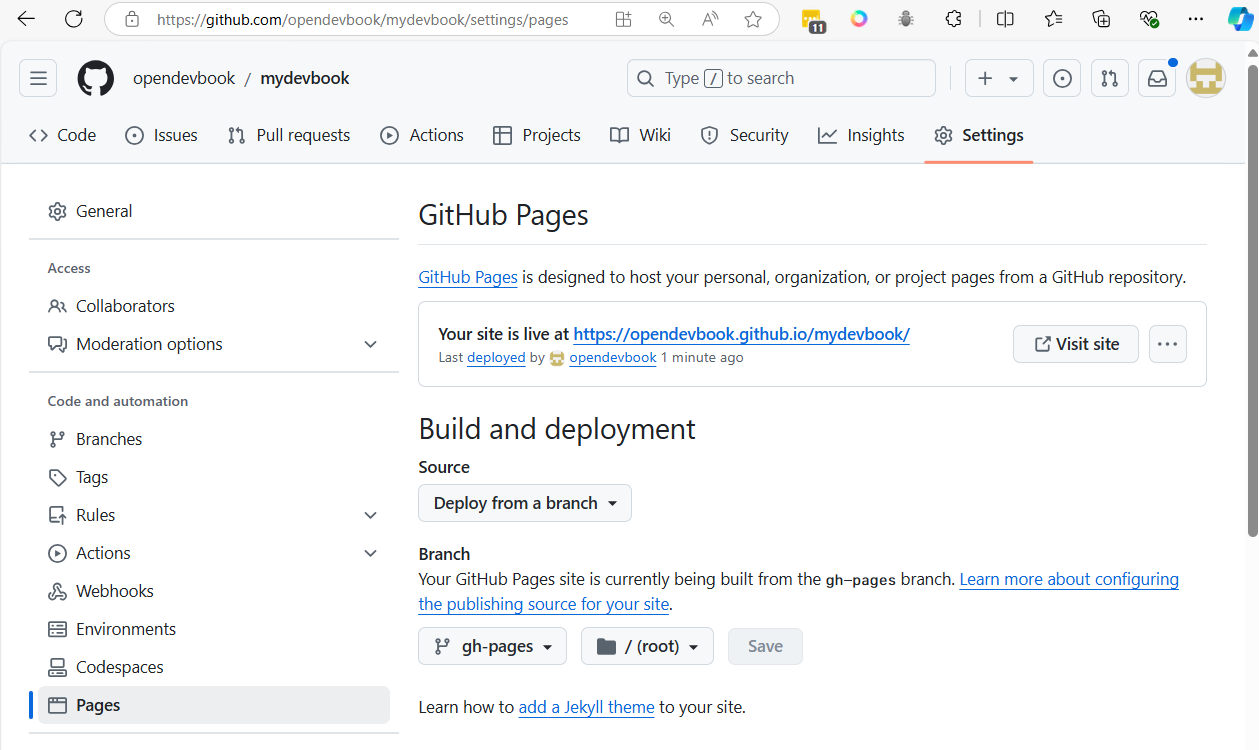
Git will provide link to web
[https://opendevbook.github.io/mydevbook/][https://opendevbook.github.io/mydevbook/]
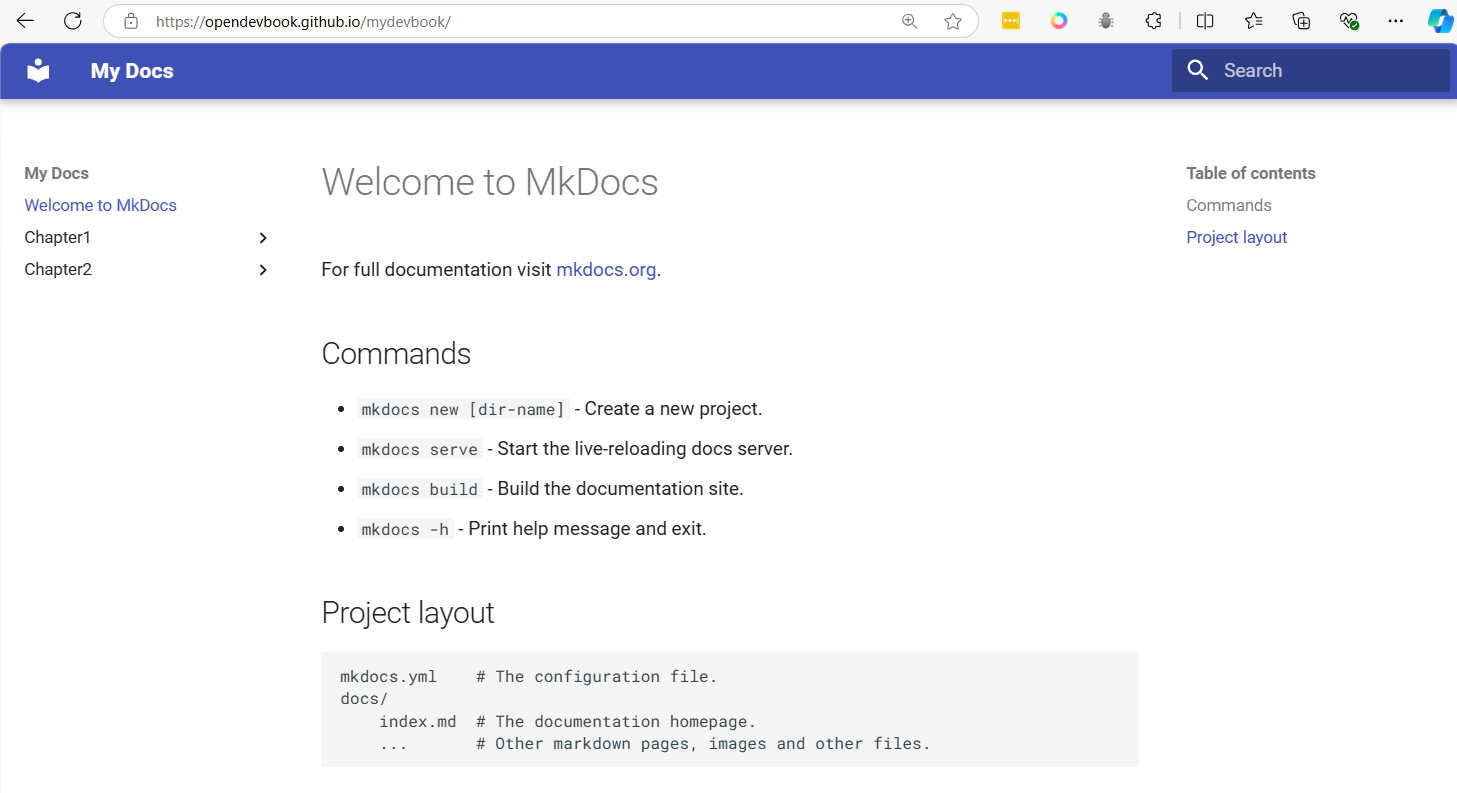
workshop 3 image proces with opencv on Python project
- Clone project
git clone https://github.com/opendevbook/pathumthani-water-level-api-2.git
- add python environment
cd pathumthani-water-level-api-2
rmdir /s /q  .git
python -m venv venv
venv\Scripts\activate
pip install -r requirements.txt
- Start application
python app.py

- Open browser http://127.0.0.1
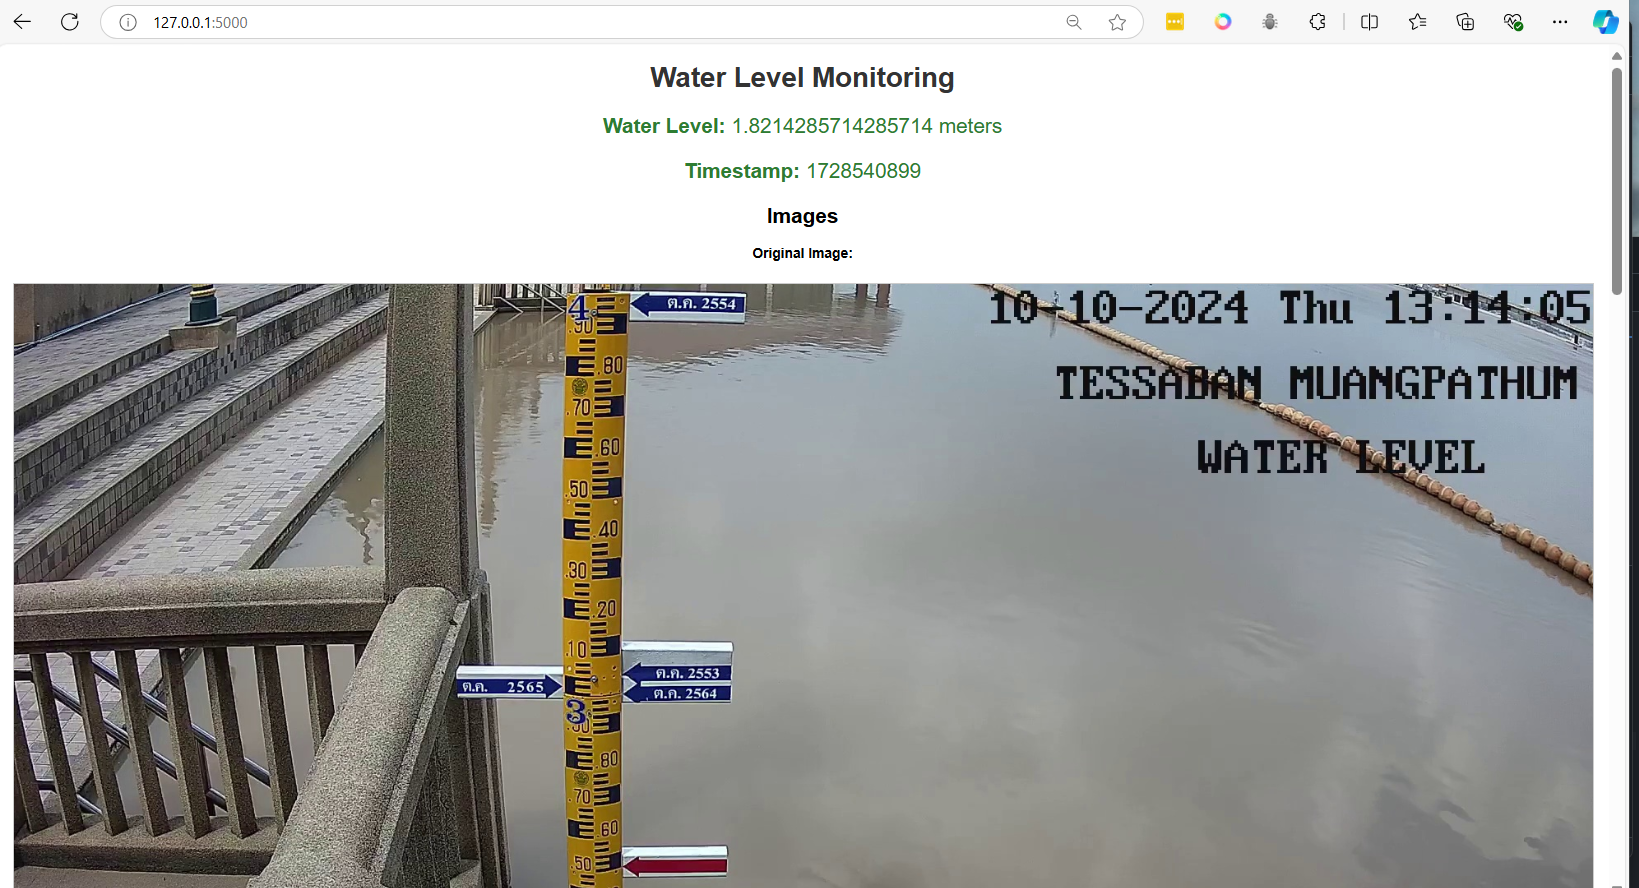
- Open browser http://127.0.0.1/status

change .github/workflows/docker-build.yml
name: Docker Image CI pathumthani-water-level

on:
  push:
    branches: [ "main" ]
  pull_request:
    branches: [ "main" ]

jobs:
  build:
    runs-on: ubuntu-latest

    steps:
    - uses: actions/checkout@v4
    - name: Build the Docker images
      run: |
        docker build . -t ${{ secrets.DOCKER_HUB_ACCOUNT }}/pathumthani-water-level:latest

    - name: Login to Docker Hub
      run: |
        echo "${{ secrets.DOCKER_HUB_PASSWORD }}" | docker login -u ${{ secrets.DOCKER_HUB_ACCOUNT }} --password-stdin

    - name: Push images to Docker Hub
      run: |
        docker push ${{ secrets.DOCKER_HUB_ACCOUNT }}/pathumthani-water-level:latest